Introduction
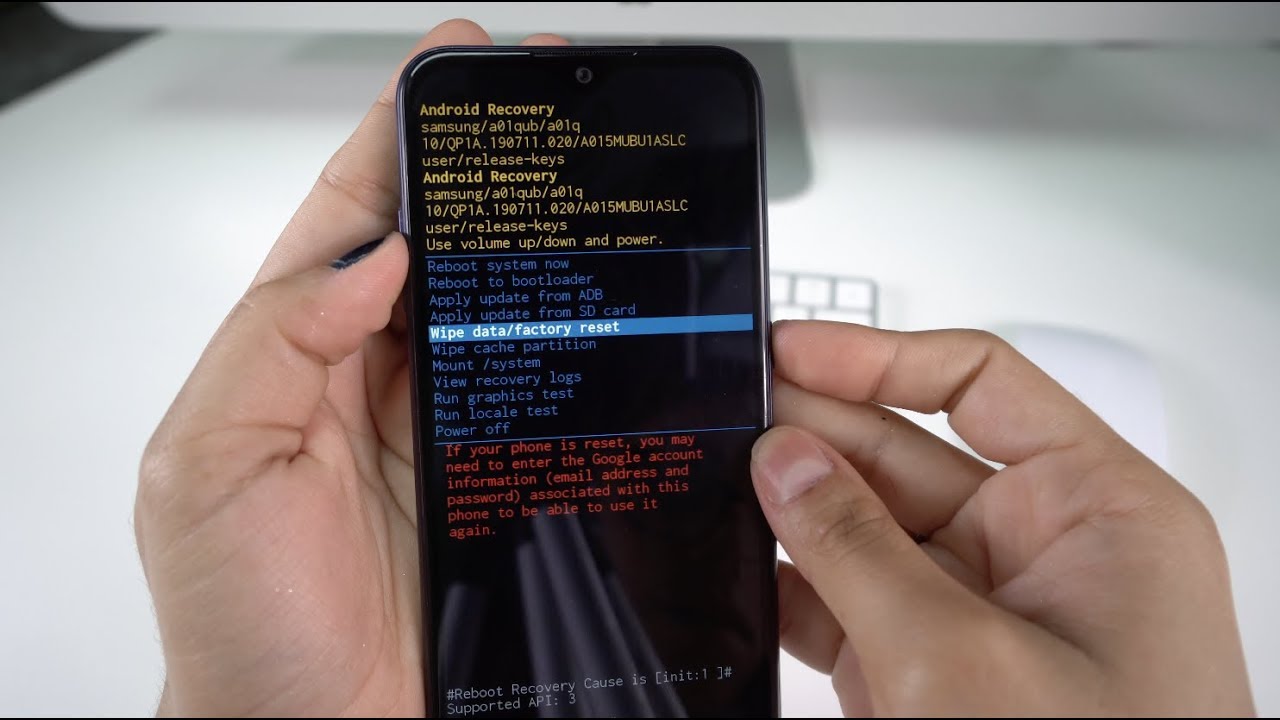
Are you experiencing issues with your Samsung Galaxy A01 and looking for a solution? Performing a factory reset can be a helpful troubleshooting step that can resolve many software-related problems. Whether you’re preparing to sell your device or simply want to start fresh, a factory reset will erase all data and restore your phone to its original settings.
A factory reset is a great way to troubleshoot common issues such as freezing, slow performance, or unresponsive apps. It can also help if you’re planning to pass on your Galaxy A01 to someone else, as it ensures that your personal information is completely removed from the device.
In this guide, we will walk you through the step-by-step process of performing a factory reset on your Samsung Galaxy A01. It’s important to note that this process will erase all data including your apps, photos, contacts, and settings, so be sure to back up any important information before proceeding.
Before we get started, make sure you have a full battery charge or connect your phone to a power source. Also, ensure that you have the necessary information to sign back into your Google account, as well as any other important accounts or applications that require sign-in credentials.
Performing a factory reset can solve many software-related issues and restore your Samsung Galaxy A01 to its original state. So, if you’re ready to start fresh and resolve any lingering issues, let’s dive into the step-by-step process of performing a factory reset on your Samsung Galaxy A01.
Step 1: Back up your data
Before proceeding with a factory reset, it is essential to back up your data to ensure that you don’t lose any important files or information. By creating a backup, you can easily restore your data once the reset is complete. Here’s how you can back up your data on the Samsung Galaxy A01:
- Start by navigating to the Settings menu on your device. You can access this by swiping down from the top of your screen and tapping on the gear-shaped settings icon.
- In the settings menu, scroll down and tap on the “Accounts and Backup” option. This will vary depending on the Android version you have on your device.
- Next, tap on the “Backup and Restore” option.
- In the Backup and Restore menu, you will find options to back up various types of data, such as apps, settings, and multimedia content. You can also choose to back up your data to your Samsung account, Google account, or to an external storage device such as an SD card.
- Select the data types that you want to back up by toggling the switches next to each category. It is recommended to back up everything to ensure a comprehensive backup. If you have limited storage space, prioritize the most important files and data.
- Once you have selected the desired backup options, tap on the “Back up now” button. This will initiate the backup process, which might take some time depending on the amount of data being backed up.
- Once the backup is complete, you can verify the backup by going back to the Backup and Restore menu. Here, you will see the date and time of the last backup.
Backing up your data before a factory reset is crucial to ensure that you don’t lose any important files or information. Taking a few minutes to create a backup can save you from the frustration of losing valuable data. Once you have successfully backed up your data, you can proceed with confidence to the next steps of performing a factory reset on your Samsung Galaxy A01.
Step 2: Access the settings menu
To perform a factory reset on your Samsung Galaxy A01, the first step is to access the settings menu on your device. This menu allows you to customize various aspects of your phone’s settings and perform system-wide changes. Here’s how you can access the settings menu:
- Unlock your Samsung Galaxy A01 by entering your PIN, password, or using the fingerprint scanner.
- From the home screen, swipe down from the top of the screen to access the notification panel.
- In the top-right corner of the panel, you will find a gear-shaped settings icon. Tap on this icon to open the settings menu.
- Alternatively, you can also access the settings menu by locating the settings app on your home screen or app drawer and tapping on it.
Upon tapping the settings icon or the settings app, you will be taken to the main settings menu, which contains a wide range of options and features that you can customize according to your preferences. From here, you can configure everything from network settings to display options and app permissions.
The settings menu is the control center of your Samsung Galaxy A01, allowing you to manage various aspects of your device. It is important to access this menu to perform a factory reset, as it is where you will find the necessary options to reset your phone to its default settings.
Now that you have successfully accessed the settings menu on your Samsung Galaxy A01, you are one step closer to performing a factory reset. In the next step, we will guide you through the process of selecting the appropriate settings to initiate the reset.
Step 3: Tap on “General Management”
After accessing the settings menu on your Samsung Galaxy A01, the next step in performing a factory reset is to navigate to the “General Management” section. Here’s how you can do it:
- In the settings menu, scroll down until you find the “General Management” option. It is typically located towards the bottom of the menu.
- Tap on “General Management” to enter the submenu.
The “General Management” section encompasses various settings related to the overall management and control of your device. Here, you can find options such as language and input settings, date and time settings, and more.
By selecting “General Management,” you are one step closer to initiating the factory reset process on your Samsung Galaxy A01. In the next step, we will guide you through the process of selecting the appropriate reset option to restore your device to its original state.
Step 4: Select “Reset”
Once you have accessed the “General Management” section in the settings menu of your Samsung Galaxy A01, the next step is to select the “Reset” option. This is where you will find the necessary settings to perform a factory reset on your device. Here’s how you can do it:
- In the “General Management” submenu, scroll down until you see the “Reset” option. Tap on it to proceed.
Within the “Reset” section, you will find various options related to resetting different aspects of your device. These options may include resetting network settings, app preferences, or simply performing a factory data reset.
It’s important to note that selecting the “Reset” option will lead you to a submenu where you can choose the specific reset option you wish to perform. Carefully follow the steps to ensure you select the correct option for a factory data reset.
By selecting the “Reset” option, you are one step closer to initiating the factory reset process on your Samsung Galaxy A01. In the next step, we will guide you through the process of choosing the “Factory Data Reset” option, which will erase all data and restore your device to its original settings.
Step 5: Choose “Factory Data Reset”
After selecting the “Reset” option in the settings menu of your Samsung Galaxy A01, the next step is to choose the “Factory Data Reset” option. This is the specific reset option that will erase all data on your device and restore it to its original settings. Follow the steps below to proceed:
- In the “Reset” submenu, look for the “Factory Data Reset” option. Tap on it to continue.
- You may be prompted with a warning message stating that all data will be erased. Read the message carefully to understand the consequences of performing a factory data reset.
- If you understand and are ready to proceed, tap on the “Factory Data Reset” option again to confirm your choice.
Choosing the “Factory Data Reset” option is a significant step, as it initiates the process of erasing all data on your Samsung Galaxy A01. This includes apps, photos, contacts, messages, and any other personal information or settings you have on your device. Make sure you have backed up all important data before proceeding with this step.
Once you have chosen the “Factory Data Reset” option and confirmed your choice, the reset process will begin. Depending on the amount of data on your device, the process may take a few minutes to complete. During this time, it’s important not to interrupt the process or turn off your device.
By choosing the “Factory Data Reset” option, you are preparing your Samsung Galaxy A01 for a complete restoration to its original factory settings. In the next step, we will guide you through the process of confirming the reset and entering your PIN or password to proceed.
Step 6: Confirm the reset
After selecting the “Factory Data Reset” option on your Samsung Galaxy A01, the next step is to confirm the reset. This step ensures that you are fully aware of the consequences of the reset and are ready to proceed. Follow the steps below to confirm the reset:
- You will be presented with a confirmation screen that provides information about what will be deleted during the reset process. Take a moment to review and ensure you understand the implications.
- If you are ready to proceed, tap on the “Reset” or “Erase Everything” button to confirm the reset.
It’s crucial to note that confirming the reset will permanently erase all data on your Samsung Galaxy A01. This includes apps, photos, videos, contacts, messages, and any other personal information stored on your device. Be absolutely certain that you have backed up all important data before proceeding.
Once you have confirmed the reset, the process will begin. Your Samsung Galaxy A01 will wipe all data and revert to its original factory settings. This may take a few minutes, and during this time, it’s important not to interrupt the process or turn off your device as it may lead to complications.
By confirming the reset, you are giving your Samsung Galaxy A01 the go-ahead to erase all data and start fresh. In the next step, we will guide you on how to enter your PIN or password to proceed with the reset.
Step 7: Enter your PIN/password
After confirming the reset, the next step in performing a factory reset on your Samsung Galaxy A01 is to enter your PIN or password. This is a security measure to ensure that only authorized users can initiate the reset process. Follow the steps below to enter your PIN or password:
- On the screen, you will be prompted to enter your PIN or password. This is the same PIN or password that you use to unlock your device normally.
- Carefully enter your PIN or password using the on-screen keyboard.
- If you have successfully entered the correct PIN or password, the reset process will continue.
It’s important to note that entering the PIN or password correctly is essential to proceed with the reset. If you enter the wrong PIN or password multiple times, you may be temporarily locked out of your device. In such cases, refer to the troubleshooting instructions specific to your device or contact Samsung support for further assistance.
The PIN or password verification adds an extra layer of security to ensure that only authorized individuals can perform a factory reset on your Samsung Galaxy A01. Once you have entered the correct PIN or password, the reset process will proceed to the next step of deleting all data and restoring your device to its original settings.
In the next step, we will guide you through the process of tapping on the “Delete All” button to confirm and complete the reset process.
Step 8: Tap on “Delete All”
After entering your PIN or password, the next step in performing a factory reset on your Samsung Galaxy A01 is to tap on the “Delete All” button. This is the final confirmation step before your device erases all data and restores itself to its original settings. Follow the steps below to complete this step:
- On the screen, you will see a final confirmation message indicating that all data will be deleted and cannot be recovered. Take a moment to review this message and ensure you are ready to proceed.
- If you are certain and ready to proceed with the reset, tap on the “Delete All” or “Reset” button.
By tapping on the “Delete All” button, you are giving your Samsung Galaxy A01 the final command to erase all data on your device. This includes apps, photos, videos, contacts, messages, and any other personal information or settings. It’s crucial to have backed up all necessary data before reaching this step, as the reset process is irreversible.
Once you tap on the “Delete All” button, the reset process will commence. Your Samsung Galaxy A01 will begin erasing all data and reverting to its original factory settings. This process may take a few minutes, and it’s important not to interrupt the process or turn off your device during this time.
By successfully tapping on the “Delete All” button, you are giving your final approval for the factory reset. In the next step, we will guide you on waiting for the reset process to complete.
Step 9: Wait for the reset to complete
After tapping on the “Delete All” button to initiate the factory reset on your Samsung Galaxy A01, the final step is to patiently wait for the reset process to complete. This process will erase all data on your device and restore it to its original factory settings. Here’s what you need to do:
- Once you have tapped on the “Delete All” button, your device will begin the reset process.
- During this time, it’s important not to interrupt the process or turn off your Samsung Galaxy A01.
- Depending on the amount of data on your device, the reset process may take a few minutes to complete.
- Your device may reboot multiple times during the reset process, which is normal.
While the reset process is underway, it’s important to remain patient and allow the device to complete the necessary operations. Interrupting the process or turning off your device prematurely may lead to complications and potentially render your device inoperable.
Once the reset process is complete, your Samsung Galaxy A01 will be restored to its original factory settings. All data, applications, settings, and personal information will be erased from the device. You will have a clean slate to start anew or pass on your device to someone else.
Congratulations! You have successfully completed the factory reset on your Samsung Galaxy A01. You can now set up your device as per your preferences and needs.
Conclusion
Performing a factory reset on your Samsung Galaxy A01 can be an effective solution to troubleshoot software-related issues or prepare your device for a fresh start. By following the step-by-step guide outlined in this article, you can easily perform a factory reset and restore your device to its original factory settings.
Before proceeding with a factory reset, remember to back up all important data to ensure you don’t lose any valuable files or information. Take the time to access the settings menu, select the appropriate reset options, and confirm the reset before proceeding. It’s essential to enter your PIN or password correctly to authorize the reset process. Finally, be patient and wait for the reset process to complete without interrupting the device.
Performing a factory reset can resolve common issues such as freezing, slow performance, or unresponsive apps. It also ensures that your personal information is completely removed from the device if you decide to sell or pass on the Samsung Galaxy A01.
Remember, a factory reset is a powerful tool, but it should be used with caution as it permanently erases all data on your device. Make sure to back up any important files or information before proceeding, and double-check that you have entered the correct PIN or password to authorize the reset. If you encounter any difficulties or have further questions, refer to Samsung’s support resources or reach out to their customer service for assistance.
By following the steps outlined in this guide, you can confidently perform a factory reset on your Samsung Galaxy A01 and resolve any software-related issues or start fresh with your device. Enjoy the benefits of a clean and restored device, ready for new experiences and improved performance.


