Benefits of using Client Hyper-V on a Virtual Machine
Client Hyper-V is a powerful feature that allows you to run virtual machines on your Windows desktop or laptop. While it may seem like a feature better suited for professionals or developers, there are several benefits for any user who wants to harness the power of virtualization. Here are some key advantages of using Client Hyper-V on a virtual machine:
- Isolation: One of the main benefits of running a virtual machine with Client Hyper-V is the ability to create isolated environments. You can install and test different operating systems, applications, or configurations without affecting your main system. This level of isolation is ideal for software developers, testers, or anyone who needs to experiment with different setups without risking their primary environment.
- Resource Efficiency: By utilizing virtual machines, you can make the most of your hardware resources. Instead of having multiple physical machines for different tasks, you can run multiple virtual machines on a single device. This allows for better resource allocation, reducing the need for additional hardware and saving both space and energy.
- Security: Virtual machines provide an added layer of security. In the event that a virtual machine becomes compromised or infected with malware, it can be easily isolated, removed, and replaced without affecting the main system. This helps protect your data and provides a safer environment for testing potentially harmful applications or websites.
- Flexibility and Compatibility: Client Hyper-V allows you to run various operating systems and software that may not be compatible with your host system. This is particularly useful for running legacy applications or different versions of an operating system for compatibility testing. It also enables developers to test their software on different environments without the need for multiple physical machines.
- Easier Software Testing: With Client Hyper-V, you can quickly and efficiently set up virtual machines to test software or applications. This eliminates the need for physical devices or complicated dual-boot setups, making the testing process more streamlined and efficient. It also provides a standardized testing environment that can be easily replicated across different machines.
These are just a few of the many benefits of using Client Hyper-V on a virtual machine. Whether you are a developer, tester, or simply an enthusiast looking to explore different operating systems, Client Hyper-V provides a powerful toolset to enhance your computing experience. By enabling virtualization, you can unlock a world of possibilities and take advantage of the numerous benefits that virtual machines have to offer.
Enabling Client Hyper-V on a Virtual Machine
Client Hyper-V is a feature available in Windows that allows you to run virtual machines on your desktop or laptop. Enabling Client Hyper-V is a straightforward process that can be done with a few steps. Here is how you can enable Client Hyper-V on a virtual machine:
- Check system requirements: Before proceeding, ensure that your system meets the requirements for running Client Hyper-V. You will need a 64-bit processor with Second Level Address Translation (SLAT) support, at least 4 GB of RAM, and sufficient storage space for creating virtual machines.
- Enable virtualization in BIOS: Access your computer’s BIOS settings by restarting the system and pressing the appropriate key during startup (typically Esc, F2, or Delete). Look for the virtualization option and ensure it is enabled. This step may vary depending on your computer’s manufacturer and BIOS version.
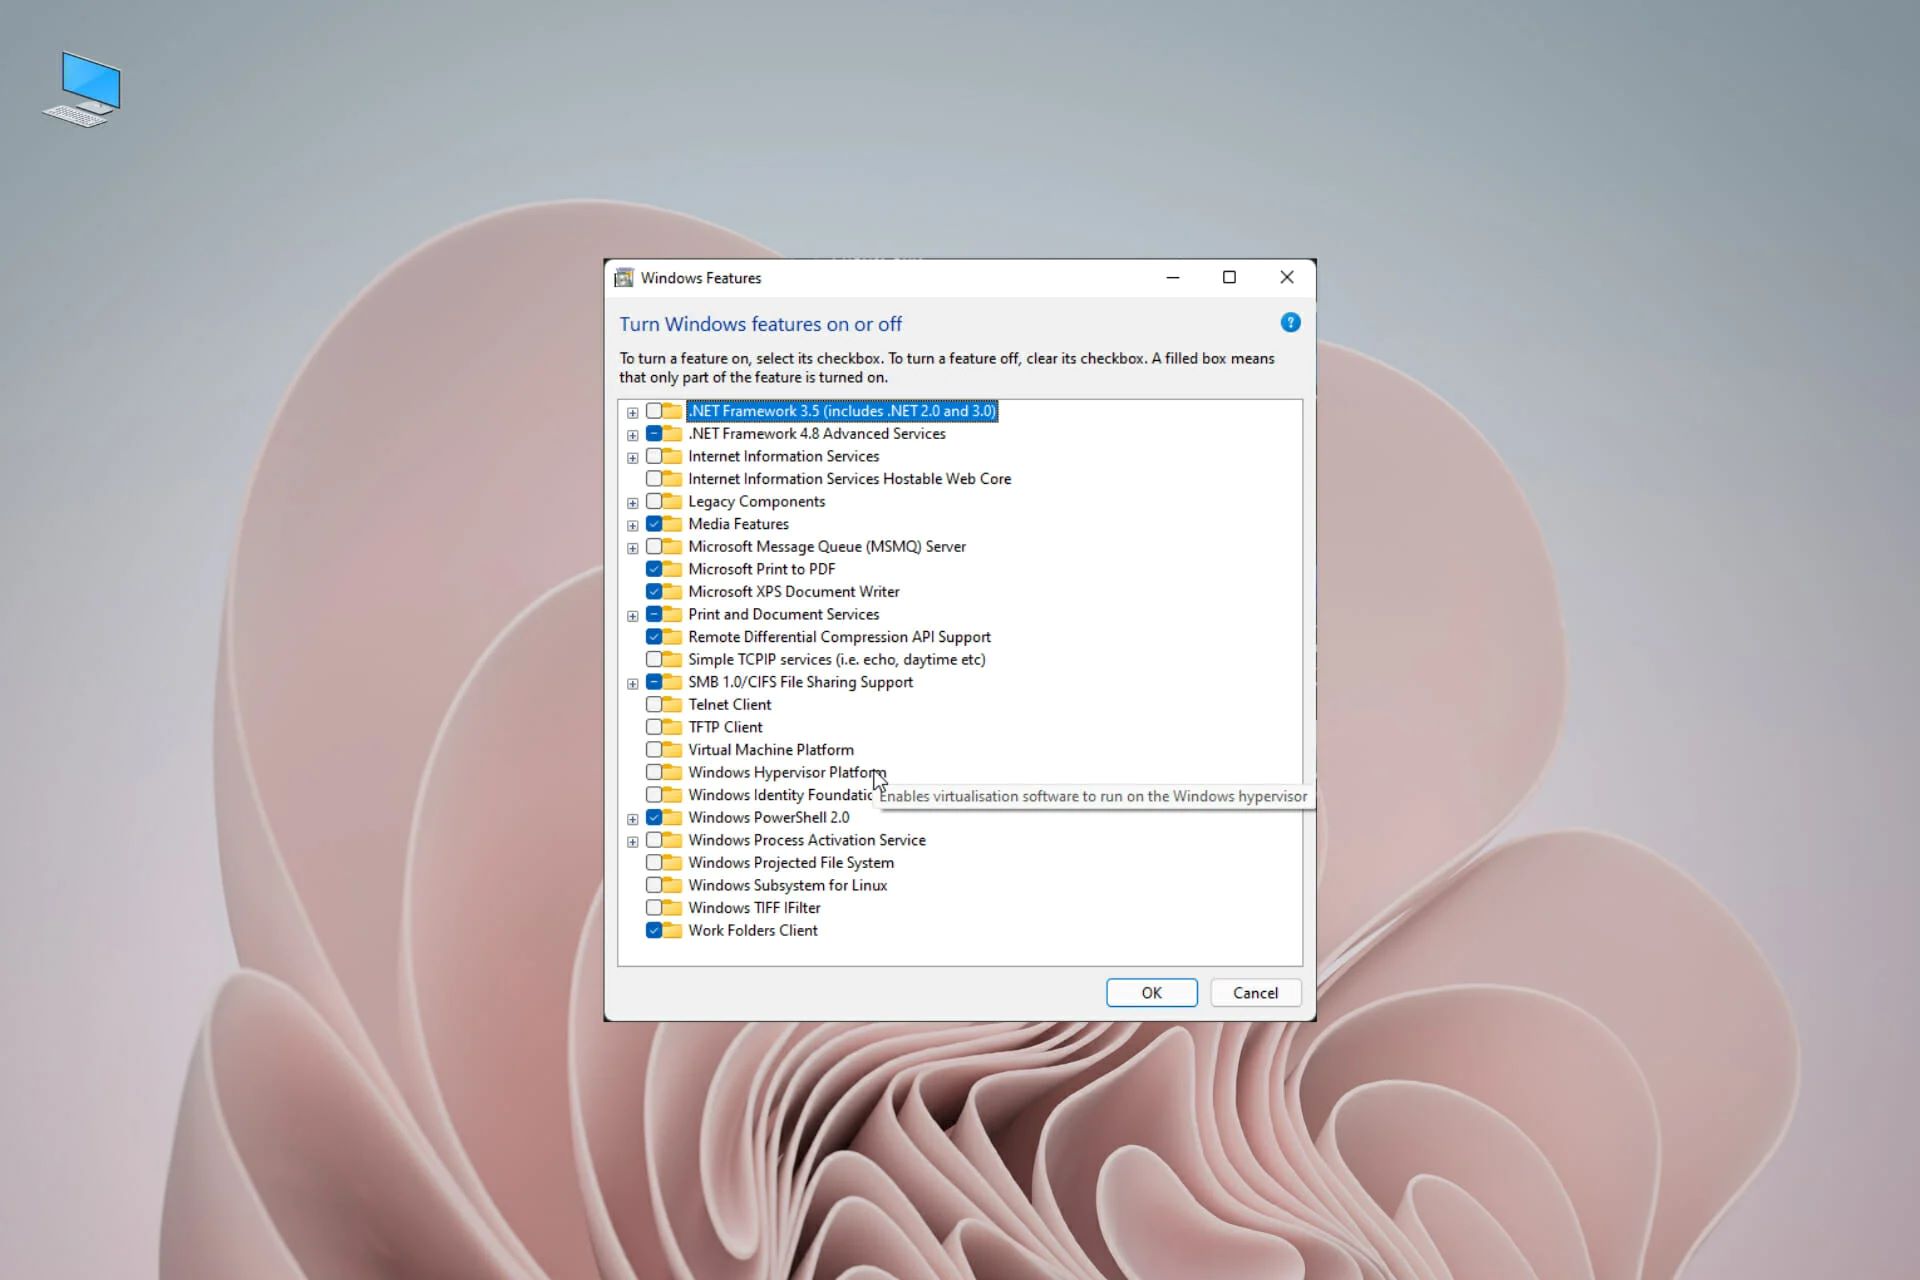
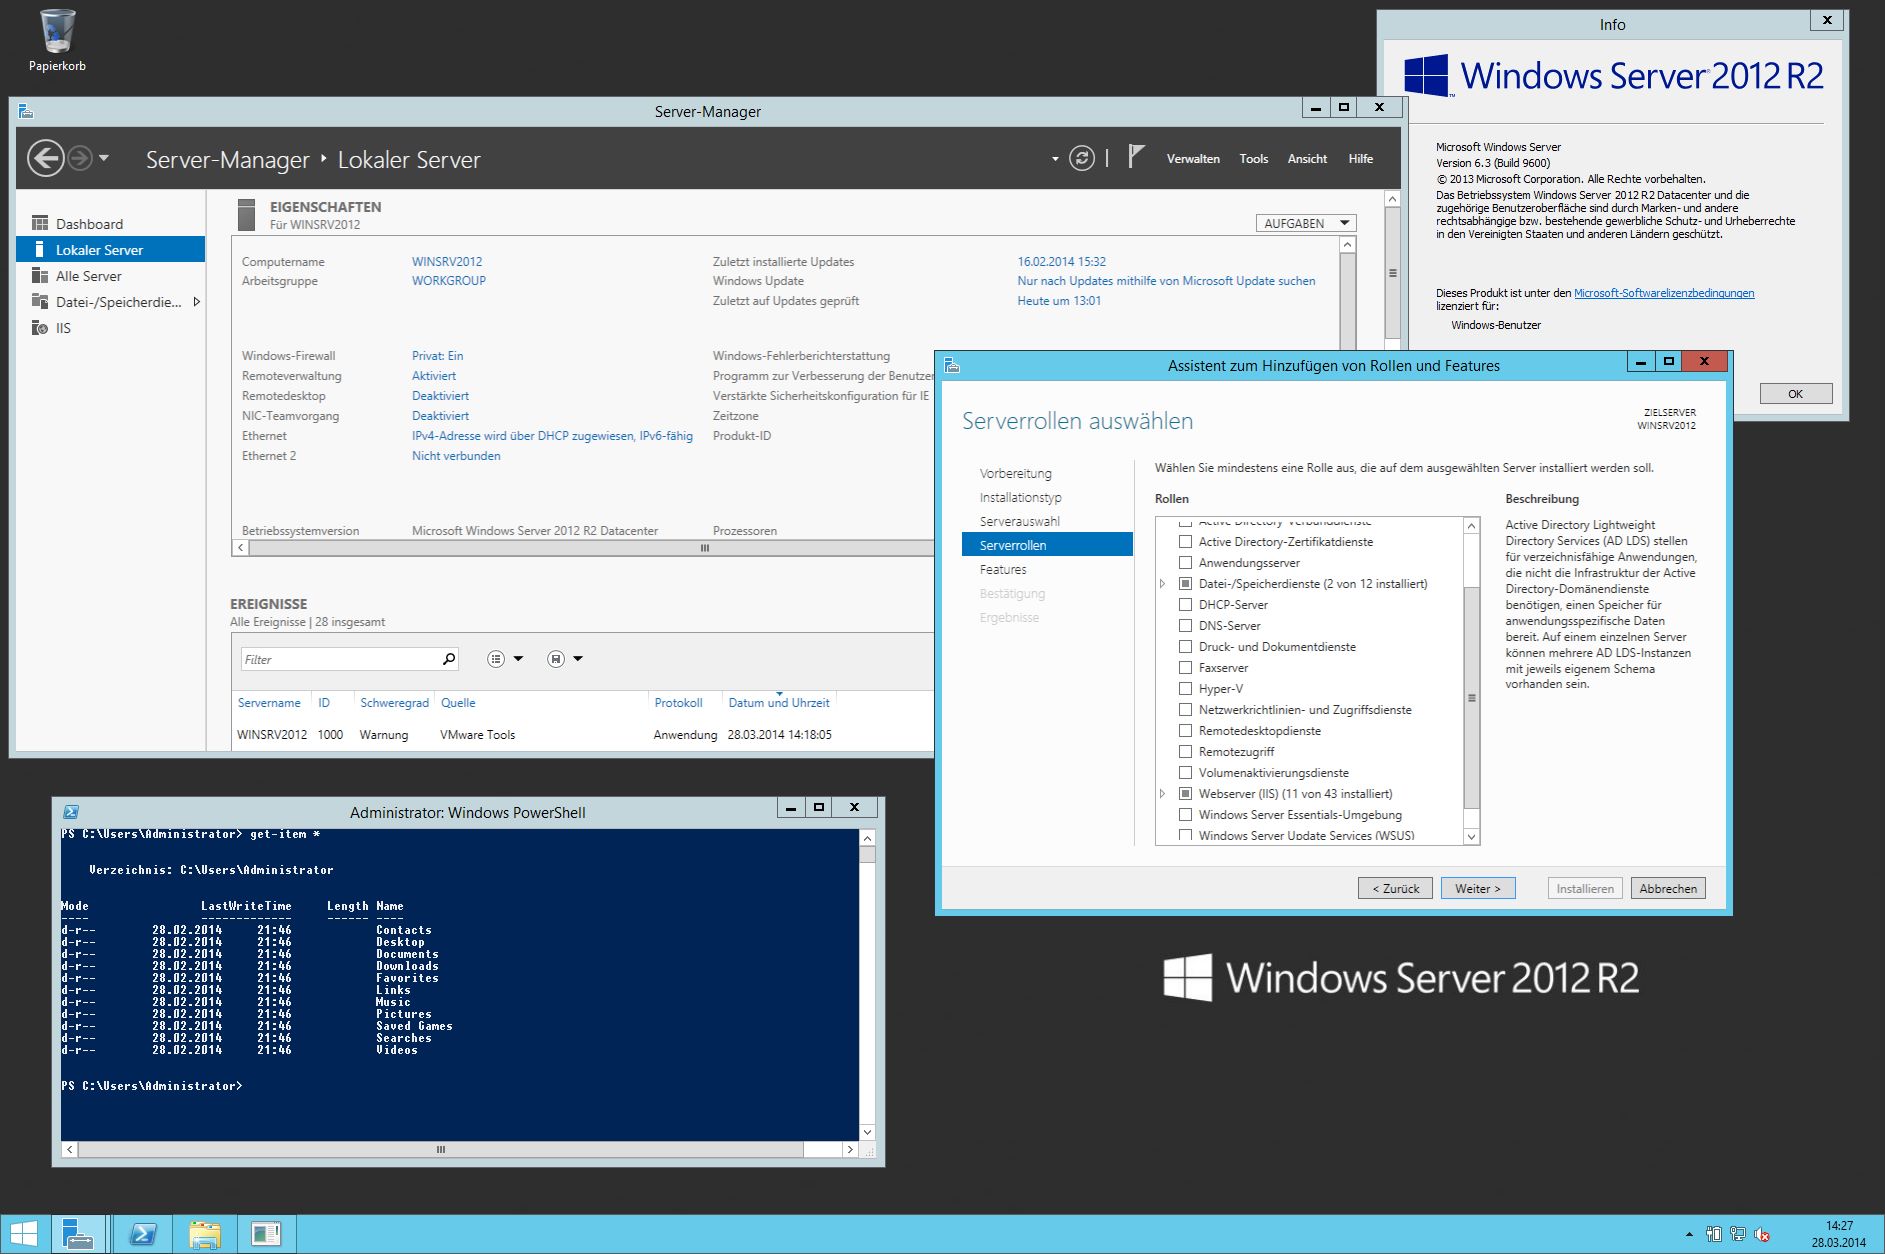
- Enable Hyper-V using Control Panel: Open the Control Panel on your Windows machine and navigate to “Programs” or “Programs and Features,” depending on your version of Windows. Click on “Turn Windows features on or off” and wait for the list to load. Look for “Hyper-V” and expand the menu. Check the box next to “Hyper-V” and any additional features you want to enable.
- Enable Hyper-V using PowerShell: Alternatively, you can enable Hyper-V using PowerShell. Open PowerShell with administrative privileges and run the command “Enable-WindowsOptionalFeature -Online -FeatureName Microsoft-Hyper-V -All” to install Hyper-V and all its dependencies.
- Restart your computer: Once you have enabled Client Hyper-V through the Control Panel or PowerShell, restart your computer to apply the changes.
After completing these steps, Client Hyper-V will be enabled on your virtual machine. You can now create and manage virtual machines using Hyper-V Manager or other compatible virtualization software. Remember to allocate appropriate resources to your virtual machines, such as memory and CPU cores, depending on the requirements of the operating systems or applications you plan to run.
Enabling Client Hyper-V opens up a world of possibilities, allowing you to utilize the benefits of virtualization and run multiple operating systems simultaneously on your computer. Whether you are a developer, tester, or simply someone looking to explore different environments, Client Hyper-V provides a powerful toolset for creating and managing virtual machines with ease.
What is Client Hyper-V?
Client Hyper-V is a feature included in certain versions of Windows operating systems, such as Windows 10 Pro, Enterprise, and Education editions. It allows users to create and run virtual machines on their desktop or laptop, providing a robust virtualization platform for various purposes. Whether you are a developer, IT professional, or simply an enthusiast, Client Hyper-V offers powerful capabilities to enhance your computing experience.
With Client Hyper-V, you can create multiple virtual machines that act as separate environments on your host system. Each virtual machine runs its own operating system, applications, and settings, providing isolation and ensuring that one virtual machine does not interfere with others or the main system. This level of isolation is particularly useful for testing software, experimenting with different configurations, or running legacy applications that may not be compatible with the host system.
Client Hyper-V utilizes hardware virtualization technologies, such as Intel Virtualization Technology (Intel VT) or AMD Virtualization (AMD-V), to create a virtualized environment. This allows virtual machines to have direct access to the underlying hardware resources, such as CPU, memory, and storage, ensuring efficient and seamless performance.
One of the key advantages of Client Hyper-V is its compatibility with various operating systems. You can create virtual machines running Windows, Linux, or other supported operating systems, enabling you to test software across different platforms or run specific applications that require a specific operating system environment. This flexibility makes Client Hyper-V a valuable tool for software developers, system administrators, and QA testers.
In addition to operating system compatibility, Client Hyper-V supports a wide range of virtualized hardware, allowing you to configure virtual machines with different CPUs, memory sizes, network adapters, and storage options. This enables you to replicate real-world scenarios, simulate networking environments, or allocate specific resources to meet the requirements of your applications.
Client Hyper-V can be managed through various tools, such as Hyper-V Manager, PowerShell, or third-party virtualization software. These tools provide interfaces for creating, configuring, and managing virtual machines, as well as monitoring their performance and resource usage.
In summary, Client Hyper-V is a powerful virtualization feature included in select versions of Windows operating systems. It allows users to create and run virtual machines, providing isolation, compatibility, and flexibility. Whether you need to test software, experiment with different environments, or run specific applications, Client Hyper-V offers a robust virtualization platform that enhances your productivity and expands the capabilities of your computer.
System Requirements for Client Hyper-V
Before enabling Client Hyper-V on your Windows computer, it is important to ensure that your system meets the necessary hardware and software requirements. These requirements are essential for running virtual machines smoothly and efficiently. Here are the key system requirements for Client Hyper-V:
- 64-bit Processor: Client Hyper-V requires a 64-bit processor with Second Level Address Translation (SLAT) support. This hardware feature is necessary for efficient virtualization and is commonly found in modern CPUs from Intel (Intel VT-x) and AMD (AMD-V).
- Minimum RAM: To run virtual machines effectively, your system should have a minimum of 4 gigabytes (GB) of RAM. However, more RAM is recommended depending on the number and workload of the virtual machines you plan to run. The amount of RAM allocated to each virtual machine impacts their performance and overall system stability.
- Storage Space: Sufficient storage space is essential for creating and storing virtual machine files. The amount of space required depends on the size of the virtual machines and their associated files. It is recommended to have ample free disk space to accommodate your virtualization needs.
- Operating System Edition: Client Hyper-V is available in certain editions of Windows, such as Windows 10 Pro, Enterprise, and Education. Ensure that you have the appropriate edition installed on your computer to enable and use Client Hyper-V. The feature may not be available in Windows Home editions.
- BIOS Configuration: Virtualization support needs to be enabled in your computer’s BIOS or UEFI settings. Access the BIOS/UEFI menu during computer startup by pressing the relevant key (e.g., Del, F2, F10) and ensure that hardware virtualization support is enabled. The specific location of this setting may vary depending on the manufacturer and model of your computer.
Note that while these requirements ensure proper functionality of Client Hyper-V, it is advisable to have a more powerful system if you plan to run resource-intensive virtual machines or multiple virtual machines simultaneously. This includes a faster processor, more RAM, and ample storage space to meet the demands of your virtualization tasks.
Checking and meeting the system requirements for Client Hyper-V is crucial for a seamless virtualization experience. By ensuring that your hardware and software configurations align with the recommended specifications, you can maximize the capabilities of your virtual machines and efficiently run different operating systems and applications on your Windows computer.
Checking if your system supports Client Hyper-V
Before enabling Client Hyper-V on your Windows system, it’s important to verify if your computer meets the necessary requirements for running virtual machines. Checking if your system supports Client Hyper-V is a straightforward process that involves a few steps. Here are some methods to determine if your system can support Client Hyper-V:
- Processor Compatibility: The first step is to ensure that your computer’s processor supports hardware virtualization. Most modern processors from Intel and AMD are equipped with virtualization technology. You can check the specifications of your processor on the manufacturer’s website or refer to the documentation that came with your computer.To determine if virtualization is enabled in your BIOS settings, you can follow these steps:
– Restart your computer and access the BIOS or UEFI settings by pressing the appropriate key during startup (e.g., Del, F2, F10).
– Look for a setting related to virtualization or hardware virtualization support. The exact location of this setting may vary depending on your computer’s manufacturer and BIOS version.
– Ensure that the virtualization support option is enabled. Save the changes and exit the BIOS settings.Note: If you are unsure about accessing the BIOS settings or making changes, it’s recommended to consult your computer’s user manual or seek assistance from the manufacturer’s support website.
- Using System Information: Another way to check for Client Hyper-V compatibility is to use the System Information tool on your Windows computer. Here’s how to access it:- Press the Windows key + R to open the Run dialog box.
– Type “msinfo32” (without quotes) and press Enter.
– In the System Information window, look for the line that says “Hyper-V Requirements“. If it displays “Yes“, then your system meets the requirements for running Client Hyper-V. If it shows “No“, then your hardware may not support virtualization or it might be disabled in the BIOS settings. - Using PowerShell: PowerShell provides a command-line interface to check the status of virtualization on your system. Here’s how to use PowerShell to check for Client Hyper-V compatibility:- Press the Windows key + X and select “Windows PowerShell (Admin)” from the menu.
– Type “systeminfo” (without quotes) and press Enter.
– Look for the line that says “Hyper-V Requirements“. If it displays “Virtualization Enabled In Firmware: Yes“, then your system supports Client Hyper-V. If it shows “Virtualization Enabled In Firmware: No“, then your hardware may not support virtualization or it might be disabled in the BIOS settings.
By following these methods, you can determine if your system supports Client Hyper-V. If virtualization is not enabled, you may need to access your computer’s BIOS or UEFI settings and enable the virtualization option. Once your system meets the requirements, you can proceed with enabling Client Hyper-V to enjoy the benefits of running virtual machines on your Windows computer.
Steps to Enable Client Hyper-V on a Virtual Machine
Enabling Client Hyper-V on a virtual machine is a straightforward process that allows you to harness the power of virtualization on your Windows computer. By following these steps, you can enable Client Hyper-V and start creating and running virtual machines:
- Check System Requirements: Before proceeding, ensure that your computer meets the necessary system requirements for running Client Hyper-V. This includes a compatible version of Windows (such as Windows 10 Pro, Enterprise, or Education) and hardware with virtualization support.
- Enable Hyper-V: There are two main methods to enable Hyper-V: using the Control Panel or through PowerShell. Here are the steps for each method:Control Panel Method:
– Open the Control Panel on your Windows computer.
– Navigate to the “Programs” or “Programs and Features” section.
– Click on “Turn Windows features on or off“.
– Locate “Hyper-V” in the list of features and check the box beside it.
– Select any additional features you want to enable and click “OK“.
– Windows will install the necessary components, and you may be prompted to restart your computer.PowerShell Method:
– Open PowerShell with administrative privileges.
– Run the command “Enable-WindowsOptionalFeature -Online -FeatureName Microsoft-Hyper-V -All“.
– PowerShell will install Hyper-V and its dependencies automatically.
– Restart your computer to finalize the installation.Note: The PowerShell method provides greater flexibility and control, especially when automating the process or enabling specific features.
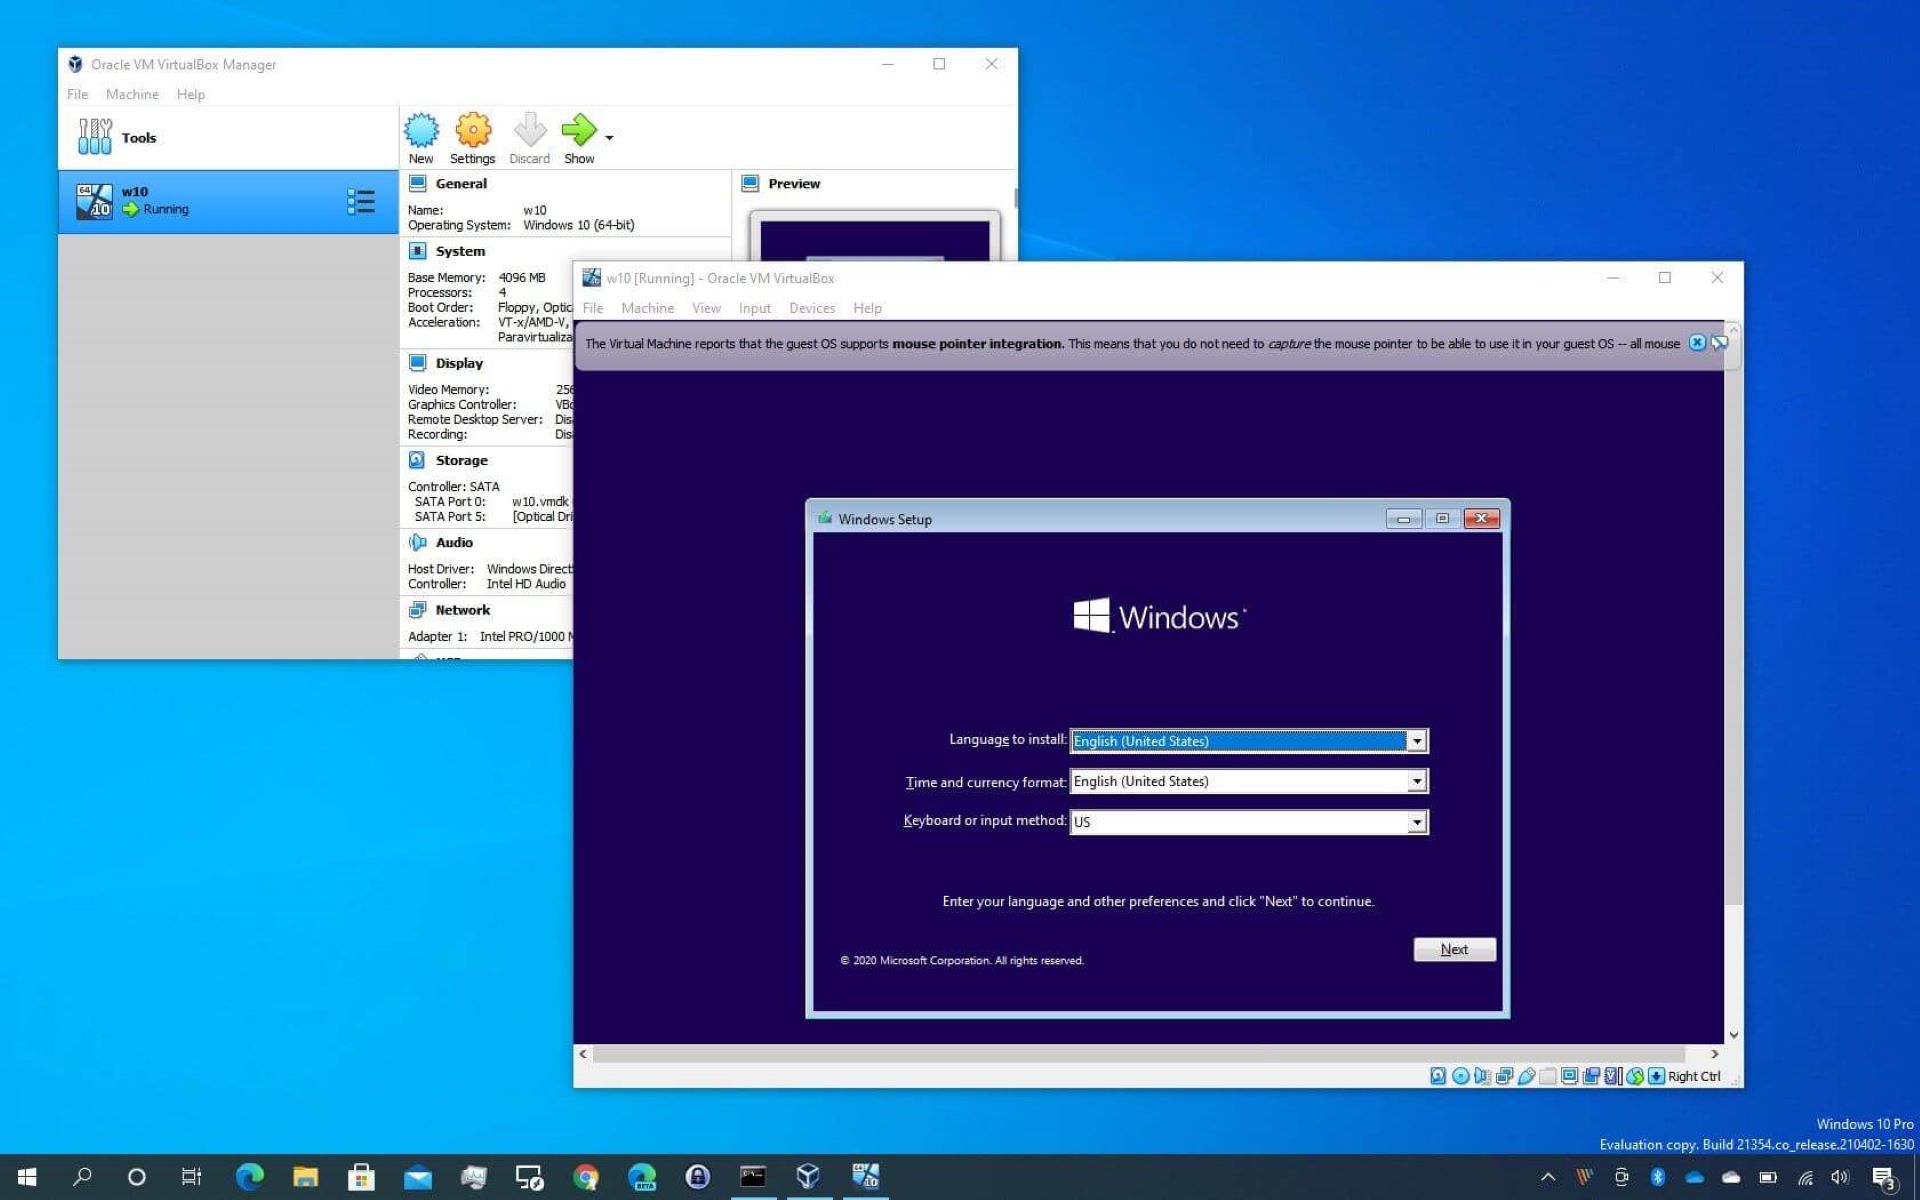
- Create Virtual Machines: Once Hyper-V is enabled, you can start creating virtual machines by using Hyper-V Manager or other compatible virtualization software. Launch Hyper-V Manager, and you will have the option to create a new virtual machine by following the on-screen instructions. Specify the virtual machine name, location, and configuration settings such as memory, CPU cores, and storage allocation.
- Install Operating System: After creating a virtual machine, you will need to install an operating system on it. This process involves mounting an ISO file or providing an installation source, configuring settings such as language and product key, and going through the installation steps just as you would on a physical machine.
- Configure Virtual Machine Settings: Once the operating system is installed, you can further customize the virtual machine settings based on your needs. This includes configuring network settings, integrating services between the host and virtual machine, adjusting memory or CPU allocations, and installing additional software or drivers.
- Start the Virtual Machine: With all the necessary configurations in place, you can now start the virtual machine. Select the virtual machine from Hyper-V Manager and click on the “Start” button. The virtual machine will boot up and present you with the operating system’s login screen or desktop, ready for you to use and interact with.
By following these steps, you can successfully enable Client Hyper-V on a virtual machine and begin utilizing the power of virtualization on your Windows computer. Remember to allocate appropriate resources and configure the virtual machine settings according to your requirements for optimal performance and functionality.
Disabling Client Hyper-V on a Virtual Machine
If you no longer require Client Hyper-V on a virtual machine or want to temporarily disable it, you can easily disable the feature to revert back to a non-virtualized environment. Disabling Client Hyper-V on a virtual machine involves a few simple steps. Here’s how to disable Client Hyper-V:
- Turn off the Virtual Machine: Before disabling Client Hyper-V, it is recommended to turn off the virtual machine that is currently running. This ensures a smooth transition and prevents any data loss or inconsistencies.
- Access Hyper-V Manager: Open the Hyper-V Manager on your Windows computer. You can find it in the Windows Administrative Tools or by searching for “Hyper-V Manager” in the Start menu.
- Select the Virtual Machine: From the Hyper-V Manager, locate the virtual machine that has Client Hyper-V enabled and select it by clicking on it. This will display the virtual machine’s details and configuration options.
- Open the Settings: In the right-hand panel of the Hyper-V Manager, you will find various actions and settings related to the selected virtual machine. Click on the “Settings” option to open the virtual machine’s settings.
- Disable Hyper-V: In the settings window, navigate to the “Hyper-V” category or a similar option related to virtualization settings. Uncheck the box next to “Enable this virtual machine for Hyper-V” or any similarly worded option. This action disables Client Hyper-V on the virtual machine.
- Apply the Changes: After unchecking the option to disable Client Hyper-V, click the “Apply” or “OK” button to save the changes. This will apply the new settings to the virtual machine.
- Restart the Virtual Machine: To fully complete the disabling process, you may need to restart the virtual machine. If prompted, restart the virtual machine to load the changes and revert it back to a non-virtualized state.
By following these steps, you can successfully disable Client Hyper-V on a virtual machine. Once disabled, the virtual machine will operate without the virtualization layer and behave like a regular non-virtualized machine.
Disabling Client Hyper-V can be useful in scenarios where you no longer require virtualization or need to ensure compatibility with certain applications that may not function within a virtualized environment. If you decide to re-enable Client Hyper-V in the future, you can follow the steps to enable it again and restore virtualization capabilities to the virtual machine.
Common Issues and Troubleshooting Client Hyper-V
While Client Hyper-V is a powerful virtualization feature, you may encounter certain issues or challenges when using it. Fortunately, many of these problems can be resolved with some troubleshooting steps. Here are some common issues and troubleshooting methods for Client Hyper-V:
- Virtualization Support: Ensure that your computer’s hardware supports virtualization and that it is enabled in the BIOS or UEFI settings. Without virtualization support, you may experience compatibility issues or be unable to enable Client Hyper-V.
- Insufficient Resources: If you are experiencing performance issues with your virtual machines, check if your host system has enough resources allocated to the virtual machines. Insufficient memory, CPU cores, or disk space can adversely impact the performance of virtual machines. Consider adjusting the resource allocation in Hyper-V Manager to better meet the needs of your virtual machines.
- Networking Issues: If your virtual machines are unable to connect to the network or experience network connectivity problems, check the network settings in Hyper-V Manager. Ensure that the virtual switch is correctly configured and connected to the appropriate network adapter. Troubleshoot network issues on your host system, such as checking for driver updates or firewall settings that may be blocking network communication.
- Integration Services: Integration Services enhance the performance and functionality of virtual machines. If integration services are not installed or functioning properly, you may face issues such as slow performance or limited features. To resolve this, make sure Integration Services are installed and up to date on your virtual machines.
- Unsupported Operating Systems: Some operating systems may not be fully compatible with Client Hyper-V. Always ensure that you are using a supported operating system and that it meets the system requirements for running virtual machines with Hyper-V. Unsupported operating systems may not install or function correctly within a virtual machine.
- Third-Party Software Conflicts: In certain cases, conflicts with third-party software or security applications may cause issues with Client Hyper-V. If you encounter problems, try temporarily disabling or uninstalling any third-party software that may impact virtualization. Also, check for any software updates or patches that may address known compatibility issues.
- Hyper-V Service Issues: If Hyper-V is not starting or functioning properly, you can attempt to restart the Hyper-V service or perform a system reboot to resolve any service-related issues. Additionally, ensure that you have the latest updates and patches installed for Hyper-V to benefit from bug fixes and improvements.
If you encounter any persistent issues with Client Hyper-V that cannot be resolved through troubleshooting or the steps mentioned above, it may be helpful to consult relevant online forums, Microsoft documentation, or seek assistance from technical support professionals who specialize in virtualization.
By understanding and addressing these common issues, you can ensure a smoother experience with Client Hyper-V and make the most of its capabilities for running virtual machines on your Windows computer.
Conclusion
Client Hyper-V is a powerful feature that brings virtualization capabilities to your Windows computer, allowing you to create and run virtual machines with ease. By enabling Client Hyper-V, you can take advantage of various benefits, including isolation, resource efficiency, security, flexibility, and easier software testing.
Benefits of using Client Hyper-V
Client Hyper-V provides isolation, allowing you to test different configurations and run multiple operating systems without impacting your main system. It also optimizes resource usage, enabling you to run multiple virtual machines on a single device. With added security features, you can safeguard your main system and data while testing potentially harmful applications. Additionally, Client Hyper-V ensures compatibility, allowing you to run different operating systems and applications that may not be compatible with your host system. It also simplifies software testing by providing a standardized environment.
Enabling Client Hyper-V
To enable Client Hyper-V, you need to check system requirements, enable virtualization in BIOS settings, and activate Hyper-V through the Control Panel or PowerShell. Once enabled, you can create virtual machines, install operating systems, and configure settings based on your specific needs. Client Hyper-V opens up possibilities for developers, testers, and enthusiasts, offering a versatile virtualization platform.
Troubleshooting and Disabling Client Hyper-V
While using Client Hyper-V, you may encounter common issues such as resource constraints, networking problems, or conflicts with third-party software. By troubleshooting these issues and ensuring hardware compatibility, you can resolve most problems and enhance your virtualization experience. If you need to temporarily disable Client Hyper-V, you can easily do so by turning off the virtual machine and modifying the settings in Hyper-V Manager.
Harness the Power of Virtualization
Client Hyper-V empowers users to create, manage, and run virtual machines, providing a flexible and efficient solution for various computing needs. Whether you are a developer, IT professional, or simply someone looking to explore different environments, the capabilities of Client Hyper-V can greatly enhance your computing experience. By taking advantage of its benefits and troubleshooting any issues that arise, you can unleash the power of virtualization and optimize your productivity.