Introduction
Welcome to the world of virtualization! Virtual machines have become an essential component of modern computing, offering a flexible and efficient way to run multiple operating systems on a single physical machine. One of the leading virtualization platforms is Hyper-V, developed by Microsoft. Whether you are a system administrator, developer, or simply someone who wants to explore the benefits of virtualization, this guide will take you through the process of creating a virtual machine using Hyper-V.
Virtual machines enable you to isolate different operating systems and applications, optimize resource allocation, and simplify management and maintenance tasks. With Hyper-V, you can create and manage virtual machines running various Windows and Linux operating systems, making it a versatile solution for a wide range of scenarios.
Before we dive into the steps of creating a Hyper-V virtual machine, it’s important to ensure you have the necessary prerequisites in place. These include a compatible hardware, a supported operating system, and enabling virtualization in your system’s BIOS. Once you have met these requirements, you can proceed to install Hyper-V and start building your virtual machines.
In this guide, we will walk you through each step of the process, from installing Hyper-V to configuring virtual machine settings, managing network connectivity, and installing the operating system. We will also discuss some troubleshooting techniques that can help you address common issues you may encounter along the way.
By the end of this guide, you will have a solid understanding of how to create and manage virtual machines using Hyper-V. So, let’s get started and unlock the power of virtualization with Hyper-V!
Prerequisites for Creating Hyper-V Virtual Machine
Before you can start creating virtual machines using Hyper-V, there are a few prerequisites you need to fulfill. These requirements ensure that your system is compatible with Hyper-V and enable you to have a smooth virtualization experience. Let’s take a look at the essential prerequisites:
Compatible Hardware: To run Hyper-V, your computer needs to have a compatible processor with virtualization support. Most modern processors have this capability, but it’s important to check if your processor supports virtualization. You can usually find this information in your computer’s BIOS settings or by checking the documentation provided by the manufacturer.
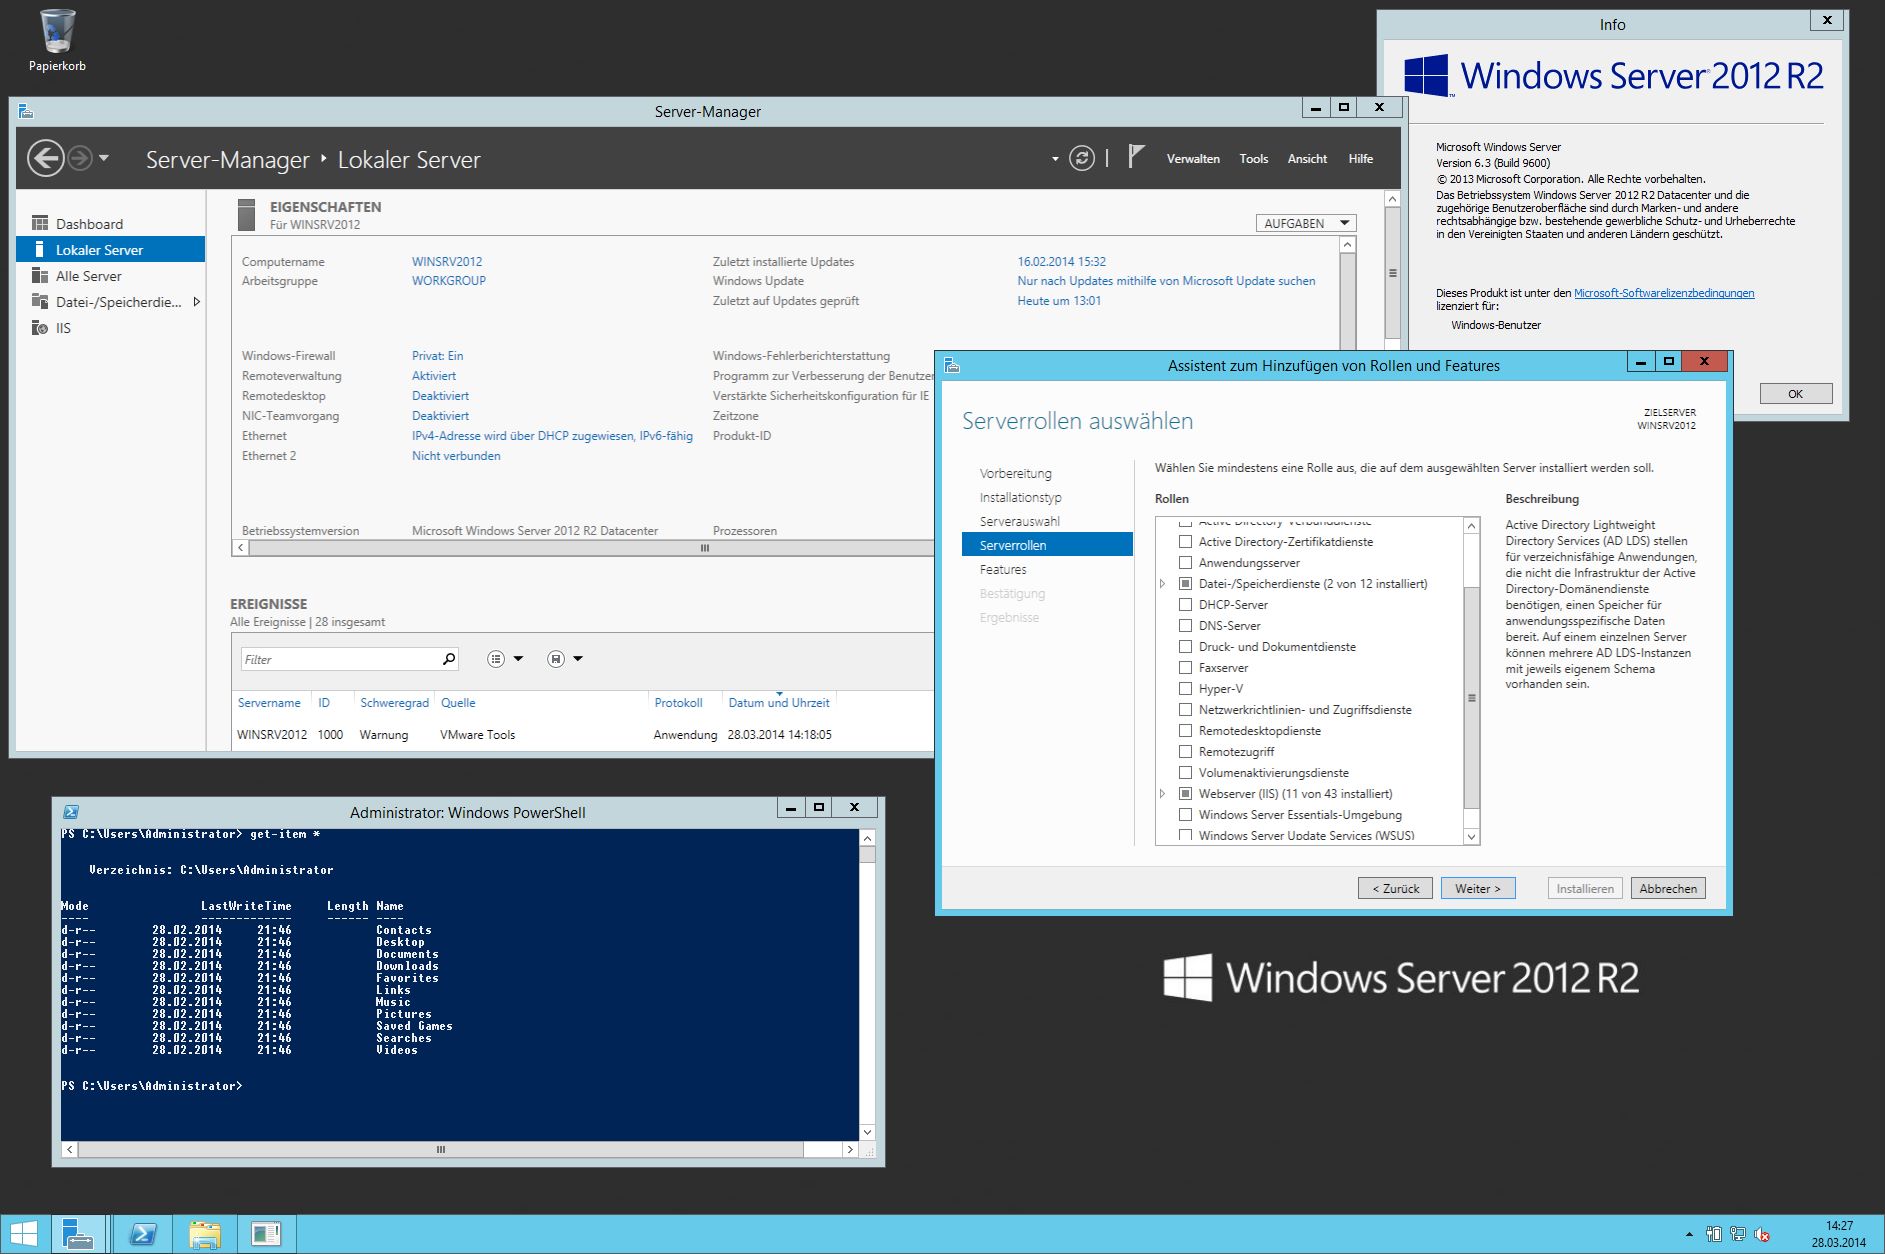
Supported Operating System: Hyper-V is available for specific editions of Windows operating systems. For Windows 10, the Hyper-V feature is available in the Pro, Enterprise, and Education editions. If you’re using Windows Server, you can install the Hyper-V role on supported editions such as Windows Server Standard or Datacenter.
Enable Virtualization in BIOS: In addition to having a compatible processor, you also need to enable virtualization in your system’s BIOS settings. The process of enabling virtualization may vary depending on your computer’s manufacturer and model. Typically, you can access the BIOS settings by pressing a specific key during the boot process, such as F2 or Del. Once in the BIOS, look for an option related to virtualization or VT-x (for Intel processors) or AMD-V (for AMD processors) and make sure it is enabled.
Sufficient Resources: Creating and running virtual machines requires a certain amount of system resources, including processor, memory, and disk space. Ensure that your computer meets the minimum requirements for running Hyper-V and that you have enough resources available to allocate to virtual machines. Insufficient resources can lead to poor performance or instability.
Administrative Access: To install and configure Hyper-V, you need to have administrative access to your computer. Make sure you are logged in with an account that has administrative privileges to perform the necessary tasks.
Backup System: It is always recommended to have a backup system in place before creating and managing virtual machines. While Hyper-V provides features like snapshotting, having a backup ensures that you have a copy of your important data and configurations in case of any unforeseen issues or failures.
By ensuring that you meet these prerequisites, you can proceed with confidence to install Hyper-V and begin creating virtual machines. Now that you have a clear understanding of the requirements, let’s move on to the next step: installing Hyper-V!
Step 1: Installing Hyper-V
Before you can start creating virtual machines with Hyper-V, you need to install the Hyper-V feature on your Windows operating system. The following steps will guide you through the process:
- Open the Control Panel: Click on the “Start” menu and type “Control Panel” in the search bar. Open the Control Panel from the search results.
- Click on “Programs”: In the Control Panel, click on the “Programs” option.
- Click on “Turn Windows features on or off”: Under the “Programs and Features” section, click on the “Turn Windows features on or off” link. This will open the Windows Features dialog box.
- Select Hyper-V: In the Windows Features dialog box, scroll down and locate the “Hyper-V” option. Check the box next to “Hyper-V” to enable it.
- Optional: Install additional features: If you plan to use specific features such as the Hyper-V management tools or PowerShell modules, expand the “Hyper-V” option and check the boxes next to the desired features.
- Click on “OK”: Once you have selected the desired Hyper-V features, click on the “OK” button to start the installation process.
- Wait for the installation: Windows will now install the Hyper-V feature along with any selected additional features. This process may take a few minutes to complete.
- Restart your computer: After the installation is finished, Windows will prompt you to restart your computer. Save any unsaved work and click on the “Restart Now” button to restart your system.
Once your computer has restarted, you will have Hyper-V installed and ready to use. You can now proceed to create virtual machines and start exploring the possibilities of virtualization.
Note: The steps for installing Hyper-V may vary slightly depending on your Windows version. If you encounter any issues or need more detailed instructions, you can refer to Microsoft’s official documentation or seek assistance from online forums and communities dedicated to Hyper-V.
Step 2: Creating a Virtual Machine
With Hyper-V installed, you are now ready to create your first virtual machine. The following steps will guide you through the process:
- Open Hyper-V Manager: Click on the “Start” menu, type “Hyper-V Manager” in the search bar, and open the Hyper-V Manager from the search results.
- Click on “New” and select “Virtual Machine”: In the Hyper-V Manager, click on the “New” button in the right-hand panel and select “Virtual Machine” from the options. This will open the New Virtual Machine Wizard.
- Specify a name and location: In the wizard, enter a name for your virtual machine and choose a location where its files will be stored. You can also optionally select a different storage path for virtual hard disks.
- Assign memory: Set the amount of memory (RAM) that will be allocated to the virtual machine. Consider the requirements of the operating system and applications you plan to run on the virtual machine.
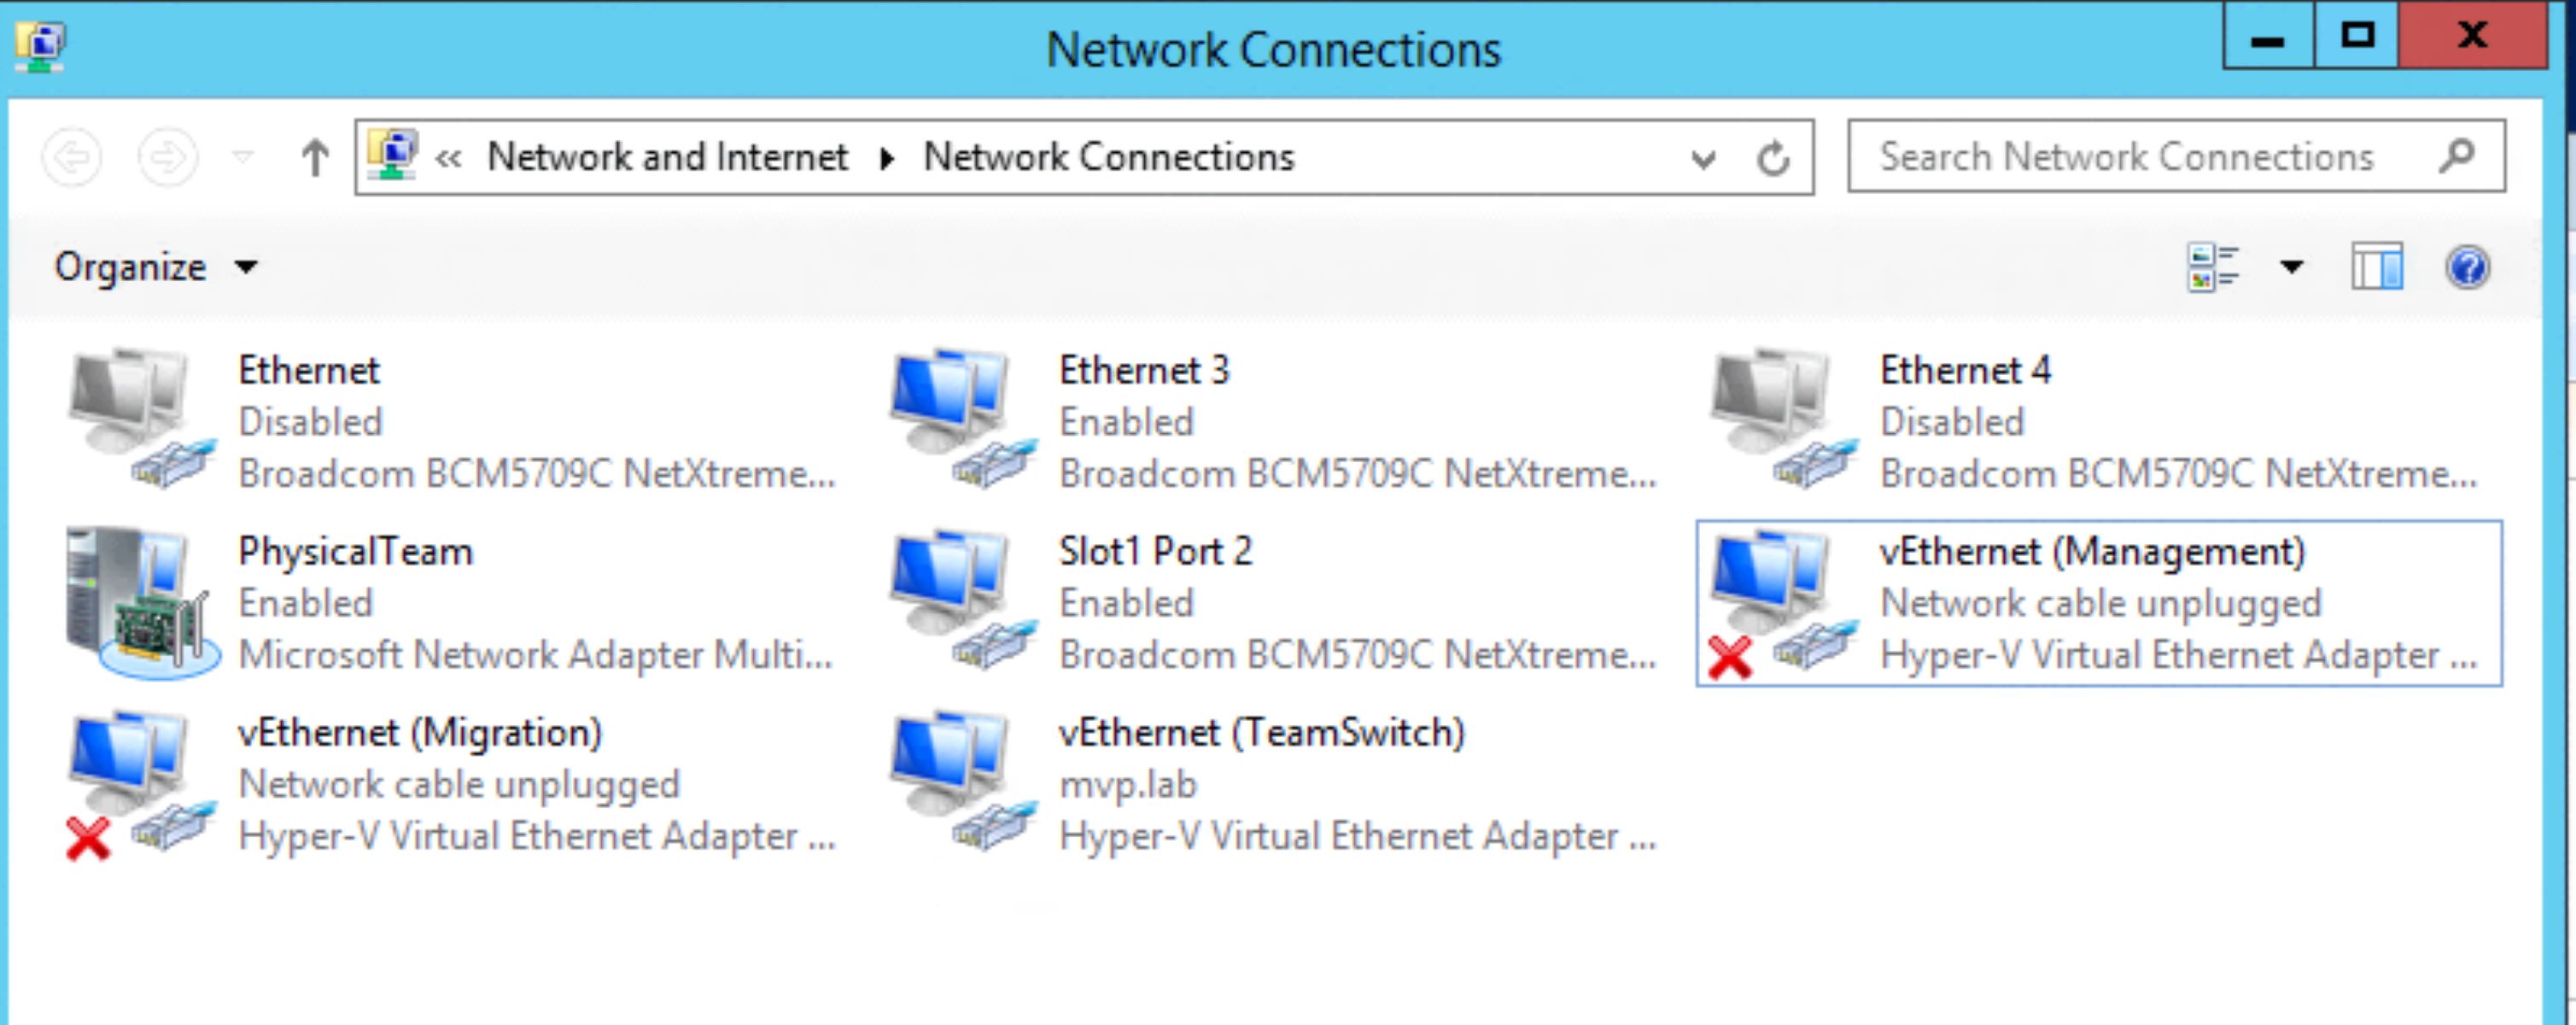
- Configure networking: Choose a networking option for the virtual machine. You can select an existing virtual switch or create a new one to provide network connectivity to the virtual machine.
- Create a virtual hard disk: Specify whether to create a new virtual hard disk or use an existing one. Set the size and location for the virtual hard disk file.
- Select installation options: Decide whether to install an operating system later or from a DVD, ISO file, or network-based installation server. Choose the option that suits your needs and select the respective installation media.
- Review and complete the wizard: Review the summary of your settings and click the “Finish” button to complete the New Virtual Machine Wizard.
- Power on the virtual machine: Once the creation process is complete, select the virtual machine in the Hyper-V Manager and click on the “Start” button to power on the virtual machine.
Congratulations! You have successfully created a virtual machine using Hyper-V. You can now proceed to configure the virtual machine settings, install the operating system, and customize it according to your requirements.
Remember that you can create multiple virtual machines to run different operating systems or simulate various environments. Hyper-V provides a powerful and flexible platform that allows you to create, manage, and maintain virtual machines with ease.
If you encounter any issues during the creation process or need more detailed instructions, refer to the official documentation provided by Microsoft or seek assistance from Hyper-V communities and forums online.
Step 3: Configuring Virtual Machine Settings
After creating a virtual machine in Hyper-V, it’s important to configure its settings to optimize its performance and meet your specific requirements. Here are the steps to configure the virtual machine settings:
- Open Hyper-V Manager: Launch the Hyper-V Manager by clicking on the “Start” menu, typing “Hyper-V Manager” in the search bar, and selecting the Hyper-V Manager from the search results.
- Select the virtual machine: In the Hyper-V Manager, locate the virtual machine you want to configure and select it by clicking on its name.
- Access the settings: In the right-hand panel of the Hyper-V Manager, click on the “Settings” option. This will open the settings window for the selected virtual machine.
- General settings: In the General section, you can modify the virtual machine name, change its location, and adjust other basic settings such as the number of virtual processors and the amount of memory allocated to the virtual machine.
- Hardware settings: In the Hardware section, you can add or remove hardware components from the virtual machine, including virtual hard disks, virtual network adapters, and DVD drives. You can also modify settings for each component, such as the size of the virtual hard disk or the type of virtual network adapter.
- Integration services: In the Integration Services section, you can enable or disable certain integration services that enhance the interaction between the virtual machine and the Hyper-V host. These services include Time Synchronization, Data Exchange, and Heartbeat.
- Snapshots: In the Snapshots section, you can manage the snapshots taken of the virtual machine at different points in time. You can create, apply, merge, or delete snapshots, allowing you to revert the virtual machine to a previous state if needed.
- Management: In the Management section, you can configure advanced management settings for the virtual machine, such as enabling secure boot, assigning a virtual machine priority, or configuring automatic start and stop actions.
- Remote Desktop: In the Remote Desktop section, you can enable Remote Desktop Protocol (RDP) access to the virtual machine, allowing remote connections to the virtual machine’s desktop.
- Apply and save changes: Once you have made the desired changes to the virtual machine settings, click on the “Apply” button to apply the changes. Then, click on the “OK” button to save the settings.
It’s important to carefully configure the virtual machine settings according to your specific needs. Optimizing the settings can help improve performance, ensure proper resource allocation, and enable seamless integration between the virtual machine and the Hyper-V host.
Remember, you can always revisit the settings and make adjustments as necessary. It’s a good practice to review and update the settings periodically to align with any changes in your requirements or the virtual machine’s workload.
If you encounter any difficulties or need more detailed instructions, you can refer to Microsoft’s official documentation or seek assistance from Hyper-V communities and forums online.
Step 4: Configuring Network Settings for Virtual Machine
Configuring network settings for your virtual machine in Hyper-V is crucial for enabling network connectivity and allowing the virtual machine to communicate with other devices on the network. Follow these steps to configure the network settings for your virtual machine:
- Open Hyper-V Manager: Launch the Hyper-V Manager by clicking on the “Start” menu, typing “Hyper-V Manager” in the search bar, and selecting the Hyper-V Manager from the search results.
- Select the virtual machine: In the Hyper-V Manager, locate the virtual machine for which you want to configure the network settings and select it by clicking on its name.
- Access the settings: In the right-hand panel of the Hyper-V Manager, click on the “Settings” option. This will open the settings window for the selected virtual machine.
- Select “Network Adapter”: In the settings window, click on the “Network Adapter” option on the left-hand side navigation pane. This will display the network adapter settings for the virtual machine.
- Choose a virtual switch: Under the “Network” section, select the virtual switch that you want to associate with the virtual machine. A virtual switch connects the virtual machine to the physical network.
- Configure advanced settings: If needed, you can configure advanced settings for the network adapter, such as the MAC address, VLAN ID, bandwidth management, and network optimization features.
- Apply and save changes: Once you have made the desired network settings, click on the “Apply” button to apply the changes. Then, click on the “OK” button to save the settings.
By configuring the network settings for your virtual machine, it becomes accessible on the network and can communicate with other devices. This allows you to connect to the virtual machine remotely, transfer data, and perform various networking tasks as if it were a physical machine.
It’s important to select the appropriate virtual switch and configure any advanced settings based on your network requirements. Consider factors such as security, performance, and network compatibility when making these decisions.
If you encounter any difficulties or need more detailed instructions, you can refer to Microsoft’s official documentation or seek assistance from Hyper-V communities and forums online. Proper network configuration will ensure seamless connectivity for your virtual machines in Hyper-V.
Step 5: Installing Operating System on Virtual Machine
Once you have configured the necessary settings for your virtual machine in Hyper-V, it’s time to install the operating system. Follow these steps to install an operating system on your virtual machine:
- Open Hyper-V Manager: Launch the Hyper-V Manager by clicking on the “Start” menu, typing “Hyper-V Manager” in the search bar, and selecting the Hyper-V Manager from the search results.
- Select the virtual machine: In the Hyper-V Manager, locate the virtual machine on which you want to install the operating system and select it by clicking on its name.
- Start the virtual machine: In the right-hand panel of the Hyper-V Manager, click on the “Start” button to power on the virtual machine.
- Connect to the virtual machine: Once the virtual machine has started, right-click on its name and select “Connect” to establish a connection with the virtual machine console.
- Attach installation media: On the virtual machine console, click on the “Media” tab and select “Insert Disk” or “Insert ISO Image”. Choose the appropriate installation media, such as a DVD or an ISO file, and click “OK”.
- Start the installation: Restart the virtual machine by clicking on the “Action” tab, selecting “Reset”, and then clicking “Yes” to confirm. The virtual machine will boot from the selected installation media and launch the operating system setup.
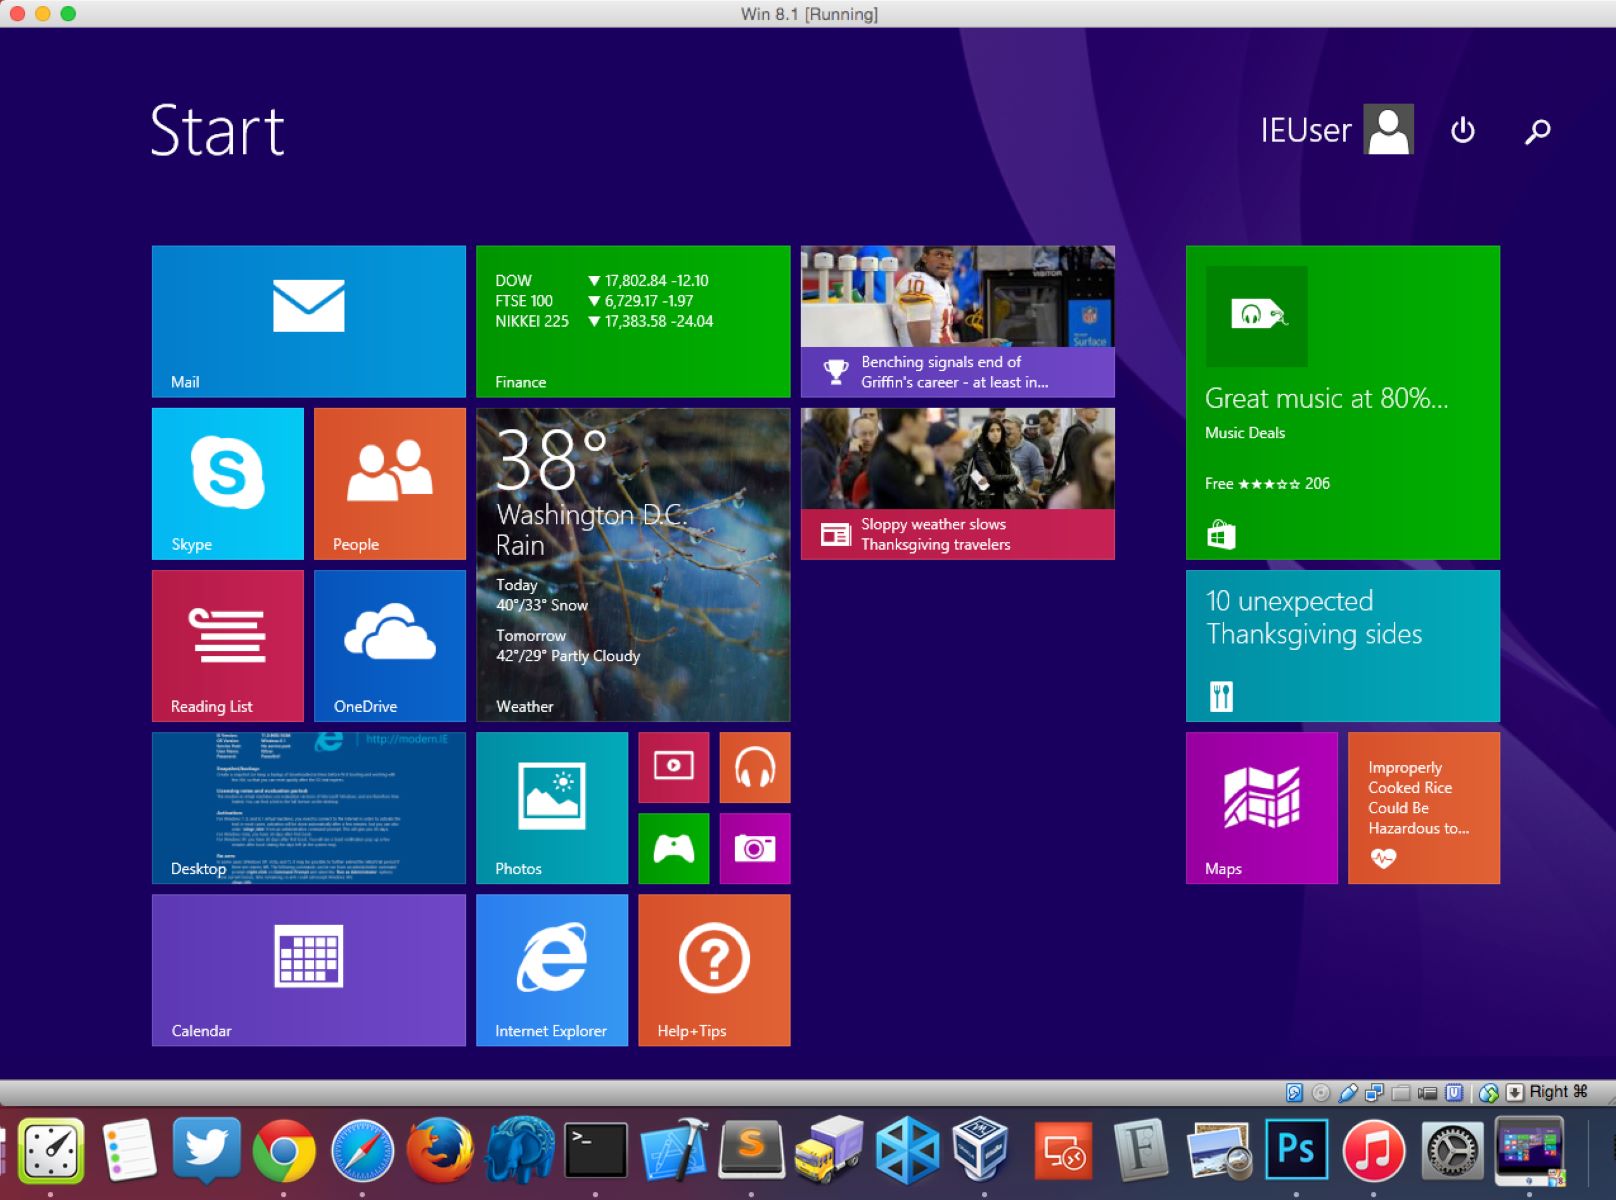
- Follow the operating system installation wizard: Follow the prompts and instructions provided by the operating system installation wizard to complete the installation. This may include selecting a language, accepting license agreements, specifying installation options, and configuring user accounts.
- Complete the installation and configure the operating system: Once the installation is complete, the virtual machine will restart. You can then log in to the operating system and perform any necessary configuration, such as installing updates, setting up network connectivity, and installing additional software or drivers.
Installing an operating system on a virtual machine is similar to installing it on a physical machine, with the added flexibility and convenience of virtualization. You can install various operating systems, including Windows, Linux, and other supported platforms, depending on your needs.
Remember to have the necessary installation media or ISO file ready when starting the installation process. Additionally, make sure you have valid licenses for the operating system you are installing on the virtual machine.
If you encounter any difficulties or need more detailed instructions, you can refer to the official documentation provided by the operating system vendor or seek assistance from Hyper-V communities and forums online. Happy virtual machine OS installation!
Step 6: Virtual Machine Management and Troubleshooting
Managing virtual machines in Hyper-V involves various tasks to ensure their smooth operation and troubleshoot any issues that may arise. Here are some key steps for effective virtual machine management:
- Start and stop virtual machines: In the Hyper-V Manager, you can start, stop, and even save the state of virtual machines. This allows you to pause and resume virtual machines as needed and gracefully shut them down when not in use.
- Manage virtual machine resources: You can adjust resource allocations for virtual machines, including CPU, memory, and storage. This helps ensure that each virtual machine has adequate resources for its workload and prevents resource contention.
- Create checkpoints and snapshots: Hyper-V allows you to create checkpoints or take snapshots of virtual machines at specific points in time. This feature is useful for creating restore points or testing different configurations and can help recover from system issues or roll back changes.
- Monitor virtual machine performance: Hyper-V provides performance monitoring and reporting tools to analyze the performance of virtual machines. By monitoring key metrics such as CPU usage, memory utilization, and disk performance, you can identify bottlenecks and optimize resources.
- Manage virtual machine storage: You can attach and detach virtual hard disks, resize existing disks, and manage disk snapshots. This allows you to effectively manage storage resources for your virtual machines and accommodate changing storage requirements.
- Configure virtual machine networking: You can modify networking settings for virtual machines, such as assigning virtual network adapters and configuring network protocols. This helps ensure proper connectivity and enables communication between the virtual machines and the rest of the network.
- Handle virtual machine migrations: Hyper-V supports live migration, which allows you to move running virtual machines between Hyper-V hosts without disrupting their operation. This feature ensures high availability and allows for maintenance or load balancing activities.
Additionally, it’s important to have troubleshooting techniques in your virtual machine management toolkit. Here are some common issues you may encounter and suggestions for troubleshooting:
- Network connectivity problems: Verify network adapter settings, check firewall configurations, and ensure proper network connectivity between the virtual machine and the network.
- Performance issues: Monitor resource utilization, review virtual machine settings, and optimize resource allocation to address performance bottlenecks.
- Operating system or application errors: Update the operating system and applications on the virtual machine, install the latest patches and updates, and troubleshoot specific errors using system logs and diagnostic tools.
- Virtual machine startup failures: Check hardware compatibility, review BIOS settings, and verify that necessary drivers are installed for the virtual machine to properly start.
- Integration service problems: Ensure that integration services are installed and up to date on the virtual machines to enable smooth interaction with the Hyper-V host.
By effectively managing and troubleshooting virtual machines in Hyper-V, you can ensure their optimal performance, reliability, and availability. Keep a proactive approach, monitor for potential issues, and apply appropriate solutions to maintain a healthy virtual environment.
If you encounter complex issues or need additional guidance, consult official documentation, seek assistance from Microsoft support, or engage with the vibrant Hyper-V user community.
Conclusion
Congratulations on completing the journey of creating and managing virtual machines using Hyper-V! You have learned how to install Hyper-V, create virtual machines, configure their settings, install operating systems, and troubleshoot common issues. By harnessing the power of virtualization, you can enhance flexibility, efficiency, and scalability in your computing environment.
Throughout this guide, we have covered the essential prerequisites for Hyper-V, the step-by-step process of installing the software, creating virtual machines, configuring network settings, installing operating systems, and managing and troubleshooting virtual machines. Each step plays a crucial role in the successful deployment and utilization of virtual machines.
Remember to regularly update your virtual machine settings and management techniques as the needs of your environment evolve. Stay vigilant in monitoring performance, resource allocation, and security to maximize the benefits of virtualization.
As you explore and experiment with Hyper-V, continue to leverage documentation, user forums, and support channels to expand your knowledge and address any challenges you may encounter. Utilize the vast resources available to further optimize your virtual machine management skills.
Virtualization with Hyper-V opens up a world of possibilities for system administrators, developers, and individuals seeking efficient and adaptable computing solutions. Whether it’s creating test environments, running multiple operating systems, or consolidating server workloads, virtual machines are a valuable tool.
Thank you for joining us on this virtual machine journey with Hyper-V. Embrace the power of virtualization and continue exploring the boundless opportunities it offers in the ever-evolving world of technology.