Introduction
When it comes to disposing of old hard disk drives (HDDs), simply tossing them in the trash is not enough to ensure the data on them is completely destroyed. As technology advances and the risk of data breaches increases, it becomes paramount to take proper measures to securely destroy HDDs to prevent unauthorized access to sensitive information.
While there are various software tools available that claim to securely erase data from HDDs, physical destruction remains one of the most reliable and foolproof methods. By physically destroying the drive, you ensure that the data stored on it is inaccessible and irrecoverable.
In this article, we will explore several methods for destroying HDDs effectively. These methods range from simple techniques that can be performed with basic tools, to more advanced methods that require specialized equipment. Each method offers its own level of security, and your choice should depend on the sensitivity of the data and the resources available.
It is important to note that the methods discussed here are meant to be used on HDDs that are no longer needed or functioning. Destroying a working HDD without proper backups is not recommended, as it will result in permanent data loss.
Now, let’s dive into the various methods of destroying hard disk drives to ensure the complete destruction of data and maintain the security of your sensitive information.
Method 1: Physical Destruction
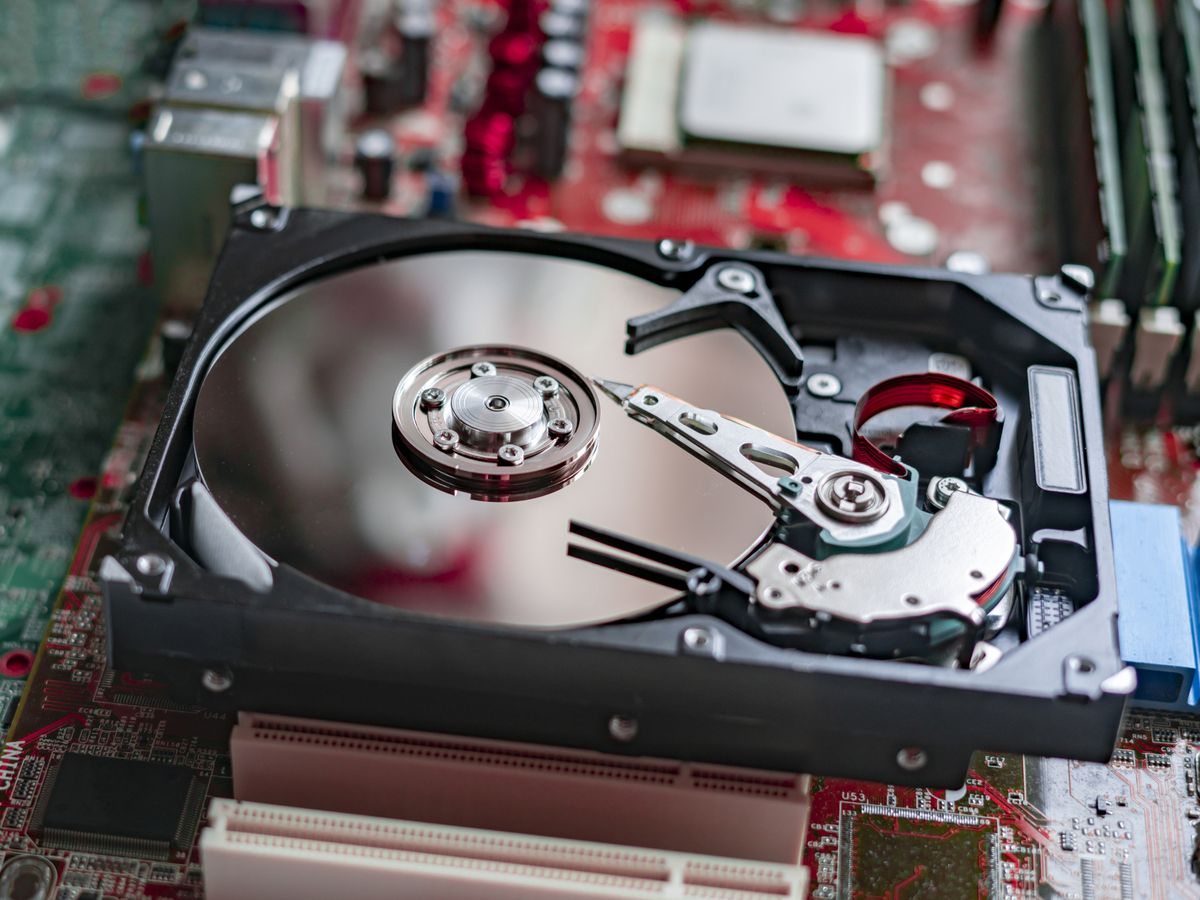
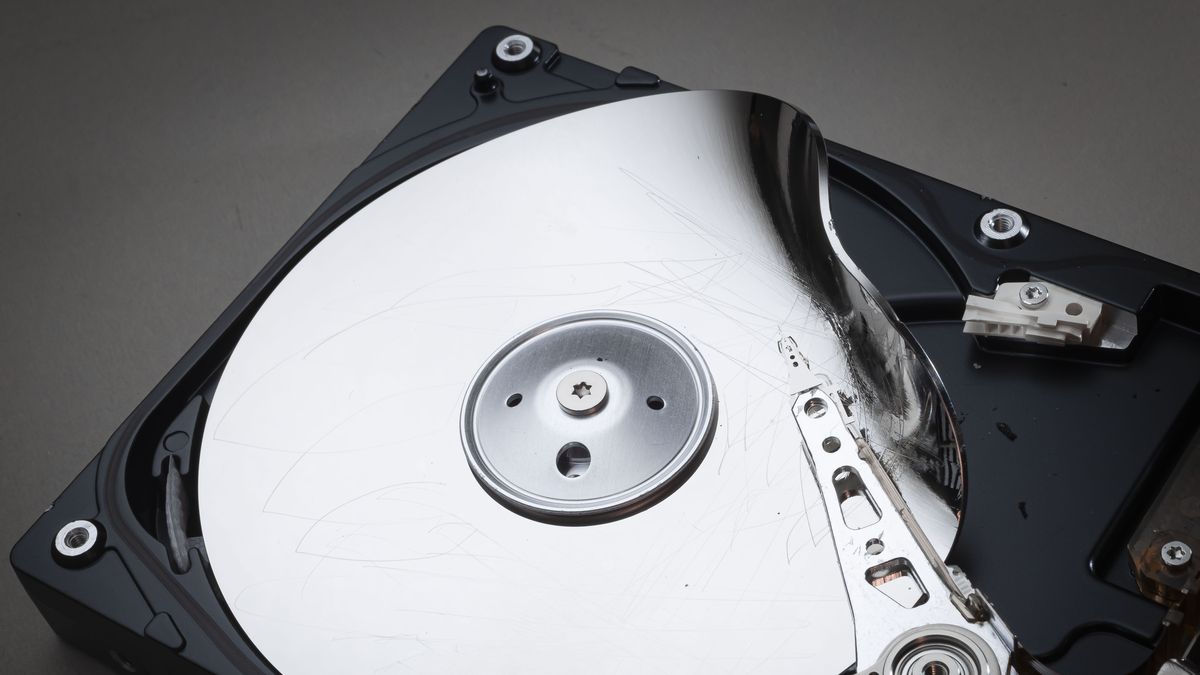
Physical destruction is one of the most straightforward and effective methods of destroying a hard disk drive. By physically damaging the drive, you ensure that the platters, which contain the data, are rendered unreadable and unusable.
There are several ways to physically destroy a hard disk drive, depending on the tools and resources available. One common method is using a hammer to strike the drive repeatedly, focusing on the area where the platters are located. This method effectively damages the drive and makes data recovery virtually impossible.
Another method involves using power tools, such as a drill or angle grinder, to pierce through the drive’s casing and directly damage the platters. It’s important to exercise caution and wear protective gear when using power tools.
For those with access to more advanced equipment, a hydraulic press can be used to completely crush the drive. This method ensures that the platters are completely destroyed and provides an added level of security.
Regardless of the method chosen, it is crucial to wear protective gloves and eye protection during the destruction process to avoid injury from flying debris or sharp edges.
Once the hard disk drive has been physically destroyed, it is advisable to dispose of the pieces in separate waste streams to ensure that they cannot be reassembled or salvaged. This can be done by separating the metal components from any plastic or electronic parts and disposing of them in appropriate recycling centers.
Physical destruction offers a high level of certainty that the data on the hard disk drive is completely destroyed. However, it is important to remember that physically destroying a hard drive means that it can no longer be used or accessed, so it should only be done on drives that are no longer needed or functional.
Next, we will explore another method of destroying a hard disk drive: drilling holes.
Method 2: Drilling Holes
Drilling holes into a hard disk drive is another effective way to render the data stored on it unreadable and inaccessible. This method involves using a power drill to create multiple holes on the surface of the drive’s platters.
To begin, you will need a drill with a strong metal drill bit. It is recommended to use a high-speed drill bit made specifically for metal to ensure efficient hole creation. Additionally, wearing protective gear, such as gloves and safety goggles, is essential to prevent injury.
Start by identifying the location of the platters inside the drive. Most hard disk drives have multiple platters stacked on top of each other. Carefully place the drive on a stable surface and secure it firmly, ensuring it does not move during the drilling process.
Using the drill, slowly and steadily apply pressure to create the holes on the drive’s surface. Aim to penetrate through the metal casing and into the platters. It is recommended to create multiple holes in different areas of the drive to ensure complete destruction of the platters.
While drilling, you may encounter resistance due to the platter’s sturdy construction. Apply gradual and consistent pressure, taking breaks as needed to allow the drill bit to cool down. Continue drilling until you have created sufficient holes to render the platters completely unreadable.
Once the drilling process is complete, it is advisable to dispose of the drive and its components separately to prevent any attempts at data recovery. Separate the metal parts from any plastic or electronic components, and dispose of them in appropriate waste streams or recycling centers.
Drilling holes offers a relatively simple and accessible method of destroying a hard disk drive for individuals who have access to basic power tools. However, it is important to remember that this method permanently renders the drive unusable, so it should only be done on drives that are no longer needed or functioning.
In the next section, we will explore another method: hammering the hard drive.
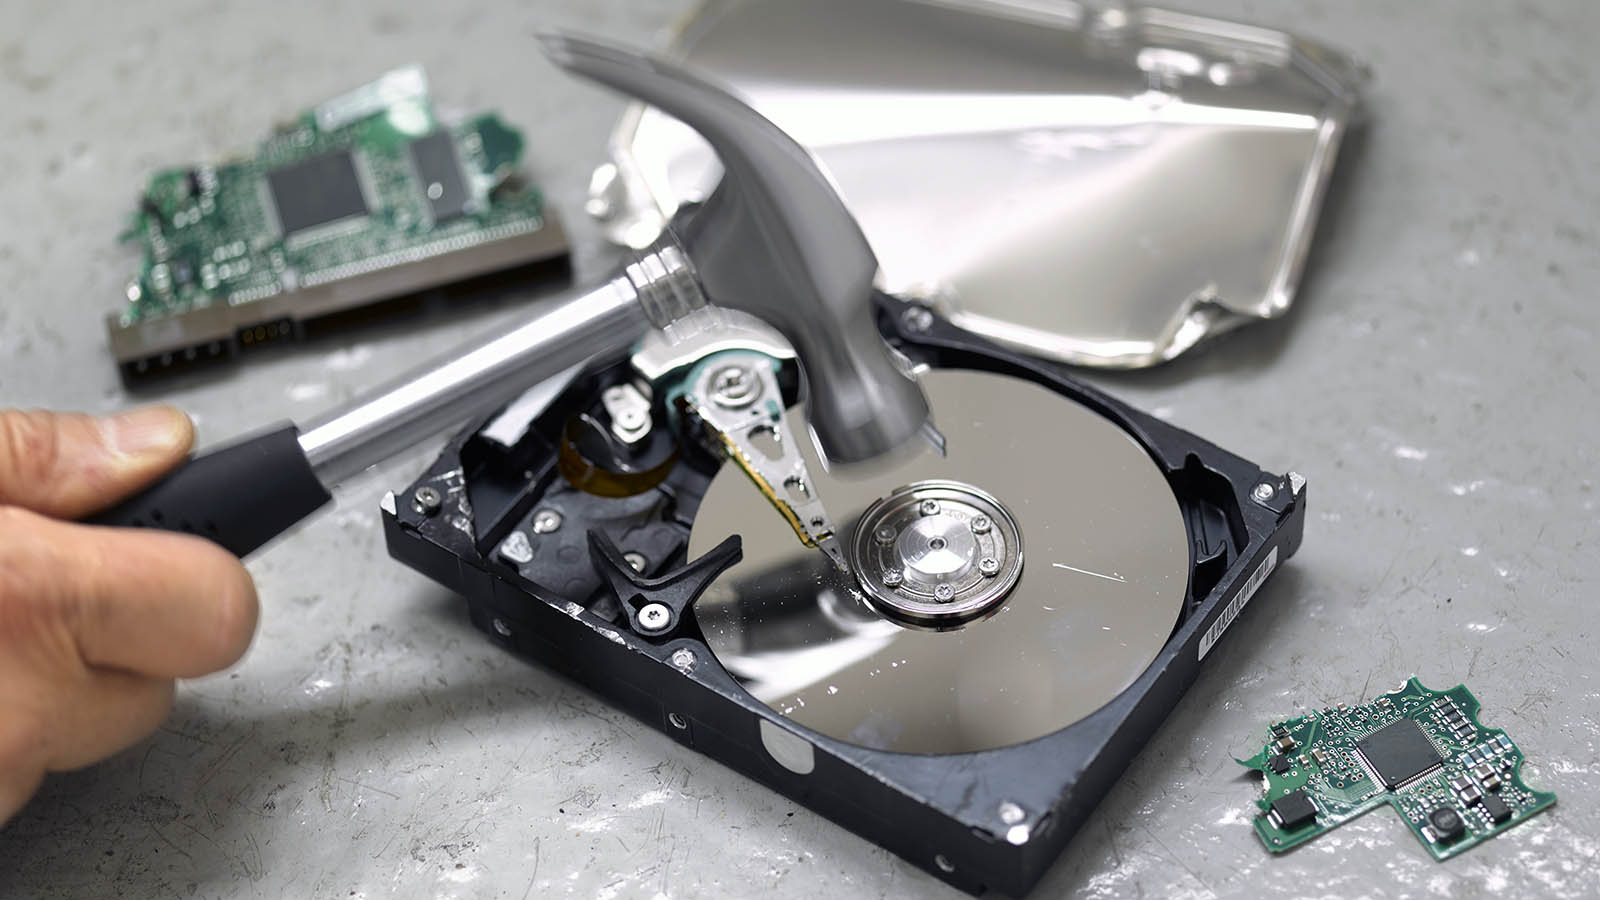
Method 3: Hammering the Hard Drive
Hammering the hard drive is a straightforward yet effective method of destroying the data stored on it. This method involves using a hammer or similar heavy object to strike the drive with force, causing irreparable damage to the platters and making data recovery nearly impossible.
Before beginning the process, it is essential to wear protective gear, such as safety goggles and gloves, to prevent any potential injury from flying debris or sharp edges. Additionally, ensure you are in a well-ventilated area with a sturdy surface to work on.
Start by removing the hard drive from its enclosure, if applicable, and place it on a stable and secure surface, such as a concrete floor or workbench. Position the drive so that the platters are facing upwards, making them easier to target with the hammer.
Using steady and forceful strikes, begin hammering the drive directly on top of the platters. Focus on hitting different areas of the drive, including the center and edges, to ensure that all the platters are adequately damaged.
As you hammer the drive, you may hear the distinct sound of the platters being shattered. Continue striking the drive until you are confident that the platters are irreversibly damaged.
Once the hammering process is complete, it is crucial to properly dispose of the destroyed hard drive. Separate any metal components from electronic or plastic parts and dispose of them in appropriate recycling centers or waste management facilities.
Hammering the hard drive is a simple and accessible method that does not require any specialized tools. However, it is worth noting that this approach permanently destroys the drive, making it unrecoverable and unusable. Therefore, it should only be performed on drives that are no longer needed or functional.
In the next section, we will explore another method of destroying a hard disk drive: shredding.
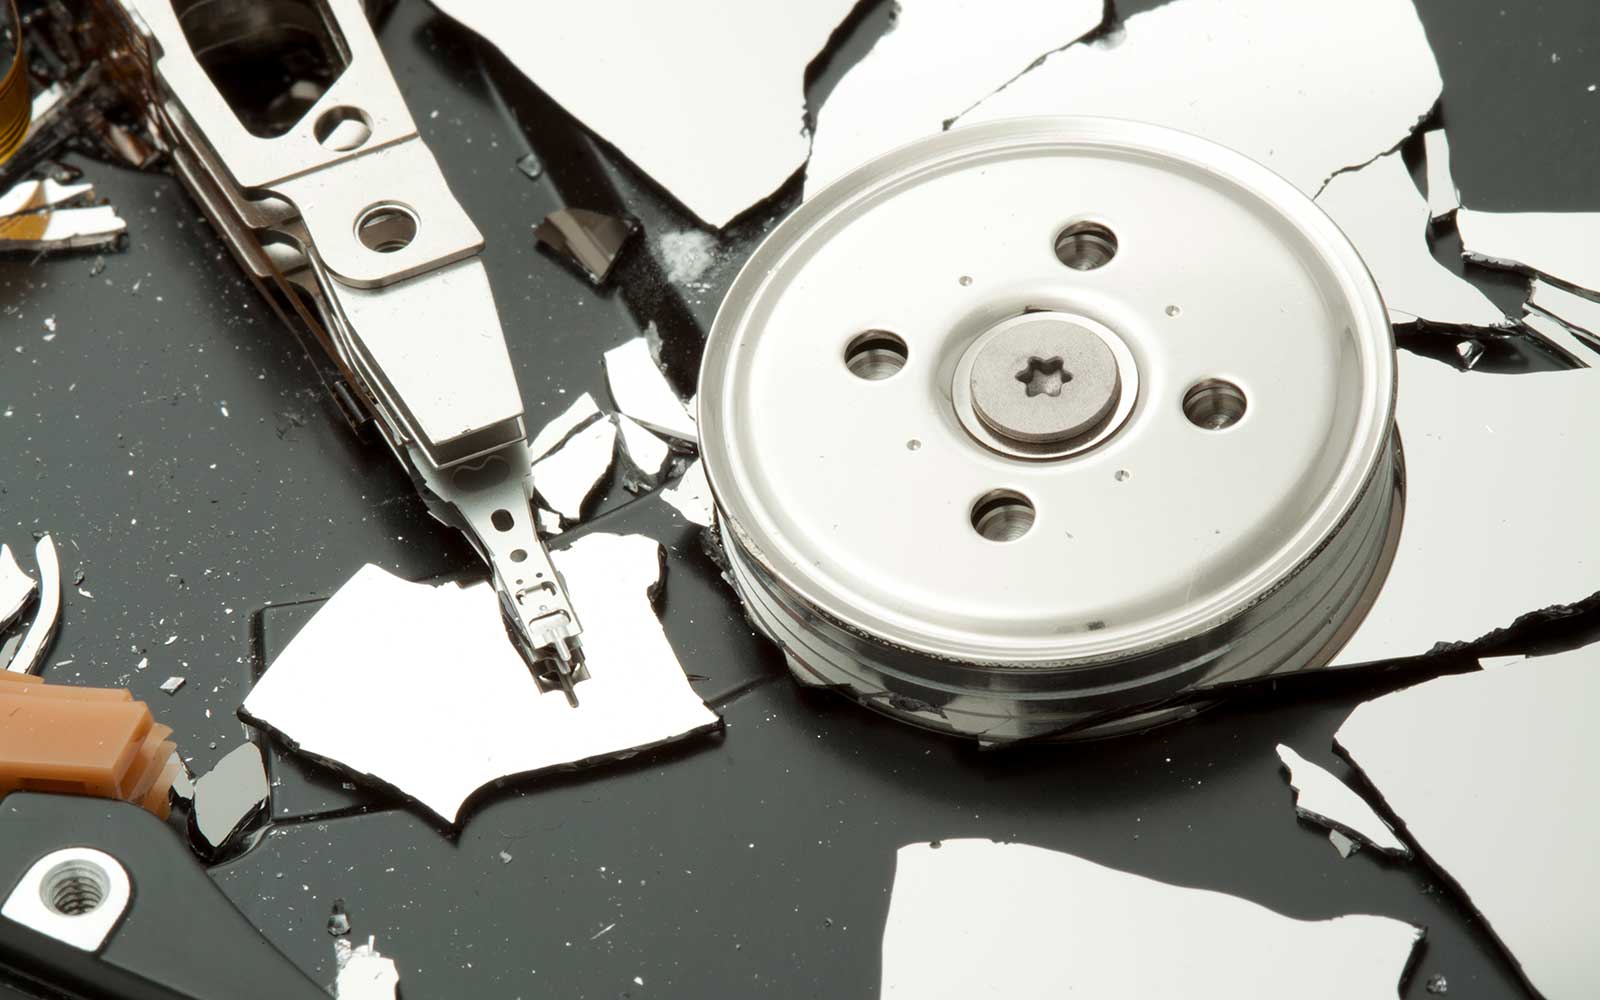
Method 4: Shredding the Drive
Shredding the hard disk drive is a highly effective method that ensures complete destruction of the data. This method involves using a specialized hard drive shredder, which is designed to break the drive into small, unrecognizable pieces, rendering the data irretrievable.
To perform this method, you will need access to a hard drive shredding machine. These machines are specifically built to handle the destruction of hard disk drives and are capable of shredding them into tiny fragments.
Start by preparing the hard disk drive for shredding. Remove it from its enclosure, if applicable, and ensure there are no other components or attachments present. Many shredders require the drive to be fed into the machine manually, so it is important to follow the specific instructions provided by the manufacturer.
Carefully insert the hard drive into the shredder’s designated slot or opening. Make sure the drive is positioned securely and does not slide or move during the shredding process.
Activate the shredder and allow it to go through the shredding cycle. The machine will use sharp blades or cutting mechanisms to tear the drive into small pieces. Depending on the shredder, this process can take a few seconds to a few minutes.
Once the shredding process is complete, ensure that all the drive’s components have been properly shredded and are no longer recognizable. If any large pieces remain, they may need to be shredded again to ensure complete destruction.
Dispose of the shredded pieces in separate waste streams to further prevent any possibility of data recovery. Recycle the shredded metal components and dispose of any plastic or electronic parts in appropriate recycling centers.
Shredding the hard disk drive provides a high level of security and guarantees that the data is permanently destroyed. However, it is important to note that this method requires access to a specialized shredding machine, which may not be readily available to everyone.
In the next section, we will explore another method of destroying a hard disk drive: degaussing.
Method 5: Degaussing the Drive
Degaussing is a highly effective method of destroying a hard disk drive by erasing the magnetic data stored on the drive’s platters. This method utilizes a powerful electromagnetic field to completely neutralize the magnetic data, making it irretrievable.
To perform degaussing, you will need a degausser. A degausser is a specialized device that generates a strong magnetic field to demagnetize the drive. It is important to note that not all degaussers are designed to handle hard disk drives, so ensure you have a degausser specifically meant for this purpose.
Start by removing the hard disk drive from its enclosure, if applicable, and place it in the designated area of the degausser. Ensure that the drive is positioned correctly and is in direct contact with the degausser’s magnetic field.
Activate the degausser and allow it to run through its degaussing cycle. The magnetic field generated by the degausser will effectively erase the magnetic data on the drive’s platters, rendering it unreadable and unrecoverable.
Once the degaussing process is complete, verify the efficacy of the degaussing by attempting to access the data on the drive. If successful, it indicates that the degaussing was not effective, and additional measures may be required.
Properly dispose of the degaussed hard disk drive by separating any metal parts from plastic or electronic components. Recycle the metal parts and dispose of the other components in appropriate waste management facilities.
Degaussing is a highly secure method of destroying a hard disk drive as it eliminates the magnetic data completely. However, it is important to note that this method renders the drive permanently unusable, so it should only be used on drives that are no longer needed or functional.
In the next section, we will explore another method of destroying a hard disk drive: using acid.
Method 6: Using Acid to Destroy the Drive
Using acid to destroy a hard disk drive is an extreme and highly effective method of data destruction. This method involves using corrosive substances to dissolve the drive’s components and render the data completely unrecoverable.
It’s important to note that this method should only be attempted by professionals who have knowledge and experience working with hazardous materials. Safety precautions, including protective gloves, goggles, and a well-ventilated environment, should always be followed to minimize potential risks.
Start by removing the hard disk drive from its enclosure, if applicable. It’s crucial to handle the drive with care, as acid can cause damage to your skin or clothing. Place the drive in a large container specifically designed to handle corrosive substances.
Choose a suitable acid for the destruction process. Sulfuric acid is commonly used due to its strong corrosive properties. Pour enough acid into the container to submerge the drive completely. Ensure that the container is made of a material resistant to the corrosive nature of the acid.
Place the drive in the container and allow it to soak in the acid for a sufficient period of time. The duration will vary depending on the strength of the acid and the materials used in the drive’s construction. Follow safety guidelines and the instructions provided by the manufacturer of the acid to determine the appropriate soaking time.
After the drive has soaked, carefully remove it from the container, taking precautions to avoid contact with the acid. Rinse the drive thoroughly with water to neutralize any remaining acid. Place the drive in a well-ventilated area to dry completely.
Dispose of the acid and any other materials used in the process according to local regulations for hazardous waste. It is crucial to handle the waste properly to avoid harm to yourself and the environment.
Using acid to destroy a hard disk drive is an extremely aggressive method that ensures complete data destruction. However, it is crucial to emphasize that this method should only be attempted by professionals who have the necessary knowledge and expertise to handle corrosive substances safely.
In the next section, we will explore another method of destroying a hard disk drive: burning it.
Method 7: Burning the Drive
Burning a hard disk drive is an extreme method that ensures complete destruction of the drive and the data it contains. This method involves subjecting the drive to intense heat and flames, rendering it irrecoverable.
It is crucial to exercise extreme caution when performing this method, as burning electronic devices can release toxic fumes and cause environmental pollution. Ensure you are in a well-ventilated outdoor area away from flammable materials and follow all fire safety regulations.
Before starting, remove the hard disk drive from its enclosure, if applicable, and ensure it does not contain any plastic or electronic components that could release toxic materials when burned.
Place the hard drive in a controlled fire pit or a designated area suitable for burning materials. Use additional fireproof materials, such as bricks or stones, to create a contained area for the fire.
Ignite the fire and carefully place the hard disk drive into the flames, ensuring it is fully engulfed. Keep a safe distance from the fire and monitor it closely as the drive burns.
Allow the fire to burn until the hard drive is completely consumed and reduced to ashes. Ensure that the ashes are cool before handling them, as they may still retain heat.
Once the ashes are completely cooled, dispose of them responsibly, following the guidelines and regulations for proper disposal of burnt materials.
It is important to emphasize that burning a hard disk drive should only be done as a last resort and for hard drives that are no longer needed or functional. Proper precautions and safety measures must be followed to prevent injury and environmental harm.
In the next section, we will explore another method of destroying a hard disk drive: disassembling it.
Method 8: Disassembling the Drive
Disassembling a hard disk drive is a method of destroying the drive that involves taking it apart piece by piece, rendering the data on the drive inaccessible. This method requires careful disassembly to ensure that the sensitive components of the drive are damaged beyond repair.
Before beginning the disassembly process, it is important to note that this method can be challenging and may require specific tools. Additionally, disassembling a hard drive will void any warranties or guarantees, so it should only be done on drives that are no longer needed or functional.
Start by removing the hard disk drive from its enclosure, if applicable. Some enclosures may have screws or clips that hold the drive in place. Carefully disconnect any cables or connectors attached to the drive.
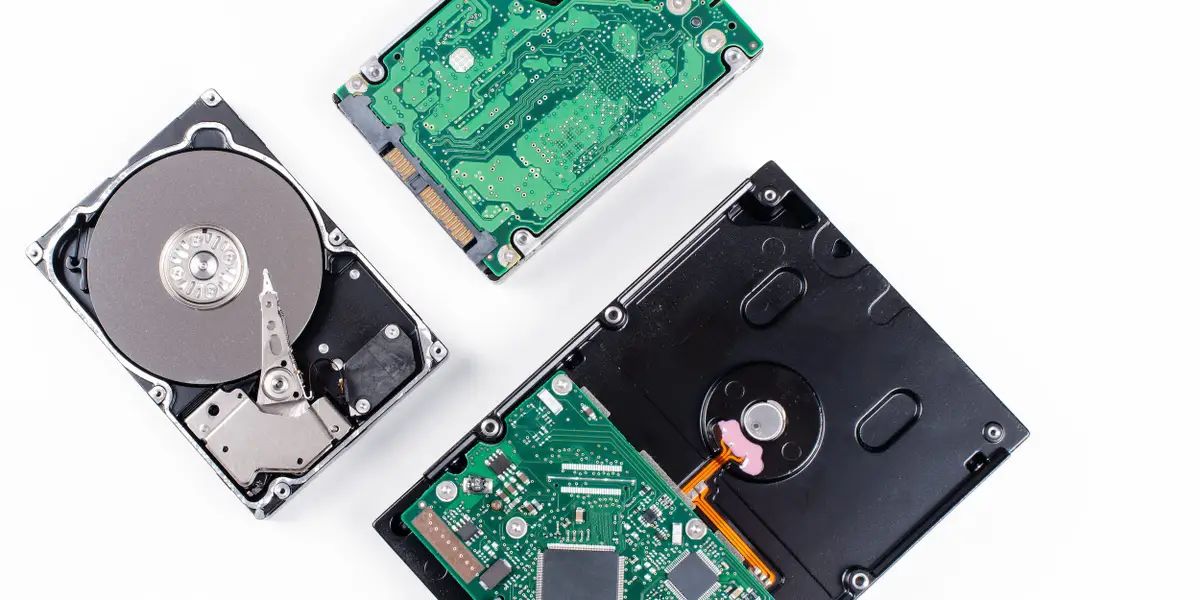
Once the drive is free from its enclosure, examine it closely to identify the different components. Most hard drives have a metal casing that houses the internal components, including the platters and the read/write heads.
Using the appropriate tools, such as screwdrivers or pliers, remove the screws or fasteners that hold the drive casing together. Take care not to damage any of the internal components while disassembling the drive.
Once the casing is removed, you will have access to the platters and the read/write heads. Use tools like pliers or hammers to physically damage these components, making them unreadable and unrecoverable.
Continue disassembling the drive, removing any other components such as circuit boards or motors. Ensure that all sensitive parts of the drive are irreparably damaged or destroyed.
Once the drive has been completely disassembled and the necessary components have been destroyed, properly dispose of the separate parts. Separate metal components from electronic or plastic parts and dispose of them responsibly in appropriate recycling centers.
Disassembling a hard disk drive offers the advantage of destroying the internal components directly, ensuring the data becomes inaccessible. However, it requires technical knowledge and the proper tools, and should only be performed on drives that are no longer needed or functioning.
With this, we have explored various methods of destroying a hard disk drive, each offering its own level of security and reliability. It is crucial to choose the most suitable method based on the sensitivity of the data and the available resources.
Conclusion
Securely destroying a hard disk drive is of utmost importance in preventing unauthorized access to sensitive data. In this article, we have explored various methods for destroying hard disk drives, each offering its own level of effectiveness and security.
Physical destruction methods, such as drilling holes, hammering, shredding, and disassembling the drive, ensure that the data on the drive’s platters is rendered unreadable and irrecoverable. These methods are relatively accessible and can be performed with basic tools.
Advanced techniques, such as degaussing and using acid, provide a higher level of security by completely erasing the data or destroying the drive’s components. However, these methods require specialized equipment and expertise.
Burning the drive is an extreme method that ensures complete destruction, but it should only be performed with caution due to safety concerns and environmental considerations. Careful handling and disposal of the burnt materials are essential.
It is important to note that the choice of method should depend on the sensitivity of the data, the available resources, and the level of certainty required to destroy the drive effectively.
Regardless of the method chosen, it is crucial to prioritize safety and follow proper disposal procedures for the destroyed hard disk drives to minimize environmental impact and prevent any potential recovery attempts.
By selecting the appropriate method and executing it correctly, you can confidently ensure that the data stored on the hard disk drive is thoroughly destroyed and the security of sensitive information is maintained.