Introduction
Deleting an email address can be a necessary task for various reasons. Whether you have switched providers, want to consolidate your accounts, or simply no longer need a particular email address, knowing how to delete it is essential. In this guide, we will walk you through the steps to effectively delete an email address.
Deleting an email address may seem like a daunting task, but with the right guidance, it can be a straightforward process. It involves logging into your account, navigating to account settings, locating the delete account option, confirming the deletion, and removing any personal information associated with the account. By following these steps, you can ensure that your email address is permanently removed from the email service provider’s database.
It is important to note that deleting an email address will result in the loss of all data associated with that account, including emails, contacts, and any other information stored within the account. Therefore, it is crucial to back up any important data or transfer it to another email address before proceeding with the deletion.
It’s also essential to make sure you are certain about deleting the email address. Once deleted, it may not be possible to recover the account or the information associated with it. Take the time to consider your decision and make sure it aligns with your needs.
Now, let’s dive into the step-by-step process of how to delete an email address and ensure a smooth and secure deletion.
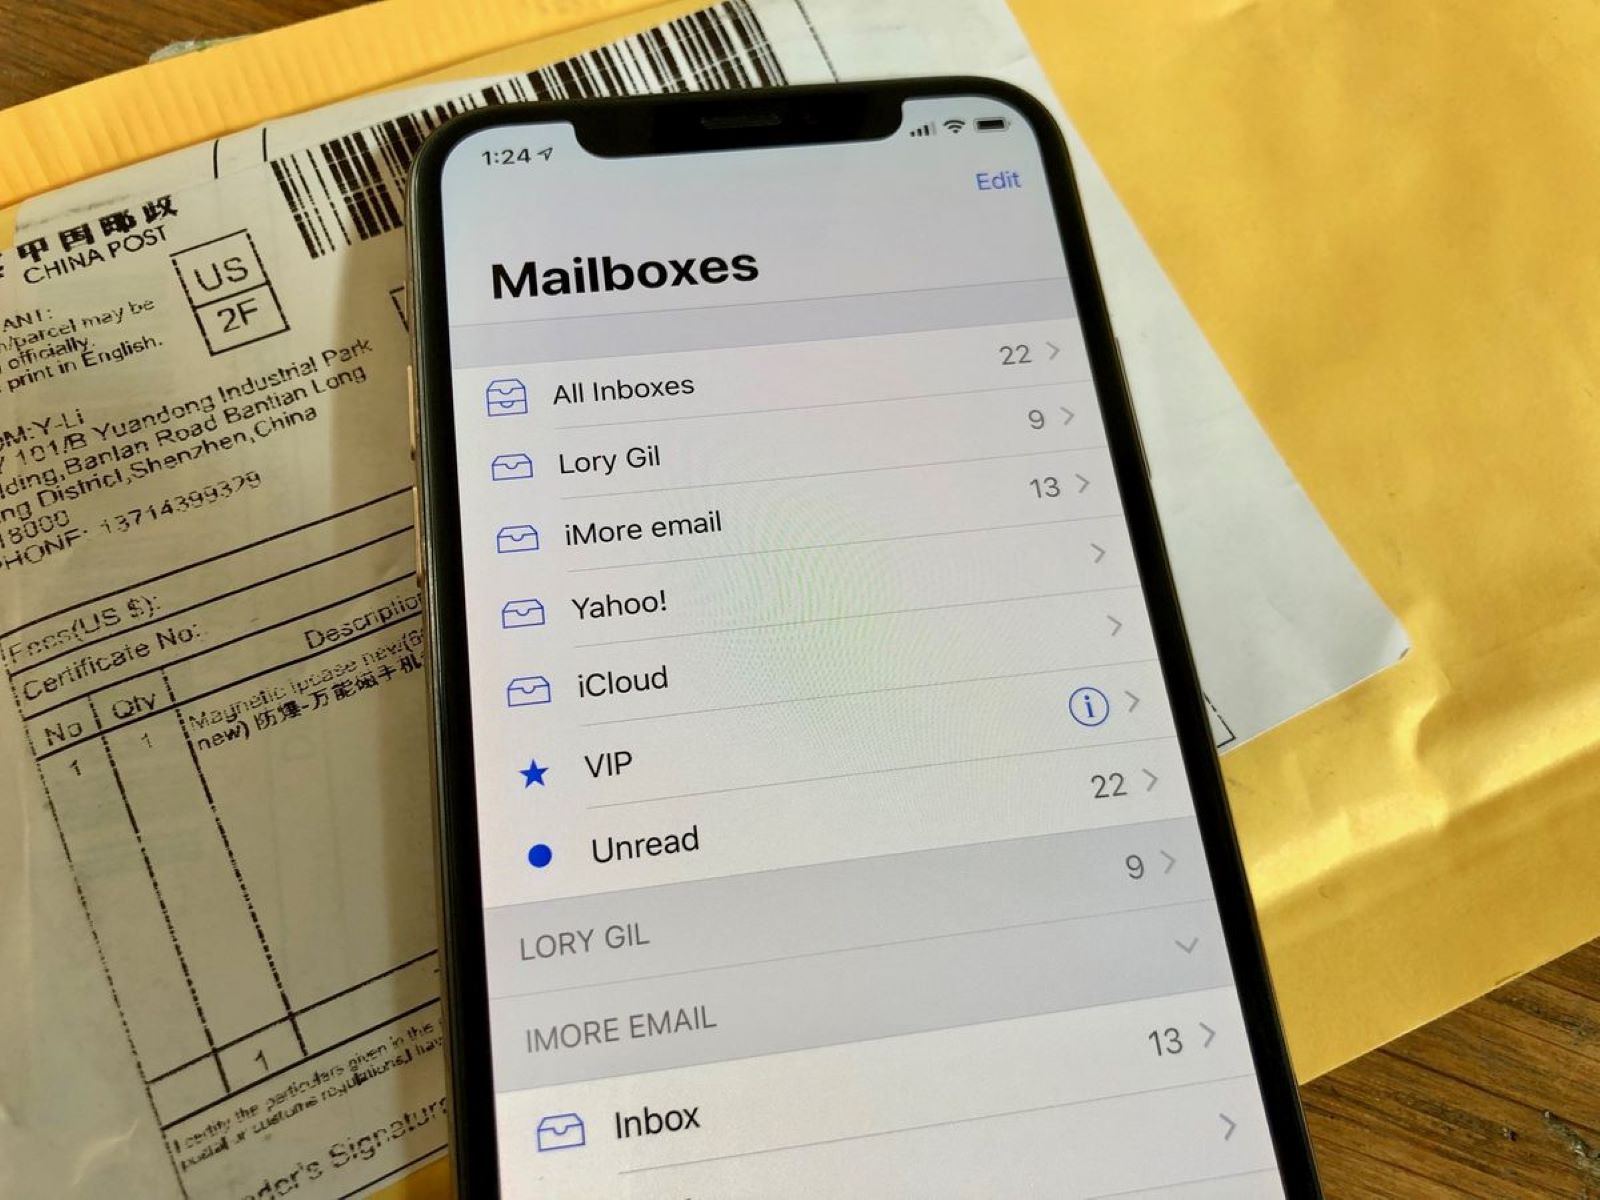
Step 1: Sign in to Your Email Account
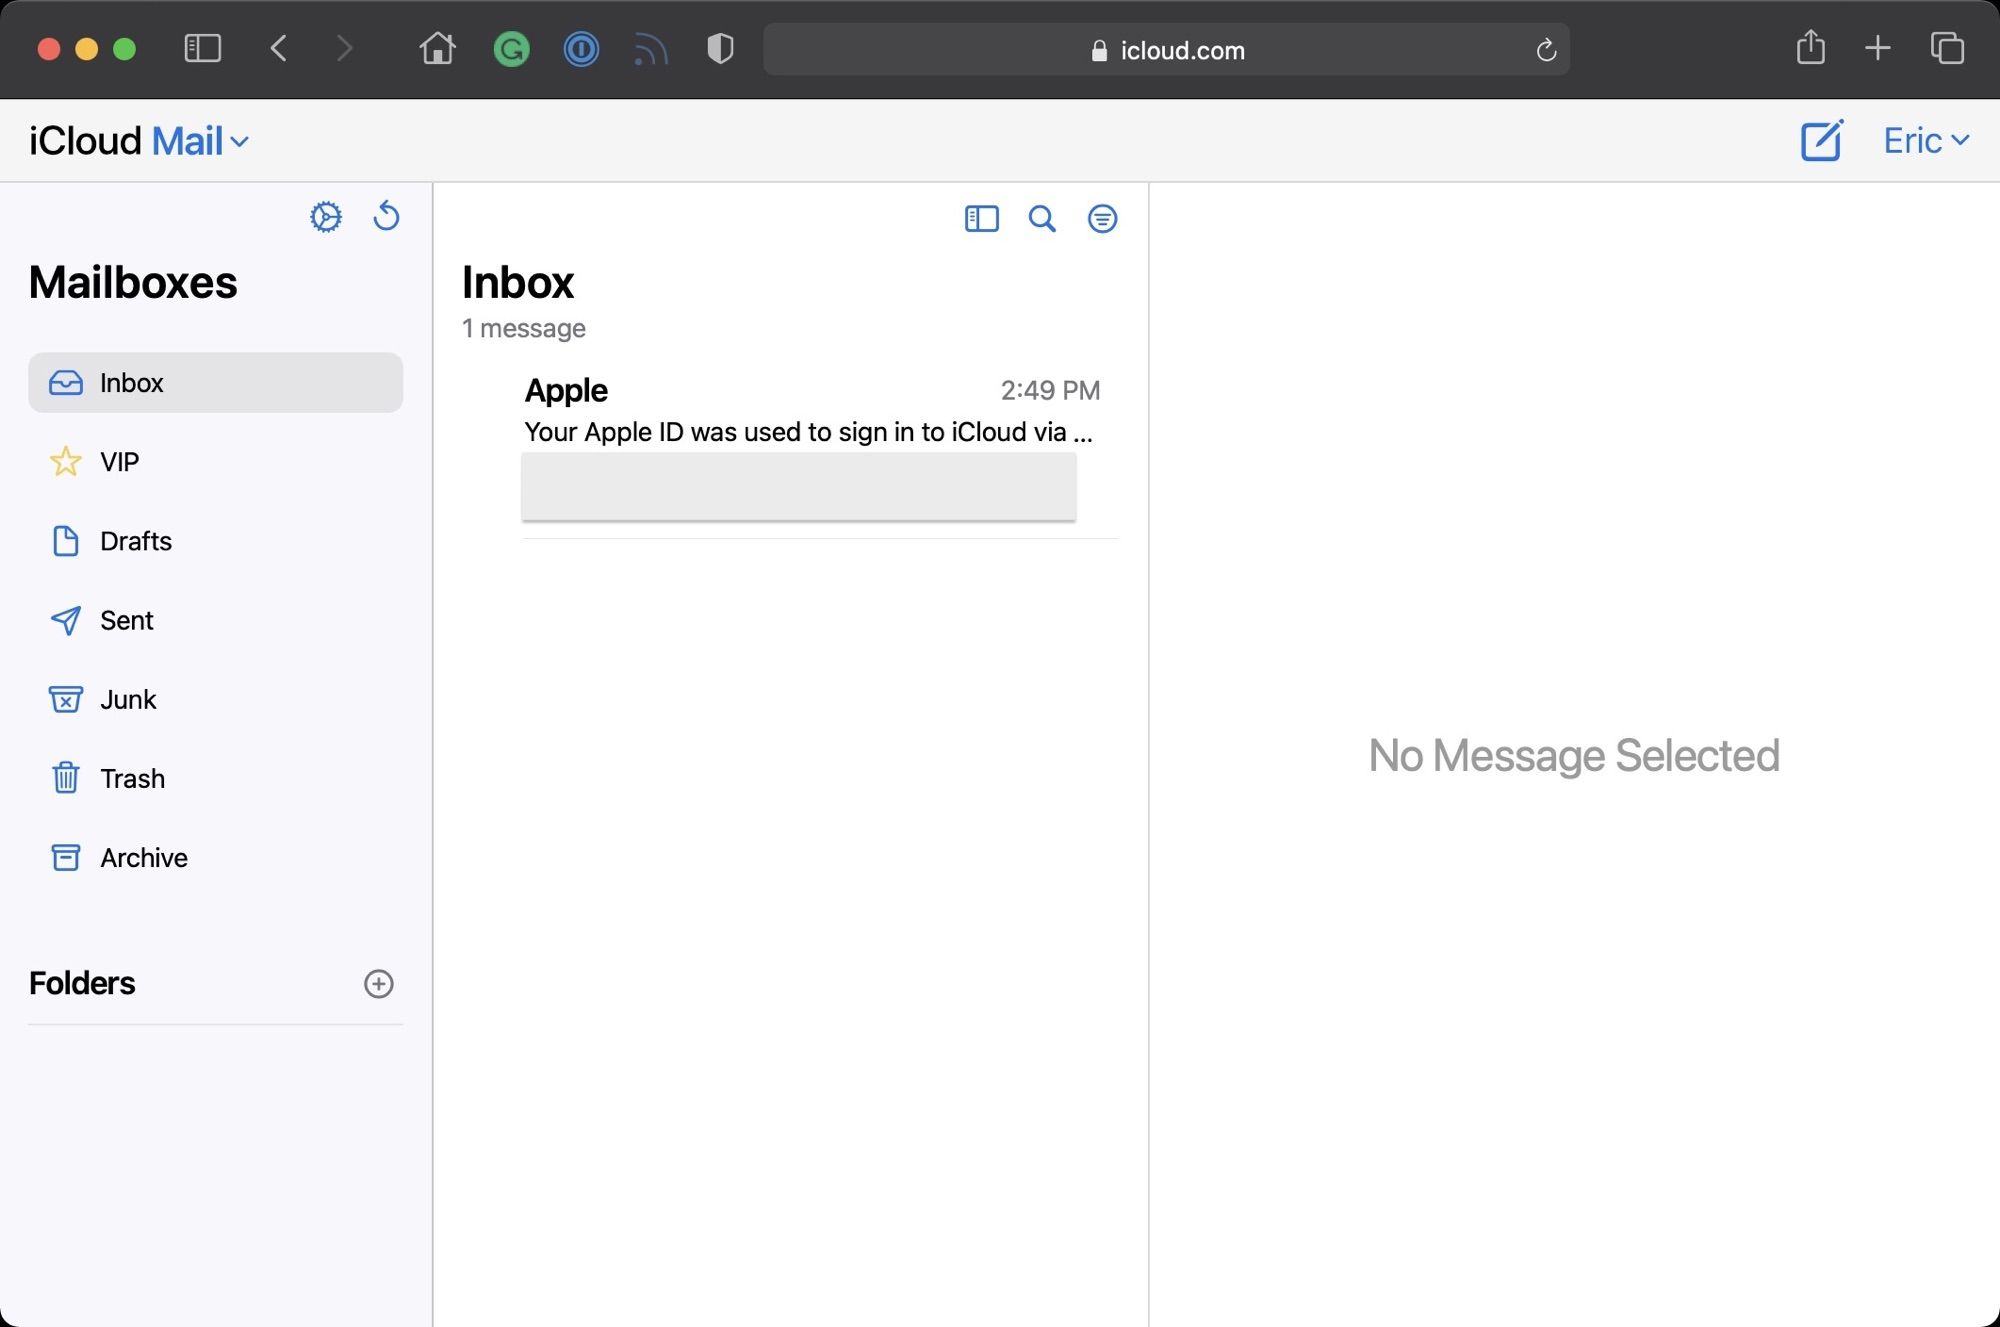
The first step in deleting an email address is to sign in to your email account. Open your preferred web browser and visit the website of the email service provider. Once there, locate the login section and enter your email address and password in the respective fields.
If you have trouble remembering your login credentials, most email service providers offer a “Forgot Password” option. Click on this link and follow the instructions to reset your password. It is essential to have access to the email account associated with the address you want to delete.
After successfully signing in to your email account, you will be redirected to your inbox or dashboard, depending on the email service provider. Take a moment to ensure that you are accessing the correct account associated with the email address you wish to delete.
Please note that if you have multiple email accounts with the same service provider, make sure you are signed in to the correct account as deleting the wrong one could result in the loss of important data.
Once you have confirmed that you are signed in to the correct account, you are ready to proceed to the next step.
Step 2: Navigate to Account Settings
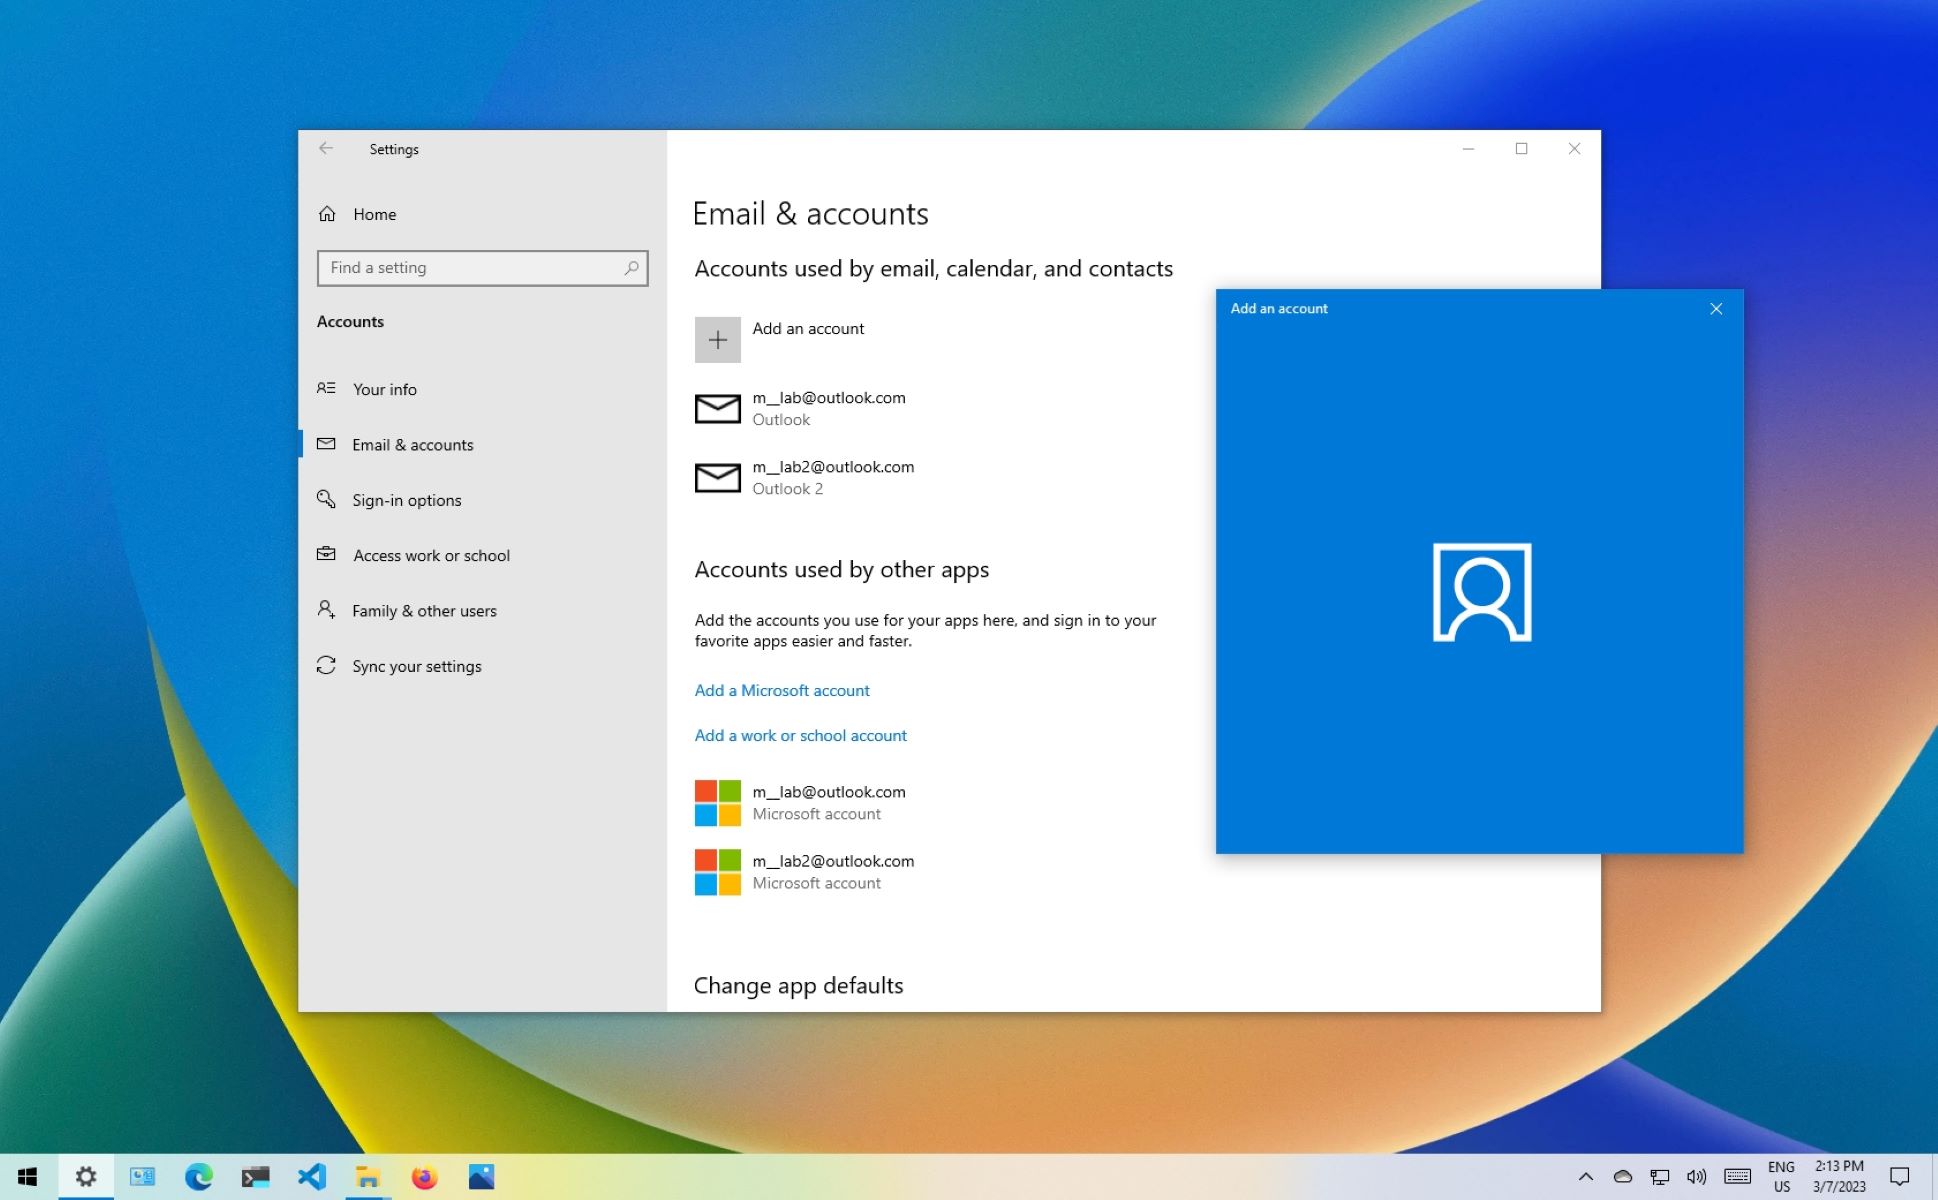
After signing in to your email account, the next step is to navigate to the account settings. Account settings can usually be accessed by clicking on your profile picture or username, which is often located in the top-right corner of the screen. Look for a dropdown menu or a settings icon and click on it to reveal a list of options.
In the account settings menu, you should see a variety of options related to your account preferences, security, and privacy settings. Take your time to familiarize yourself with the available options, as different email service providers may have slightly different layouts and terminologies.
Scroll through the settings menu until you find the option that relates to managing your email addresses or account information. The specific wording may vary, but it is commonly labeled as “Account Information,” “Account Settings,” or “Profile Settings.”
Once you have located the appropriate section, click on it to access the account settings page. This page contains all the relevant options and controls related to your email address and account.
At this stage, it is important to ensure that you have sufficient permissions to make changes to your account. Some email service providers may require additional security measures, such as entering your password again or verifying your identity through a secondary authentication method.
Once you have successfully navigated to the account settings page and verified your permissions, you are ready to proceed to the next step of deleting your email address.
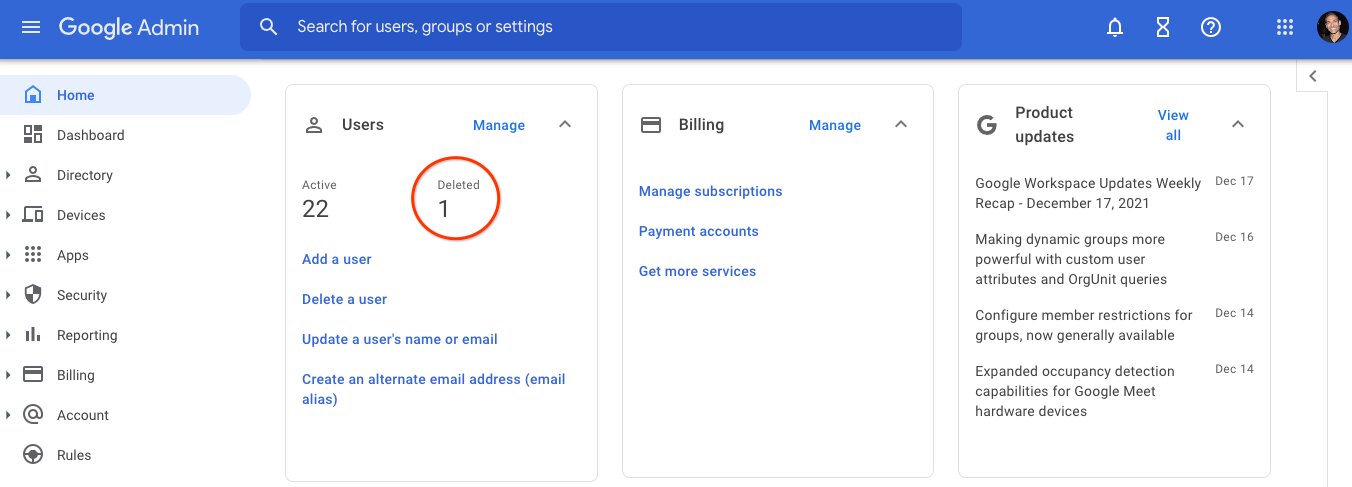
Step 3: Locate the Delete Account Option
After accessing the account settings page, the next step is to locate the delete account option. This option is usually found in the account settings menu, but the exact placement may vary depending on the email service provider.
Look for a subsection or tab within the account settings page that is specifically related to managing your email address or account. Common labels for this section include “Account Management,” “Email Account,” or “Account Preferences.”
Once you have found the relevant section, carefully review the options available. Look for any references to deleting or closing your account. In some cases, the delete account option may be labeled as “Close Account,” “Remove Account,” or something similar.
It is important to note that some email service providers may not have a straightforward delete account option and may require you to perform additional steps to achieve account deletion. This can include contacting customer support or submitting a request through the website or app.
If you are unable to locate the delete account option or are unsure about the steps involved, consult the email service provider’s documentation or search for specific instructions online. Many email service providers have support articles or forums where users can find guidance on deleting their accounts.
Once you have successfully located the delete account option or determined the necessary steps to delete your email address, you are ready to proceed. Remember to carefully read any instructions or warnings provided by the email service provider before proceeding with the deletion process.
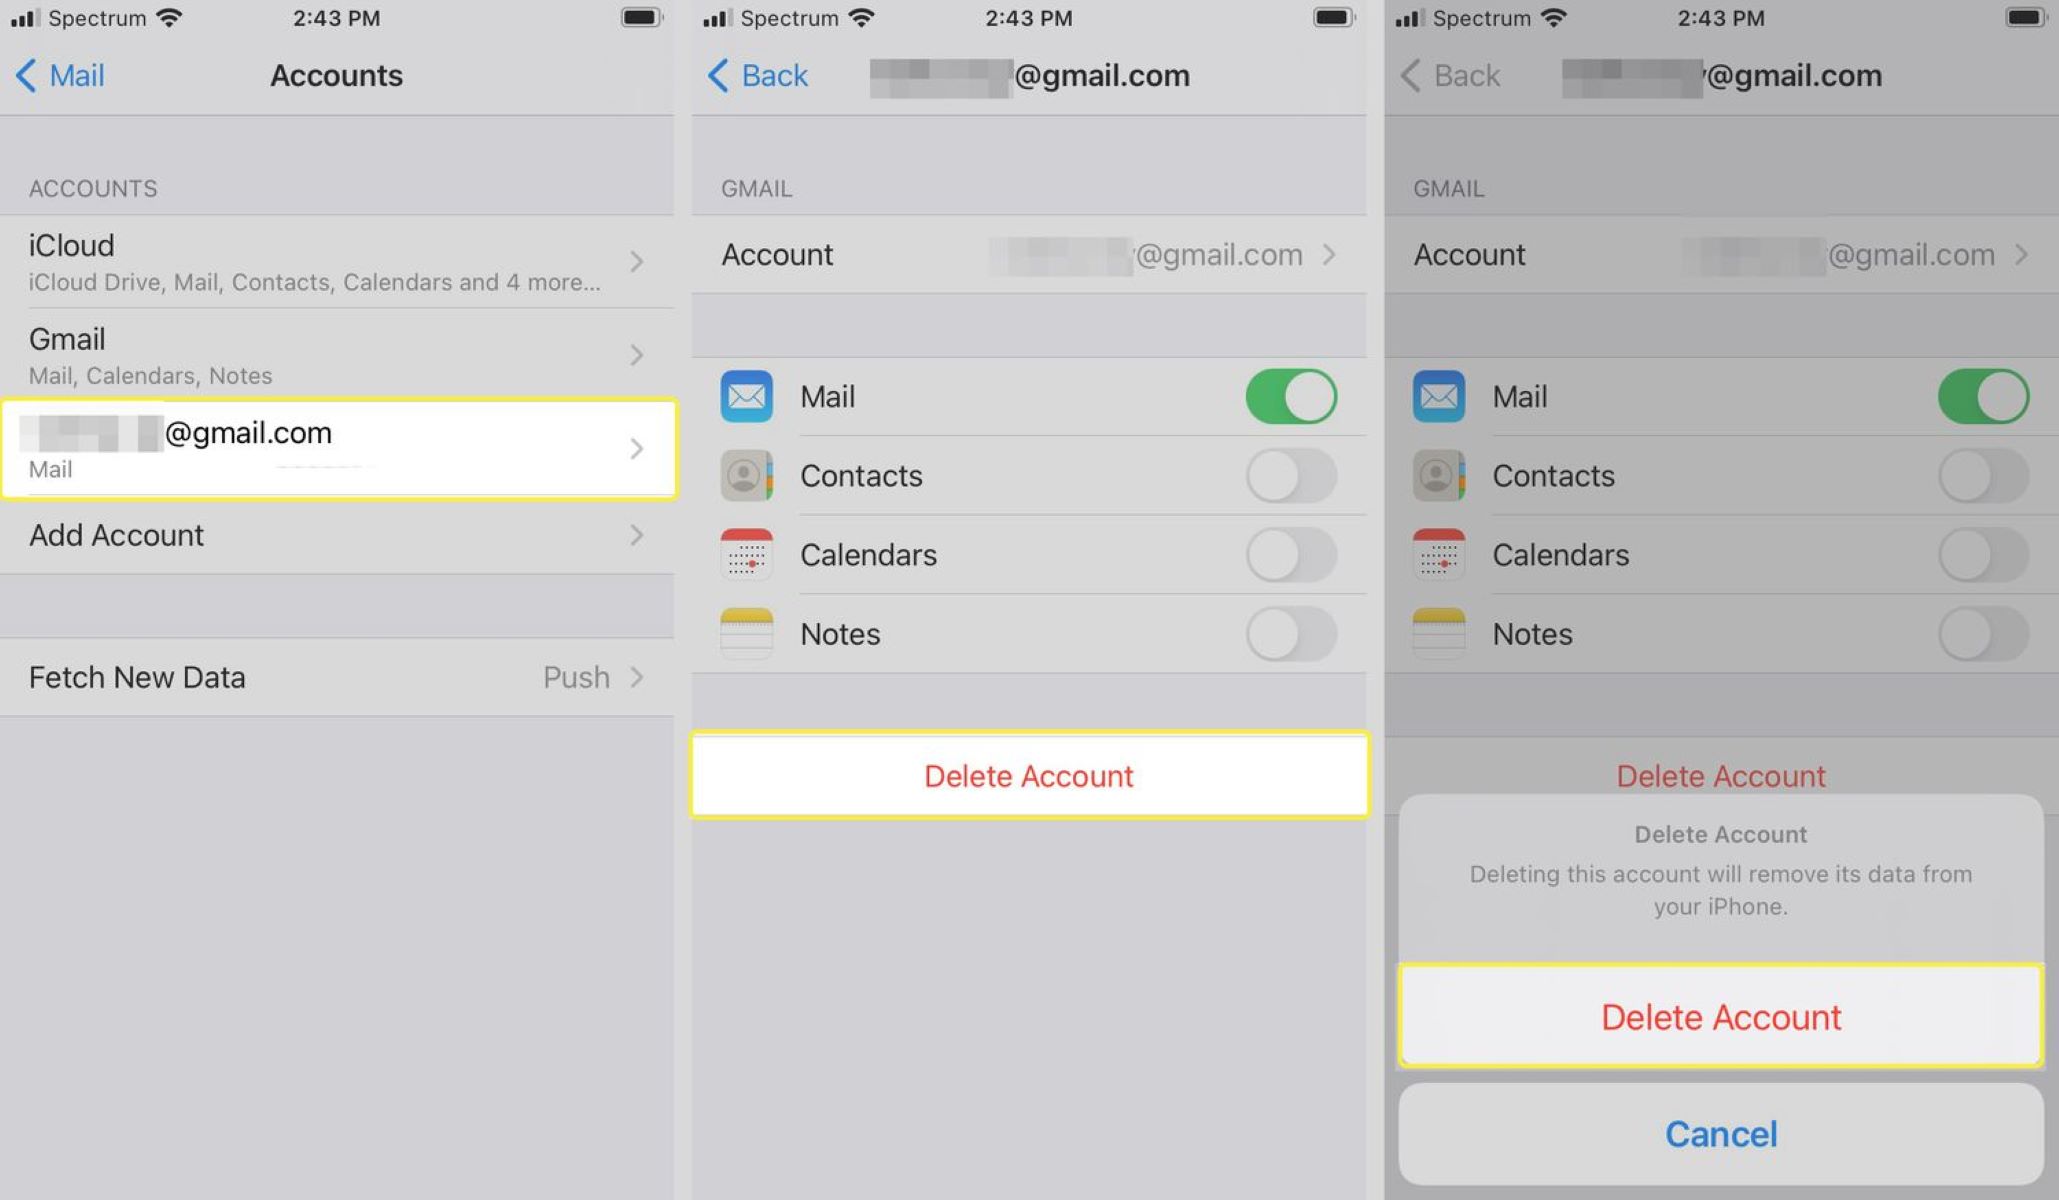
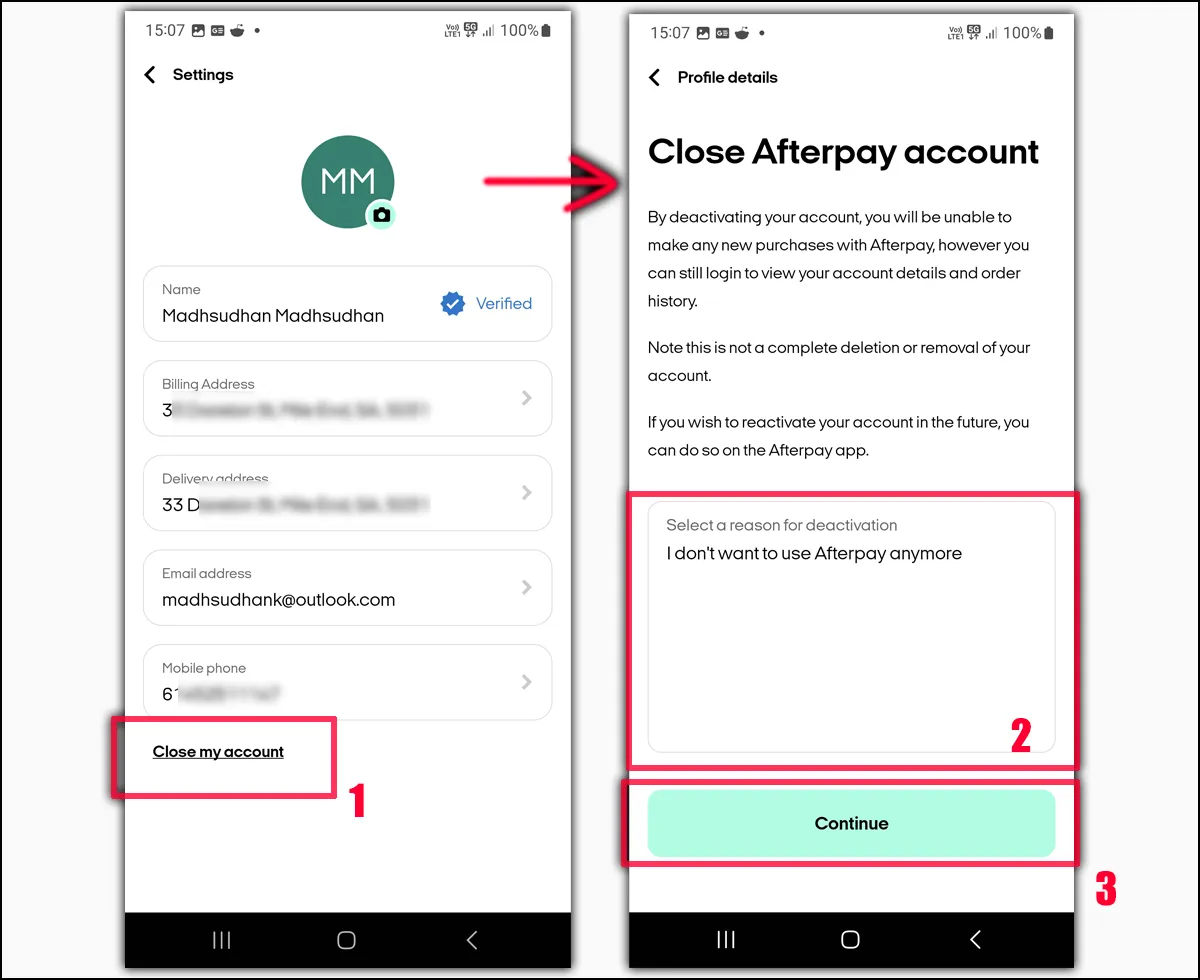
Step 4: Confirm Delete Account
Once you have located the delete account option, it is time to proceed with deleting your email address. However, before the deletion is finalized, most email service providers require you to confirm your decision.
Click on the delete account option or follow the instructions provided by the email service provider to initiate the deletion process. You may be prompted to provide a reason for deleting your account, such as switching providers, consolidating accounts, or no longer needing the email address.
After providing the necessary information, carefully review any warnings or notifications that may appear on the screen. Email service providers often display reminders about the consequences of deleting an account, such as the loss of data and the inability to recover the account once it is deleted.
It is important to take a moment to consider these warnings and ensure that you have backed up any essential information or transferred it to another email address. Once the account is deleted, it may not be possible to retrieve any data or access the account again.
If you are certain about deleting your email address and are prepared for the consequences, proceed with confirming the deletion. This may involve clicking on a confirmation button, entering your password, or completing an additional verification step to ensure the account deletion is authorized.
Once you have confirmed the deletion, the email service provider will initiate the process of permanently removing your email address and associated data from their system. The time it takes to complete this process may vary depending on the service provider.
It is worth noting that some email service providers may have a grace period after initiating the deletion process. During this time, you may be able to cancel the account deletion if you change your mind. Take note of any instructions provided by the email service provider regarding canceling the deletion, if available.
With the account deletion confirmed, you have completed a significant step in removing your email address. Now, let’s move on to the next step to ensure the complete removal of any personal information.
Step 5: Remove Personal Information
Deleting your email address is not the final step in ensuring the complete removal of your personal information. It is crucial to take additional measures to remove any remaining traces of your data from the email service provider’s system.
Start by reviewing the email service provider’s documentation or support resources to understand the steps for removing personal information. This may include deleting contacts, emails, files, and any other data associated with your account.
Go through your email account and delete any remaining emails that contain sensitive or personal information. This includes messages with personal identifiers, financial data, or any other information that you no longer want to be stored on the email service provider’s servers.
If your email account contains contacts, delete any entries that are no longer needed or contain personal information. Be thorough and ensure that all personal data associated with your account is removed.
Review any other data associated with your account, such as files or attachments, and delete or transfer them to another location if necessary. This helps to ensure that no remnants of your personal information remain within the email service provider’s system.
Additionally, consider removing any forwarding or auto-reply settings that may be active for your email address. These settings can continue to forward or respond to incoming emails even after the account deletion, potentially revealing your email address or personal information to others.
After removing all personal information from your email account, take a moment to verify that you have successfully completed this step. Double-check your contacts, emails, files, and settings to ensure that no remnants of your personal information remain.
By following these steps and systematically removing your personal information, you can minimize the chance of any residual data being retained by the email service provider.
With the removal of your personal information, you have effectively completed the process of deleting your email address. Congratulations on successfully executing all the necessary steps to permanently delete your email account.
Remember to take note of any confirmations or final notifications provided by the email service provider to ensure the deletion is fully processed and no longer accessible.
If you have any concerns or questions during this process, it is always advisable to reach out to the email service provider’s customer support for assistance.
Conclusion
Deleting an email address may seem like a daunting task, but by following the steps outlined in this guide, you can successfully remove your email account and associated personal information from the email service provider’s system. It is crucial to approach the process with caution, ensuring that you have backed up any important data and carefully considered the consequences of the deletion.
Remember to sign in to your email account, navigate to the account settings, locate the delete account option, and confirm the deletion. Take the time to review any warnings or notifications provided by the email service provider to ensure that you are fully aware of the implications of this action.
Additionally, be thorough in removing all personal information from your email account, such as contacts, emails, files, and settings. This step helps to ensure that no remnants of your data are left behind.
It is important to note that the deletion process and requirements may vary depending on the specific email service provider. Therefore, it is advisable to consult the email service provider’s documentation or support resources for any specific instructions or additional steps that may be required.
By following these steps and taking the necessary precautions, you can successfully delete an email address and protect your privacy. Always remember to consider your decision carefully and seek assistance from the email service provider’s customer support if you encounter any issues or have any concerns.
We hope this guide has provided you with the information you need to confidently delete your email address. Good luck with your account deletion process!</p