Introduction
Asana is a popular project management tool that offers a wide range of features to help teams stay organized and collaborate effectively. One of the key functionalities of Asana is the ability to create recurring tasks. Recurring tasks are tasks that need to be completed on a regular basis, such as weekly meetings, monthly reports, or quarterly reviews.
By setting up recurring tasks in Asana, you can save time and avoid the hassle of manually creating tasks repeatedly. This feature allows you to automate the process, ensuring that important tasks are always on your radar without the need for constant reminders.
In this article, we will explore the benefits of using recurring tasks in Asana, the different types of recurring tasks you can create, and provide you with a step-by-step guide on how to set up recurring tasks in Asana. Additionally, we will discuss some advanced options that you can leverage to customize and optimize your recurring tasks.
Whether you are a small team or a large organization, implementing recurring tasks in Asana can help improve productivity, accountability, and overall project management efficiency. So, let’s dive in and discover how you can leverage this powerful feature in Asana to streamline your workflow and achieve better results.
Benefits of Using Recurring Tasks in Asana
Recurring tasks in Asana offer numerous benefits that can enhance your project management experience and improve team productivity. Here are some key advantages of utilizing recurring tasks in Asana:
- Time-saving: By setting up recurring tasks, you eliminate the need to manually create tasks repeatedly. This automated process saves time and ensures that essential tasks are always accounted for in your project workflow.
- Consistency: Recurring tasks help maintain consistency in your work routine. Whether it’s a weekly team meeting or a monthly report, Asana ensures that these tasks are created and assigned consistently, reducing the risk of missing important deadlines or milestones.
- Improved accountability: When tasks recur on a regular basis, team members are more likely to develop an accountability mindset. Having recurring tasks in Asana encourages individuals to take ownership of their responsibilities and ensures that tasks are completed as scheduled.
- Efficiency: By automating repetitive tasks, Asana enables teams to focus on more value-added activities. Recurring tasks free up time and mental energy, allowing team members to concentrate on higher-priority tasks, creative problem-solving, and strategic initiatives.
- Streamlined communication: Recurring tasks in Asana facilitate seamless communication among team members. Each instance of the recurring task serves as a prompt for discussions related to that specific task, providing a centralized platform for sharing updates, asking questions, and collaborating effectively.
- Flexibility: Asana offers various options for customizing recurring tasks to meet your specific needs. You can choose the frequency of recurrence, define specific days of the week, set end dates, and make adjustments as your project requirements evolve.
By leveraging the benefits of recurring tasks in Asana, you can optimize your project management processes, improve team efficiency, and ensure that critical tasks are consistently addressed. Let’s explore the different types of recurring tasks you can create in Asana next.
Types of Recurring Tasks in Asana
Asana offers various types of recurring tasks that can be customized according to your project needs. Here are some common types of recurring tasks you can create:
- Repeating meetings: If your team has regular meetings, such as weekly status updates or monthly check-ins, you can create recurring tasks to ensure that these meetings are scheduled automatically. This helps maintain consistency and ensures that everyone is aligned and updated.
- Report generation: Many projects require regular reports, whether it’s a daily progress report, a weekly sales report, or a monthly performance analysis. By setting up recurring tasks for report generation in Asana, you can ensure that these reports are created and delivered on time.
- Content publishing: For content creators or marketing teams, recurring tasks can be used to schedule the publishing of blog posts, social media updates, or newsletters. By automating the scheduling process, you can maintain a consistent content calendar and engage your audience effectively.
- Client follow-ups: If you have client-facing tasks that require regular follow-ups or check-ins, you can use recurring tasks in Asana to set reminders for client communications. This helps you stay on top of client relationships and ensures that no important interactions slip through the cracks.
- Project milestones: Recurring tasks can also be used for tracking project milestones or recurring deadlines. For example, if you have monthly deliverables or quarterly reviews, setting up recurring tasks in Asana allows you to stay organized and ensure that these milestones are met consistently.
These are just a few examples of the types of recurring tasks you can create in Asana. The flexibility of the tool allows you to adapt and customize recurring tasks to fit your specific project requirements.
Now that we understand the benefits and types of recurring tasks in Asana, let’s delve into a step-by-step guide on how to create recurring tasks in Asana.
Step-by-Step Guide to Creating Recurring Tasks in Asana
Creating recurring tasks in Asana is a straightforward process. Follow these simple steps to set up your own recurring tasks:
- Access the Asana dashboard: Sign in to your Asana account and navigate to your project dashboard.
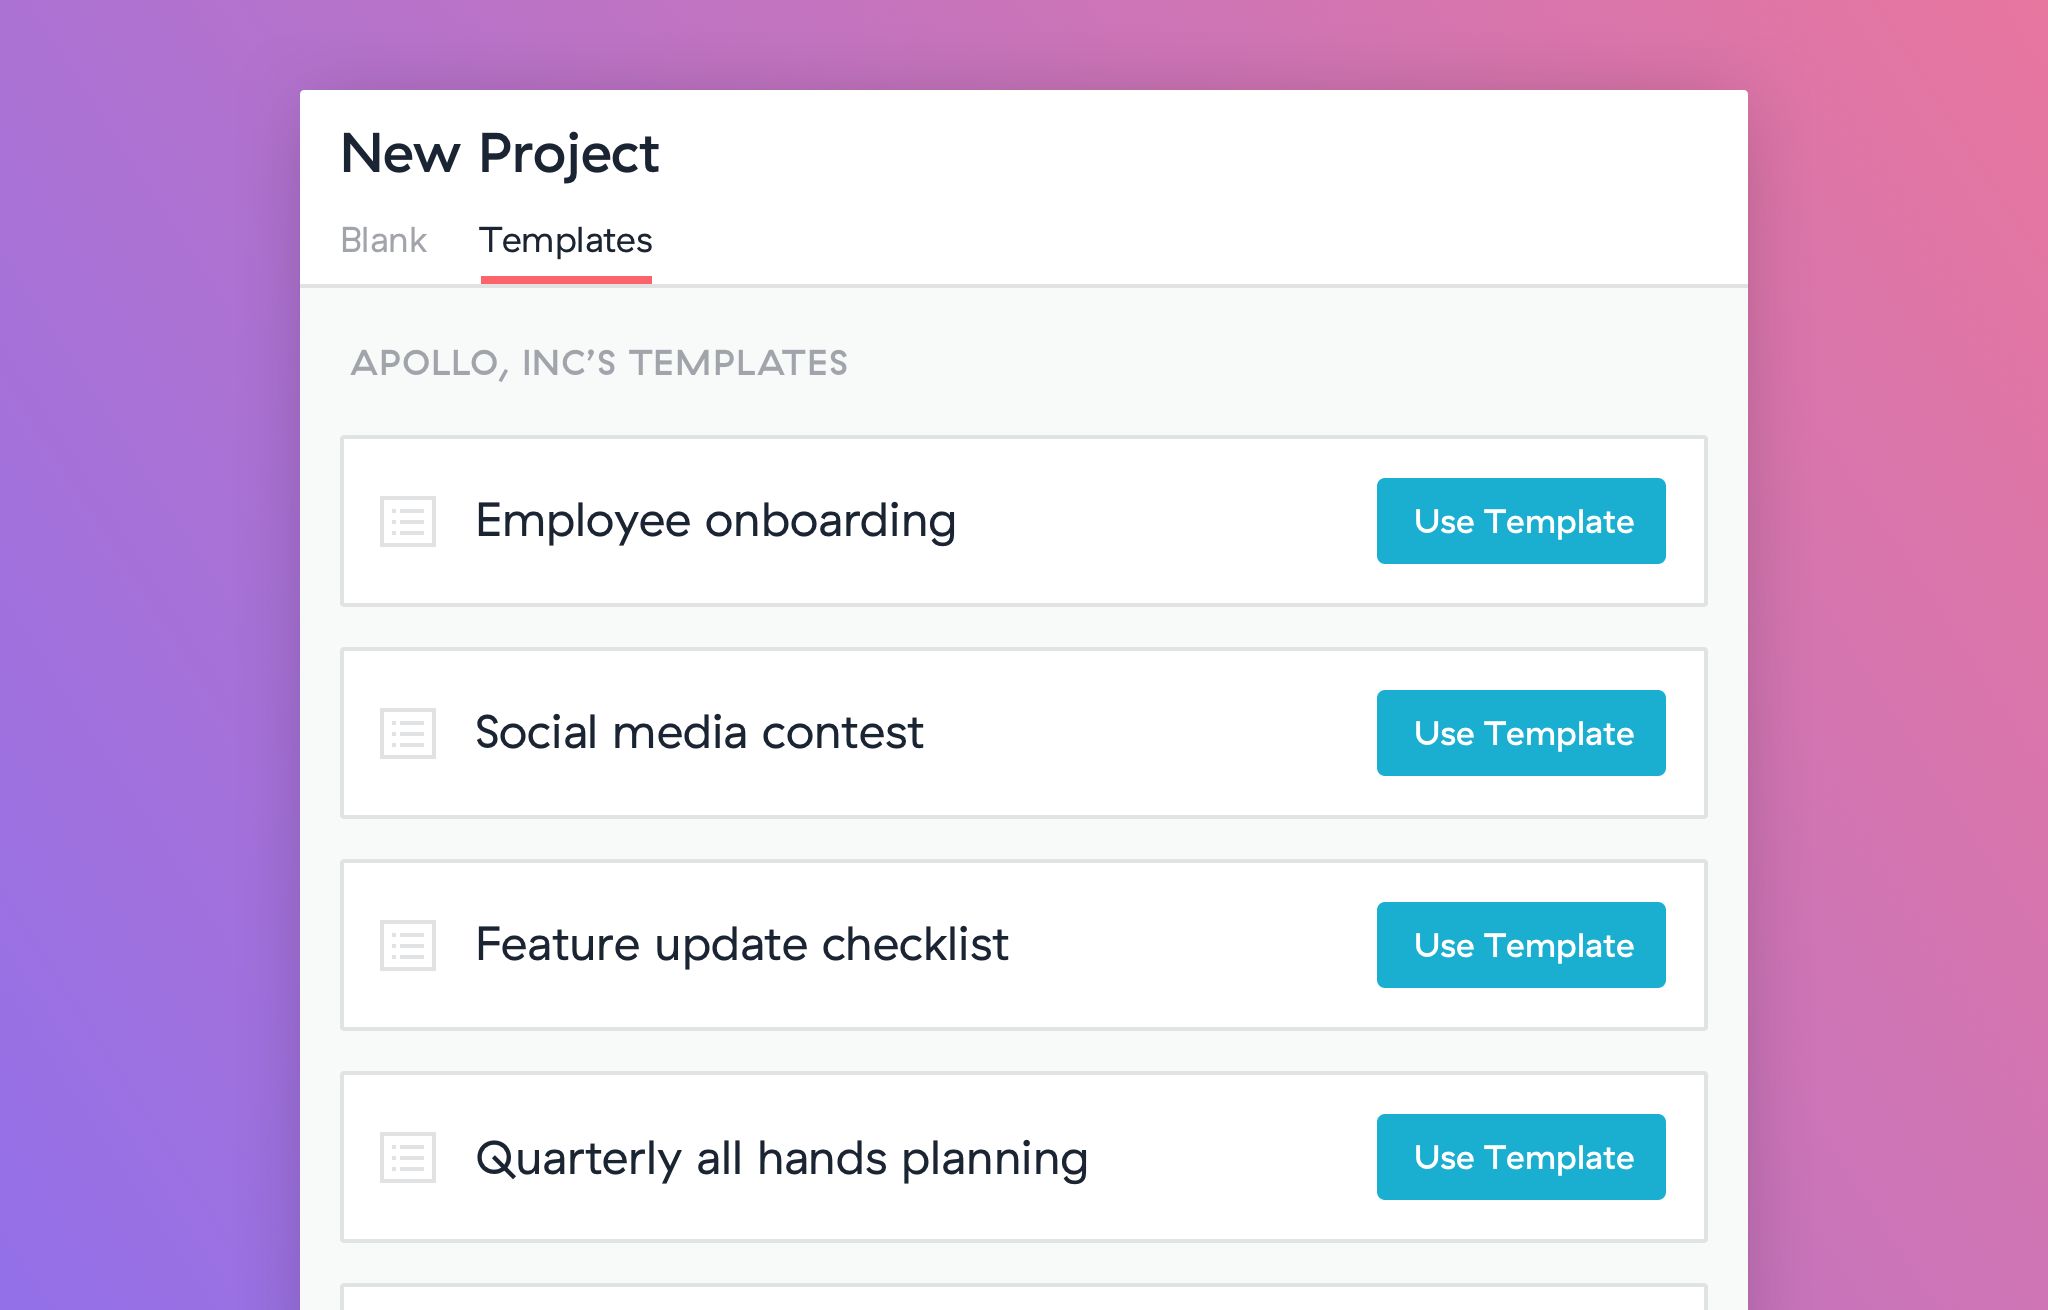
- Select the project or create a new one: Choose the project where you want to create the recurring task. If you don’t have an existing project, you can create a new one by clicking on the “+” button next to “Projects” in the sidebar.
- Click on the “+” button to create a new task: Once you are in the desired project, click on the “+” button to add a new task.
- Set the task details: Enter the task title and any additional details or instructions in the task description field. You can also use formatting options to make the task details more organized and visually appealing.
- Set the recurrence pattern: In the task view, locate the “Due Date” field and click on the calendar icon. From the drop-down menu, select the option “Set to repeat.”
- Choose the start and due dates: Specify the start date and the due date for the recurring task. You can select options such as daily, weekly, monthly, or custom intervals. Choose the frequency that best suits your task.
- Add any additional details or subtasks: If there are specific instructions, attachments, or subtasks associated with the recurring task, you can include them in the task description or create separate subtasks to provide further clarity.
- Assign the task to team members: Assign the recurring task to the relevant team members responsible for its completion. You can assign the task to multiple individuals or teams, depending on your project requirements.
- Review and save the recurring task: Before finalizing the task, double-check all the details, recurrence settings, and task assignments. Once everything is in order, click on the “Save” or “Create Task” button to save the recurring task.
That’s it! You have successfully created a recurring task in Asana. The task will now recur based on the specified recurrence pattern and appear in the project view accordingly. You can easily track the progress and completion of the task as it recurs over time.
Now, let’s move on to explore some advanced options for recurring tasks in Asana.
Access the Asana Dashboard
To begin creating recurring tasks in Asana, you need to access the Asana dashboard. Here’s how you can do it:
- Sign in to your Asana account: Open your preferred web browser and go to the Asana website (asana.com). Sign in to your account using your credentials. If you don’t have an account yet, you can easily sign up for a new one.
- Navigate to the Asana dashboard: Once you are signed in, you will be directed to the Asana dashboard. The dashboard is the central hub where you can access all your projects, tasks, and team collaboration features.
The Asana dashboard provides an intuitive and user-friendly interface that allows you to easily navigate through different projects and tasks. The main dashboard provides an overview of your projects and any tasks that have been assigned to you or the teams you are a part of.
On the left sidebar of the dashboard, you will find a list of your projects, workspace, and team sections. You can click on the project name to access the specific project where you want to create the recurring tasks.
Additionally, the header contains the search bar, notifications, and your profile settings. The search bar allows you to quickly find specific tasks or projects by typing in relevant keywords.
Overall, the Asana dashboard is designed to provide an organized and efficient workspace, enabling you to manage your projects and tasks effectively. Accessing the dashboard is the first step towards creating recurring tasks and leveraging the full potential of the Asana project management tool.
Now that you know how to access the Asana dashboard, let’s move on to the next step: selecting the project or creating a new one.
Select the Project or Create a New One
Once you have accessed the Asana dashboard, the next step in creating recurring tasks is to select the project where you want to create the tasks. If you already have an existing project, you can simply navigate to it. If not, you can create a new project in a few simple steps:
- Existing projects: On the left sidebar of the Asana dashboard, under the “Projects” section, you will find a list of all your existing projects. Scroll through the list or use the search bar to easily locate the project you want to work on. Click on the project name to select it.
- Create a new project: If you do not have an existing project or want to create a new one for your recurring tasks, follow these steps:
- Click on the “+” button next to “Projects” on the left sidebar. This will open a pop-up window.
- Enter a name for your new project in the designated field. You can also provide a brief description to provide context for the project.
- Choose the project color by clicking on the color palette icon. Select a color that represents the project or matches your visual preferences.
- Specify the project privacy settings. You can choose to make the project public, accessible to your team, or private for specific members.
- Click on the “Create Project” button to create the new project. You will be redirected to the project view.
By selecting the appropriate project or creating a new one, you ensure that your recurring tasks are organized within the relevant project’s workspace. This helps maintain clarity, centralize task management, and streamline collaboration among team members.
Once you have selected or created the project for your recurring tasks, you are ready to move on to the next step: creating a new task. This will allow you to set up the specifics of the recurring task, such as task details, due dates, and recurrence patterns. Let’s explore this step in detail in the next section.
Click on the “+” Button to Create a New Task
Once you have selected the project where you want to create the recurring tasks, the next step is to click on the “+” button to add a new task. Here’s how you can do it:
- Locate the “+” button: On the top header of the Asana dashboard or within the project view, you will find a “+” button. This button is the universal symbol for creating new tasks.
- Click on the “+” button: Once you have identified the “+” button, click on it to open the task creation interface. Depending on your settings and layout preferences, a new task creation window or panel will appear.
The task creation interface allows you to enter all the necessary details and specifications for the recurring task you want to create.
Within the task creation interface, you will typically find fields to enter the task title, due date, task description, assignee, and any additional tags or custom fields specific to your project or workflow.
Take advantage of formatting options, such as bold or italic text, bullet points, or numbering, to enhance the readability and organization of your task details.
If your Asana account is integrated with other apps or platforms, you may also have the option to link or attach files, integrate with external tools, or set up automation rules for the recurring task.
Once you have filled in all the relevant information and details for the recurring task, you are one step closer to setting up a recurring schedule for it. The next step is to define the recurrence pattern and specify the start and due dates for the task. We will explore this step in detail in the following section.
Set the Task Details
Setting the task details is an essential step when creating a recurring task in Asana. Here’s how you can specify the necessary information for the task:
- Task title: Enter a descriptive and concise title that accurately represents the recurring task. A clear task title ensures that team members understand the purpose and scope of the task at a glance.
- Task description: Provide additional information, context, or instructions in the task description field. Use this space to clarify any requirements, deadlines, or dependencies associated with the task. Consider including relevant links, documents, or references to help team members complete the task effectively.
- Tags and labels: Depending on your project’s organization or workflow, you may have the option to add tags or labels to your task. Tags can be used to categorize tasks based on their priority, status, or other relevant criteria. This makes it easier to filter, search, and track tasks within the project.
- Custom fields and subtasks: Asana allows you to create custom fields and subtasks within a task. Custom fields can be used to add specific information or metadata to your recurring tasks, such as estimated time, project phase, or client details. Subtasks can be used to break down the recurring task into smaller and more manageable steps. This can help improve clarity and ensure that all aspects of the task are accounted for.
When setting the task details, it is important to be thorough and clear in your communication. Providing all relevant information upfront reduces the chance of misunderstandings and confusion among team members.
In addition, you can use formatting options such as bold or italic text, bullet points, or headings to enhance the readability and organization of the task details. This makes it easier for team members to digest and comprehend the information provided.
Once you have filled in the necessary task details, you are ready to move on to the next step: setting the recurrence pattern for the task. We will explore this step in detail in the following section.
Set the Recurrence Pattern
Setting the recurrence pattern is a crucial step when creating a recurring task in Asana. This allows you to specify how often the task should repeat. Here’s how you can set the recurrence pattern:
- Access the due date field: Within the task view, locate the “Due Date” field. This is where you can set the recurrence pattern for the task.
- Select the option to repeat: Click on the calendar icon next to the “Due Date” field. A drop-down menu will appear with various options. Choose the option that says “Set to repeat” to enable the recurring task functionality.
- Choose the frequency: Once you have enabled the recurring task feature, you can choose the frequency at which the task should repeat. Asana provides options such as daily, weekly, monthly, or custom intervals.
- Specify the days of the week (if applicable): Depending on your chosen frequency, you may have the option to select specific days of the week for the recurring task. This is useful when you want the task to repeat on particular days, such as every Monday and Wednesday.
- Define the end date (optional): If there is a specific end date for the recurring task, you can set it within the recurrence settings. This is applicable when the task has a defined duration or when it needs to stop repeating after a certain point.
Setting the correct recurrence pattern is crucial to ensure that the task repeats at the desired intervals. By providing the appropriate frequency, days of the week, and end date, you can customize the recurrence to align with your project requirements.
Asana’s recurring tasks feature offers flexibility and allows you to manage various types of repetitive tasks effectively. Whether it’s a weekly meeting, a monthly report, or any other task that occurs on a regular basis, the recurrence pattern can be tailored to fit your specific needs.
Once you have set the recurrence pattern, you’re almost done. The next steps involve choosing the start and due dates for the recurring task, adding any additional details or subtasks, and assigning the task to team members. We will explore these steps in the following sections.
Choose the Start and Due Dates
After setting the recurrence pattern for your task, the next step is to choose the start and due dates. Here’s how you can specify these important dates for your recurring task in Asana:
- Access the task details: In the task view, locate the “Due Date” field. This is where you can set the start and due dates for your recurring task.
- Select the start date: Click on the calendar icon next to the “Due Date” field to open the date picker. Choose the date on which you want the recurring task to start. This should be the first occurrence of the task based on the recurrence pattern you have set.
- Select the due date: Similarly, choose the due date for your recurring task. This will be the date by which each occurrence of the task should be completed.
By selecting the appropriate start and due dates, you establish the timeframe for each instance of the recurring task. This helps keep track of deadlines and ensures that the task remains on schedule.
Keep in mind that the start and due dates you set for the recurring task should align with the recurrence pattern you have chosen. For example, if you have set a weekly recurrence, each occurrence of the task will repeat at the defined frequency within the specified start and due dates.
If the recurring task has a specific end date, you can ensure that each instance of the task occurs within the desired timeframe. This is particularly useful when you want to limit the duration of the recurring task or when it needs to stop repeating after a certain point.
Once you have chosen the start and due dates for your recurring task, you can proceed to the next step: adding any additional details or subtasks. We will explore this step in more detail in the following section.
Add any Additional Details or Subtasks
After setting the start and due dates for your recurring task in Asana, the next step is to add any additional details or subtasks. Here’s how you can provide further context and break down the task into manageable steps:
- Access the task details: In the task view, make sure you’re in the fields where you can input task details.
- Add details: Use the text editor or description field to provide any necessary additional information, instructions, or specifications for the recurring task. This can include project requirements, required resources, or any other relevant details that will help team members understand and execute the task effectively.
- Include attachments or links: If there are any files, documents, or links that are relevant to the task, you can add them as attachments or embed them within the task description. This helps provide easy access to important reference materials and streamlines the workflow.
- Create subtasks (if needed): If the recurring task consists of multiple steps or subtasks, you can break it down by creating subtasks within the main task. This allows for a clear and organized approach to completing the recurring task. Assign responsibilities, set due dates, and provide instructions for each subtask to ensure all components are completed efficiently.
Adding details and subtasks to your recurring task enhances clarity and provides a comprehensive understanding of the task requirements. It allows team members to have all the necessary information readily available, helping them work more effectively and efficiently.
Furthermore, by breaking down the task into subtasks, you can prioritize and delegate specific responsibilities within the recurring task. This promotes collaboration and helps ensure that each component of the task is completed successfully.
Once you have added the necessary details and subtasks, you can proceed to the next step: assigning the task to team members. We will explore this step in more detail in the following section.
Assign the Task to Team Members
After adding all the necessary details and subtasks to your recurring task in Asana, the next step is to assign the task to team members. Here’s how you can allocate responsibilities effectively:
- Access the assignees field: In the task view, locate the field where you can assign the task to team members. This is usually labeled as “Assignee” or “Assigned to.”
- Select team members: Click on the assignees field and select the team members who are responsible for completing the recurring task. You can search for specific users or select from a list of available team members.
- Consider assigning multiple team members (if applicable): If the recurring task requires collaboration or if there are multiple responsibilities within the task, you can assign it to multiple team members. This allows for shared ownership and ensures that everyone involved is aware of their roles and responsibilities.
- Clarify task ownership: Communicate with the assigned team members to clarify any specific instructions, expectations, or deadlines associated with the task. This helps avoid any potential confusion and ensures that everyone is on the same page regarding the task requirements.
Assigning the task to team members is crucial for accountability and effective task management. When team members are assigned a task, it becomes clear who is responsible for its completion. This promotes efficient collaboration, eliminates ambiguity, and helps ensure that the recurring task is addressed promptly and accurately.
By involving the relevant team members, you leverage their expertise and ensure that all necessary contributions are made to the recurring task. Assigning tasks also promotes a sense of ownership, motivating team members to take responsibility for their assigned roles and contribute to the overall success of the project.
Once you have assigned the task to the appropriate team members, you’re almost done. The last step involves reviewing and saving the recurring task. We will explore this final step in the next section.
Review and Save the Recurring Task
After going through all the previous steps to create a recurring task in Asana, the final step is to review the task details and save it. Here’s how you can ensure that everything is in order before proceeding:
- Double-check the task details: Take a moment to review the task title, description, due dates, recurrence pattern, assigned team members, and any other relevant information. Make sure that the task details accurately reflect the requirements and expectations of the recurring task.
- Verify the recurrence settings: Ensure that the recurrence pattern is correctly established according to your desired frequency, start and due dates, and any specific days of the week. Verify that the recurrence settings align with the objective and schedule of the recurring task.
- Confirm the assigned team members: Validate that the task has been assigned to the intended team members or individuals responsible for its completion. Ensure that the assigned team members are aware of their roles, deadlines, and any other relevant information related to the recurring task.
- Make any necessary modifications: If you spot any errors or need to make adjustments to the task details, recurrence settings, or team assignments, you can do so before saving. Use the editing options within the task view to make the necessary modifications.
- Click on the “Save” or “Create Task” button: Once you are confident that everything is accurate and in line with your requirements, click on the “Save,” “Create Task,” or equivalent button within the Asana interface to save the recurring task.
Reviewing the task details and ensuring their correctness is essential to prevent any confusion or mismanagement. It allows you to confirm that the recurring task is set up correctly and aligns with your project goals and timelines.
By saving the recurring task, you finalize the creation process, and Asana will begin generating individual instances of the task according to the specified recurrence pattern. Each instance of the task will appear within the project view and adhere to the set start and due dates.
Now that you have successfully reviewed and saved the recurring task, it is ready for execution, tracking, and collaboration. Utilize the power of Asana’s recurring task feature to streamline your workflow and ensure that important tasks are consistently addressed.
Before we conclude, let’s explore some advanced options for recurring tasks in Asana that can further enhance your task management capabilities.
Advanced Options for Recurring Tasks in Asana
Asana provides advanced options to customize and optimize your recurring tasks even further. These features allow you to fine-tune the recurrence pattern, set up task notifications and reminders, and utilize task dependencies. Here are some advanced options you can explore:
- Set custom recurrence patterns: In addition to the predefined recurrence options, Asana allows you to create custom recurrence patterns. This gives you more flexibility in specifying intricate schedules for your recurring tasks. You can set patterns such as “every 3 weeks on Mondays and Fridays” or “on the third Thursday of every month.”
- Configure task notifications and reminders: Asana lets you set up notifications and reminders for your recurring tasks. You can receive email notifications, push notifications, or in-app notifications when a recurring task is due or when it’s time to start working on it. This ensures that you and your team stay informed and on track with your tasks.
- Use dependencies for recurring tasks: Dependencies allow you to establish logical relationships between tasks. With Asana, you can create dependencies for recurring tasks, ensuring that certain tasks can only begin or be completed after other dependent tasks are completed. This helps you manage dependencies and avoid starting or finishing tasks prematurely.
By exploring these advanced options, you can further tailor your recurring tasks to suit your project needs and enhance your task management capabilities.
With custom recurrence patterns, you have greater control over the timing and frequency of your recurring tasks, allowing you to set up complex scheduling requirements. This is particularly useful when your recurring tasks follow specific patterns that are not covered by the predefined options in Asana.
Notifications and reminders ensure that you and your team members are aware of upcoming recurring tasks, keeping everyone on track and preventing any tasks from slipping through the cracks. You can choose the notification method that works best for you, ensuring timely communication and task completion.
Task dependencies help you manage the workflow and ensure that tasks are executed in the correct order. By setting dependencies for recurring tasks, you can establish a clear sequence and avoid any confusion or delays caused by tasks being worked on out of order.
By utilizing these advanced options, you can maximize the efficiency and effectiveness of your recurring tasks in Asana, enabling smoother collaboration, improved project management, and better productivity for your team.
Now that you have explored the advanced options for recurring tasks in Asana, you have the knowledge and tools to optimize your task management processes. Take advantage of these features to streamline your workflow and achieve better results.
Set Custom Recurrence Patterns
Asana offers the flexibility to set custom recurrence patterns for your recurring tasks. This advanced option allows you to design intricate schedules based on specific requirements and unique timelines. Here’s how you can take advantage of custom recurrence patterns in Asana:
- Access the recurring task: Open the task that you want to customize with a unique recurrence pattern.
- Modify the recurrence settings: Locate the recurrence settings, such as the frequency and days of the week, within the task’s due date field.
- Select “Custom” recurrence: Instead of choosing a predefined recurrence option, select the “Custom” option to access more granular settings.
- Build your custom schedule: Asana provides a variety of options to create your custom schedule. You can specify the interval, like every 2 weeks, and the specific days of the week when the task should recur.
- Set unique patterns: If your task requires a specific pattern, you can set it using additional options provided by Asana. For instance, you can set the task to repeat every other week on Mondays, Wednesdays, and Fridays.
- Refine further with exceptions: Asana also allows you to exclude certain dates or adjust the recurrence pattern based on exceptions. This feature is helpful when you need to skip specific dates or adjust the recurrence pattern for certain occurrences.
Custom recurrence patterns give you the freedom to adapt the repetition of your tasks to specific project needs and timelines. Whether you need tasks to recur on a biweekly basis, follow a unique sequence of days, or have exceptions to the regular pattern, Asana’s custom recurrence offers the flexibility to cater to your requirements.
This advanced option empowers you to create a precise schedule that aligns with your project’s demands. With custom recurrence patterns, you can ensure that recurring tasks are happening when and how you need them, enhancing the efficiency and effectiveness of your project management efforts.
Take advantage of Asana’s custom recurrence patterns to optimize the scheduling of your recurring tasks, making them more in line with the specific needs and intricacies of your projects. This way, you can harness the full potential of Asana’s task management capabilities and customize your workflow to best suit your team’s requirements.
Configure Task Notifications and Reminders
In addition to setting up recurring tasks, Asana provides the option to configure task notifications and reminders. These features help keep you and your team members informed about upcoming tasks and ensure that important deadlines are not missed. Here’s how you can configure task notifications and reminders in Asana:
- Access task settings: Open the task for which you want to configure notifications and reminders.
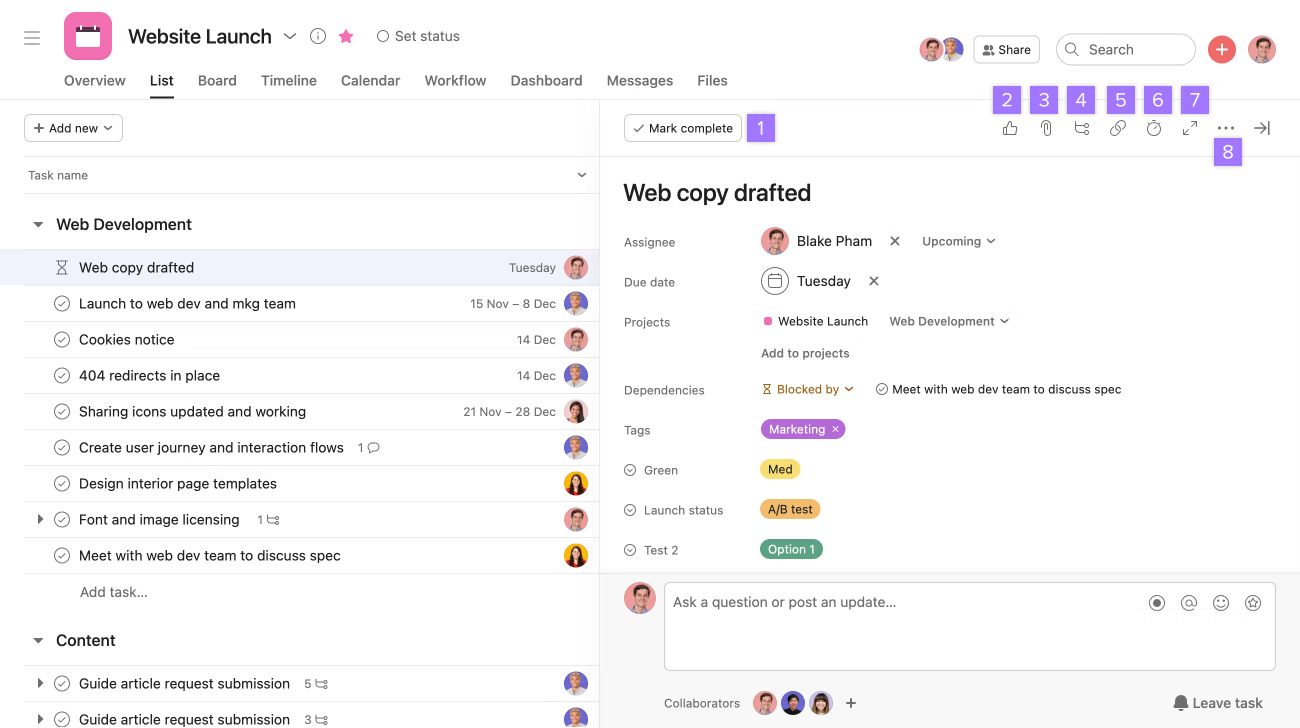
- Open the task actions menu: Locate the task actions menu, usually denoted by three horizontal dots or an ellipsis icon, within the task view.
- Choose “Add due date notification”: From the task actions menu, select the option “Add due date notification” to set up notifications for the task.
- Select notification timing: Asana provides options to receive notifications before the due date. You can choose when you want to be notified, such as a certain number of days or hours before the task is due.
- Choose notification recipients: Specify who should receive the notifications. You can set them to be sent to the task assignee, additional team members, or yourself.
- Enable task reminders: To further ensure that tasks are not forgotten, enable task reminders. Reminders prompt team members to work on or complete the task at specific intervals before the due date.
- Select reminder intervals: You can set the timing of reminders, such as receiving them a certain number of days or hours before the task is due.
- Save your settings: Once you have configured the notifications and reminders to your preference, click on the “Save” or “Apply” button to save your settings.
Configuring notifications and reminders in Asana helps you stay on top of your tasks, ensuring that important deadlines are not overlooked. These features provide proactive alerts, keeping you and your team members informed about upcoming due dates and important task milestones.
By receiving timely notifications, you can plan and prioritize your work effectively. Reminders serve as gentle prompts that help you stay focused and ensure that tasks are addressed before they become overdue.
Utilizing task notifications and reminders in Asana fosters better task management, reduces the risk of missed deadlines, and enhances overall project productivity. By configuring these features to align with your preferences and work style, you and your team can stay organized, meet deadlines, and achieve project goals more efficiently.
Make the most out of Asana’s notification and reminder functionalities to create a more productive and proactive working environment, improving communication and task accountability among team members.
Use Dependencies for Recurring Tasks
Asana provides the option to use task dependencies for recurring tasks, allowing you to establish logical relationships between tasks and ensure proper sequencing. Dependencies can be incredibly useful for managing complex projects that involve multiple interdependent tasks. Here’s how you can utilize task dependencies for recurring tasks in Asana:
- Identify task dependencies: Determine the tasks that need to be completed before or after the recurring task. Dependencies can be both internal (within the same project) or external (across different projects).
- Access the dependent task: Open the task that is dependent on the recurring task or the task on which the recurring task is dependent.
- Set the dependency: Within the task details or task view, find the option to set the dependency. Depending on your Asana setup, this could be in the form of a task actions menu, a dependent task field, or a link to set the dependency.
- Link the recurring task: Connect the recurring task to the dependent task by selecting it from the available options. You can search for the recurring task or choose it from a dropdown menu.
- Adjust dependency type and rules (if needed): Depending on the nature of the dependency, you can configure certain rules. For example, you may want the dependent task to start only when the recurring task is completed or when it starts.
- Repeat for other dependent tasks: If there are multiple tasks dependent on the recurring task, repeat the above steps to establish the dependencies for each task.
Using task dependencies for recurring tasks ensures that the proper sequence and order of tasks are maintained. It allows you to create a logical flow that ensures tasks are completed in the most efficient and effective way.
By setting task dependencies, you can manage the relationships between recurring tasks and other dependent tasks. This helps in avoiding any confusion, preventing tasks from being started prematurely, and ensuring that the project progresses smoothly.
Task dependencies provide transparency and clarity within your project, as each task’s dependencies are clearly outlined. This enables team members to understand the order of work and focus on the tasks that are ready to be executed, maximizing productivity and minimizing delays.
By utilizing task dependencies for recurring tasks in Asana, you can optimize your project management efforts, improve collaboration, and achieve better overall project outcomes.
Now that you understand how to utilize task dependencies, you can integrate them into your recurring tasks to ensure seamless project execution and successful task management.
Conclusion
Creating recurring tasks in Asana offers numerous benefits for better project management and improved team productivity. By automating repetitive tasks, you can save time and ensure consistency in your workflow. With Asana’s user-friendly interface and advanced features, setting up recurring tasks becomes a streamlined and efficient process.
In this article, we explored the benefits of using recurring tasks in Asana, including time savings, consistency, improved accountability, efficiency, streamlined communication, and flexibility. We also provided a step-by-step guide on how to create recurring tasks, covering how to access the Asana dashboard, select or create a project, create a new task, set task details, define recurrence patterns, choose start and due dates, add additional details or subtasks, assign tasks to team members, and review and save the recurring task.
We also discussed advanced options for recurring tasks, such as setting custom recurrence patterns, configuring task notifications and reminders, and using task dependencies to establish logical relationships between tasks.
Asana’s custom recurrence patterns allow you to tailor the repetition of tasks to specific project needs and timelines. Configuring task notifications and reminders keeps you and your team members informed about upcoming tasks, preventing missed deadlines. Task dependencies help you manage the workflow and ensure tasks are carried out in the correct order, fostering smooth project progression.
By leveraging these advanced features in Asana, you can optimize your task management processes, streamline collaboration, and achieve better results in your projects.
So, whether it’s recurring meetings, report generation, content publishing, client follow-ups, or project milestones, Asana’s recurring tasks feature empowers you to efficiently manage these repetitive tasks and foster productivity and success within your team.
Start utilizing recurring tasks in Asana today and experience the benefits of automated task management, enhanced organization, and improved team collaboration.