Introduction
Connecting your Samsung Smart TV to the internet opens up a world of entertainment possibilities, allowing you to stream your favorite shows and movies, access online apps, and browse the web. Whether you’re a tech-savvy individual or a beginner, this step-by-step guide will help you easily connect your Samsung Smart TV to the internet.
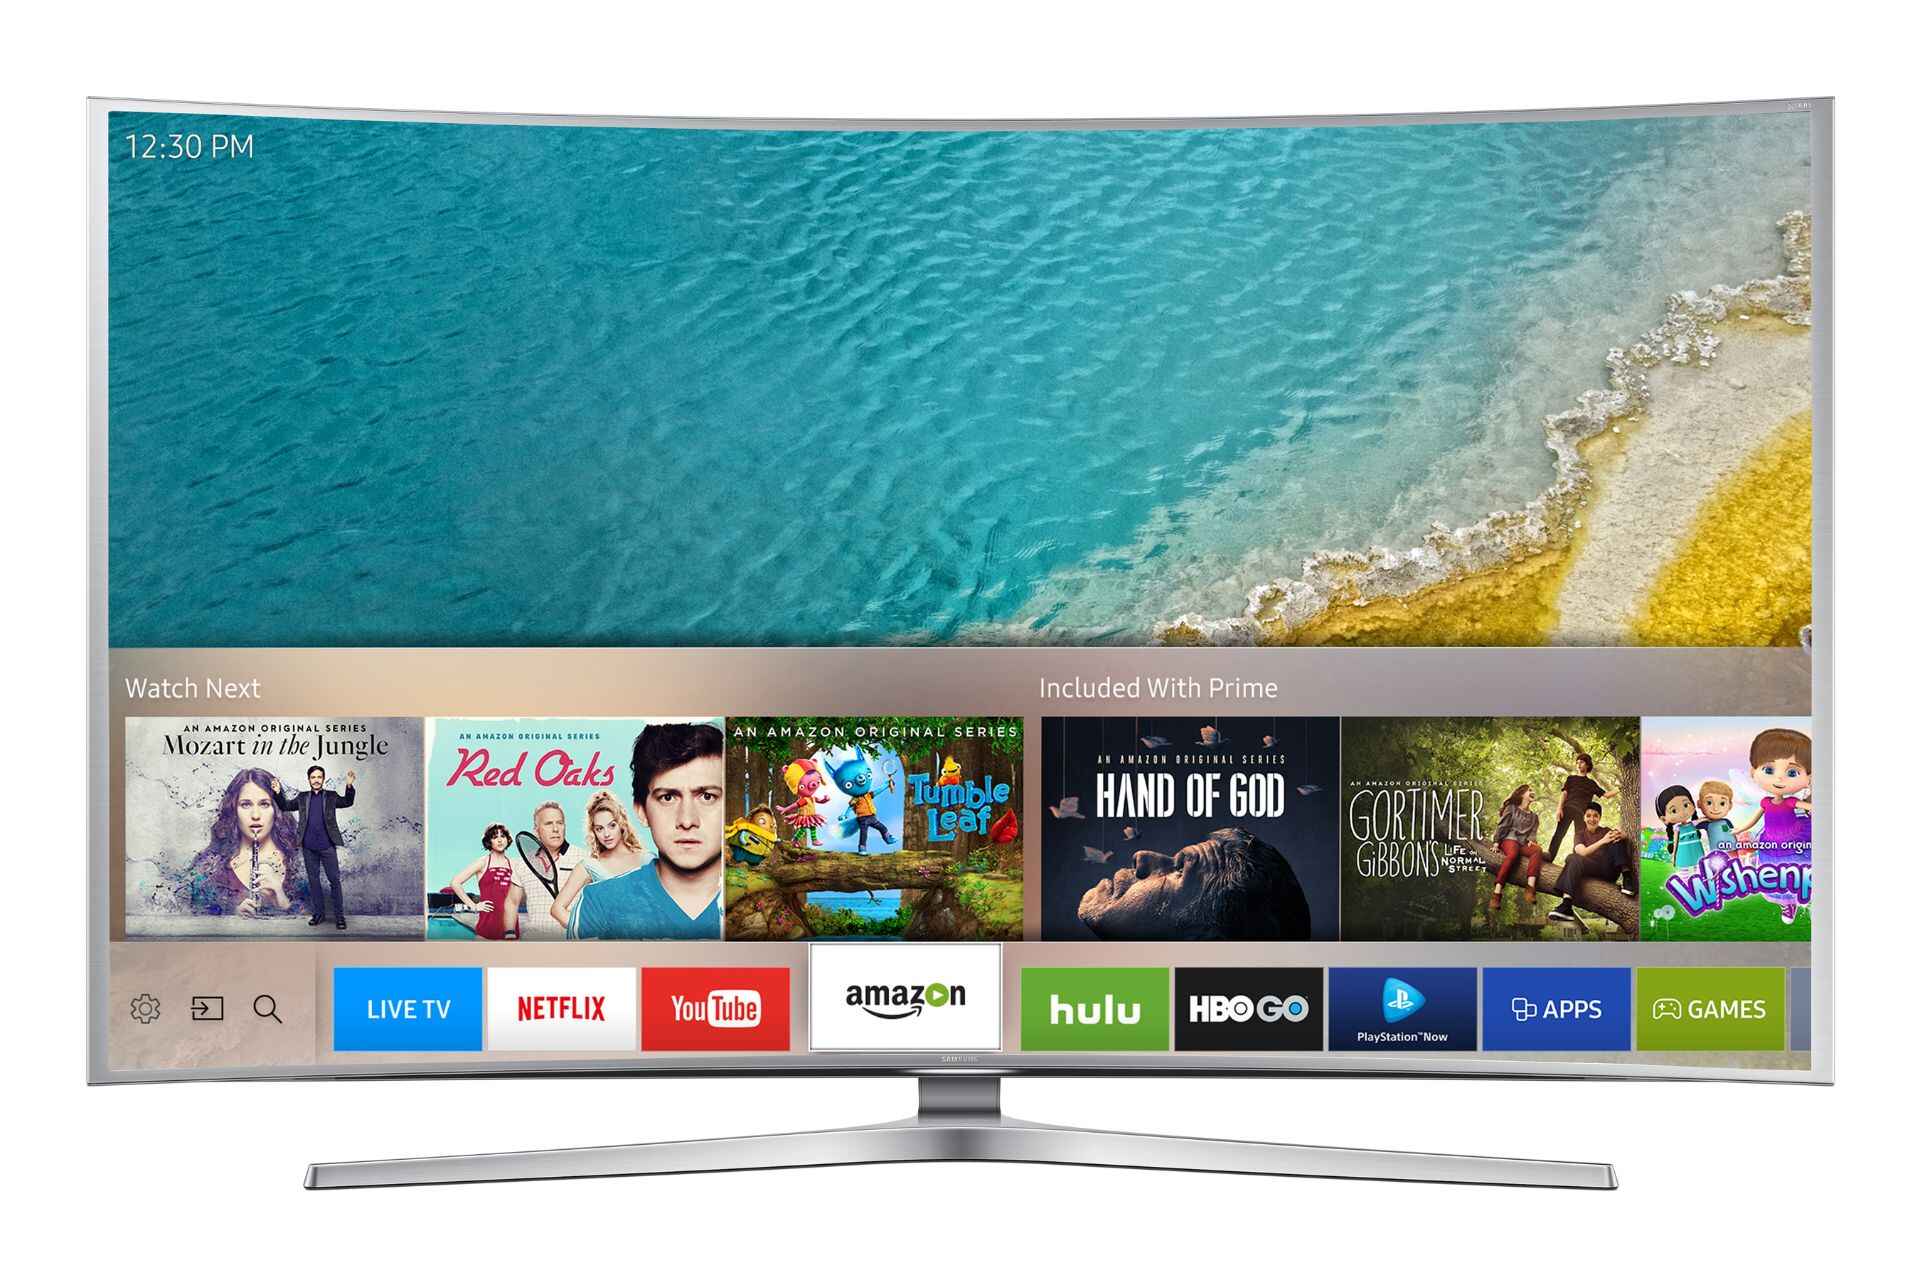
With the internet connection, your Samsung Smart TV can provide a seamless entertainment experience. You can stream content from popular streaming platforms like Netflix, Hulu, and Disney+, as well as access online apps like YouTube and Spotify. Additionally, you can browse the web, check email, and even play multiplayer games with friends and family.
Before diving into the steps, it’s important to ensure that you have a stable internet connection available in your home. You can either connect your Samsung Smart TV via a wired Ethernet connection or wirelessly through Wi-Fi. Wi-Fi provides more flexibility when it comes to placing the TV anywhere in the room, while a wired connection offers a more stable and consistent connection.
This guide will focus on connecting your Samsung Smart TV to the internet wirelessly through Wi-Fi. It’s recommended to have the Wi-Fi network name (SSID) and password ready before proceeding. With this information at hand, let’s get started with the step-by-step process.
Keep in mind that the following steps may slightly vary depending on the model and software version of your Samsung Smart TV.
Step 1: Check your Internet Connection
Before connecting your Samsung Smart TV to the internet, it’s essential to ensure that your home internet connection is working properly. Follow these steps to check your internet connection:
- Ensure that your router is powered on and functioning correctly. Check if the lights on the router are solid or blinking, indicating an active internet connection.
- If you have other devices connected to the same internet network, such as smartphones or computers, check if they have internet access. This will help determine if the issue lies with the TV or the overall internet connection.
- If you’re experiencing internet connectivity issues, try power cycling your router by unplugging it from the power source, waiting for a few seconds, and then plugging it back in. This can often resolve temporary connection problems.
- If the problem persists, consider contacting your internet service provider (ISP) for further assistance. They may be able to troubleshoot the issue remotely or help you identify any potential network problems.
Ensuring a stable internet connection is vital for a seamless streaming experience on your Samsung Smart TV. Once you’ve confirmed that your internet connection is working correctly, you can proceed to the next step of connecting your TV to the network.
Step 2: Connect your Samsung Smart TV to your Router
Now that you’ve confirmed that your internet connection is stable, it’s time to connect your Samsung Smart TV to your router. Follow these steps to establish a physical connection:
- Locate the Ethernet port on the back of your Samsung Smart TV. It is usually labeled as “LAN” or “Internet”.
- Plug one end of an Ethernet cable into the Ethernet port on your TV and the other end into an available port on your router.
- Make sure the cable is securely plugged in on both ends to ensure a reliable connection.
- Once you have successfully connected the Ethernet cable, your Samsung Smart TV should now be physically connected to your router. However, if you prefer a wireless connection, you can skip this step and proceed to the next section.
Connecting your Samsung Smart TV directly to your router via an Ethernet cable ensures a stable and reliable internet connection. This connection method is particularly useful if you have a weak Wi-Fi signal or experience interference with wireless networks in your home.
Now that your TV is physically connected to the router, you can proceed to the next step where we will access the network settings menu on your Samsung Smart TV.
Step 3: Access the Network Settings Menu
Once your Samsung Smart TV is connected to the router, it’s time to access the Network Settings menu to configure the internet connection. Follow these steps to access the menu:
- Using your TV remote, press the “Menu” button. This will display the main menu options on your screen.
- Navigate through the menu using the arrow keys on your remote. Look for the “Settings” or “Setup” option and select it by pressing the “Enter” button.
- Inside the Settings or Setup menu, locate and select the “Network” or “Network Settings” option. This will allow you to configure your internet connection.
- Depending on your TV model and software version, you might see various options such as “Wired Network” or “Wireless Network”. Select the appropriate option based on your desired connection method. If you want to connect wirelessly, choose the “Wireless Network” option.
- Once you’ve selected the correct network option, your Samsung Smart TV will start scanning for available networks in the vicinity. Wait for the scanning process to complete.
Now that you have successfully accessed the Network Settings menu, you are ready to connect your TV to the Wi-Fi network. In the next step, we will guide you through the process of connecting to Wi-Fi.
Step 4: Connect to Wi-Fi
Now that you have accessed the Network Settings menu on your Samsung Smart TV, it’s time to connect to your Wi-Fi network. Follow these steps to establish a wireless connection:
- From the list of available networks, select your Wi-Fi network. It should be displayed with the network name (SSID) that you previously set up.
- If the network is password-protected, you will be prompted to enter the Wi-Fi password (security key). Use the on-screen keyboard to enter the password accurately.
- Double-check the entered password to ensure there are no typos or mistakes. Wi-Fi passwords are case-sensitive.
- Once you have entered the password correctly, select the “Connect” or “Next” option to initiate the connection process.
- Your Samsung Smart TV will now attempt to establish a connection to the Wi-Fi network. Wait for a few moments while the TV connects to the network.
- If the connection is successful, you will see a confirmation message on your screen. Your Samsung Smart TV is now connected to the Wi-Fi network.
Congratulations! You have successfully connected your Samsung Smart TV to your Wi-Fi network. This will enable you to enjoy a variety of online streaming services, apps, and web browsing directly on your TV.
Before moving on, it’s recommended to perform a quick test to ensure that the internet connection is working correctly on your Samsung Smart TV. In the next step, we will guide you through the process of testing the connection.
Step 5: Enter Wi-Fi Password
When connecting your Samsung Smart TV to a Wi-Fi network, it’s essential to enter the correct Wi-Fi password to establish a successful connection. Follow these steps to enter the Wi-Fi password on your TV:
- Using your TV remote, navigate to the on-screen keyboard. The keyboard may appear automatically when you need to enter the Wi-Fi password, or you may have to select the text field first.
- Use the arrow keys on your remote to move the cursor and select the desired characters. The on-screen keyboard may have letters, numbers, and special characters available for input.
- Enter the Wi-Fi password character by character, following the on-screen prompts. Take your time to ensure the correct password is entered without any mistakes.
- If you make a mistake while entering the password, use the arrow keys to move the cursor and correct the error. Most TVs provide an option to delete characters or clear the entire password field.
- Once you have entered the complete Wi-Fi password correctly, navigate to the “Connect” or “Next” button on the on-screen keyboard and select it.
It’s crucial to input the Wi-Fi password accurately, as it is case-sensitive. Double-check each character to ensure there are no typos or mistakes. A correct password entry will allow your Samsung Smart TV to establish a secure connection to your Wi-Fi network.
Now that you have entered the Wi-Fi password successfully, you are ready to proceed to the next step and test the internet connection on your Samsung Smart TV.
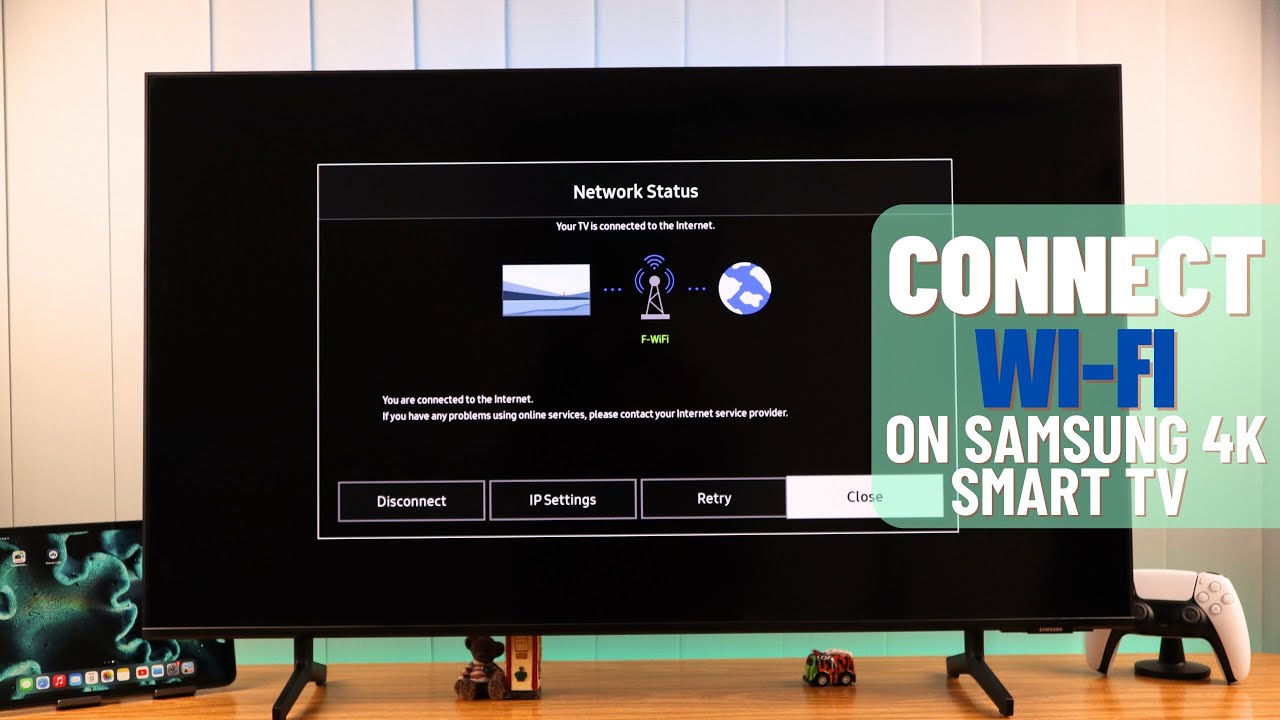
Step 6: Test the Connection
After connecting your Samsung Smart TV to the Wi-Fi network and entering the password, it’s important to test the internet connection to ensure everything is functioning correctly. Follow these steps to test the connection on your TV:
- Using your TV remote, navigate back to the Network Settings menu.
- Select the option that allows you to test the internet connection. It may be labeled as “Test Connection” or “Check Network Status”.
- Wait for the TV to perform the connection test. This process may take a few moments.
- Once the test is complete, your Samsung Smart TV will display the results on-screen. It will indicate whether the connection was successful.
- If the connection test indicates a successful connection, you can proceed to enjoy your favorite streaming services, apps, and other online features on your Samsung Smart TV.
- If the connection test fails, make sure that your router is functioning correctly and that you have entered the correct Wi-Fi password. You may need to go back and retry the previous steps to establish a proper connection.
- If you continue experiencing issues with the internet connection, you may consider power cycling your router or contacting your internet service provider for further assistance.
Once you have successfully tested the internet connection on your Samsung Smart TV, you can freely explore the world of online entertainment and enjoy a range of features available on your TV.
Now that you have successfully connected your Samsung Smart TV to the internet, you can enjoy seamless streaming, access online apps, and browse the web directly from your TV. Should you encounter any issues or need further assistance, consult the troubleshooting tips in the next section.
Troubleshooting Tips
While connecting your Samsung Smart TV to the internet is usually a straightforward process, you may encounter some issues along the way. Here are some troubleshooting tips to help you resolve common connectivity problems:
- Check your Wi-Fi signal strength: If you’re experiencing a weak Wi-Fi signal or intermittent connection, try moving your router closer to your TV or eliminating any potential obstacles that may block the signal, such as walls or other electronic devices.
- Restart your TV: Sometimes, a quick restart of your Samsung Smart TV can resolve minor connection issues. Simply power off your TV, wait a few seconds, and then turn it back on.
- Restart your router: Similar to restarting your TV, power cycling your router can help refresh the connection. Unplug the router from the power source, wait for a few seconds, and then plug it back in.
- Double-check your Wi-Fi password: If you’re unable to connect to your Wi-Fi network, ensure that you have entered the correct password. Pay attention to uppercase and lowercase letters, as well as any special characters.
- Update your TV’s firmware: Outdated firmware can sometimes cause connectivity issues. Check for any available firmware updates for your Samsung Smart TV and install them as needed.
- Reset network settings: If all else fails, you can try resetting the network settings on your Samsung Smart TV. This will remove any saved Wi-Fi networks and configurations. Consult the user manual or contact Samsung support for instructions specific to your model.
By following these troubleshooting tips, you can hopefully resolve any connectivity issues and enjoy a seamless internet experience on your Samsung Smart TV. In case the problem persists, it may be helpful to consult your TV’s user manual or reach out to Samsung support for further assistance.
Now that you have troubleshooted any potential issues, you should be ready to connect your Samsung Smart TV to the internet and enjoy all the features and entertainment options it offers.
Conclusion
Connecting your Samsung Smart TV to the internet opens up a world of entertainment possibilities, allowing you to stream your favorite shows and movies, access online apps, and browse the web. With the step-by-step guide provided, you can easily connect your TV to the internet and start enjoying its features.
We began by checking your internet connection to ensure it is stable and working properly. Then, we guided you through the process of connecting your Samsung Smart TV to your router either through a wired Ethernet connection or wirelessly via Wi-Fi. We then walked you through accessing the Network Settings menu and entering your Wi-Fi password to establish a successful connection.
Next, we emphasized the importance of testing the internet connection on your Samsung Smart TV to ensure that everything is functioning correctly. In the troubleshooting tips section, we provided helpful suggestions to address common connectivity issues that you may encounter.
By following these steps and troubleshooting tips, you can connect your Samsung Smart TV to the internet and enjoy a seamless streaming experience, access online apps, and browse the internet directly on your TV.
Remember, each Samsung Smart TV model may have slight variations in the setup process and menu options. Consult your TV’s user manual for specific instructions or reach out to Samsung support for further assistance if needed.
Now that you have successfully connected your Samsung Smart TV to the internet, sit back, relax, and enjoy the endless entertainment possibilities that it brings right into your living room!