Introduction
Welcome to the world of smart television! Samsung Smart TVs offer a multitude of features and functionalities that allow you to access a wide range of content. However, to make the most of these features, it is essential to connect your Samsung Smart TV to Wi-Fi. By connecting your TV to a wireless network, you gain access to a myriad of online streaming services, navigate through apps effortlessly, and take advantage of various other smart features.
In this guide, we will walk you through the process of connecting your Samsung Smart TV to Wi-Fi. Whether you are a newbie to smart TVs or you just need a refresher, we’ve got you covered. You will learn how to set up the Wi-Fi settings on your TV, connect to a Wi-Fi network, and troubleshoot any connectivity issues you may encounter along the way.
Before diving into the step-by-step instructions, it’s worth highlighting the benefits of connecting your Samsung Smart TV to Wi-Fi. First and foremost, a wireless connection eliminates the need for messy cables running across your living room, providing a clean and clutter-free setup. Additionally, connecting to Wi-Fi enables you to access a vast array of online streaming platforms, including popular ones like Netflix, Hulu, and Amazon Prime Video, as well as explore various apps and online content at your fingertips.
Now that we’ve covered the basics, let’s move on to the first step: setting up the Wi-Fi settings on your Samsung Smart TV.
Step 1: Setting Up the Wi-Fi Settings on Your Samsung Smart TV
Before you can connect your Samsung Smart TV to Wi-Fi, you need to ensure that the TV is properly set up to access a wireless network. Follow these steps to configure the Wi-Fi settings:
- Turn on your Samsung Smart TV and grab the remote control.
- Press the “Menu” button on the remote to access the TV’s settings menu.
- Navigate to the “Network” section using the arrow keys on the remote, then press the “Enter” button to select it.
- Choose “Network Settings” from the options presented on the screen.
- Select “Wireless” as the network type. If your TV supports both wired and wireless connections, choose “Wireless” to connect using Wi-Fi.
- The TV will start scanning for available Wi-Fi networks. Wait for the scan to complete.
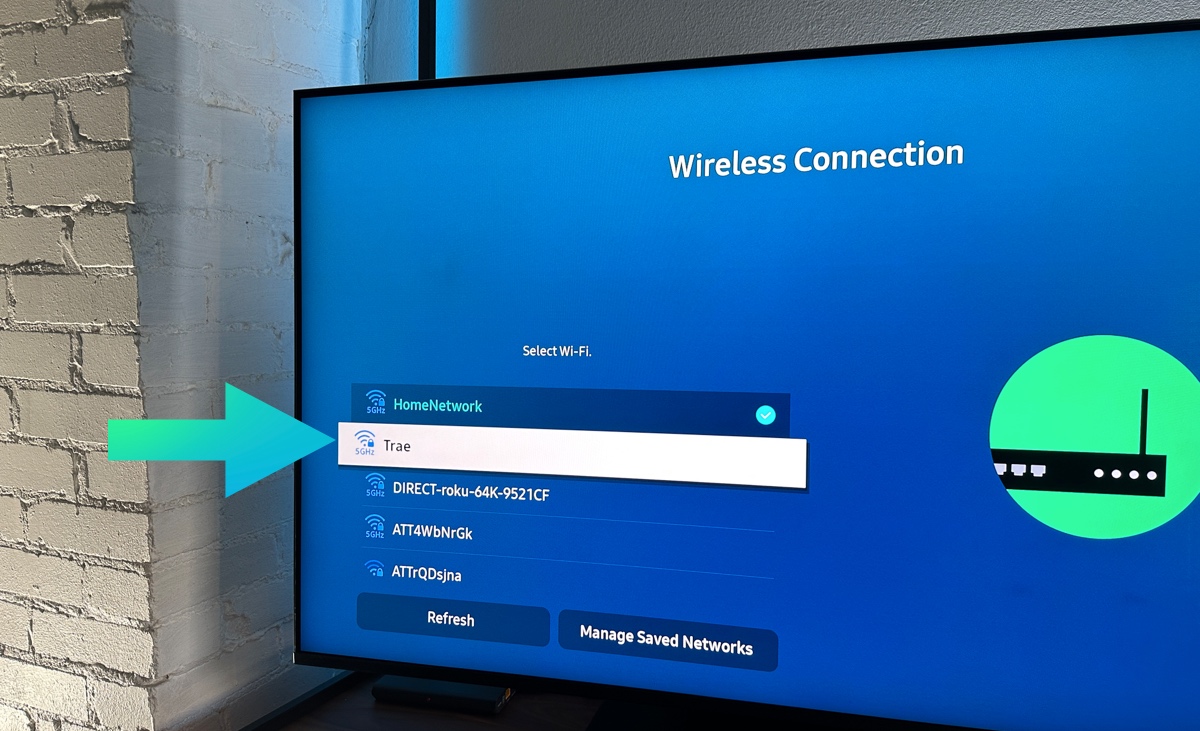
- A list of detected networks will appear on the screen. Select your Wi-Fi network from the list.
- If your network is secured with a password, a pop-up window will prompt you to enter the network password. Use the TV remote’s arrow and numeric keys to enter the password.
- Once you have entered the password, select “Done” or “Connect” to proceed.
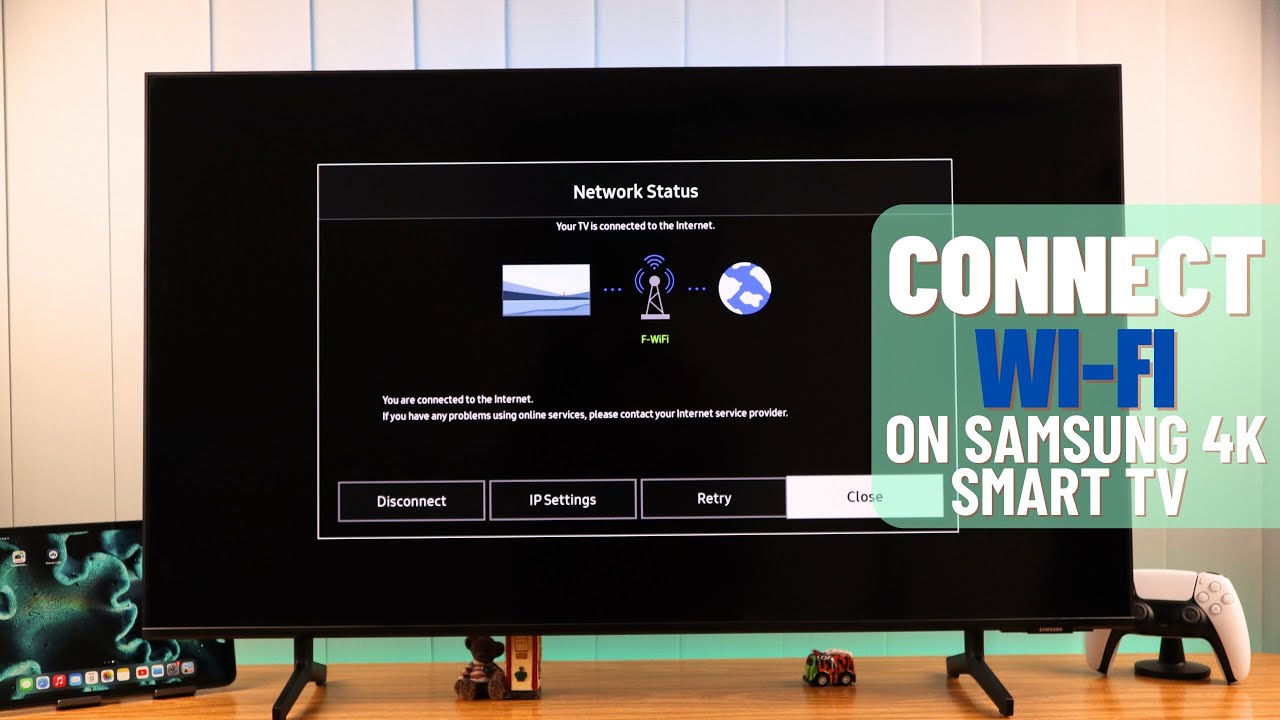
- Wait a few moments for the TV to establish a connection with the chosen Wi-Fi network. You will see a confirmation message on the screen when the connection is successfully established.
Congratulations! You have now successfully set up the Wi-Fi settings on your Samsung Smart TV. Next, let’s proceed to the next step: connecting to a Wi-Fi network.
Step 2: Connecting to a Wi-Fi Network
Now that you have set up the Wi-Fi settings on your Samsung Smart TV, it’s time to connect to a Wi-Fi network. Follow these steps to establish a connection:
- Ensure that your Samsung Smart TV is turned on and the Wi-Fi settings are properly configured.
- Using the TV remote, press the “Menu” button to access the settings menu.
- Navigate to the “Network” section and select “Network Settings”.
- Choose “Wireless” if it isn’t already selected.
- A list of available Wi-Fi networks will appear on the screen.
- Select your Wi-Fi network from the list.
- If your network is secured, enter the password using the remote’s arrow and numeric keys.
- Once the password is entered, select “Done” or “Connect” to initiate the connection.
- The TV will attempt to establish a connection with the Wi-Fi network. Wait for a few moments while the connection process takes place.
- Once the connection is established, you will see a confirmation message on the screen.
Great job! Your Samsung Smart TV is now connected to the Wi-Fi network. Now you can enjoy the plethora of online streaming services, apps, and other smart features that require an internet connection.
Note: If you encounter any issues while connecting to the Wi-Fi network, please refer to the next step for troubleshooting tips.
Step 3: Troubleshooting Tips for Wi-Fi Connectivity Issues
Encountering Wi-Fi connectivity issues with your Samsung Smart TV can be frustrating, but fear not! Here are some troubleshooting tips to help you resolve common Wi-Fi problems:
- Check your Wi-Fi signal: Ensure that your Wi-Fi signal is strong enough by bringing your TV closer to the router or placing the router in a central location in your home.
- Restart your TV and router: Sometimes, a simple restart can resolve connectivity issues. Turn off both your TV and router, wait for a few minutes, and then turn them back on.
- Confirm the network settings: Double-check the network settings on your TV to ensure that the correct network name (SSID) and password are entered.
- Verify the Wi-Fi password: If you are unsure about the Wi-Fi password, check the router settings or contact your internet service provider (ISP) for assistance.
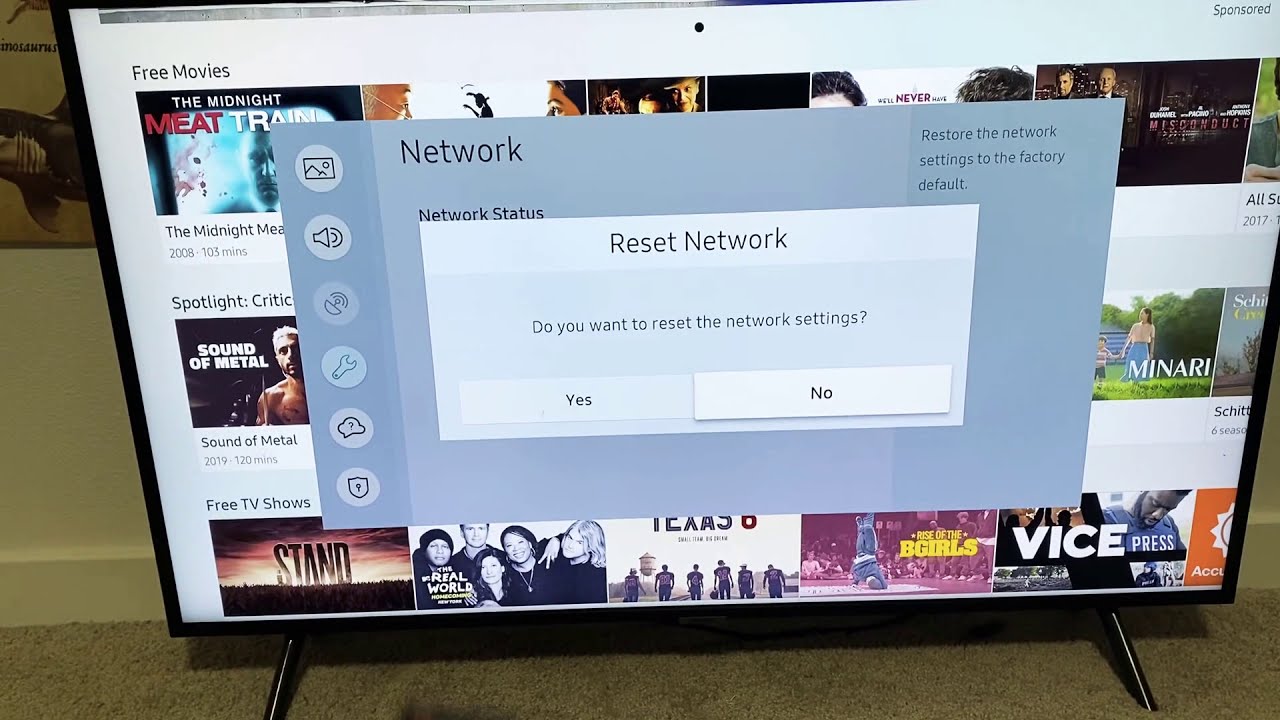
- Reset the network settings: If all else fails, you can try resetting the network settings on your TV. This will remove all saved Wi-Fi networks, so make sure you have the necessary information to reconnect to your network.
- Update your TV’s firmware: Outdated firmware can sometimes cause Wi-Fi connectivity issues. Check for any firmware updates for your Samsung Smart TV and install them if available.
- Consider using an Ethernet connection: If you continue to experience Wi-Fi problems, you can try connecting your TV to the router using an Ethernet cable for a more stable and reliable connection.
- Contact your ISP or Samsung support: If none of the above solutions work, it may be time to reach out to your internet service provider or Samsung support for further assistance.
By following these troubleshooting tips, you should be able to overcome most Wi-Fi connectivity issues on your Samsung Smart TV. Remember, a stable and reliable Wi-Fi connection is crucial for enjoying all the smart features that your TV offers.
Now that you have learned how to set up the Wi-Fi settings and connect to a network, you are all set to experience the seamless world of online streaming and smart TV features. Happy watching!
Conclusion
Congratulations! You have successfully learned how to connect your Samsung Smart TV to Wi-Fi. By following the steps outlined in this guide, you have taken full advantage of the smart features and online content available on your TV.
We started by setting up the Wi-Fi settings on your Samsung Smart TV, ensuring that it is properly configured to connect to a wireless network. Then, we walked through the process of connecting your TV to a Wi-Fi network, allowing you to access a wide range of streaming services, apps, and online content with ease.
Furthermore, we provided troubleshooting tips for common Wi-Fi connectivity issues. These tips can help you overcome any challenges you may face, ensuring a stable and reliable connection for uninterrupted streaming and enjoyable smart TV experiences.
Remember, a strong and stable Wi-Fi connection is essential for maximizing the capabilities of your Samsung Smart TV. If you continue to experience difficulties, don’t hesitate to reach out to your internet service provider or Samsung support for further assistance.
Now that you are equipped with the knowledge to connect your Samsung Smart TV to Wi-Fi and troubleshoot any issues, dive into a world of entertainment and explore the plethora of online streaming services, apps, and features available at your fingertips. Enjoy the convenience and excitement of a connected smart TV experience!