Introduction
Welcome to our guide on how to connect your smart TV to cable. With the advancement of technology, smart TVs have become a popular choice for entertainment at home. They offer a range of features, including access to streaming services, apps, and internet browsing. However, if you prefer to watch live TV and have a cable subscription, connecting your smart TV to cable is essential.
By connecting your smart TV to cable, you can enjoy a wide range of channels, including news, sports, and your favorite shows. The process of connecting your smart TV to cable might seem a bit daunting if you’re new to it, but fear not! We’ll walk you through it step-by-step, ensuring a smooth and hassle-free setup.
In this guide, we’ll cover the necessary steps to properly connect your smart TV to cable. We’ll also provide troubleshooting tips to help you overcome any potential issues you might encounter along the way. Whether you own a brand-new smart TV or have had one for a while, this guide is designed to help you make the most of your cable subscription.
Before we dive into the step-by-step process, it’s important to note that the specific instructions may vary depending on your TV model and cable provider. However, the general principles and concepts discussed in this guide should apply to most smart TVs and cable connections.
If you’re ready to start enjoying your favorite cable channels on your smart TV, let’s get started with preparing your TV and cable connection in the next section.
Step 1: Prepare your Smart TV and Cable Connection
Before you can connect your smart TV to cable, it’s important to ensure that you have everything you need and that your TV is ready for the setup process. Follow these steps to get started:
- Check your TV’s specifications: Look at your TV’s manual or the manufacturer’s website to determine if it has a built-in cable tuner. This is important because it will determine how you connect your cable to your TV.
- Locate the cable outlet: Find the cable outlet in your home where you’ll be connecting your TV. It is usually located on a wall, or you may have a cable jack installed behind the TV.
- Check your cable subscription: Ensure that you have an active cable subscription from a local cable provider. Without a subscription, you won’t be able to access cable channels on your smart TV.
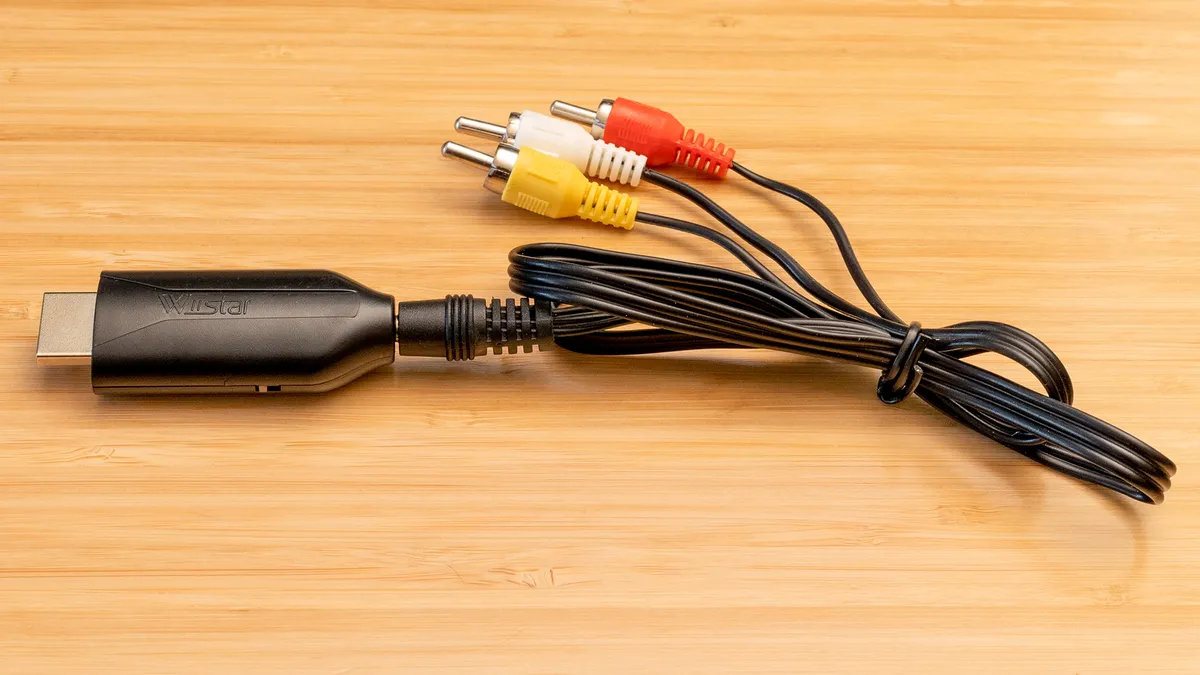
- Prepare the cables: Depending on your TV’s specifications, you may need an HDMI cable or a coaxial cable. Check the cable types supported by your TV and make sure you have the appropriate cables on hand.
- Plan the cable routing: Determine the path of the cable from the wall outlet to your TV. Make sure you have enough slack in the cable to comfortably connect it to the TV without straining the connections.
By following these steps and ensuring that you have all the necessary equipment and subscriptions in place, you’ll be ready to move on to the next step of connecting your cable to your smart TV. Let’s find out how to find the cable input on your TV in the next section.
Step 2: Find the Cable Input on your Smart TV
Once you have prepared your smart TV and cable connection, the next step is to locate the cable input on your TV. This input is where you will connect your cable to receive the TV signal. Follow these steps to find the cable input:
- Turn on your smart TV: Press the power button on your TV or use the remote control to turn it on.
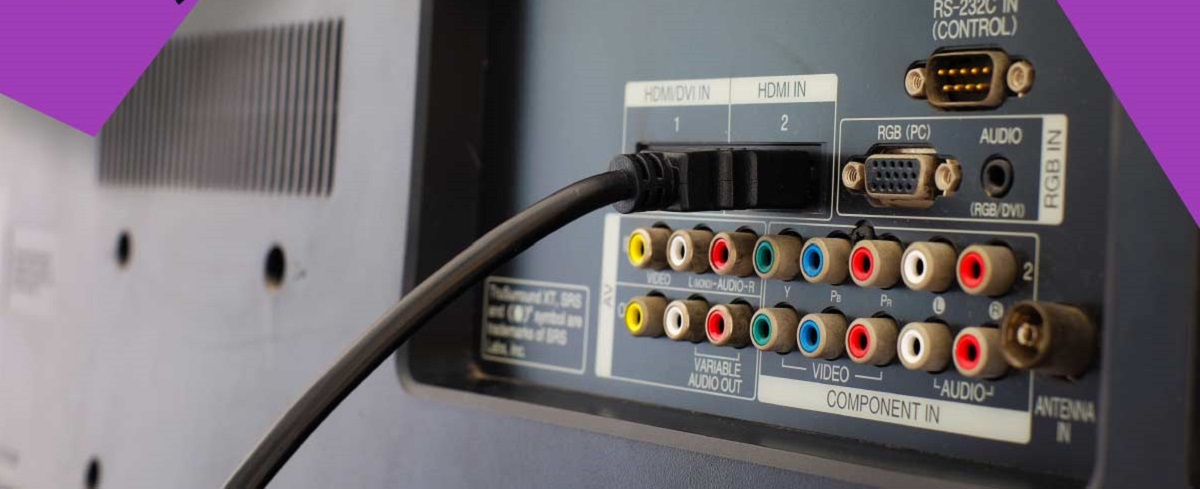
- Locate the input panel: Look for the input panel on your TV. This panel is usually located on the back or side of the TV.
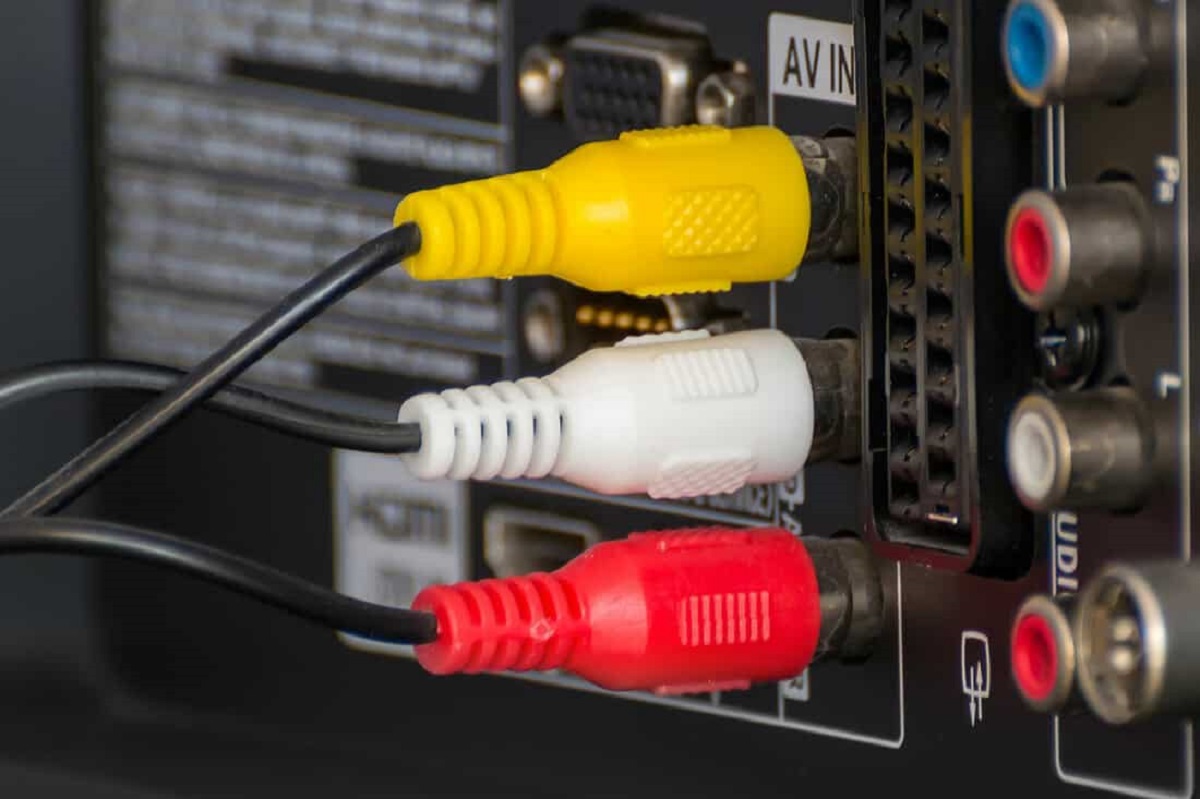
- Identify the cable input: Look for labels or icons near the input panel that indicate the cable input. It is often labeled as “Cable In,” “ANT In,” or “RF In.”
- Inspect the input ports: Depending on your TV model, the cable input may be a coaxial port or an HDMI port. If it’s a coaxial port, it will have a small threaded metal ring. If it’s an HDMI port, it will be rectangular and slightly wider.
Once you have identified the cable input on your smart TV, you’re ready to move on to the next step of physically connecting the cable. In the following section, we will guide you through the process of connecting the cable to your smart TV.
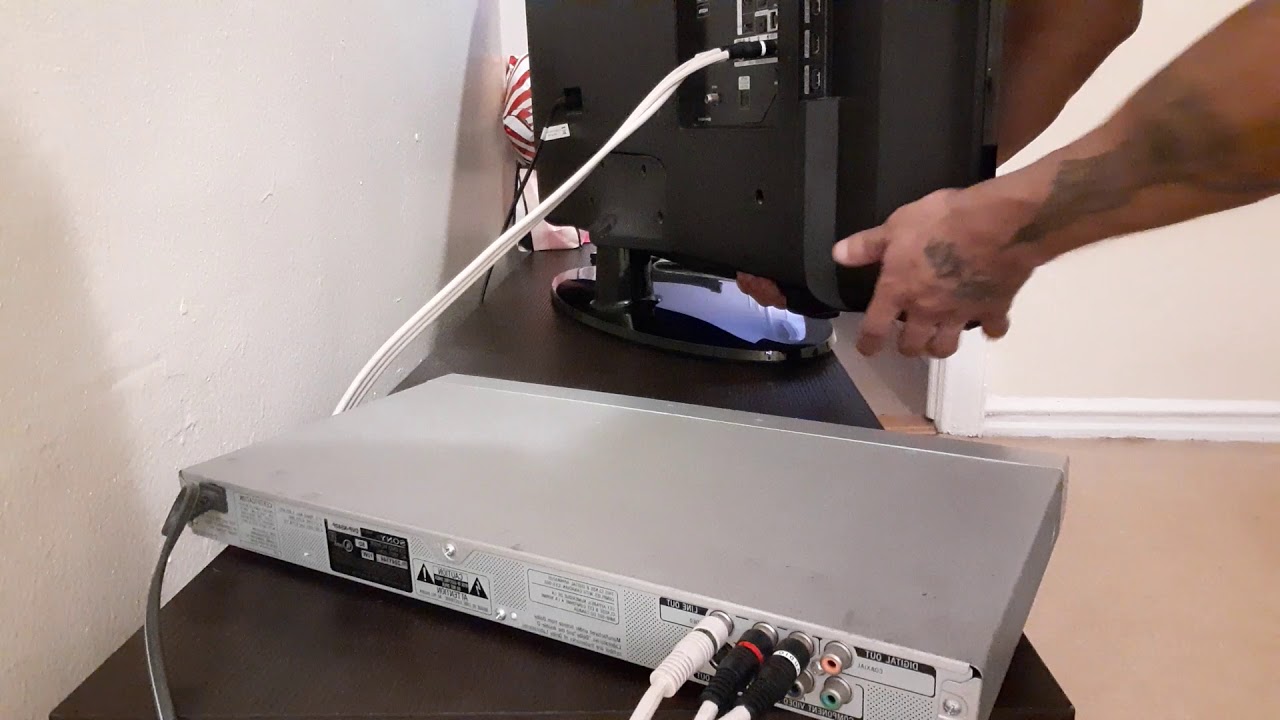
Step 3: Connect the Cable to your Smart TV
Now that you have found the cable input on your smart TV, it’s time to connect the cable and establish a physical connection between your TV and the cable source. Follow these steps to connect the cable to your smart TV:
- Turn off your smart TV: Before making any connections, ensure that your TV is turned off.
- Locate the cable: Take the coaxial cable or HDMI cable and find the end that will connect to the cable outlet.
- Insert the cable into the input: For a coaxial cable, screw the threaded metal ring into the cable input. Ensure that it is securely fastened but avoid overtightening. If you have an HDMI cable, simply insert one end into the HDMI port of your TV.
- Secure the cable: Once the cable is connected, use any cable clips or ties you have to secure the cable along the path you planned earlier. This will help keep the cable organized and prevent it from being accidentally disconnected.
Connecting the cable to your smart TV is an important step towards accessing cable channels. Now that the physical connection is established, we can move on to scanning for channels on your TV. In the next section, we will guide you through the process of scanning for channels so you can start enjoying your favorite shows and programs.
Step 4: Scan for Channels on your Smart TV
After connecting the cable to your smart TV, the next step is to scan for channels. This process allows your TV to detect and store all the available cable channels. Here’s how you can scan for channels on your smart TV:
- Turn on your smart TV: Press the power button on your TV or use the remote control to turn it on.
- Access the TV menu: Use the remote control to navigate to the menu or settings section of your TV.
- Open the channel setup: Look for options related to channel setup, tuning, or scanning. This can vary depending on the brand and model of your TV. Consult your TV’s manual or refer to the manufacturer’s website for specific instructions.
- Select the cable option: In the channel setup menu, choose the cable option or the option that corresponds to your TV’s cable input.
- Initiate the channel scan: Start the channel scanning process. Your TV will begin searching for available channels and store them in its memory. This process might take a few minutes, so be patient and allow your TV to complete the scan.
- Saving the channels: Once the scanning process is complete, your TV may prompt you to save the channels. Follow the on-screen instructions to save the detected cable channels.
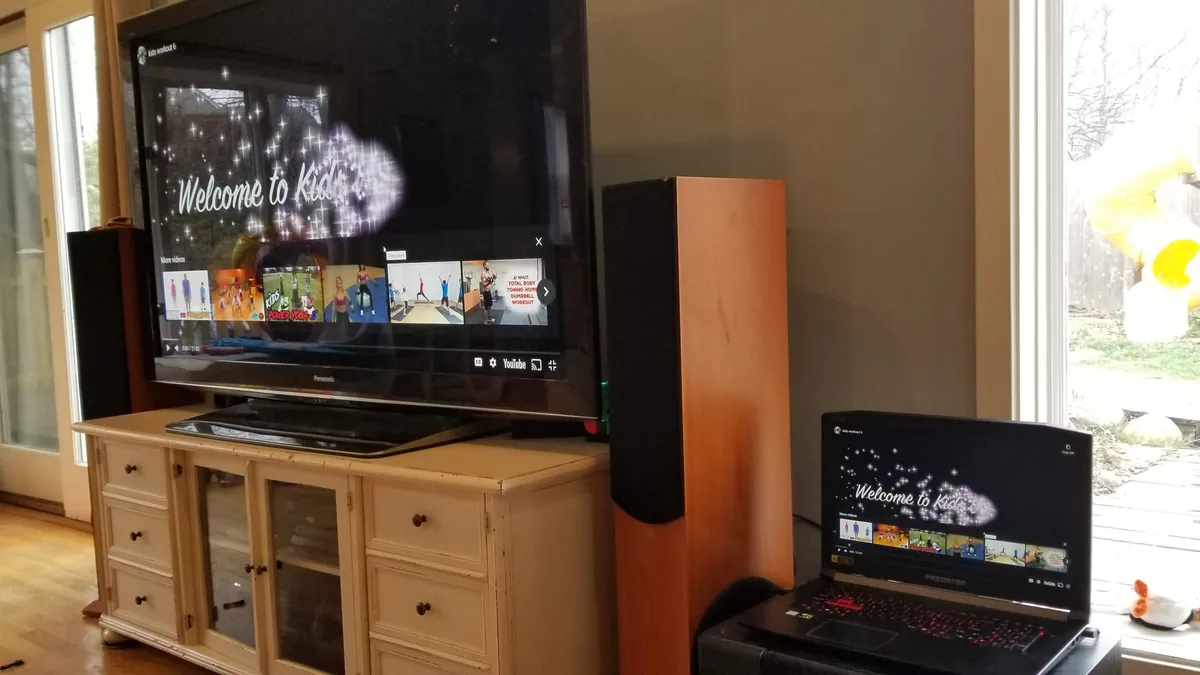
Once the scanning process is finished and the channels are saved, you can start exploring and watching your favorite cable channels on your smart TV. In the next step, we will discuss how to set up your smart TV so that you can have the best viewing experience.
Step 5: Set Up your Smart TV
After scanning for channels on your smart TV, it’s time to set it up for optimal performance and personalized viewing experience. Here are the steps to follow when setting up your smart TV:
- Connect to the internet: If your smart TV has Wi-Fi capabilities, navigate to the network settings and connect it to your home Wi-Fi network. This will enable you to access streaming services, download apps, and enjoy online content.
- Software updates: Check for software updates for your smart TV. Manufacturers often release updates that enhance performance, fix bugs, and provide new features. Follow the instructions provided by your TV to download and install any available updates.
- Adjust picture and sound settings: Access the picture and sound settings on your smart TV and adjust them to your preferences. You can modify the brightness, contrast, color, and audio settings to get the best viewing and listening experience.
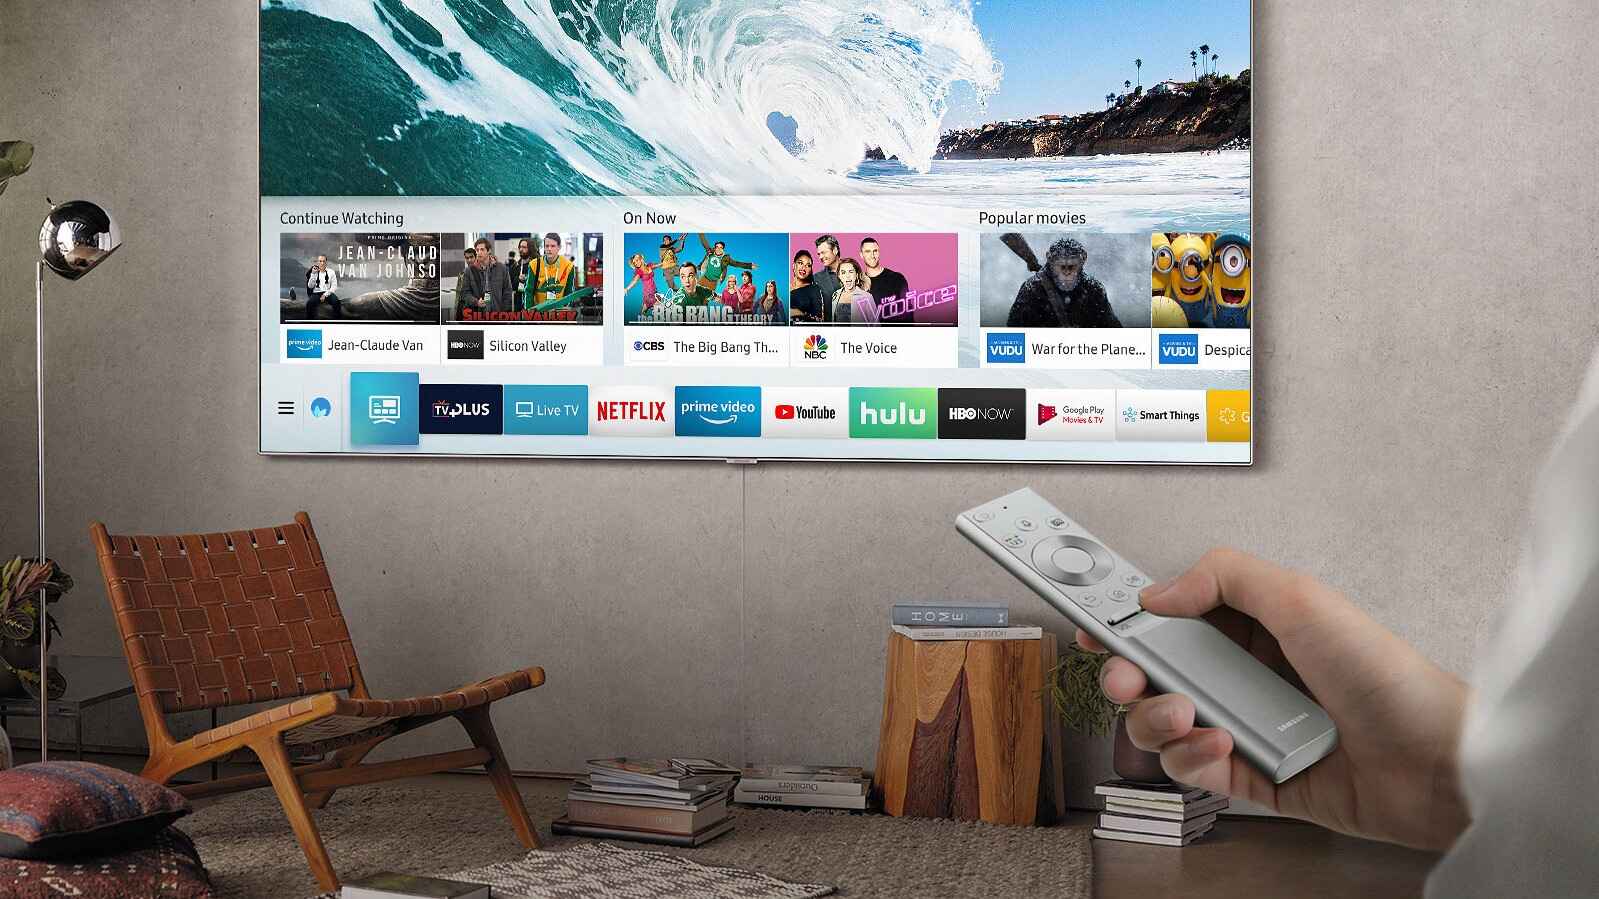
- Personalize your TV: Explore the settings menu to customize the display, audio, and other features according to your preferences. You can set your preferred language, time zone, and choose your favorite apps to appear on the home screen for quick access.
- Install apps: If your smart TV supports app installations, visit the app store or market specific to your TV’s operating system. Download and install the apps of your choice, such as streaming platforms, gaming apps, and more.
- Set parental controls: If you have children or want to limit certain content, set up parental controls to ensure a safe viewing environment. This will allow you to block or restrict access to specific channels or content based on rating.
Setting up your smart TV may require some time and adjustment, but it’s worth investing in a personalized experience that meets your preferences. Once the setup is complete, you’re ready to enjoy all the features and benefits your smart TV has to offer.
Step 6: Troubleshooting Tips
While connecting and setting up your smart TV should be a straightforward process, you might encounter some issues along the way. Here are some common troubleshooting tips to help you overcome potential problems:
- No signal: If you’re not getting a signal or experiencing a weak signal, ensure that all cable connections are secure. Double-check that the cable is properly connected to both the TV and the cable outlet. You may also try using a different cable or connecting to a different cable outlet.
- Incorrect channels: If the scanned channels are not displaying correctly or are in the wrong order, try rescanning for channels. This can refresh the channel list and fix any discrepancies.
- Poor picture or audio quality: If you’re experiencing poor picture or audio quality, check if your TV’s picture or sound settings need adjustment. You can also try unplugging the TV for a few minutes and then plugging it back in to reset the settings.
- Software update issues: If you encounter problems during a software update, ensure you have a stable internet connection. If the update fails or gets interrupted, try retrying the update or contacting the manufacturer’s support for assistance.
- Remote control issues: If the remote control isn’t working properly, check the batteries and ensure that there are no obstructions between the remote and the TV. If necessary, replace the batteries or consider purchasing a universal remote control.
- Streaming issues: If you experience buffering or lagging while streaming, check your internet connection speed. You may need to upgrade your internet plan or move your router closer to the TV for a stronger signal.
If you encounter persistent issues that you are unable to resolve, consult your TV’s manual or contact the manufacturer’s customer support for further assistance. They will be able to provide specific troubleshooting steps based on your TV model and the nature of the problem.
By following these troubleshooting tips, you can overcome common issues and enjoy a smooth and hassle-free experience with your smart TV and cable connection.
Conclusion
Connecting your smart TV to cable allows you to access a wide range of channels and enjoy live TV on a modern and feature-rich device. By following the steps outlined in this guide, you can easily set up your smart TV and establish a seamless connection with your cable provider.
We started by preparing your smart TV and cable connection, ensuring that you have the necessary equipment and subscriptions. Then, we guided you through finding the cable input on your TV and connecting the cable securely. After that, we showed you how to scan for channels and set up your smart TV for optimal performance.
Lastly, we shared troubleshooting tips to help you overcome common issues that may arise during the setup process. Remember, if you encounter persistent issues, referring to your TV’s manual or reaching out to the manufacturer’s customer support can provide further assistance.
Now that your smart TV is connected to cable and set up, it’s time to kick back and enjoy all the television programs, shows, and live events that your cable subscription offers. Whether you’re catching up on the latest news, watching your favorite sports team, or binge-watching your preferred TV series, your smart TV will provide a convenient and immersive viewing experience.
Thank you for following this guide, and we hope it has helped you successfully connect your smart TV to cable. Happy watching!