Introduction
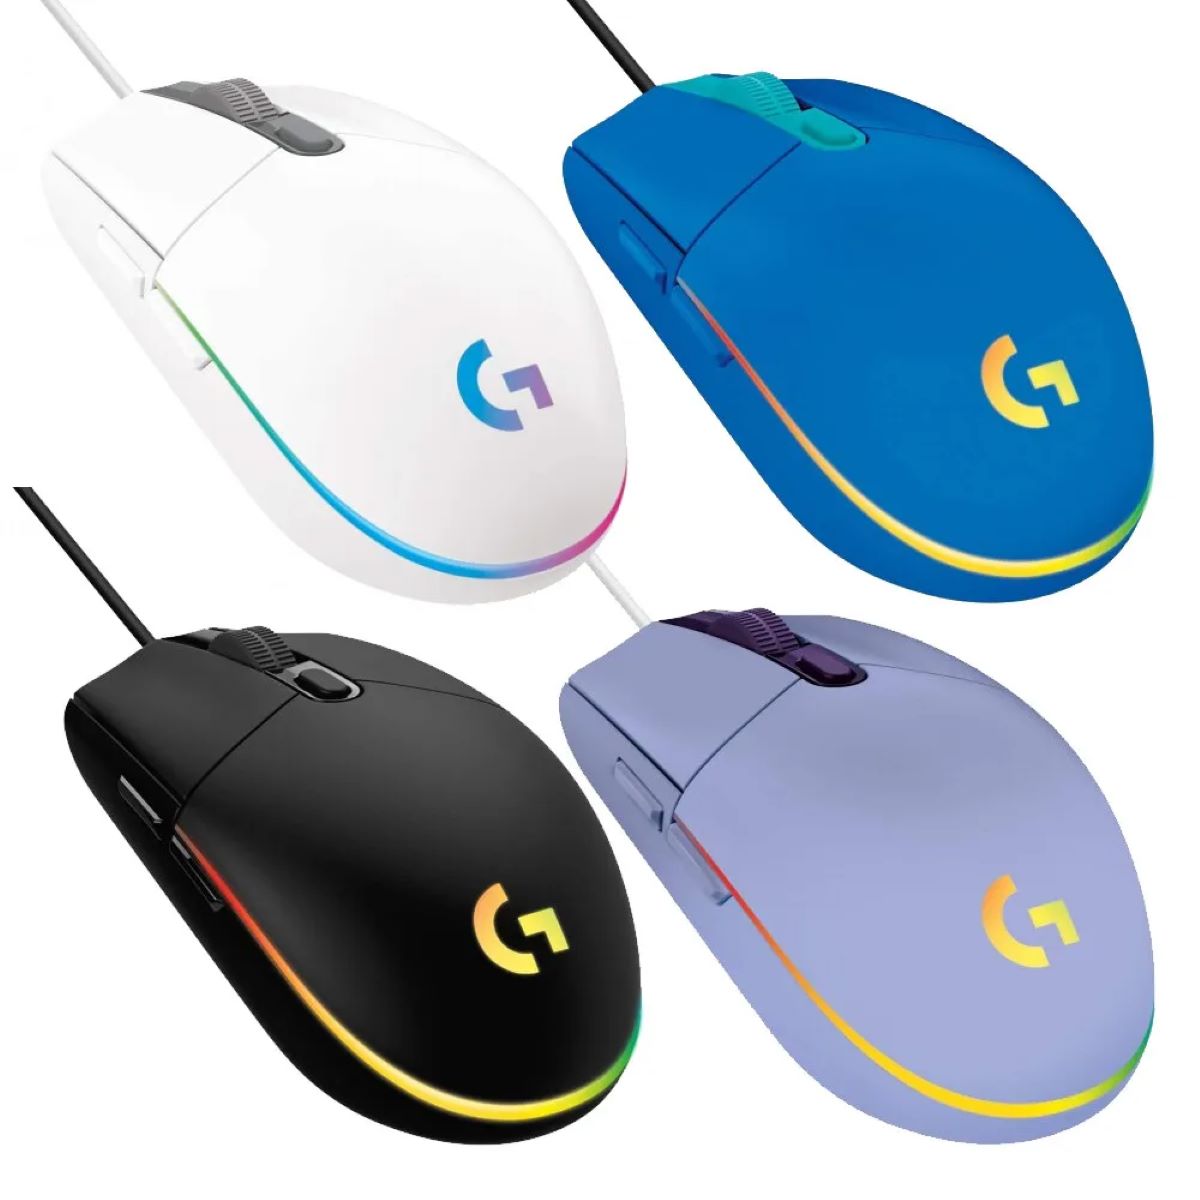
Welcome to the world of Logitech gaming mice! If you recently purchased a Logitech mouse and are wondering how to connect it to your computer using Ghub software, then you’ve come to the right place. Ghub is a powerful software developed by Logitech that allows you to customize and optimize your Logitech gaming peripherals.
Whether you’re a casual gamer or a professional eSports player, having a reliable and well-configured mouse can greatly enhance your gaming experience. With Ghub, you can easily connect your Logitech mouse, access advanced customization options, and take full control of your gaming performance.
In this guide, we will walk you through the step-by-step process of connecting your Logitech mouse to Ghub software. We will also provide tips on customizing your mouse settings and troubleshooting common issues that you may encounter along the way.
Before we dive into the steps, make sure that you have your Logitech mouse ready and that you have a stable internet connection. Additionally, make sure to download the latest version of Ghub software from the official Logitech website to ensure compatibility and access to all the features. Once you’re all set, let’s get started on connecting your Logitech mouse to Ghub!
Step 1: Download and Install Ghub Software
The first step in connecting your Logitech mouse to Ghub is to download and install the Ghub software on your computer. Ghub is compatible with both Windows and macOS operating systems, so make sure to choose the appropriate version for your computer.
To begin, open your preferred web browser and navigate to the Logitech website. Look for the section or page dedicated to the Ghub software. Once you’re on the Ghub software page, you should see a prominent download button. Click on it to start the download of the Ghub installer.
Once the Ghub installer is downloaded, locate the file in your computer’s downloads folder or the designated folder where your downloads are saved. Double-click on the installer file to start the installation process. Follow the on-screen prompts and agree to any terms and conditions presented to you.
During the installation process, Ghub will automatically detect your Logitech mouse, if it is already connected to your computer. If not, don’t worry, as we’ll cover the connection process in the next steps. Once the installation is complete, you should see the Ghub icon on your desktop or in your system tray.
Now that Ghub is installed on your computer, you are one step closer to connecting your Logitech mouse and unlocking its full potential. Proceed to the next step to learn how to connect your mouse to Ghub.
Step 2: Connect Your Logitech Mouse
Now that you have the Ghub software installed on your computer, it’s time to connect your Logitech mouse. Follow these simple steps to establish the connection:
- Ensure that your Logitech mouse is turned on and has working batteries, if applicable. If your mouse is wired, make sure it is connected to your computer via the USB cable.
- If you’re using a Logitech wireless mouse, locate the receiver that came with your mouse. Plug it into an available USB port on your computer. The receiver should automatically be detected by your computer’s operating system.
- For Bluetooth-enabled Logitech mice, make sure your computer has Bluetooth capability. Turn on Bluetooth and put your mouse in pairing mode. Consult your mouse’s user manual for specific instructions on how to enable pairing mode.
- If your Logitech mouse is already connected to your computer but not recognized by Ghub, disconnect and reconnect it. This can help establish the connection between the mouse and the software.
After following these steps, your Logitech mouse should now be successfully connected to your computer. If you’re using a wireless mouse, you can enjoy the freedom of untethered movement, and if you’re using a wired mouse, you can rest assured knowing that your connection is secure and reliable.
With your mouse connected, you’re ready to launch the Ghub software and pair your mouse. Move on to the next step to learn how to do this efficiently and easily.
Step 3: Launch Ghub and Pair Your Mouse
With your Logitech mouse successfully connected to your computer, it’s time to launch the Ghub software and pair your mouse. Follow these steps to complete the pairing process:
- Locate the Ghub icon on your desktop or in your system tray and double-click it to launch the software. If Ghub is not already open, you can also search for it using the search function in your computer’s start menu.
- Once Ghub is launched, you may be prompted to sign in with your Logitech account. If you already have an account, enter your login details. If not, you can create a new account by following the provided instructions.
- After signing in, Ghub will automatically detect your Logitech mouse and display it in the Devices section. Select your mouse from the list of available devices.
- Click on the “Pair” or “Connect” button next to your mouse’s name in the Ghub software. This will initiate the pairing process between your mouse and the software.
- Follow any additional on-screen prompts provided by Ghub to complete the pairing process. These prompts may include firmware updates, customization options, and other settings specific to your Logitech mouse model.
Once the pairing process is complete, you will see your Logitech mouse listed as a connected device in the Ghub software. You can now access a range of customization options, such as adjusting DPI settings, programming buttons, creating macros, and more.
In the next step, we will explore how to customize your Logitech mouse settings using the Ghub software. Continue reading to unleash the full potential of your gaming mouse!
Step 4: Customize Mouse Settings in Ghub
Now that your Logitech mouse is paired with the Ghub software, you have access to a wide range of customization options to optimize your gaming experience. Follow these steps to customize your Logitech mouse settings:
- Open the Ghub software on your computer.
- Select your Logitech mouse from the list of connected devices.
- You will be directed to the main dashboard for your mouse. Here, you can explore various tabs and sections to customize different aspects of your mouse’s functionality.
- Adjust the DPI (dots per inch) settings to modify the sensitivity of your mouse. Higher DPI settings result in faster cursor movement, while lower DPI settings offer more precise control.
- Explore the button customization options to remap buttons according to your preferences. You can assign different functions, macros, or even launch specific programs using the buttons on your mouse.
- Take advantage of the advanced settings, such as surface tuning, to optimize your mouse’s performance on different types of surfaces.
- Experiment with lighting effects and colors to personalize the aesthetics of your Logitech mouse.
- Save your customized settings as profiles. This allows you to switch between different configurations easily, depending on your needs.
These are just a few examples of the customization options available. Throughout the Ghub software, you’ll discover more features and settings specific to your Logitech mouse model.
By customizing your Logitech mouse settings in Ghub, you can create a personalized gaming experience tailored to your preferences and playing style. Take some time to experiment with different settings and find what works best for you.
Now that you’ve customized your Logitech mouse, let’s move on to the next section, where we’ll provide troubleshooting tips to help you resolve any potential issues you may encounter along the way.
Step 5: Troubleshooting Tips
While connecting and customizing your Logitech mouse using the Ghub software is usually a smooth process, you may encounter occasional hiccups or issues. Here are some troubleshooting tips to help you resolve common problems:
- If Ghub fails to detect your Logitech mouse, try disconnecting and reconnecting the mouse. You can also try restarting your computer and relaunching the Ghub software.
- Ensure that you have the latest version of Ghub installed. Check the Logitech website for any available software updates.
- If you’re using a wireless Logitech mouse, make sure the battery is not running low. Try replacing the batteries or charging the mouse if necessary.
- For Bluetooth-enabled Logitech mice, ensure that your computer’s Bluetooth is turned on and your mouse is in pairing mode. You can find instructions on how to enable pairing mode in your mouse’s user manual.
- If your Logitech mouse is not responsive or behaving unexpectedly, try cleaning the sensor and the surface it is used on. Dust and debris can sometimes interfere with the mouse’s performance.
- If you experience frequent disconnections or unstable connection, try moving the wireless receiver closer to your mouse or removing any potential sources of interference, such as other wireless devices or metal objects.
- If you encounter specific issues with button mapping, lighting effects, or other customization features, refer to the Ghub software’s user guide or online resources for troubleshooting guidance.
If you have tried these troubleshooting tips and are still experiencing issues with your Logitech mouse and Ghub software, it may be helpful to reach out to Logitech’s customer support for further assistance.
By following these troubleshooting tips, you can quickly resolve common issues and ensure smooth performance with your Logitech mouse and the Ghub software.
Congratulations! You have successfully connected, customized, and troubleshooted your Logitech mouse using the Ghub software. Enjoy your enhanced gaming experience!
Conclusion
Connecting your Logitech mouse to the Ghub software opens up a world of customization and optimization possibilities. By following the step-by-step process outlined in this guide, you have learned how to download and install Ghub, connect your Logitech mouse, pair it with Ghub, customize mouse settings, and troubleshoot any issues that may arise along the way.
Ghub provides you with the power to tailor your Logitech mouse to your specific gaming needs, ensuring optimal performance and comfort. From adjusting sensitivity and button mapping to creating unique lighting effects, you have the tools to personalize your gaming experience.
Remember to check for software updates regularly to take advantage of new features and improvements. Logitech continues to enhance Ghub to provide the best possible experience for their users.
If you encounter any difficulties or have further questions, don’t hesitate to consult Logitech’s support resources or reach out to their customer service team for assistance. They are there to help you get the most out of your Logitech gaming mouse and Ghub software.
Now that you are familiar with the process, take the time to explore and experiment with the customization options in Ghub. Find the settings that work best for you and elevate your gaming performance to new heights.
Thank you for choosing Logitech and Ghub for your gaming needs. Enjoy your personalized gaming experience with your Logitech mouse and Ghub software!


