Introduction
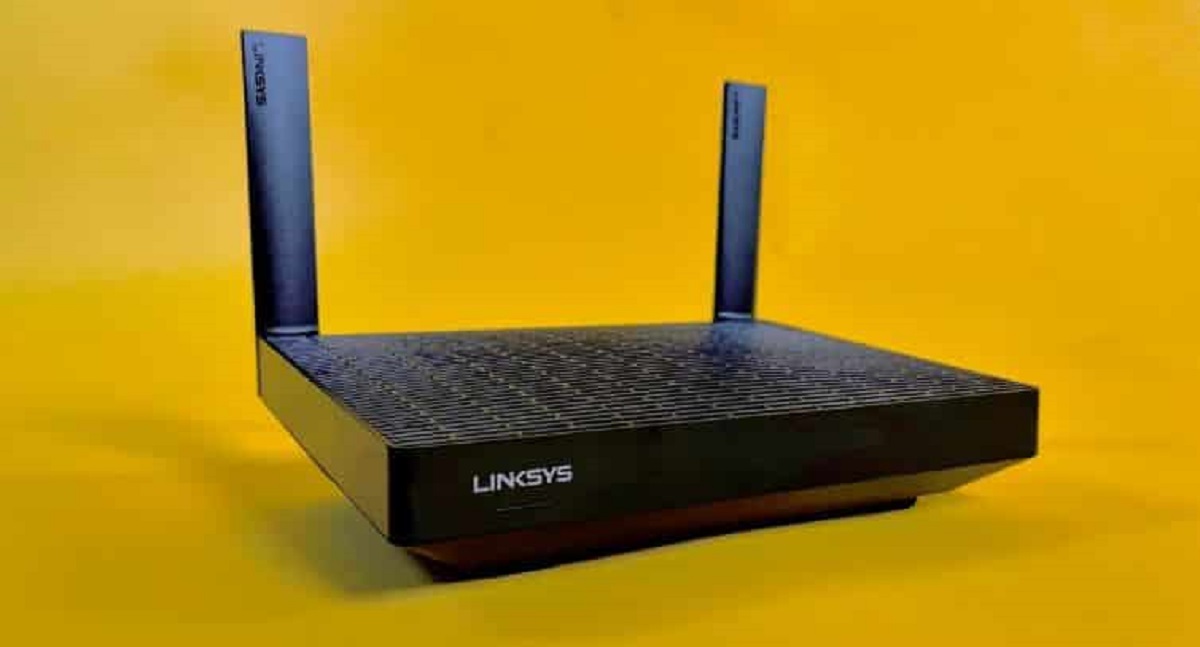
Welcome to the comprehensive guide on how to connect your Linksys Wifi Extender! If you have been experiencing weak or dead spots in your home’s wifi coverage, adding a wifi extender can be a great solution to extend the range of your existing wifi network. The Linksys Wifi Extender is a reliable and user-friendly device that can help boost your wifi signal and provide a stronger connection throughout your home or office.
In this guide, we will walk you through the step-by-step process of setting up and connecting your Linksys Wifi Extender. Whether you are a beginner or have some technical knowledge, this guide is designed to be easy to follow and will ensure you can get your wifi extender up and running in no time.
Before we dive into the setup process, it’s important to understand how a wifi extender works. Essentially, a wifi extender, also known as a wifi booster or wifi repeater, captures the existing wifi signal from your router and retransmits it, amplifying the signal and extending its range. This allows you to have a stronger and more reliable wifi connection in areas where the signal is typically weak or nonexistent.
The Linksys Wifi Extender is a popular choice among users due to its reliability, performance, and user-friendly interface. With its easy setup process and intuitive web-based interface, connecting your Linksys Wifi Extender is a straightforward task that can be completed within a few minutes.
In the following sections, we will cover each step in detail, including unpacking the wifi extender, connecting it to a power outlet, accessing the setup page, configuring the settings, connecting it to your existing wifi network, and optimizing its placement for maximum coverage. So, without further ado, let’s get started with setting up your Linksys Wifi Extender!
Step 1: Unpacking the Linksys Wifi Extender
Before you can start setting up your Linksys Wifi Extender, you need to unpack it and ensure that you have all the necessary components. Let’s walk through this first step:
- Locate the package: Start by finding the box containing the Linksys Wifi Extender. It should have the Linksys logo and product information clearly displayed on the packaging.
- Open the box: Carefully remove the tape or seals from the box and open it to reveal the contents.
- Check the contents: Take a moment to ensure that you have all the components required for the setup. The Linksys Wifi Extender package typically includes the wifi extender unit, a power adapter, an Ethernet cable (if needed), and any additional documentation or user guides provided by Linksys.
- Inspect for damage: Check the wifi extender unit and other components for any signs of damage or defects. If you notice any issues, contact Linksys support for assistance.
It’s important to note that some wifi extender models may have additional components or accessories specific to that particular model. Refer to the user guide or documentation provided with your Linksys Wifi Extender for more details on the specific contents of your package.
Once you have unpacked the Linksys Wifi Extender and verified that all the components are present and in good condition, you are ready to proceed to the next step: connecting the wifi extender to a power outlet.
Step 2: Connecting the Linksys Wifi Extender to a Power Outlet
Now that you have unpacked the Linksys Wifi Extender, it’s time to connect it to a power outlet. Follow these steps:
- Find a suitable location: Choose a location for your wifi extender that is near your existing wifi router and within range of the areas where you want to improve the wifi signal. This will ensure that the wifi extender can effectively capture and amplify the wifi signal.
- Plug it in: Take the power adapter provided with your Linksys Wifi Extender and connect it to the power input port on the unit. Then, plug the other end of the power adapter into a nearby power outlet. Make sure the power outlet is functioning properly.
- Turn it on: Once the wifi extender is plugged in, locate the power button or switch on the unit and turn it on. You may see indicator lights on the unit showing that it is receiving power.
- Wait for initialization: Give the wifi extender a few moments to boot up and initialize. During this time, the indicator lights may flash or change colors. Once the initialization is complete, the indicator lights should stabilize.
It’s important to note that some wifi extender models may have a different power setup or additional features. Refer to the user guide or documentation provided with your Linksys Wifi Extender for specific instructions related to your model.
Now that you have successfully connected the Linksys Wifi Extender to a power outlet, you can move on to the next step: connecting the wifi extender to a computer or mobile device.
Step 3: Connecting the Linksys Wifi Extender to a Computer or Mobile Device
After connecting the Linksys Wifi Extender to a power outlet, the next step is to establish a connection between the wifi extender and your computer or mobile device. Here’s how you can do it:
- Locate the wifi network: On your computer or mobile device, navigate to the list of available wifi networks. Look for a network name that starts with “Linksys Extender” or a similar identifier.
- Connect to the wifi extender network: Select the wifi extender network from the list of available networks. You may be prompted to enter a password or passphrase. If so, refer to the documentation that came with your wifi extender or look for a sticker on the unit itself for the default password.
- Wait for the connection: Once you have entered the password and connected to the wifi extender network, wait for a moment as your computer or mobile device establishes a connection with the wifi extender.
It’s worth noting that the connection process may vary slightly depending on your operating system and device. If you encounter any difficulties during this step, refer to the user guide or documentation provided by Linksys for troubleshooting tips specific to your device.
Once you have successfully connected your computer or mobile device to the wifi extender, you are ready to move on to the next step: accessing the setup page of the Linksys Wifi Extender.
Step 4: Accessing the Linksys Wifi Extender’s Setup Page
Now that you have successfully connected your computer or mobile device to the Linksys Wifi Extender, it’s time to access the setup page. This page allows you to configure the settings and customize the wifi extender according to your preferences. Here’s how you can access the setup page:
- Launch a web browser: Open your preferred web browser on your computer or mobile device. It could be Google Chrome, Mozilla Firefox, Safari, or any other browser that you commonly use.
- Enter the setup page address: In the address bar of your web browser, type in the default IP address of the Linksys Wifi Extender. This can typically be found in the user guide or documentation that came with your wifi extender. The most common default IP address for Linksys devices is “192.168.1.1”.
- Press Enter: After entering the IP address, press the Enter key on your keyboard or click the Go button in the browser. This action will initiate the connection to the setup page.
- Enter login credentials: On the setup page, you will be prompted to enter your login credentials. The default username and password can be found in the user guide or on a sticker located on the wifi extender unit. Enter the credentials to gain access to the setup page.
- Explore the setup page: Once logged in, you will have access to the setup page of the Linksys Wifi Extender. Here, you can configure various settings, such as wireless network name (SSID), password, security settings, and more. Take your time to explore the different options and customize the wifi extender according to your needs.
It’s important to note that changing the default login credentials is recommended to ensure the security of your wifi extender. Refer to the user guide or documentation for instructions on how to change the username and password for your specific model.
Congratulations! You have successfully accessed the setup page of the Linksys Wifi Extender. In the next step, we will guide you through the process of configuring the wifi extender settings to connect it to your existing wifi network.
Step 5: Configuring the Linksys Wifi Extender Settings
With access to the setup page of the Linksys Wifi Extender, you can now configure the settings to connect it to your existing wifi network. Follow these steps to complete the configuration:
- Locate the setup wizard: On the setup page, look for a Setup Wizard or similar option. This wizard will guide you through the process of configuring the wifi extender settings.
- Start the setup wizard: Click on the Setup Wizard or Start button to begin the configuration process. The wizard will prompt you to provide necessary information about your existing wifi network.
- Select the network: Choose your existing wifi network from the list of available networks. This will be the wifi network that you want to extend using the Linksys Wifi Extender.
- Enter network credentials: Enter the password or passphrase for your existing wifi network when prompted. This ensures that the wifi extender can connect to your network securely.
- Review and save settings: Once you have entered the necessary information, review the configuration settings displayed on the setup page. If everything looks correct, click the Save or Apply button to save the settings and continue.
During the configuration process, you may also have the option to customize other settings, such as the wifi network’s SSID (name), channel, and security settings. Feel free to explore these options and make changes as desired, although the default settings are usually suitable for most users.
After saving the settings, the Linksys Wifi Extender will apply the changes and establish a connection to your existing wifi network. This process may take a few moments, so be patient and avoid any interruptions during this time.
Congratulations! You have successfully configured the Linksys Wifi Extender settings to connect it to your existing wifi network. In the next step, we will guide you on how to verify the connection and ensure that your wifi extender is working correctly.
Step 6: Connecting the Linksys Wifi Extender to Your Existing Wifi Network
Now that you have configured the Linksys Wifi Extender settings, it’s time to connect it to your existing wifi network. By doing so, the wifi extender will amplify your network’s signal and extend its coverage. Follow these steps to connect the wifi extender to your existing wifi network:
- Open the wifi settings: On your computer or mobile device, navigate to the wifi settings menu.
- Locate the wifi extender network: In the list of available wifi networks, look for the network name of your Linksys Wifi Extender. This network name typically starts with “Linksys Extender” or a similar identifier.
- Connect to the wifi extender network: Select the wifi extender network from the list and connect to it. You may be prompted to enter a password or passphrase. Use the same password that you configured in the previous steps.
- Wait for the connection: After entering the password, wait for your computer or mobile device to establish a connection with the Linksys Wifi Extender. This process may take a moment.
Once the connection is established, your computer or mobile device will be connected to the Linksys Wifi Extender, which, in turn, is connected to your existing wifi network. This means that you can now enjoy a stronger and extended wifi signal throughout your home or office.
It’s worth noting that the wifi extender network may have the same SSID (network name) as your existing wifi network. This allows your devices to seamlessly switch between the router and the extender as you move around your home.
With the Linksys Wifi Extender successfully connected to your existing wifi network, you are now ready to verify the connection and ensure that your wifi extender is working correctly.
Step 7: Verifying the Linksys Wifi Extender Connection
After connecting the Linksys Wifi Extender to your existing wifi network, it’s important to verify that the connection is working properly. Follow these steps to ensure that your wifi extender is functioning as intended:
- Move to an area with weak wifi signal: Identify an area in your home or office where the wifi signal is typically weak or nonexistent.
- Check the wifi signal strength: On your computer or mobile device, check the wifi signal strength in the area. You should notice a significant improvement in the strength and stability of the wifi signal.
- Test internet connectivity: Open a web browser and visit a website to test the internet connectivity. The webpage should load quickly and smoothly, indicating that your Linksys Wifi Extender is successfully transmitting the wifi signal and providing internet access.
- Move around the coverage area: Walk around your home or office and test the wifi connectivity in different areas. The wifi signal should remain strong and stable, allowing you to use the internet and connect to devices without any interruptions.
If you notice any issues with the connection or experience weak wifi signal in certain areas, consider adjusting the placement of your Linksys Wifi Extender. You can try moving it to a different location, closer to areas with weak signal, to achieve better coverage.
It’s worth mentioning that factors such as walls, furniture, and other obstructions can affect the wifi signal’s range and strength. Experimenting with the placement of your wifi extender can help optimize the coverage and overall performance.
By following these steps and verifying the Linksys Wifi Extender connection, you can ensure that your devices have a strong and reliable wifi signal throughout your home or office.
Step 8: Placing the Linksys Wifi Extender for Optimal Coverage
The placement of your Linksys Wifi Extender plays a crucial role in ensuring optimal coverage and performance. By strategically positioning the wifi extender, you can maximize its signal range and eliminate any potential dead spots in your home or office. Follow these guidelines to place the wifi extender for optimal coverage:
- Analyze your existing wifi coverage: Take note of areas in your home or office where the wifi signal is weak or nonexistent. These are the areas where you will focus on improving the coverage.
- Position the wifi extender within range: Place the Linksys Wifi Extender within range of both your existing wifi router and the areas with weak signal. Ideally, the extender should be placed halfway between the router and the areas where you need to enhance the wifi signal.
- Minimize obstructions: Ensure that there are no physical obstructions, such as walls, large furniture, or appliances, between the wifi extender and your devices. These obstacles can weaken and block the wifi signal.
- Avoid interference: Keep the wifi extender away from devices that may cause interference, such as cordless phones, microwave ovens, baby monitors, and Bluetooth devices. These can interfere with the wifi signal and degrade the performance.
- Consider the antenna orientation: If your Linksys Wifi Extender has adjustable antennas, try positioning them vertically or at a 45-degree angle to maximize the wifi signal coverage. Experiment with different antenna positions for the best results.
- Test the signal strength: Walk around your home or office and test the wifi signal strength using your devices. If you still experience weak signal in certain areas, adjust the placement of the wifi extender accordingly to improve coverage.
Keep in mind that the wifi signal’s strength and range can vary depending on various factors, including the construction of your building, distance from the router, and interference from other devices. Regularly monitoring and adjusting the placement of your wifi extender can help maintain optimal coverage over time.
By following these guidelines and placing your Linksys Wifi Extender in the optimal position, you can ensure that all areas of your home or office have a strong and reliable wifi signal, allowing you to enjoy seamless internet connectivity.
Conclusion
Congratulations! You have successfully set up and connected your Linksys Wifi Extender, expanding the coverage of your existing wifi network. By following the step-by-step guide, you have learned how to unpack the wifi extender, connect it to a power outlet, establish a connection to your computer or mobile device, access the setup page, configure the settings, connect the extender to your existing wifi network, verify the connection, and optimize the placement for optimal coverage.
With the Linksys Wifi Extender in place, you can now enjoy a stronger and more reliable wifi signal throughout your home or office. Say goodbye to dead spots and weak signal areas as you experience seamless internet connectivity on all your devices.
Remember to regularly monitor the performance of your wifi extender and adjust its placement if needed. Factors such as physical obstructions, interference from other devices, and changes in your home’s layout may affect the wifi signal’s strength and range. By keeping these considerations in mind, you can ensure that your wifi extender continues to provide optimal coverage and performance.
If you encounter any issues or have further questions regarding your Linksys Wifi Extender, refer to the user guide or documentation provided by Linksys. They can provide additional troubleshooting tips and assistance specific to your model.
Thank you for choosing Linksys and taking the time to set up your wifi extender. We hope that this guide has been helpful and that you now enjoy an enhanced wifi experience. Happy browsing!


