Introduction
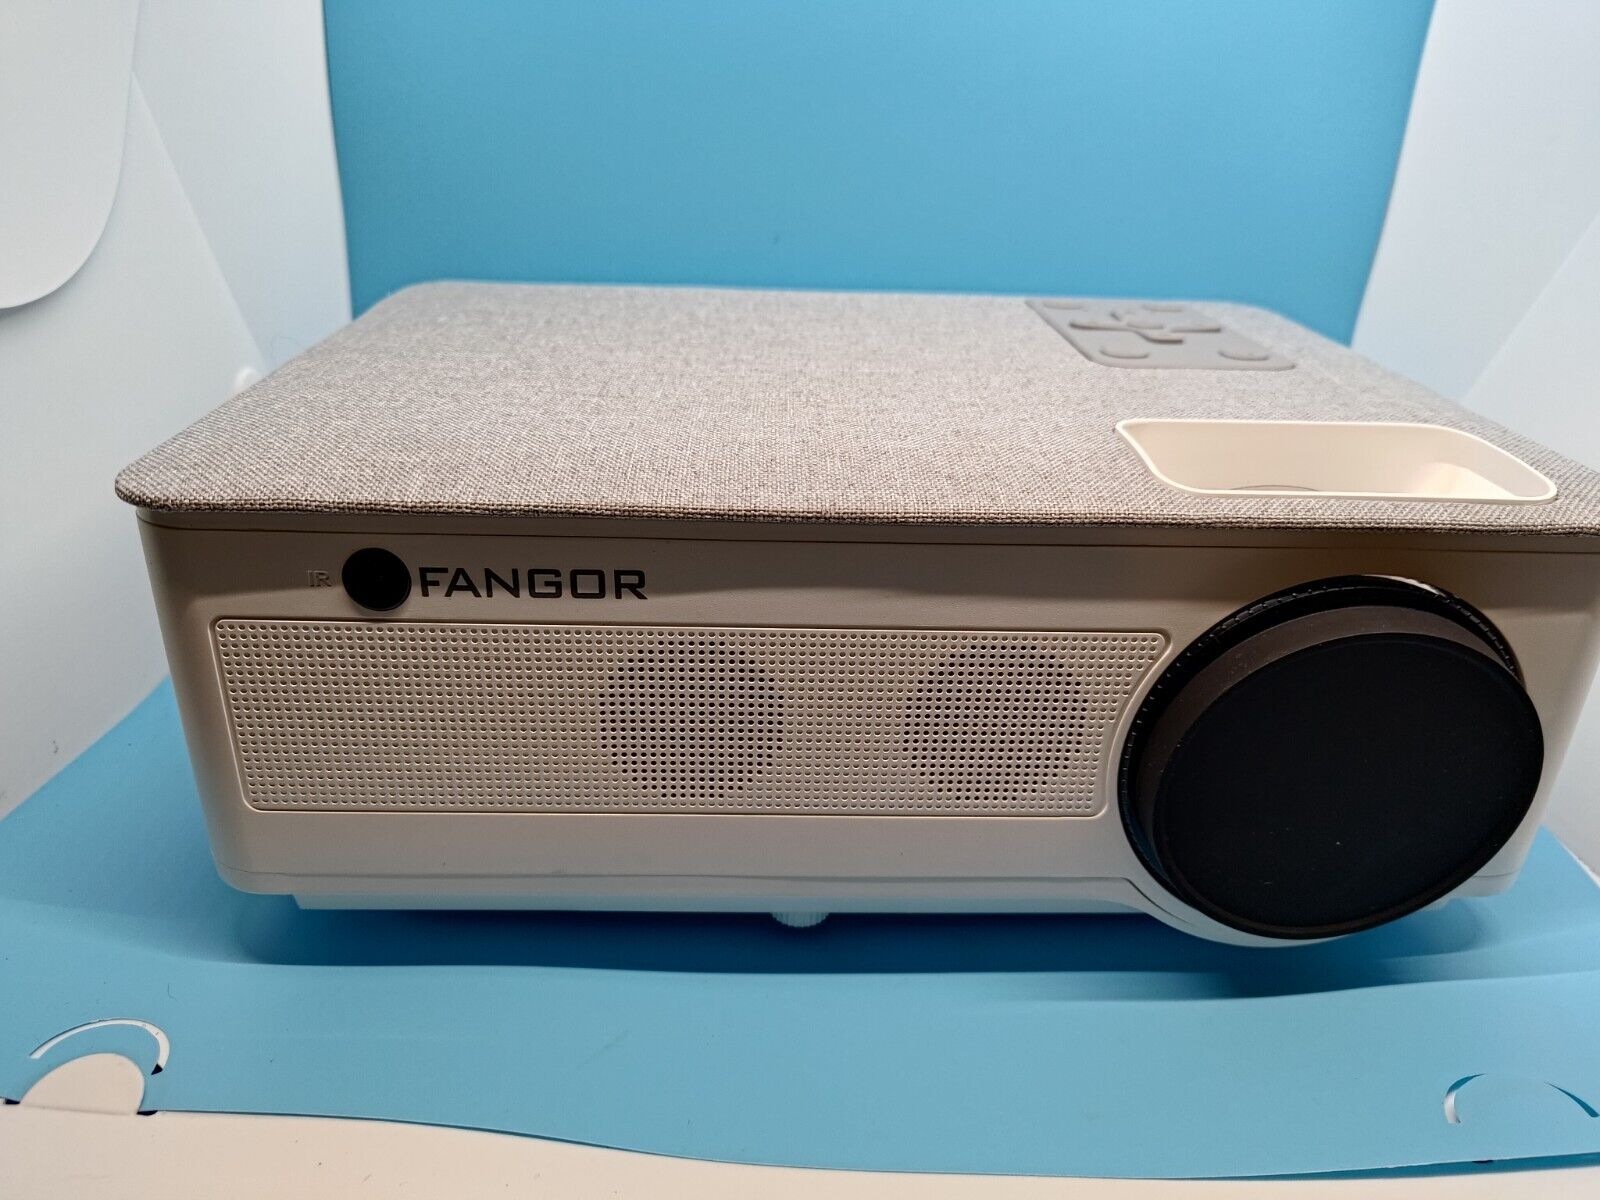
Connecting an iPhone to a Fangor projector can open up a whole new world of entertainment and convenience. Whether you want to watch your favorite movies, showcase a presentation, or play games on a bigger screen, the possibilities are endless. However, figuring out the correct way to connect your iPhone to the projector can be a bit overwhelming, especially if you’re not tech-savvy.
In this article, we will guide you through the step-by-step process of connecting your iPhone to a Fangor projector. You’ll learn various methods, from using an HDMI cable to utilizing the Lightning Digital AV adapter or even connecting wirelessly via Wi-Fi. No matter which method you prefer, we’ve got you covered.
But before we jump into the specific steps, it’s important to note that compatibility plays a crucial role in successfully connecting your iPhone to a Fangor projector. Ensure that both your iPhone and the projector support the same connectivity options. This typically includes HDMI or Lightning connectivity.
Now, let’s dive into the different methods for connecting your iPhone to a Fangor projector and unleash the full potential of your device!
Step 1: Check for Compatibility
Before attempting to connect your iPhone to a Fangor projector, it’s essential to ensure that both devices are compatible. This step will save you from frustration and help you choose the most suitable connection method. Here’s what you need to consider:
- iPhone Compatibility: Make sure that your iPhone model supports video output. Some older models may not have this capability. To check, go to the Apple website or consult your iPhone’s user manual for a list of supported models.
- Projector Compatibility: Check the specifications of your Fangor projector to verify its compatibility with the iPhone. Look for HDMI or Lightning connectivity options, as these are the most common ways to connect an iPhone to a projector.
- Cable or Adapter Compatibility: Depending on the connection method you choose, ensure that you have the necessary cables or adapters. For HDMI connectivity, you’ll need an HDMI cable. For Lightning connectivity, you’ll need a Lightning Digital AV adapter. Make sure these accessories are compatible with your iPhone model.
Once you have verified the compatibility of your iPhone and Fangor projector, you can proceed to the next steps. Remember, checking for compatibility is crucial to avoid any frustration or wasted time trying to connect incompatible devices. Once you have everything set, you are ready to connect your iPhone to the Fangor projector and enjoy a larger, more immersive screen experience.
Step 2: Connect iPhone to Fangor Projector using HDMI Cable
If your iPhone and Fangor projector both have HDMI ports, connecting them using an HDMI cable is a straightforward and reliable method. Follow these steps to establish the connection:
- Locate the HDMI port on your Fangor projector. It is typically labeled “HDMI.”
- Get an HDMI cable that is compatible with both your iPhone and the projector. Note that some iPhones require an additional adapter, such as a Lightning to HDMI adapter, to connect to an HDMI cable.
- Plug one end of the HDMI cable into the HDMI port on the projector.
- If necessary, attach the adapter to your iPhone and connect the other end of the HDMI cable to the adapter.
- Turn on your Fangor projector and select the HDMI input source.
- On your iPhone, go to the “Settings” app and tap on “Display & Brightness.”
- Under the “Display Zoom” section, select “Standard.”
- Your iPhone screen should now be mirrored on the Fangor projector. You can navigate through your iPhone’s interface, access apps, play videos, or give presentations on the big screen.
Remember that the HDMI cable provides both audio and video transmission, so you’ll be able to enjoy high-quality sound along with the visual content.
Connecting your iPhone to a Fangor projector using an HDMI cable is a dependable and convenient method, especially when you want a hassle-free way to enjoy multimedia content or deliver professional presentations. Just make sure you have the necessary cables and adapters, and you’ll be all set to experience the excitement of a larger screen size.
Step 3: Connect iPhone to Fangor Projector using Lightning Digital AV Adapter
If your Fangor projector doesn’t have an HDMI port but supports VGA or DVI inputs, you can connect your iPhone using a Lightning Digital AV adapter. This adapter allows you to stream video and audio from your iPhone to the projector. Follow these steps to establish the connection:
- Purchase a Lightning Digital AV adapter that is compatible with your iPhone model. Ensure that it has the necessary ports for VGA or DVI connectivity.
- Plug the Lightning connector of the adapter into the charging port of your iPhone.
- Connect the VGA or DVI cable to the corresponding port on the adapter.
- Connect the other end of the VGA or DVI cable to the corresponding input on the Fangor projector.
- Turn on your iPhone and the Fangor projector.
- On your iPhone, go to the “Settings” app and tap on “Display & Brightness.”
- Under the “Display Zoom” section, select “Standard” for optimum display.
- Your iPhone screen should now be mirrored on the Fangor projector. You can navigate through your iPhone’s interface, access apps, watch videos, or display presentations on the larger screen.
Keep in mind that the Lightning Digital AV adapter supports both video and audio transmission, so you will enjoy synchronized audio along with the visual content. This method provides a flexible solution for connecting your iPhone to a Fangor projector that lacks an HDMI port but supports VGA or DVI inputs.
With the Lightning Digital AV adapter, you can easily share your iPhone’s screen with a larger audience, making it ideal for presentations, demonstrations, or even enjoying content like movies and games with friends and family.
Step 4: Connect iPhone to Fangor Projector using Wi-Fi
If you prefer a wireless connection between your iPhone and Fangor projector, you can use Wi-Fi to stream content. This method allows you to mirror your iPhone’s screen without the need for any cables or adapters. Follow these steps to connect your iPhone to the Fangor projector wirelessly:
- Ensure that both your iPhone and the Fangor projector are connected to the same Wi-Fi network.
- On your iPhone, swipe down from the top-right corner of the screen to open the Control Center.
- Tap on the “Screen Mirroring” or “AirPlay” icon, depending on your iPhone’s iOS version.
- A list of available devices will appear. Select your Fangor projector from the list.
- Enter the mirroring code, if prompted, to establish a secure connection between your iPhone and the projector.
- Your iPhone screen will now be mirrored on the Fangor projector. You can navigate through your iPhone’s interface, access apps, play videos, or give presentations on the bigger screen.
It’s important to note that not all Fangor projectors support wireless screen mirroring. Ensure that your projector model is compatible with this feature before attempting to connect via Wi-Fi.
Wireless connectivity offers added convenience, as you can control your iPhone remotely while enjoying the freedom to move around without the constraints of cables. It’s an excellent solution for sharing photos, videos, or even conducting video conferences on a larger display.
Keep in mind that the quality of the wireless connection can impact the smoothness of the mirroring. Factors like distance from the Wi-Fi router and network congestion may affect the performance. Make sure to have a stable Wi-Fi connection for the best experience.
Step 5: Adjust Display Settings on iPhone
Once you have successfully connected your iPhone to the Fangor projector, you may need to make some adjustments to the display settings on your iPhone for optimal viewing. Here are a few settings you can consider:
- Brightness: Adjust the brightness of your iPhone’s screen to ensure clear visibility on the projector. You can do this by going to “Settings,” selecting “Display & Brightness,” and dragging the slider to adjust the brightness level.
- Auto-Lock: To prevent your iPhone from automatically locking and interrupting the display during longer sessions, you can change the auto-lock setting. Go to “Settings,” tap on “Display & Brightness,” select “Auto-Lock,” and choose a longer time duration or select “Never” if necessary.
- Orientation Lock: Depending on how you position your iPhone during the projection, you can consider using the orientation lock feature. This prevents accidental screen rotation while presenting or watching videos. Swipe up from the bottom of the screen to access the Control Center, and tap on the “Orientation Lock” icon.
- Display Zoom: If you want to optimize the display for the projector, you can adjust the display zoom settings on your iPhone. Go to “Settings,” select “Display & Brightness,” and choose between “Standard” or “Zoomed” mode. Standard mode will provide more screen real estate, while Zoomed mode will make elements appear larger.
By making these adjustments, you can ensure that the content displayed on the Fangor projector is clear, vibrant, and well-suited to your preferences and the environment in which you are presenting or enjoying media.
Remember, the specific display settings may vary slightly depending on your iPhone model and iOS version. Feel free to explore the settings options on your iPhone to customize the display according to your preferences and requirements.
With the display settings optimized, you are all set to fully enjoy your iPhone’s content on the larger screen provided by the Fangor projector. Whether you’re presenting, watching movies, playing games, or sharing photos, adjusting the display settings will help enhance the overall viewing experience.
Conclusion
Connecting your iPhone to a Fangor projector opens up a world of possibilities, allowing you to enjoy your favorite content on a larger screen or deliver impressive presentations. In this article, we explored different methods to connect your iPhone to a Fangor projector, including using an HDMI cable, a Lightning Digital AV adapter, or through wireless connectivity.
Before attempting any of the methods, it is crucial to check the compatibility of your iPhone and Fangor projector. Ensure that they support the same connectivity options, such as HDMI, Lightning, VGA, or DVI.
If your projector has an HDMI port, using an HDMI cable is a simple and reliable method. Connect your iPhone and the projector using the cable, adjust the display settings, and enjoy a seamless mirrored experience.
When your projector lacks an HDMI port but supports VGA or DVI inputs, the Lightning Digital AV adapter comes to the rescue. Connect your iPhone to the adapter, then connect the adapter to the projector using the appropriate cable. With this method, you can easily stream audio and video from your iPhone to the projector.
For those who prefer a wireless connection, Wi-Fi mirroring is an excellent option. Connect your iPhone and the Fangor projector to the same Wi-Fi network, enable screen mirroring on your iPhone, and enjoy the convenience of a cable-free connection.
After connecting your iPhone to the Fangor projector, it is essential to adjust the display settings on your iPhone. This ensures optimal viewing comfort and the best visual experience. Consider adjusting the brightness, auto-lock, orientation lock, and display zoom settings as per your preference.
By following these steps, you can connect your iPhone to a Fangor projector and unlock a whole new level of entertainment, productivity, and immersive media experiences. Whether you’re watching movies, sharing photos, playing games, or delivering presentations, the larger screen provided by the projector will enhance your enjoyment and engagement.
Remember to always refer to the user manuals of your iPhone and Fangor projector for specific instructions and troubleshooting tips. With a little bit of setup and preparation, you’ll be ready to showcase your iPhone’s capabilities on the big screen and make the most out of your Fangor projector.


