Introduction
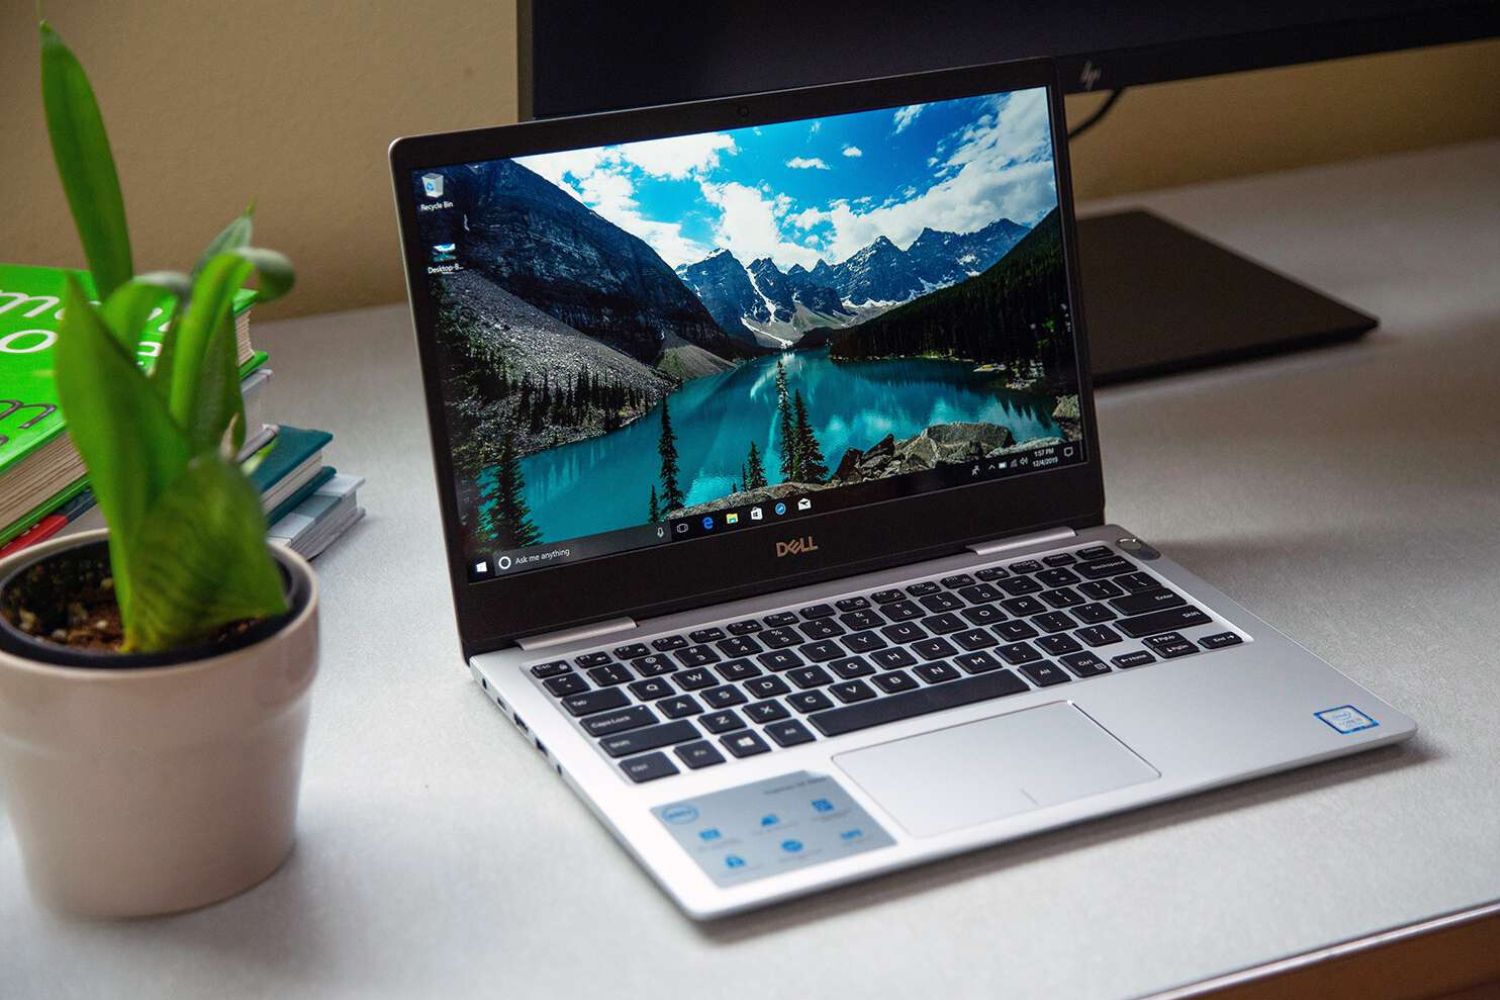
In today’s digital age, staying connected to the internet is essential for most of our daily activities. Whether it’s for work, entertainment, or staying in touch with loved ones, having a stable and reliable Wi-Fi connection is crucial. If you own a Dell computer and are wondering how to connect it to Wi-Fi, you’re in the right place. This article will guide you through the necessary steps to get your Dell computer connected to a Wi-Fi network.
Before we dive into the steps, it’s important to note that most Dell computers come equipped with a built-in Wi-Fi adapter. This adapter allows your computer to wirelessly connect to nearby Wi-Fi networks. However, if your Dell computer does not have a Wi-Fi adapter, you may need to purchase and install one separately to enable wireless connectivity.
Once you’ve ensured that your Dell computer has a Wi-Fi adapter, the next step is to turn on the Wi-Fi feature. Dell computers typically have a dedicated Wi-Fi switch or a combination of keys on the keyboard that allow you to enable or disable the wireless functionality. Turning on Wi-Fi will allow your computer to scan for available Wi-Fi networks in your vicinity.
After enabling Wi-Fi, you can then connect your Dell computer to a specific Wi-Fi network of your choice. This process involves selecting the desired network from the available list and entering the corresponding password, if required. Once connected, you can enjoy uninterrupted access to the internet and all the online activities that come with it.
However, in some cases, you may encounter issues while trying to connect to a Wi-Fi network on your Dell computer. These issues can range from authentication problems to signal interference. In the next section, we will explore some common troubleshooting steps to overcome these obstacles and ensure a successful Wi-Fi connection.
Now that we have the introduction covered, let’s move on to the first step: ensuring your Dell computer has a Wi-Fi adapter.
Step 1: Ensure the Dell computer has a Wi-Fi adapter
Before attempting to connect your Dell computer to a Wi-Fi network, it’s important to confirm whether it has a built-in Wi-Fi adapter. This adapter allows your computer to establish a wireless connection with nearby Wi-Fi networks.
To check if your Dell computer has a Wi-Fi adapter, you can follow these steps:
- Start by clicking on the “Start” button on your computer’s taskbar and then select “Device Manager” from the list of options. Alternatively, you can search for “Device Manager” using the Windows search bar.
- In the Device Manager window, look for the “Network adapters” category and expand it by clicking on the small arrow next to it. This will display a list of network adapters installed on your computer.
- Check if there is a network adapter with a name that includes terms like “Wi-Fi,” “Wireless,” or “802.11.” This indicates the presence of a Wi-Fi adapter on your Dell computer.
If you find a Wi-Fi adapter listed in the Device Manager, congratulations! You can proceed with the next steps to connect to a Wi-Fi network. However, if you don’t see a Wi-Fi adapter listed or are unsure, it’s possible that your Dell computer does not have a built-in Wi-Fi adapter. In such cases, you may need to purchase and install an external Wi-Fi adapter to enable wireless connectivity.
External Wi-Fi adapters come in various forms, such as USB dongles or PCIe cards, and can be easily connected to your Dell computer’s USB or expansion slots. Make sure to choose an adapter that is compatible with your computer’s operating system and offers the desired connection speed.
Once you’ve confirmed the presence of a Wi-Fi adapter on your Dell computer, you’re ready to move on to the next step: turning on Wi-Fi. This step is crucial to enable your computer to scan for and connect to available Wi-Fi networks.
Step 2: Turn on Wi-Fi on the Dell computer
Before you can connect your Dell computer to a Wi-Fi network, it’s important to ensure that the Wi-Fi feature is turned on. Dell computers typically have a dedicated Wi-Fi switch or a combination of keys on the keyboard that allow you to enable or disable the wireless functionality.
Here are the steps to turn on Wi-Fi on your Dell computer:
- Locate the Wi-Fi switch on your Dell computer. The exact location of the switch may vary depending on the model. In some laptops, it may be a physical switch on the side or front of the device, while in others, it may be a button on the keyboard with a Wi-Fi icon.
- If you have found the physical switch, make sure it is set to the “On” position. This will enable the Wi-Fi functionality on your Dell computer.
- If your Dell computer does not have a physical switch, look for a combination of keys on the keyboard that can toggle the Wi-Fi. Typically, this involves pressing the “Fn” key (usually located in the bottom left corner of the keyboard) in combination with one of the function keys (F1-F12) that has a Wi-Fi icon or the text “Wireless.” Pressing this key combination will turn on or off the Wi-Fi on your Dell computer.
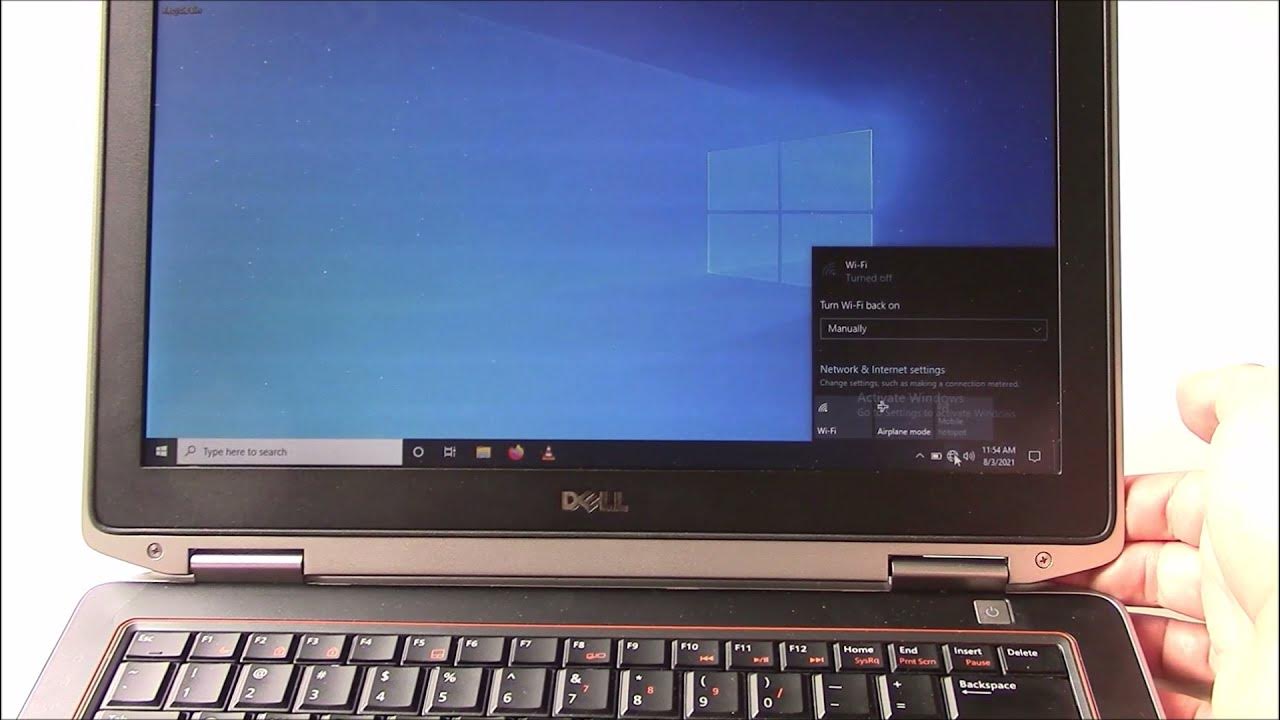
- Once you have turned on the Wi-Fi, you should see a Wi-Fi icon or symbol in the system tray/notification area of your Dell computer. This indicates that the Wi-Fi is now enabled and ready for connection.
By following these simple steps, you have successfully turned on the Wi-Fi feature on your Dell computer. Now, you can proceed to the next step, which involves connecting to a Wi-Fi network.
Note: If you encounter any issues while trying to turn on the Wi-Fi, make sure to check if your Dell computer has any physical switches or function key combinations specific to Wi-Fi. Additionally, you can refer to the user manual or support documentation provided by Dell for your specific model for further assistance.
Step 3: Connect to a Wi-Fi network on the Dell computer
Now that you have confirmed that your Dell computer has a Wi-Fi adapter and turned on the Wi-Fi feature, it’s time to connect to a Wi-Fi network. This step involves selecting the desired network from the list of available networks and entering the corresponding password, if required.
Here’s a step-by-step guide on how to connect to a Wi-Fi network on your Dell computer:
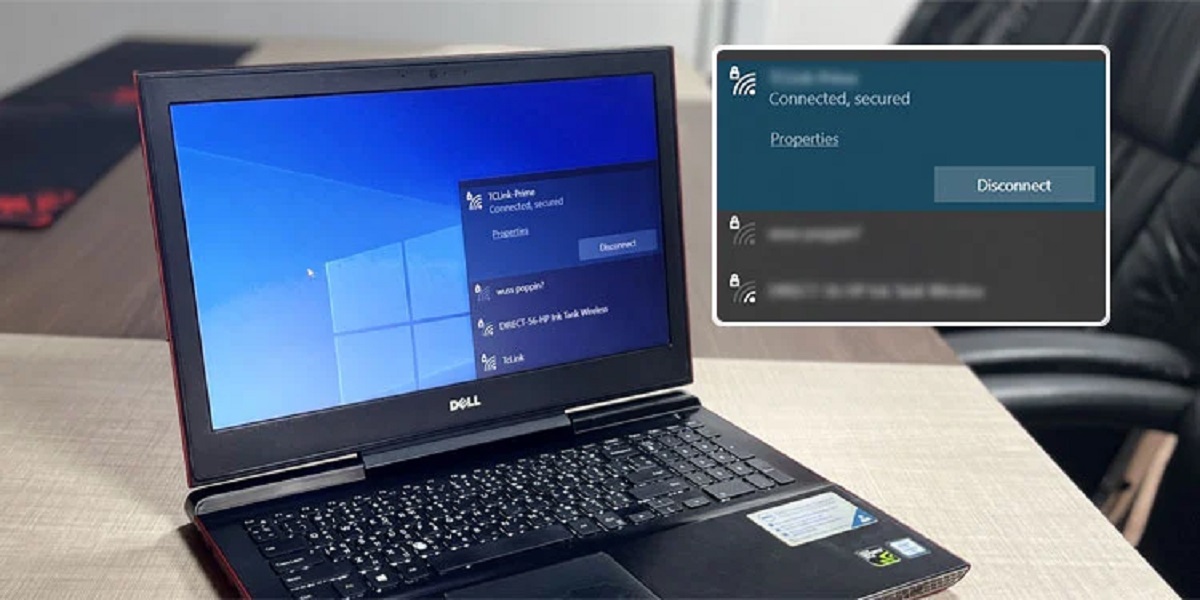
- Click on the Wi-Fi icon in the system tray/notification area of your Dell computer. This will display a list of available Wi-Fi networks in your vicinity.
- Select the Wi-Fi network you want to connect to from the list. If the network is secured, indicated by a lock icon or the text “Secured,” you will be prompted to enter the password to connect. If the network is open or unsecured, you can directly connect without entering a password.
- Enter the password for the selected Wi-Fi network, if prompted. Make sure to enter the password correctly, paying attention to capitalization, special characters, and any spaces. If you’re unsure about the password, you can contact the network owner or refer to the router’s documentation.
- After entering the password, click on the “Connect” button or press the Enter key to initiate the connection process. Your Dell computer will now attempt to establish a connection to the selected Wi-Fi network.
- Once the connection is established, you will see a confirmation message or the Wi-Fi icon in the system tray/notification area will change to indicate a successful connection. You can now enjoy uninterrupted access to the internet on your Dell computer.
Keep in mind that if you have previously connected to a Wi-Fi network and saved its credentials, your Dell computer will automatically reconnect to that network whenever it’s within range. However, if you want to connect to a different network or encounter any connectivity issues, you can follow these steps again to select a new network and enter the password.
Congratulations! You have successfully connected your Dell computer to a Wi-Fi network. Now you can browse the web, stream content, and enjoy all the online activities of your choice. In case you encounter any difficulties while connecting, the next section will provide troubleshooting steps to help you overcome common Wi-Fi connection issues on Dell computers.
Step 4: Troubleshooting common Wi-Fi connection issues on Dell computers
While connecting to a Wi-Fi network on your Dell computer is usually a smooth process, occasionally you may encounter some common issues that can disrupt the connection. Here are a few troubleshooting steps that can help you resolve these Wi-Fi connection issues:
- Check network availability: Ensure that the Wi-Fi network you are trying to connect to is up and running. Sometimes, a network may experience temporary outages or maintenance, which can prevent your Dell computer from establishing a connection.
- Move closer to the router: If you’re experiencing a weak or unstable Wi-Fi signal, try moving closer to the wireless router or access point. Distance and physical obstructions can impact the signal strength and stability, so being in close proximity to the router can improve connectivity.
- Restart the router: Sometimes, issues with the router can cause Wi-Fi connectivity problems. Try restarting the router by turning it off, waiting for a few seconds, and then turning it back on. This can help resolve any temporary glitches or conflicts in the router’s settings.
- Update Wi-Fi drivers: Outdated or incompatible Wi-Fi drivers can also lead to connectivity issues. Visit the Dell Support website and download the latest drivers for your computer model. Install the updated drivers and restart your computer to ensure the new drivers are properly applied.
- Reset network settings: Resetting the network settings on your Dell computer can often resolve connectivity problems. Go to the Control Panel, select “Network and Sharing Center,” and choose “Change adapter settings.” Right-click on the Wi-Fi adapter, select “Disable,” wait for a few seconds, and then right-click again and select “Enable.”
- Use Windows Network Troubleshooter: Windows has a built-in Network Troubleshooter that can help diagnose and fix common network-related issues. Right-click on the network icon in the system tray/notification area, select “Troubleshoot problems,” and follow the on-screen instructions to run the troubleshooter.
If none of the above troubleshooting steps resolve your Wi-Fi connection issues, it’s recommended to contact your internet service provider (ISP) or Dell support for further assistance. They can provide advanced troubleshooting steps or determine if there are any specific hardware or software issues that need to be addressed.
By using the troubleshooting techniques mentioned above, you can overcome common Wi-Fi connection problems on your Dell computer and ensure a stable and reliable internet connection.
Conclusion
Connecting your Dell computer to a Wi-Fi network is essential for accessing the internet and staying connected to the digital world. By following the steps outlined in this guide, you can easily connect your Dell computer to a Wi-Fi network and enjoy seamless internet connectivity.
First, make sure your Dell computer has a Wi-Fi adapter. If not, consider purchasing and installing an external Wi-Fi adapter to enable wireless connectivity.
Next, ensure that the Wi-Fi feature is turned on. Locate the Wi-Fi switch or use the key combination on your Dell computer to enable the wireless functionality.
After turning on Wi-Fi, you can connect to a specific Wi-Fi network by selecting it from the available list and entering the password, if required. Remember to enter the password correctly to establish a successful connection.
If you encounter any issues during the connection process, you can troubleshoot common Wi-Fi connection issues on Dell computers. These troubleshooting steps include checking network availability, moving closer to the router, restarting the router, updating Wi-Fi drivers, resetting network settings, and using the Windows Network Troubleshooter.
If all else fails, don’t hesitate to seek assistance from your internet service provider (ISP) or Dell support for further help and guidance.
By successfully connecting your Dell computer to a Wi-Fi network, you can enjoy the benefits of seamless internet browsing, online communication, and access to a wide range of online services and applications.
Stay connected, stay productive, and enjoy all that the online world has to offer with your Dell computer and a reliable Wi-Fi connection!