Introduction
Welcome to the world of Dell Ultrabooks! These sleek and powerful devices are designed to provide an exceptional computing experience, whether you’re at home, in the office, or on the go. One key feature of these Ultrabooks is their ability to connect to the internet using WiFi. In this guide, we will walk you through the process of turning on the WiFi on your Dell Ultrabook and troubleshooting any potential issues that may arise.
Having a reliable WiFi connection is crucial in today’s digital age. Whether you need to browse the web, stream videos, or stay connected with friends and colleagues, a strong and stable WiFi connection is essential. That’s why it’s important to know how to check the WiFi status, turn it on, and troubleshoot any potential issues on your Dell Ultrabook.
Before we dive into the details, it’s worth mentioning that the steps described here may vary slightly depending on the model and operating system of your Dell Ultrabook. However, the general principles and processes remain the same. Let’s get started!
Checking WiFi status on Dell Ultrabook
Before you can take any action regarding your WiFi connection, it’s important to first check the WiFi status on your Dell Ultrabook. This will help you determine whether the WiFi is currently turned on or off.
To check the WiFi status, follow these steps:
- Look for the WiFi icon in the system tray, located at the bottom-right corner of the screen. The icon typically looks like a series of curved lines or a wireless signal symbol.
- Hover your mouse over the WiFi icon to display a brief summary of the current WiFi status. It may indicate whether the WiFi is connected, disconnected, or disabled.
- If you don’t see the WiFi icon in the system tray, it’s possible that the icon is hidden. Click on the upward arrow icon (^) to expand the system tray and reveal hidden icons, including the WiFi icon.
- If you still cannot locate the WiFi icon, you can also check the WiFi status through the Windows Settings menu. Click on the Start button, then select the gear-shaped Settings icon to open the Settings menu.
- In the Settings menu, select “Network & Internet.” This will open the Network & Internet settings page.
- On the left-hand side of the Network & Internet settings page, click on “Wi-Fi.” The right-hand side of the page will display the WiFi status and other related options.
By following these steps, you will be able to verify the current WiFi status on your Dell Ultrabook. If the WiFi is already turned on, you can proceed with using the internet. If the WiFi is turned off or disabled, continue reading to learn how to turn it on.
Turning on the WiFi
If you’ve determined that the WiFi on your Dell Ultrabook is currently turned off or disabled, fret not! It’s a simple process to turn it back on and start enjoying a seamless internet connection.
To turn on the WiFi, follow these steps:
- Locate the WiFi icon in the system tray of your Dell Ultrabook. It should be in the bottom-right corner of the screen.
- Right-click on the WiFi icon to open a context menu.
- In the context menu, select “Turn on” or “Enable” to activate the WiFi functionality.
- Once you’ve selected the option to turn on the WiFi, the icon should change to indicate that the WiFi is now enabled.
Alternatively, if you prefer using the Windows Settings menu to turn on the WiFi, follow these steps:
- Click on the Start button, then select the gear-shaped Settings icon to open the Settings menu.
- In the Settings menu, select “Network & Internet.” This will open the Network & Internet settings page.
- On the left-hand side of the Network & Internet settings page, click on “Wi-Fi.” The right-hand side of the page will display the WiFi status and other related options.
- Toggle the switch labeled “Wi-Fi” from the “Off” position to the “On” position.
After completing these steps, the WiFi on your Dell Ultrabook should now be turned on and ready to connect to available networks. You can now proceed to connect to a WiFi network of your choice or troubleshoot any further issues that you may encounter.
Troubleshooting WiFi issues
While turning on the WiFi on your Dell Ultrabook is generally a straightforward process, you may still encounter some issues that prevent you from connecting to the internet. Don’t worry – we’ve got you covered with some troubleshooting tips to help you resolve common WiFi problems.
Here are some steps you can take to troubleshoot WiFi issues on your Dell Ultrabook:
- Restart your Dell Ultrabook. Sometimes, a simple restart can fix temporary glitches and restore the WiFi connection.
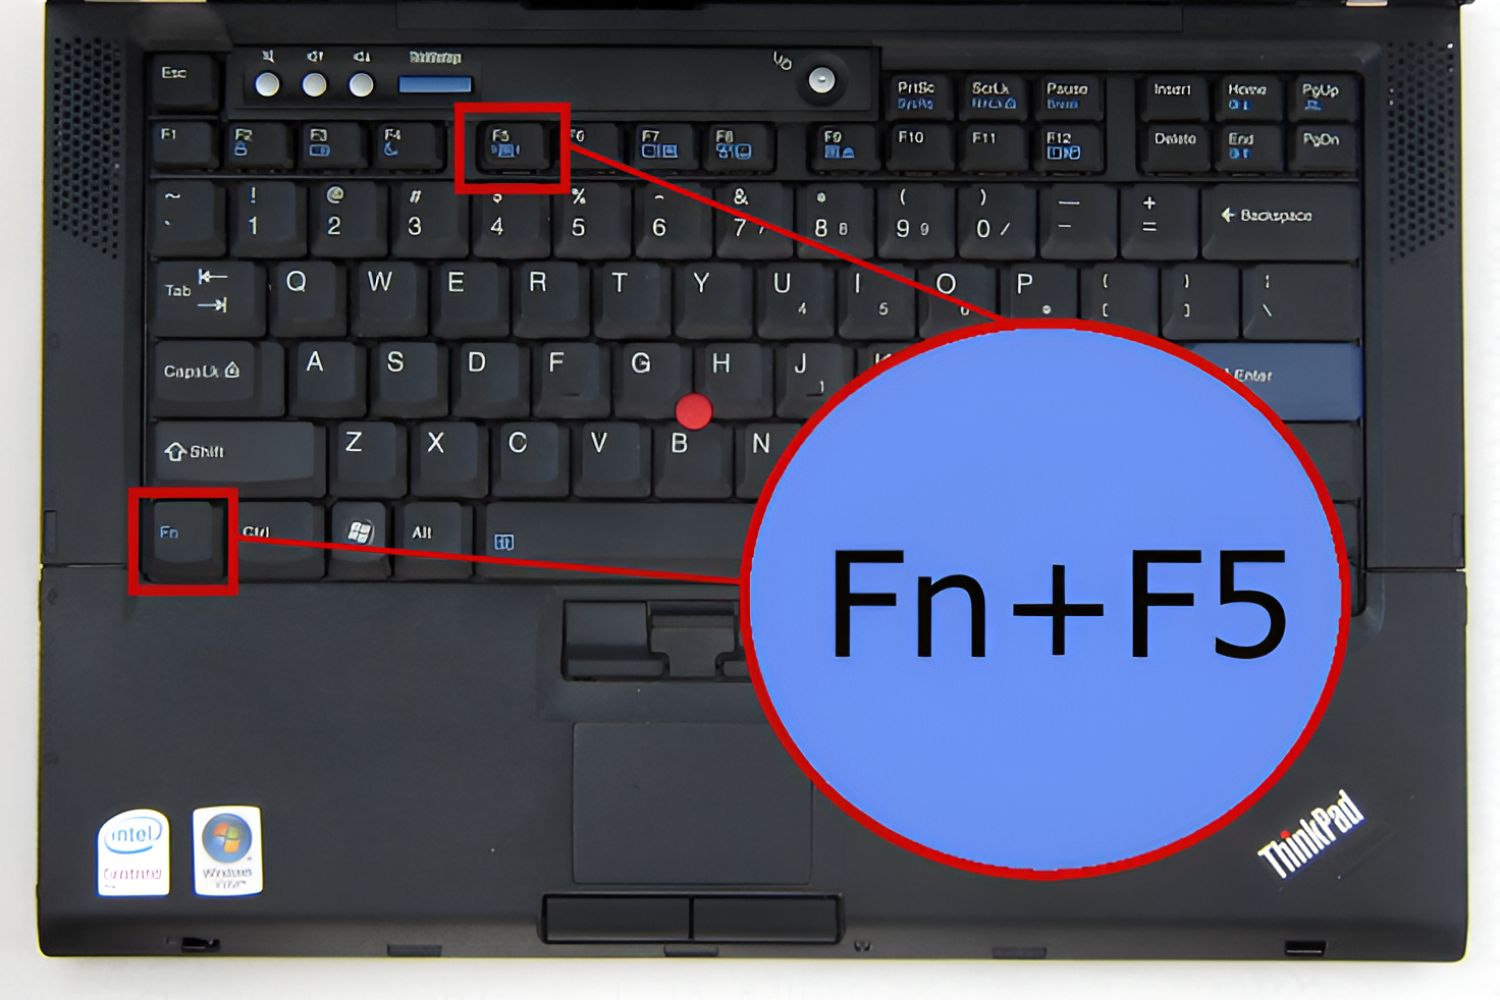
- Ensure that the wireless switch or hotkey on your Dell Ultrabook is turned on. Some devices have physical switches or function keys that can enable or disable the WiFi.
- Check if the WiFi router is turned on and functioning properly. Make sure that all cables are securely connected, and consider restarting the router if necessary.
- Move closer to the WiFi router to ensure that the signal is strong. Distance and obstacles can impact the quality of the WiFi connection.
- Try connecting to a different WiFi network to determine if the issue is specific to your current network.
- Reset the network settings on your Dell Ultrabook. This can sometimes resolve connectivity issues. To do this, go to the Windows Settings menu, select “Network & Internet,” and click on “Network reset.”
- Update the WiFi drivers on your Dell Ultrabook. Outdated drivers can cause compatibility issues. Visit the Dell support website or use the Dell Update utility to download and install the latest drivers for your WiFi adapter.
- Disable any third-party antivirus or firewall software temporarily. Sometimes, these programs can interfere with the WiFi connection.
- If all else fails, you can perform a system restore or contact Dell support for further assistance.
By following these troubleshooting steps, you should be able to identify and resolve many common WiFi issues on your Dell Ultrabook. However, if you continue to experience problems, it may be necessary to seek professional technical support.
Updating WiFi drivers on Dell Ultrabook
If you’re experiencing persistent WiFi issues on your Dell Ultrabook, it’s possible that outdated or incompatible WiFi drivers may be the culprit. Updating the WiFi drivers can often resolve connectivity issues and improve overall performance. Here’s how you can update the WiFi drivers on your Dell Ultrabook:
- Visit the Dell support website (www.dell.com/support) on a different device with internet access.
- Enter your Dell Ultrabook’s Service Tag or choose the appropriate model from the provided options.
- Locate the “Drivers & Downloads” section on the Dell support page for your Ultrabook model.
- Search for the WiFi drivers specific to your operating system and model.
- Download the latest WiFi driver software and save it to a location on your Dell Ultrabook.
- Run the downloaded driver installer file and follow the on-screen prompts to install the updated WiFi drivers.
- Restart your Dell Ultrabook to complete the driver installation process.
Alternatively, you can also use the Dell Update utility to automatically check for and install any available driver updates. The Dell Update utility is typically pre-installed on Dell Ultrabooks and can be accessed from the Start menu or by searching for “Dell Update” in the Windows search bar.
Updating the WiFi drivers on your Dell Ultrabook can help resolve compatibility issues, enhance performance, and ensure a stable connection. If you continue to experience WiFi problems after updating the drivers, you may need to consider other troubleshooting steps or contact Dell support for further assistance.
Enhancing WiFi performance on Dell Ultrabook
To fully optimize your WiFi experience on your Dell Ultrabook, there are several steps you can take to enhance the performance and ensure a fast and reliable connection. These tips can help you make the most out of your internet browsing, streaming, and downloading activities:
- Position your Dell Ultrabook near the WiFi router. Proximity to the router can significantly improve signal strength and overall performance.
- Keep your software and operating system up to date. Regularly install the latest updates and patches for your Dell Ultrabook, including WiFi firmware updates, as they can often improve compatibility and performance.
- Secure your WiFi network with a strong password. By setting up a secure network, you can prevent unauthorized access and ensure optimal performance for your devices.
- Minimize interference from other electronic devices. Keep your Dell Ultrabook away from appliances such as microwaves, cordless phones, and Bluetooth devices, as they can cause interference with your WiFi signal.
- Optimize your WiFi channel settings. Use a WiFi analyzer tool to identify crowded channels and switch to a less congested channel for better performance.
- Utilize the 5GHz frequency band whenever possible. The 5GHz band provides faster speeds and less interference compared to the 2.4GHz band.
- Consider upgrading your WiFi router. If you have an older router, it may not support the latest WiFi standards. Upgrading to a modern router can significantly improve WiFi performance.
- Use a WiFi range extender or mesh WiFi system if your Dell Ultrabook is located in an area with weak signal coverage. These devices can expand the reach of your WiFi network and improve coverage throughout your home or office.
- Check for and remove any WiFi interference sources. Some devices or appliances, such as baby monitors or wireless speakers, can interfere with WiFi signals. Keep them away from your Dell Ultrabook or disable them when not in use.
By implementing these tips, you can boost the WiFi performance on your Dell Ultrabook and enjoy a seamless and efficient internet experience. Remember to regularly monitor and optimize your WiFi connection to ensure that you’re always making the most of your Dell Ultrabook’s capabilities.
Conclusion
Having a reliable WiFi connection is essential for a seamless and productive computing experience on your Dell Ultrabook. With the proper knowledge and understanding of how to check and turn on the WiFi, troubleshoot issues, update drivers, and enhance performance, you can ensure a consistent and fast internet connection.
In this guide, we have covered the necessary steps to check the WiFi status on your Dell Ultrabook, turn on the WiFi, troubleshoot common WiFi issues, update the WiFi drivers, and enhance WiFi performance. Following these steps can help you overcome connectivity challenges and optimize your internet experience.
Remember to periodically check for updates, not only for your Ultrabook’s operating system but also for the WiFi firmware and drivers. Keeping everything up to date ensures compatibility, security, and improved performance.
If you continue to experience WiFi problems despite following these steps, don’t hesitate to seek technical support from Dell or a professional IT technician. They can provide further assistance in diagnosing and resolving any persistent issues you may encounter.
By proactively managing your WiFi connection, you can enjoy all the benefits of a stable, fast, and reliable internet connection on your Dell Ultrabook. Stay connected and make the most out of your digital experiences!


