Introduction
Welcome to this guide on how to connect your Amazon Fire tablet to a Wi-Fi network. Whether you’ve just purchased a new Fire tablet or you’re having trouble connecting to Wi-Fi, this step-by-step tutorial will help you get connected and start enjoying all the online features and content that your Fire tablet has to offer.
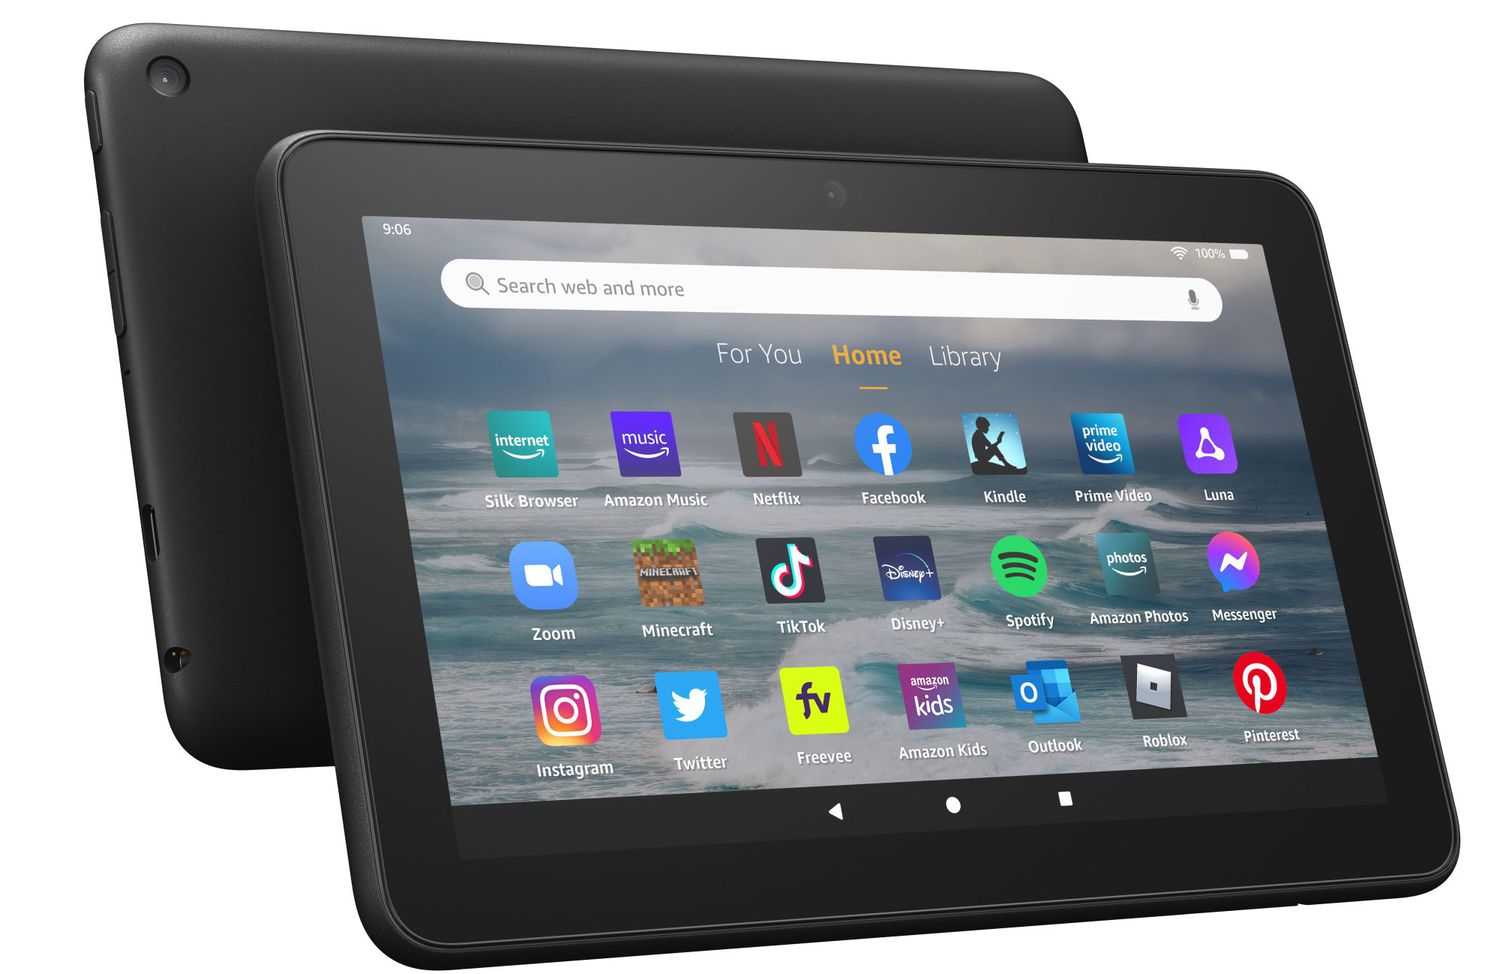
The Amazon Fire tablet is a versatile device that allows you to browse the internet, stream movies and TV shows, play games, and much more. However, in order to access these features, you need to connect your Fire tablet to a Wi-Fi network. By connecting to Wi-Fi, you can take full advantage of the device’s capabilities and access a wide range of online content and services.
Whether you’re at home, at work, or on the go, connecting your Fire tablet to a Wi-Fi network is quick and easy. You just need to follow a few simple steps to get connected and enjoy all the benefits of a wireless internet connection on your device. In this guide, we’ll walk you through the process of connecting your Fire tablet to Wi-Fi, from turning on the device to troubleshooting any issues that may arise.
Before we begin, make sure you have your Wi-Fi network name and password handy. You’ll need this information to connect your Fire tablet to your Wi-Fi network. If you’re not sure about your network’s details, you can usually find them on the back of your Wi-Fi router or by contacting your internet service provider.
Now, let’s get started and learn how to connect your Amazon Fire tablet to a Wi-Fi network.
Step 1: Turn on your Amazon Fire tablet
The first step to connecting your Amazon Fire tablet to a Wi-Fi network is to turn on the device. Locate the power button on the device’s side or top and press it to turn it on. You may need to hold the button for a few seconds until the screen lights up.
Once the device is turned on, the Amazon logo or the lock screen will appear. If you have set up a lock screen password or PIN, you will need to enter it to unlock the device. If you haven’t set up a lock screen password, you can swipe the screen to unlock it.
After unlocking the device, you will be taken to the home screen, where you can access all the apps and features of your Amazon Fire tablet.
It’s important to note that if your device has a low battery, it may not connect to Wi-Fi or may experience connectivity issues. So, ensure that the device has enough battery power for the connection process.
Now that your device is turned on and ready to go, let’s move on to the next step and access the Wi-Fi settings on your Amazon Fire tablet.
Step 2: Access the Wi-Fi settings
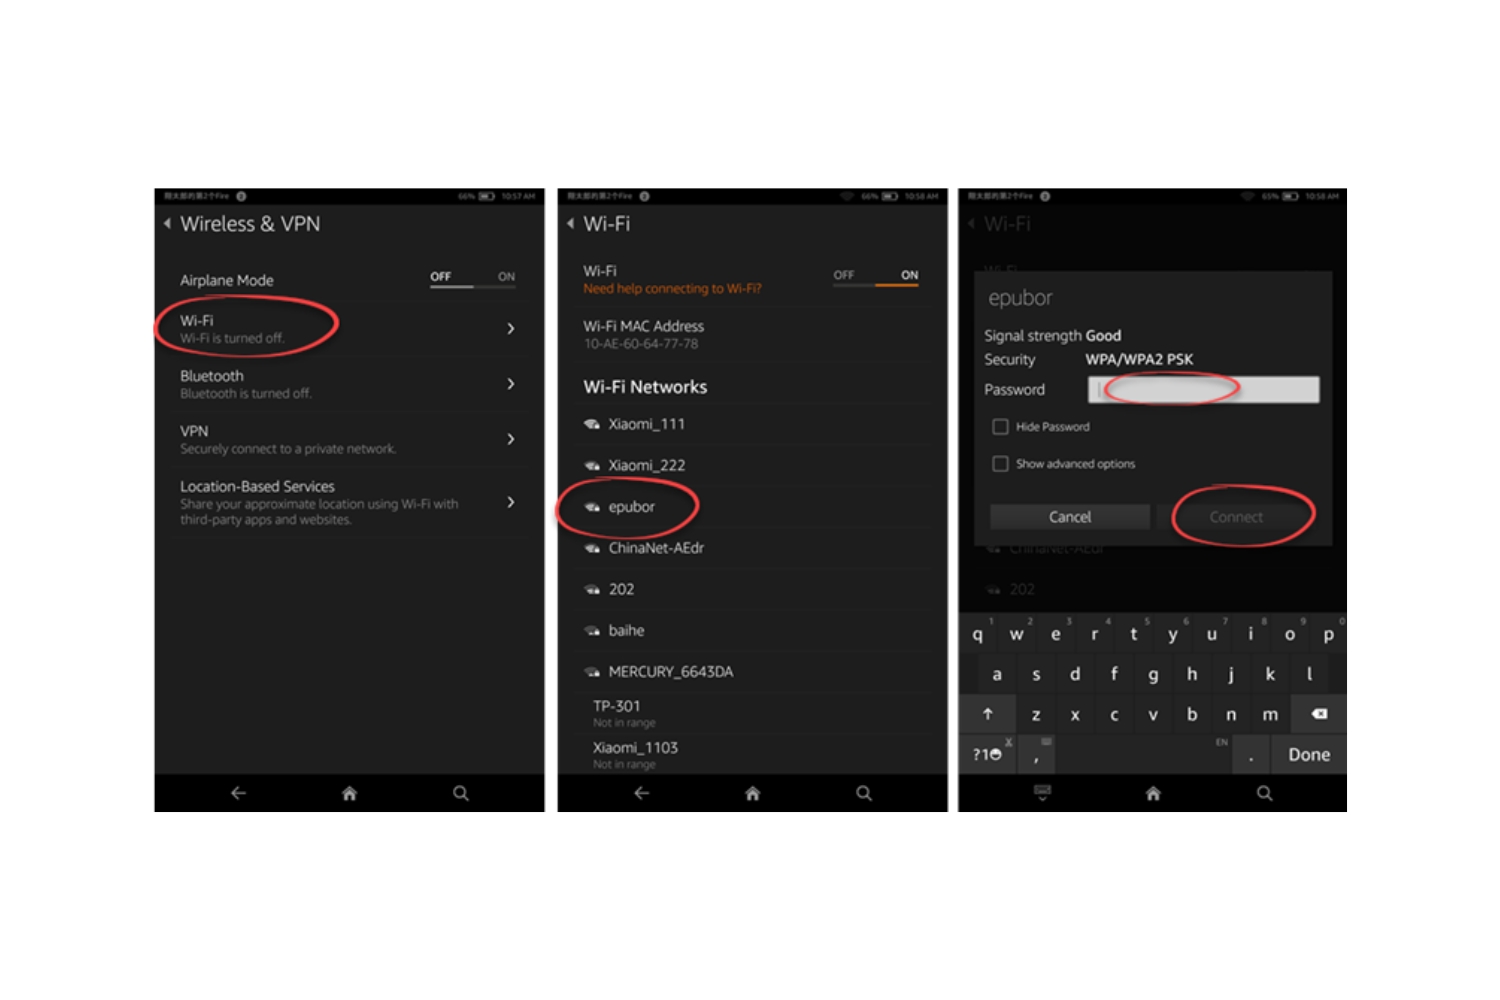
To connect your Amazon Fire tablet to a Wi-Fi network, you need to access the Wi-Fi settings on your device. Here’s how you can do it:
- Swipe down from the top of the screen to open the notification panel. This will reveal the Quick Actions menu.
- In the Quick Actions menu, tap on the “Settings” icon. It looks like a gear or cogwheel.
- In the Settings menu, scroll down and tap on the “Wi-Fi” option. This will open the Wi-Fi settings.
Once you’re in the Wi-Fi settings, you will see a list of available Wi-Fi networks in your area. You’ll also see a toggle switch that allows you to turn the Wi-Fi on or off. Make sure the toggle switch is turned on, indicating that Wi-Fi is enabled on your device.
If you see a Wi-Fi network name (SSID) that you recognize and want to connect to, move on to the next step. If not, you may need to wait a few moments for your device to scan and detect available Wi-Fi networks.
Next, let’s move on to the next step and scan for available Wi-Fi networks on your Amazon Fire tablet.
Step 3: Scan for available Wi-Fi networks
Now that you have accessed the Wi-Fi settings on your Amazon Fire tablet, it’s time to scan for available Wi-Fi networks. Follow these steps:
- In the Wi-Fi settings menu, you will see a list of available Wi-Fi networks. The networks will be displayed with their respective names (SSIDs).
- Your device will automatically scan for Wi-Fi networks in the area, but you can manually trigger a scan by tapping on the “Scan” button.
- Wait for a few moments while your device scans for available Wi-Fi networks. The scan can take a little time depending on the number of networks in your vicinity.
During the scanning process, your Amazon Fire tablet will detect all the Wi-Fi networks within range. The networks will be listed with their names, signal strength, and security status.
If there are many Wi-Fi networks available, you may need to scroll down to see the complete list. You can also check for more networks by moving your device closer to the source or router.
Once the scan is complete and the list of available Wi-Fi networks is displayed, you’re ready to move on to the next step and select the Wi-Fi network you want to connect to on your Amazon Fire tablet.
Step 4: Select your desired Wi-Fi network
Now that you have scanned for available Wi-Fi networks on your Amazon Fire tablet, it’s time to select the network you want to connect to. Follow these steps:
- In the list of available Wi-Fi networks, locate the name (SSID) of the network you want to connect to.
- Tap on the network name to select it. If the network is password-protected, a lock symbol may appear next to the network name.
When selecting a Wi-Fi network, it’s important to choose the correct one associated with your home, office, or other location. Make sure to select the network you have permission to access.
If the desired Wi-Fi network is not visible in the list, you can try the following:
- Ensure that the Wi-Fi router is turned on and functioning properly.
- Bring your Amazon Fire tablet closer to the Wi-Fi router to improve signal strength.
- Restart your Amazon Fire tablet and try again.
Once you have selected the desired Wi-Fi network, it’s time to proceed to the next step and enter the Wi-Fi network password, if required.
Step 5: Enter the Wi-Fi network password
After selecting the Wi-Fi network you want to connect to on your Amazon Fire tablet, the next step is to enter the Wi-Fi network password. Follow these steps:
- If the selected Wi-Fi network is password-protected, a prompt will appear on your screen asking for the network password.
- Tap on the password field to bring up the on-screen keyboard.
- Using the on-screen keyboard, enter the Wi-Fi network password. Make sure to enter the password correctly, taking note of any uppercase or lowercase letters, numbers, or special characters.
- If you make a mistake while entering the password, you can tap on the delete button to remove the incorrect characters.
It’s important to enter the correct Wi-Fi network password to establish a successful connection. The password is case-sensitive, so double-check that you are entering it correctly. If you’re unsure about the network password, you can usually find it on the back of your Wi-Fi router or by contacting your internet service provider.
Once you have entered the Wi-Fi network password correctly, you’re ready to move on to the next step and connect to the Wi-Fi network on your Amazon Fire tablet.
Step 6: Connect to the Wi-Fi network
Now that you have entered the Wi-Fi network password on your Amazon Fire tablet, it’s time to connect to the Wi-Fi network. Follow these steps:
- After entering the password, tap on the “Connect” button or the “Join” button.
- Your Amazon Fire tablet will now attempt to connect to the selected Wi-Fi network.
- Wait for a few seconds while the device establishes a connection with the network.
- If the entered password is correct and the network is within range, your Amazon Fire tablet will successfully connect to the Wi-Fi network.
Once your device is connected to the Wi-Fi network, you will see a confirmation message on the screen. The Wi-Fi icon will also appear in the status bar at the top of the screen, indicating that you are connected to a Wi-Fi network.
Now that you are connected to Wi-Fi, you can enjoy all the online features and content on your Amazon Fire tablet. You can browse the internet, stream movies and TV shows, download apps and games, and much more, all without using your mobile data.
If you encounter any issues during the connection process, such as a failed connection or an incorrect password message, you can try the following troubleshooting tips:
- Double-check that you have entered the correct Wi-Fi network password.
- Ensure that you are within range of your Wi-Fi router and there are no physical barriers that might hinder the Wi-Fi signal.
- Restart your Amazon Fire tablet and try connecting again.
That’s it! You have successfully connected your Amazon Fire tablet to a Wi-Fi network. Now you can enjoy all the benefits of a wireless internet connection on your device.
Step 7: Troubleshooting tips
While connecting your Amazon Fire tablet to a Wi-Fi network is usually a straightforward process, you may encounter some issues along the way. Here are some troubleshooting tips to help you overcome common Wi-Fi connectivity problems:
- Restart your Wi-Fi router: Sometimes, the router itself may be experiencing issues. Try restarting the router by unplugging it for a few seconds and then plugging it back in. This can often resolve temporary connectivity problems.
- Move closer to the Wi-Fi router: If you’re experiencing a weak or unstable Wi-Fi signal, try moving closer to the router. Thick walls or other physical barriers can impact signal strength.
- Check for Wi-Fi interference: Other electronic devices or appliances in your home can interfere with your Wi-Fi signal. Try moving your Fire tablet away from other devices or appliances, or consider relocating your router to minimize signal interference.
- Forget and reconnect to the Wi-Fi network: If you’re still having trouble connecting, you can try forgetting the Wi-Fi network on your Fire tablet and then reconnecting to it. To do this, go to the Wi-Fi settings, find the network name, tap and hold it, and select “Forget network.” Then, go through the connection process again from step 2.
- Update your Amazon Fire tablet software: An outdated software version on your device can cause Wi-Fi connectivity issues. Check for any available software updates and install them to ensure your device is running the latest firmware.
- Reset network settings: If none of the above steps work, you can try resetting the network settings on your Fire tablet. Keep in mind that this will remove all saved Wi-Fi networks and their passwords from your device, so you will need to enter them again. To reset the network settings, go to the device settings, tap on “Network & Internet,” select “Wi-Fi,” and then tap on “Advanced options” or “Reset Wi-Fi, mobile & Bluetooth.” Finally, tap on the option to reset network settings.
These troubleshooting tips should help you resolve most Wi-Fi connectivity issues on your Amazon Fire tablet. If you’re still unable to connect to a Wi-Fi network, consider reaching out to Amazon support or consulting your internet service provider for further assistance.
With these troubleshooting tips in mind, you should now be well-equipped to resolve any Wi-Fi connectivity issues you may encounter on your Amazon Fire tablet.
Conclusion
Connecting your Amazon Fire tablet to a Wi-Fi network is essential to unlock its full potential and enjoy a wide range of online features and content. By following the step-by-step guide outlined in this article, you should be able to connect your Fire tablet to Wi-Fi without any hassle.
We started by turning on the device and accessing the Wi-Fi settings. Then, we scanned for available Wi-Fi networks and selected the desired network. After that, we entered the Wi-Fi network password and connected to the network. Lastly, we provided some troubleshooting tips to help you overcome common connectivity issues.
Remember to have your Wi-Fi network name and password handy before you begin the connection process. In case you face any issues during the setup, refer to the troubleshooting tips mentioned in Step 7 to help you troubleshoot and resolve them.
Now that your Amazon Fire tablet is connected to Wi-Fi, you can enjoy seamless browsing, streaming, downloading, and app usage. Discover new movies and TV shows to watch, play games, access your favorite social media platforms, and much more, all with the convenience of a wireless internet connection.
We hope this guide has been helpful in assisting you with connecting your Amazon Fire tablet to a Wi-Fi network. If you have any further questions or require additional assistance, don’t hesitate to consult the Amazon support team or your internet service provider.
Enjoy your newly connected Fire tablet and all the amazing content it has to offer!