Introduction
Welcome to the world of 3D printing, where creativity knows no bounds and innovation is at its peak. As a 3D printing enthusiast, you’ve probably realized the importance of various components that contribute to the smooth operation of your printer. One such crucial component is the timing belt. In this article, we will guide you on how to connect a 3D printer timing belt, ensuring that your printer functions efficiently and produces high-quality prints each time.
Before we dive into the process of connecting a timing belt, let’s understand what a timing belt is and why it plays a crucial role in the functioning of a 3D printer.
A timing belt, also known as a synchronous belt, is a looped belt with teeth on its inner surface. It is made from a durable material, such as rubber or reinforced polycarbonate, and is responsible for transferring rotational motion from one component to another in a precise and synchronized manner. In a 3D printer, the timing belt connects the stepper motor to the printer’s axis, ensuring that the movement of the print head is accurate and controlled.
The proper connection of the timing belt is essential to maintain the integrity of the printer’s movement and ensure accurate positioning of the print head. An incorrectly connected timing belt can lead to print defects, misalignment, and overall poor print quality. It is crucial to follow the right steps and use the correct tools to connect the timing belt properly.
In the following sections, we will provide a step-by-step guide on how to connect a 3D printer timing belt, check its tension, and troubleshoot common issues that may arise during the process. So, grab your tools and let’s get started!
What is a timing belt?
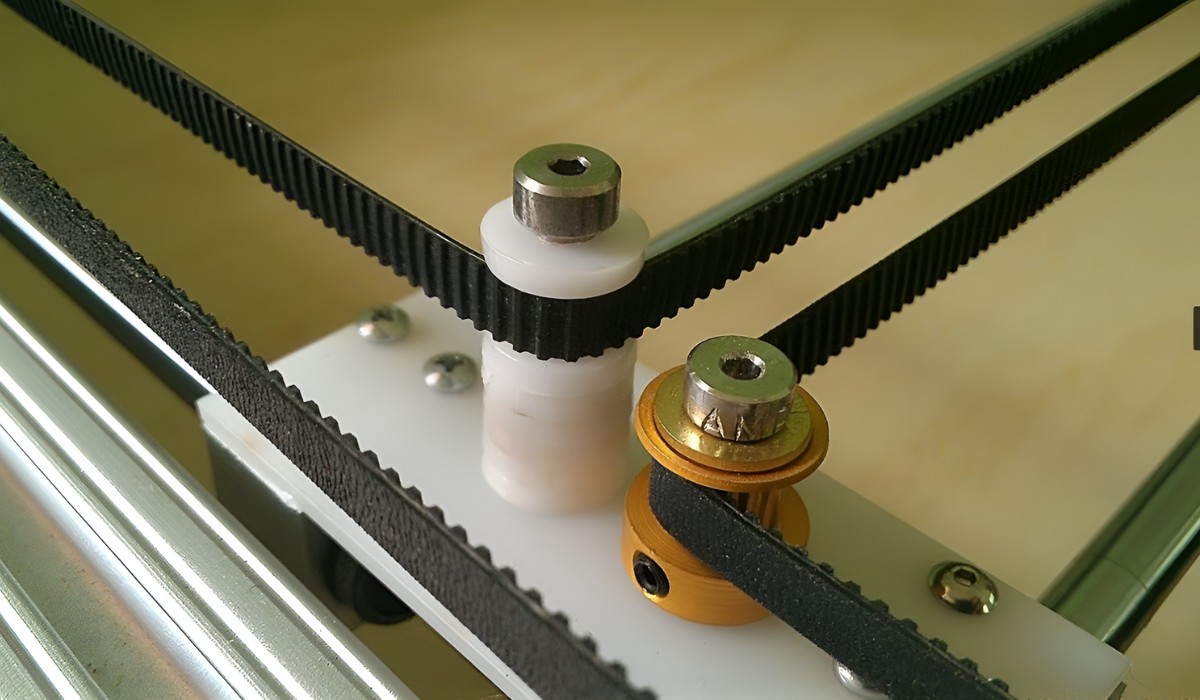
A timing belt, also known as a synchronous belt, is a crucial component in a 3D printer’s mechanism. It is a looped belt with teeth on its inner surface, made from a durable material such as rubber or reinforced polycarbonate. The teeth on the timing belt fit into corresponding gears or pulleys, allowing for a synchronized transfer of rotational motion from one component to another.
In a 3D printer, the timing belt is responsible for connecting the stepper motor to the printer’s axis, ensuring precise and accurate movement of the print head during the printing process. By maintaining a synchronized motion, the timing belt helps in achieving accurate positioning and layer-by-layer printing.
One of the critical aspects of a timing belt is its tension, which determines the level of tightness the belt has when properly connected. Adequate tension is crucial for the correct functioning of the timing belt. If the belt is too loose, it can result in skipped steps, leading to misalignment and poor print quality. On the other hand, if the belt is too tight, it can put excessive strain on the components and adversely affect the printer’s performance.
Timing belts are designed to be durable and long-lasting, offering excellent resistance to wear and tear. However, over time, they may experience signs of deterioration such as cracks, fraying, or worn-out teeth. It is essential to regularly inspect the timing belt for any signs of damage and replace it if necessary to ensure optimal performance of the 3D printer.
When choosing a timing belt for your 3D printer, consider factors such as the type of printer, desired print speed, and the required precision. Different printers may have specific requirements in terms of belt width, tooth pitch, and overall length. Consulting the printer’s manual or seeking guidance from experienced users can help in selecting the right timing belt for your 3D printer.
Now that we have a clear understanding of what a timing belt is and its significance in a 3D printer, let’s dive into the step-by-step process of connecting the timing belt to ensure a smooth printing experience.
Why is the timing belt important in a 3D printer?
The timing belt is a critical component in a 3D printer, playing a pivotal role in ensuring accurate and precise movement of the print head. Here are some key reasons why the timing belt is important in a 3D printer:
1. Synchronization: The timing belt is responsible for synchronizing the movement of the stepper motor with the printer’s axis. This synchronization ensures that the print head moves precisely in the desired direction and at the correct speed, resulting in accurate and high-quality prints.
2. Precise Positioning: By connecting the motor to the printer’s axis, the timing belt enables precise positioning of the print head. This precision is crucial for maintaining the integrity of the printed object, ensuring that each layer is accurately stacked on top of the previous one.
3. Layer-by-Layer Printing: 3D printing is a layer-by-layer process, where each layer contributes to the final object. The timing belt plays a significant role in achieving this layer-by-layer printing by facilitating controlled and accurate movement of the print head, allowing for precise deposition of the printing material.
4. Print Quality: The proper functioning of the timing belt directly impacts the print quality. An improperly connected or poorly tensioned timing belt can result in misalignment, skipped steps, and inconsistent layer deposition, leading to inferior print quality. By ensuring the correct connection and tension of the timing belt, you can enhance the overall print quality of your 3D printer.
5. Smooth Operation: A well-connected and properly tensioned timing belt ensures smooth operation of the 3D printer. It minimizes vibrations, reduces backlash, and provides a stable and consistent movement of the print head. This smooth operation is crucial for achieving precise details and intricate designs in your 3D prints.
Overall, the timing belt is a vital component in a 3D printer, contributing to the accuracy, precision, and overall performance of the printing process. It allows for synchronized movement, precise positioning, and high-quality prints. By understanding the importance of the timing belt and ensuring its proper connection and tension, you can optimize the performance of your 3D printer for outstanding results.
Tools and materials needed
Before starting the process of connecting a 3D printer timing belt, it is important to gather the necessary tools and materials. Here is a list of what you will need:
1. Timing belt: Ensure you have a suitable timing belt that matches the specifications of your 3D printer. Check the printer’s manual or consult experienced users to determine the correct belt size, tooth pitch, and overall length.
2. Allen wrench set: An Allen wrench set is essential for loosening and tightening screws and bolts during the connection process. Make sure you have a set with different sizes to accommodate the various fasteners in your 3D printer.
3. Screwdriver set: A set of screwdrivers will come in handy for removing and securing screws in different parts of the printer. It is recommended to have both flathead and Phillips-head screwdrivers to cover a wide range of screw types.
4. Pliers: Pliers can be useful for holding small parts and components in place while connecting the timing belt. They can also help with gripping and manipulating certain fasteners that may be difficult to handle with just your hands.
5. Cutting tool: You may need a cutting tool, such as wire cutters or a utility knife, to trim the timing belt to the appropriate length if necessary. Ensure you have a sharp and precise cutting tool for clean and accurate cuts.
6. Tweezers: Tweezers can be handy for tasks that require precision and delicacy, such as aligning small components or adjusting the tension of the timing belt. Opt for tweezers with fine tips to ensure optimal control.
7. Tensioning tool (optional): Depending on your printer model and personal preference, you may consider using a tensioning tool to ensure proper tension of the timing belt. This tool can help you achieve the desired level of tightness and minimize the chances of over-tensioning or under-tensioning the belt.
8. Safety goggles or glasses: It is always important to prioritize safety when working with tools and machinery. Wear safety goggles or glasses to protect your eyes from any potential hazards that may arise during the connection process.
By gathering these tools and materials beforehand, you will have everything you need to connect the timing belt to your 3D printer seamlessly and efficiently.
Step-by-step guide to connecting a 3D printer timing belt
Connecting a timing belt to your 3D printer may seem like a daunting task, but following a step-by-step guide can make the process much simpler. Here is a detailed guide to help you connect the timing belt with ease:
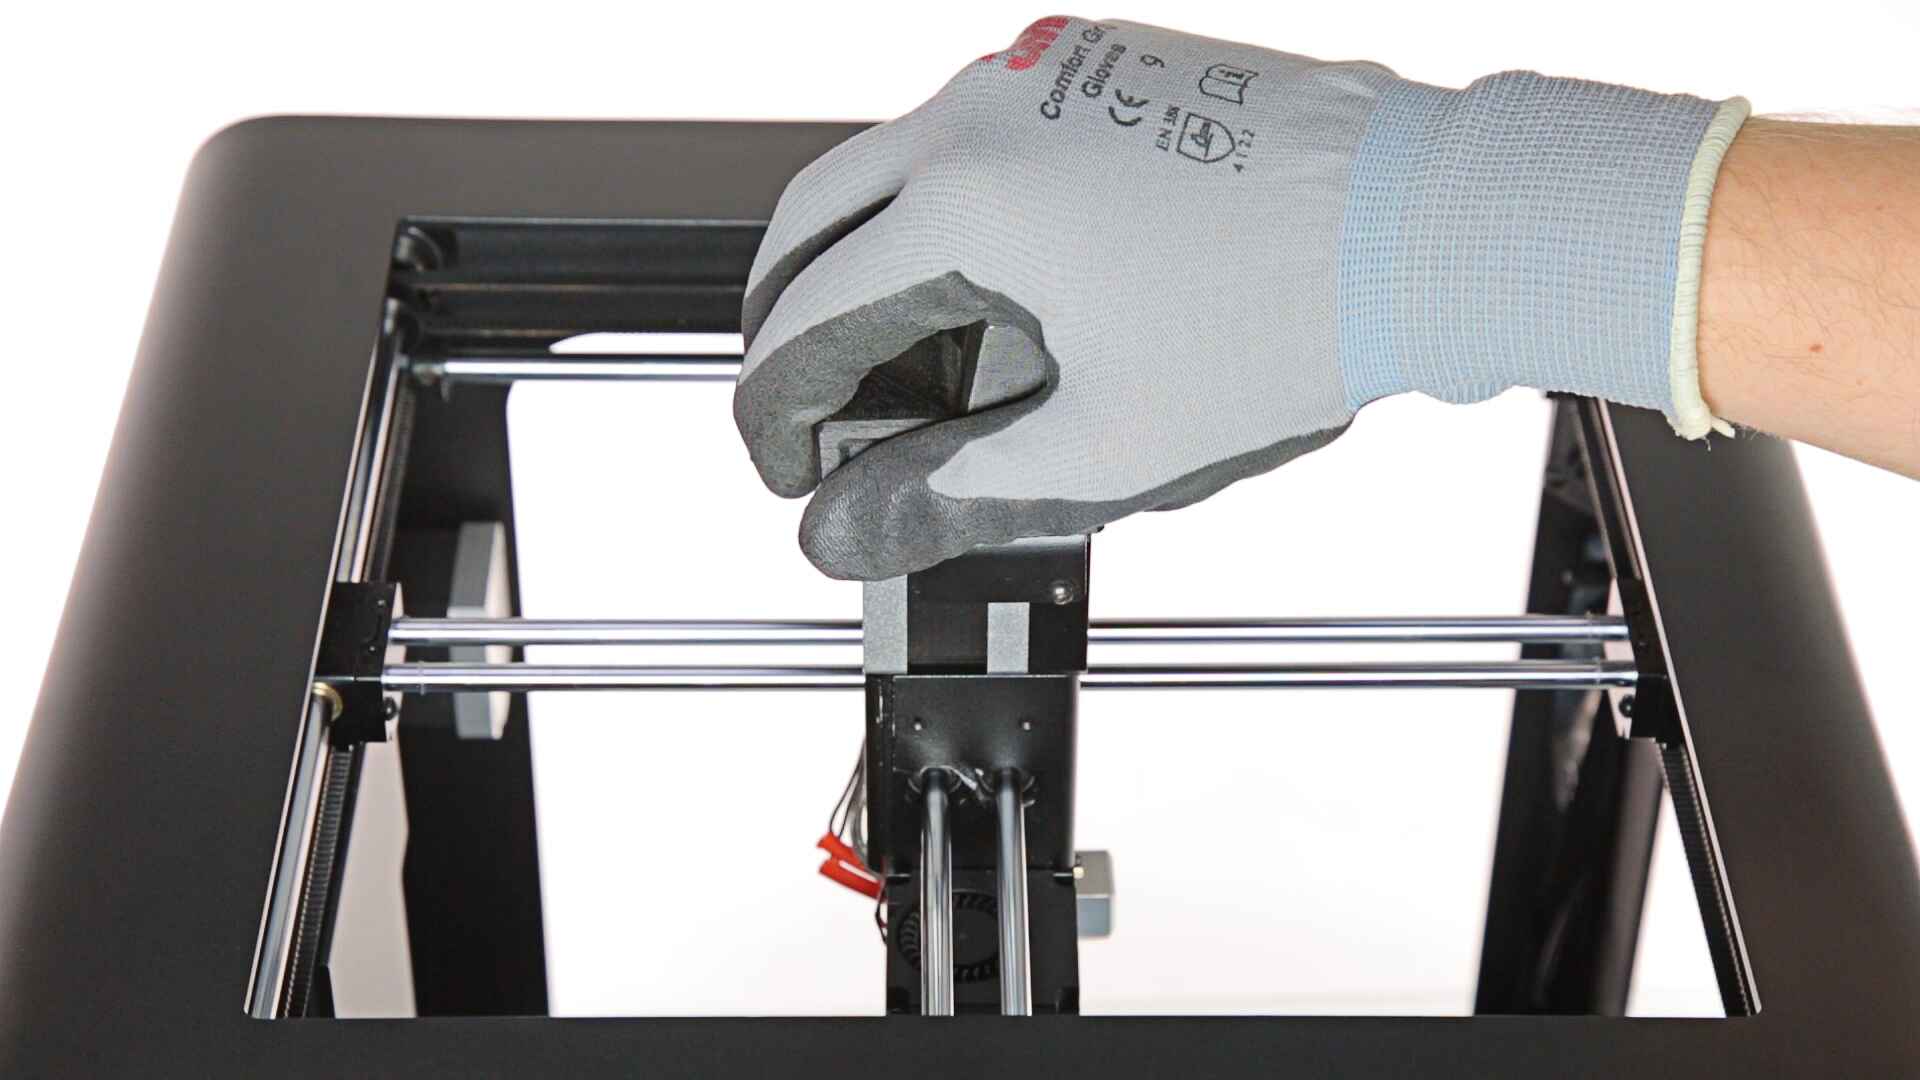
Step 1: Familiarize yourself with the printer’s structure: Before starting, take a moment to understand the layout of your 3D printer. Locate the stepper motor and the areas where the timing belt needs to be connected. This will give you a clear idea of where to work and how the belt should be positioned.
Step 2: Loosen the screws holding the motor: Use an appropriate Allen wrench or screwdriver to loosen the screws that secure the stepper motor. Loosen them enough to allow for the insertion of the timing belt, but without fully removing the screws.
Step 3: Insert the timing belt teeth into the gear or pulley: Take one end of the timing belt and insert the teeth into the corresponding gear or pulley on the stepper motor. Ensure that the teeth fit securely into the gaps of the gear or pulley.
Step 4: Wrap the timing belt around the printer’s axis: Once the timing belt is connected to the stepper motor, carefully wrap it around the printer’s axis in the desired direction. Make sure to give the belt a sufficient amount of tension, without overstretching or causing strain on the components.
Step 5: Align and secure the other end of the timing belt: Position the other end of the timing belt near the designated connection point on the printer’s axis. Align the teeth of the timing belt with the gear or pulley on the axis. Slowly tighten the screws to secure the belt in place, ensuring the belt is tensioned properly.
Step 6: Test the belt tension: Once the timing belt is securely connected, check its tension. Gently press the belt with your finger; it should have a slight amount of give, but not be too loose or too tight. Adjust the tension if necessary using a tensioning tool or by repositioning the belt and tightening the screws accordingly.
Step 7: Repeat the process for additional belts (if applicable): If your printer uses multiple timing belts, repeat the above steps for each belt, ensuring that they are correctly connected, tensioned, and aligned with their respective gears or pulleys.
Step 8: Double-check and finalize: Before proceeding with any prints, double-check all the connections, belt tension, and alignment. Make any necessary adjustments to ensure everything is in proper order.
By following this step-by-step guide, you can successfully connect the timing belt to your 3D printer, ensuring smooth and accurate movement of the print head during the printing process.
Checking the tension of the timing belt
Once you have connected the timing belt to your 3D printer, it is crucial to check its tension for optimal performance. Here is a simple guide to help you check the tension of the timing belt:
1. Gently press the timing belt: Use your finger to apply gentle pressure to the middle of the timing belt. It should have a slight amount of give or flex without feeling too loose or too tight. The ideal tension allows for some movement while maintaining stability.
2. Check the deflection: Another way to assess the tension is by checking the deflection of the belt. Press down on the timing belt with your finger at a point between two pulleys or gears. The belt should deflect slightly, ideally between 6-10 mm (0.24-0.39 inches). This deflection ensures that the belt is not too tight, which can strain the motor and components, or too loose, which can result in imprecise movements.
3. Listen for abnormal sounds: While checking the tension, listen for any unusual sounds coming from the timing belt or the printer’s movement. If you hear any grinding, clicking, or squeaking noises, it may indicate an issue with the belt tension that needs to be addressed. Adjust the tension accordingly to eliminate any unwanted sounds.
4. Ensure smooth movement: Test the printer’s movement with the timing belt connected to verify if it moves smoothly and accurately. The print head should move effortlessly without any jerking or stalling. If you notice any irregularities or inconsistencies in movement, recheck the tension and make necessary adjustments.
5. Avoid over-tensioning: It is important not to over-tension the timing belt as it can strain the motor and cause premature wear on the belt and other components. Over-tensioning may lead to skipping steps, misalignment, and poor print quality. Maintain a balance where the belt is snug and stable, but not overly tight.
6. Regularly monitor the tension: As the printer operates over time, it is natural for the timing belt tension to change slightly. It is recommended to periodically check and adjust the tension as part of your printer maintenance routine. This will help maintain optimal performance and print quality.
By following these steps and ensuring the proper tension of the timing belt, you can enjoy smooth and accurate movements of the print head, resulting in high-quality 3D prints.
Troubleshooting common issues with timing belt connection
While connecting a timing belt to your 3D printer, you may encounter some common issues that can affect its performance. Here are a few troubleshooting steps to help you address these issues:
1. Misaligned timing belt: If the timing belt is not properly aligned with the gears or pulleys, it can lead to skipped steps and inaccurate movements. Double-check the alignment by ensuring the teeth of the belt are securely seated in the gaps of the gears or pulleys. Adjust as necessary and recheck the alignment before tightening the screws.
2. Uneven tension: Inconsistent tension along the length of the timing belt can cause uneven movements and print quality issues. Ensure that the tension is evenly distributed by applying similar pressure to both ends of the belt when checking for deflection. Adjust the tension by repositioning the belt or tweaking the tensioning screws to achieve a uniform tension.
3. Slipping belt: A slipping timing belt can result in imprecise movements and skipped steps. Check for any signs of slippage by observing if the belt slips over the gears or pulleys when the printer is in operation. Tighten the screws that hold the belt in place or consider using a tensioning tool to increase the tension and prevent slipping.
4. Over-tightened belt: Over-tightening the timing belt can strain the motor and cause premature wear. If the belt feels excessively tight or the printer is struggling to move, loosen the tension by adjusting the position of the belt. Find a balance where the belt is snug and secure but not overly tight.
5. Excessive backlash: Backlash refers to the slight movement in the opposite direction before the print head changes direction. Excessive backlash can result in inaccuracies and poor print quality. Verify that the timing belt is properly tensioned and check for any looseness in the gears or pulleys. Minimize backlash by eliminating any slack in the belt and ensuring all components are securely in place.
6. Damaged or worn-out belt: If you notice any cracks, fraying, or worn-out teeth on the timing belt, it may be time to replace it. A damaged or worn-out belt can negatively affect print quality and overall performance. Regularly inspect the belt for signs of deterioration and replace it when necessary to maintain optimal performance.
By troubleshooting these common issues and taking the necessary steps to address them, you can ensure a properly connected timing belt that delivers smooth and precise movements for your 3D printer.
Conclusion
The timing belt plays a crucial role in the operation and performance of a 3D printer. It ensures synchronized movement, precise positioning, and accurate layer-by-layer printing. By following the step-by-step guide, you can successfully connect the timing belt to your 3D printer, ensuring smooth and precise movements of the print head.
Remember to check the tension of the timing belt, ensuring it has a slight amount of give without being too loose or too tight. Regularly monitor the tension and make adjustments as needed to maintain optimal performance. Troubleshooting common issues, such as misalignment, uneven tension, slipping belt, and excessive backlash, can help address any problems that may arise during the timing belt connection process.
Properly connecting the timing belt and maintaining its tension is essential for achieving high-quality 3D prints. A well-connected timing belt will result in accurate positioning, smooth operation, and excellent print quality.
By understanding the importance of the timing belt and following the guidelines provided in this article, you can ensure that your 3D printer performs at its best. So, grab your tools, connect that timing belt, and embark on a journey of limitless creativity with your 3D printer!