Introduction
Welcome to the world of 3D printing! Over the years, this revolutionary technology has made tremendous advancements, allowing us to create intricate and detailed objects that once seemed impossible to manufacture. Among the various types of 3D printers available, the resin 3D printer stands out for its ability to produce high-quality and precise prints. Whether you’re a hobbyist, an artist, or a professional in need of prototyping, understanding how a resin 3D printer works can help you harness its potential to bring your ideas to life.
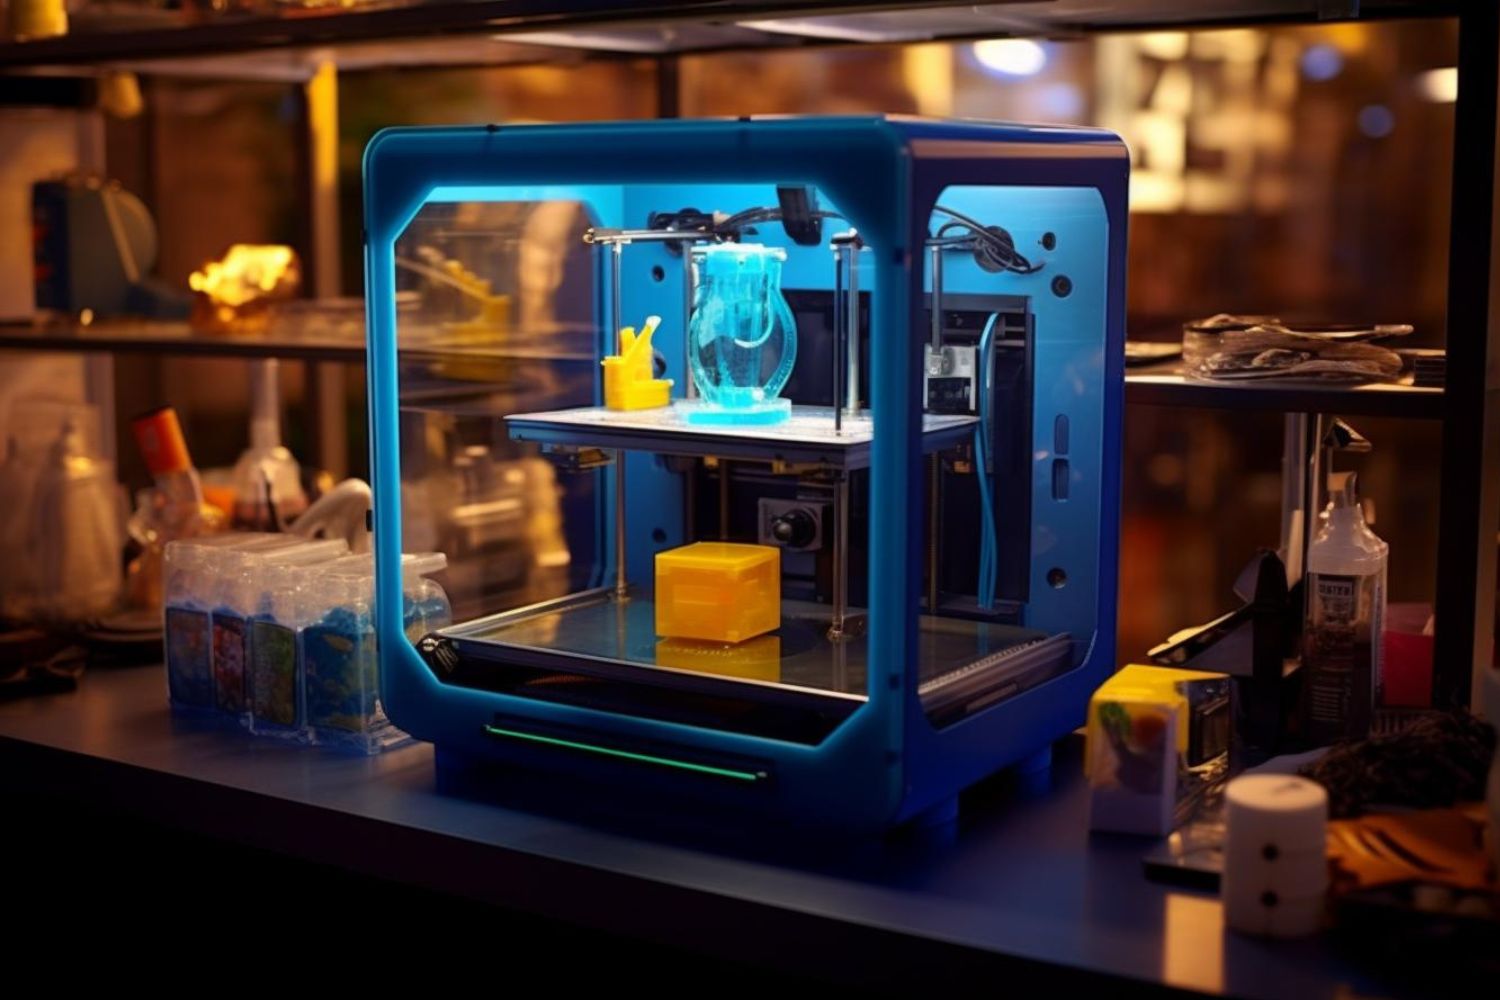
A resin 3D printer is a type of 3D printer that uses a liquid photopolymer resin as the printing material. Unlike traditional filament-based 3D printers, which deposit layers of melted plastic, resin 3D printers utilize a process called stereolithography (SLA) or digital light processing (DLP) to create objects layer by layer using light. This technology enables the production of highly detailed and smooth prints with intricate features and complex geometries.
In this article, we will explore the inner workings of a resin 3D printer and guide you through the process of creating 3D prints with this fascinating technology. From preparing the 3D model to post-processing, we will cover each step in detail. Additionally, we will discuss the advantages of using a resin 3D printer as well as the limitations and considerations to keep in mind.
Whether you’re new to 3D printing or looking to expand your knowledge, this article will provide you with valuable insights into how a resin 3D printer functions and how you can leverage its capabilities to bring your designs to life. So, let’s dive in and discover the world of resin 3D printing!
What is a resin 3D printer?
A resin 3D printer, also known as a stereolithography apparatus (SLA) or digital light processing (DLP) printer, is a type of 3D printer that uses photopolymer resin as the printing material. Unlike traditional filament-based 3D printers, which melt and deposit layers of plastic, a resin printer utilizes a process known as photopolymerization to create objects layer by layer.
Photopolymer resin is a UV-curable liquid that hardens when exposed to light of a specific wavelength. This resin comes in various formulations, each with its own properties, such as flexibility, strength, and transparency. Resins can be transparent or opaque, allowing for a wide range of applications and visual effects.
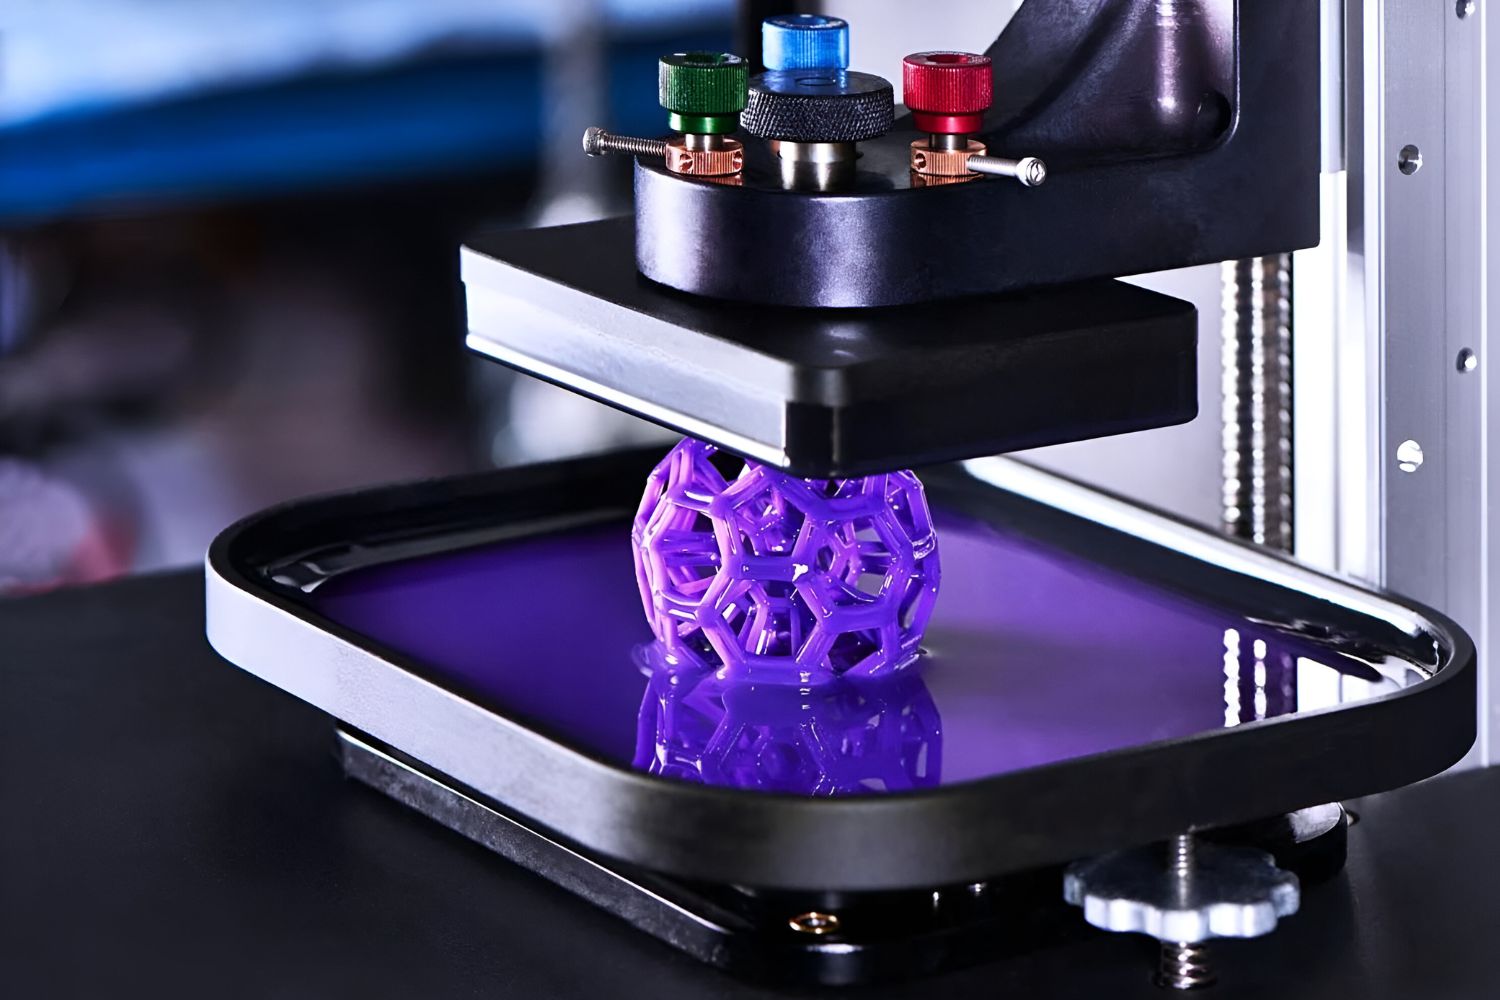
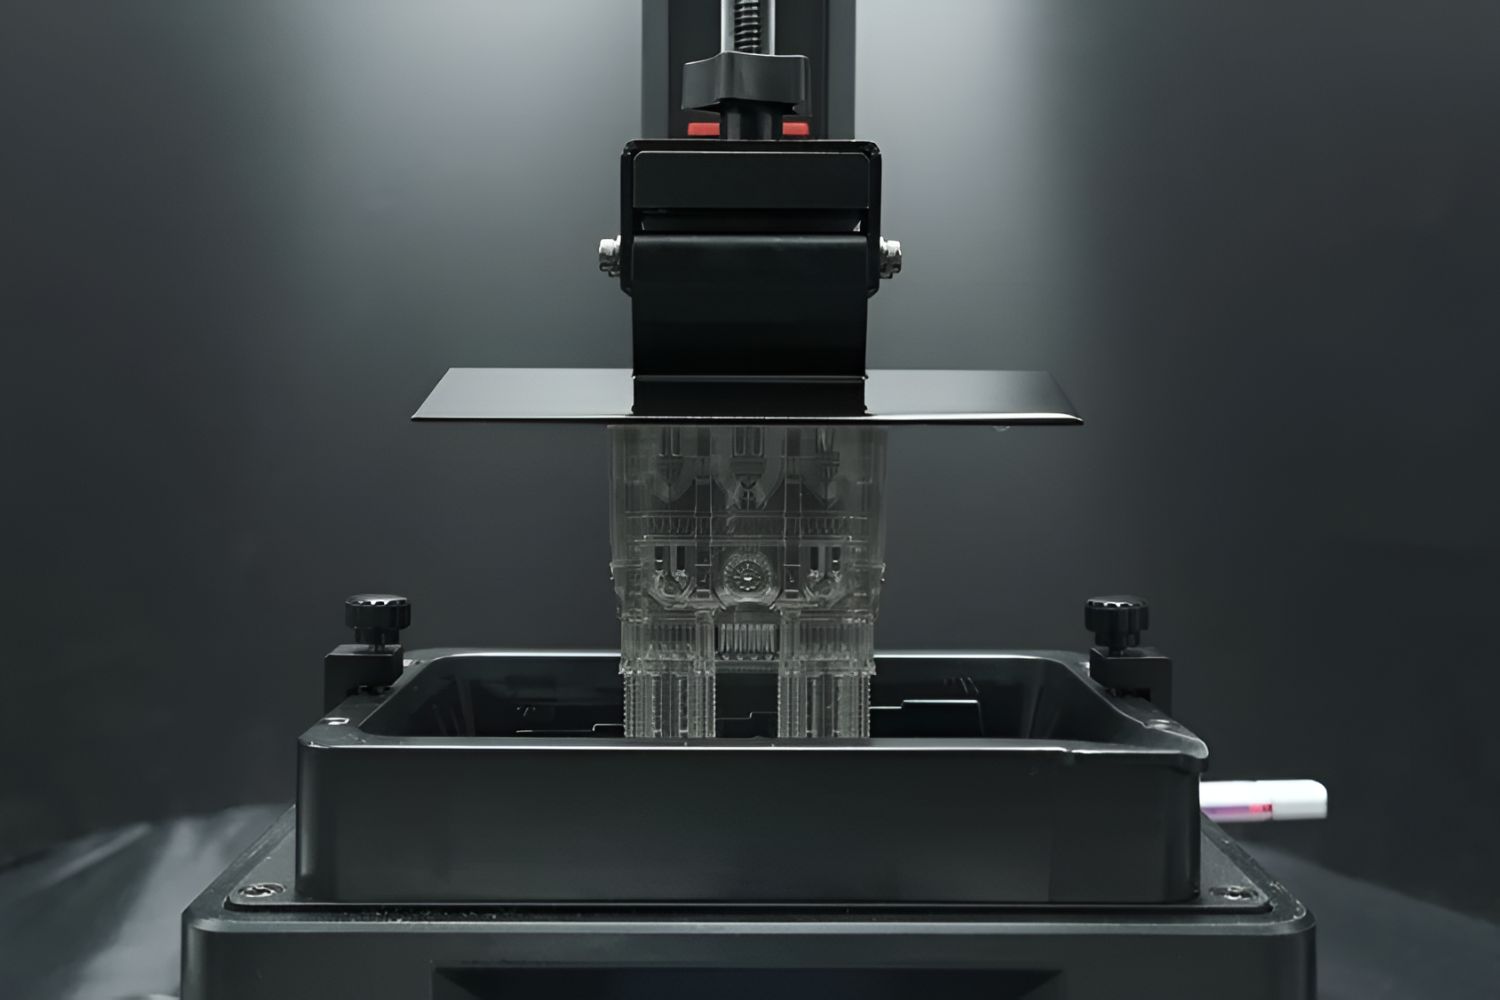
A resin 3D printer operates by using a light source, typically an ultraviolet (UV) laser or an array of LCD or LED lights, to selectively cure the resin. The printer begins by creating a base layer of resin on the build platform. The light source then projects a pattern onto the resin, solidifying it and creating the first layer of the object. The build platform moves slightly downwards, and the process repeats, layer by layer, until the entire object is formed.
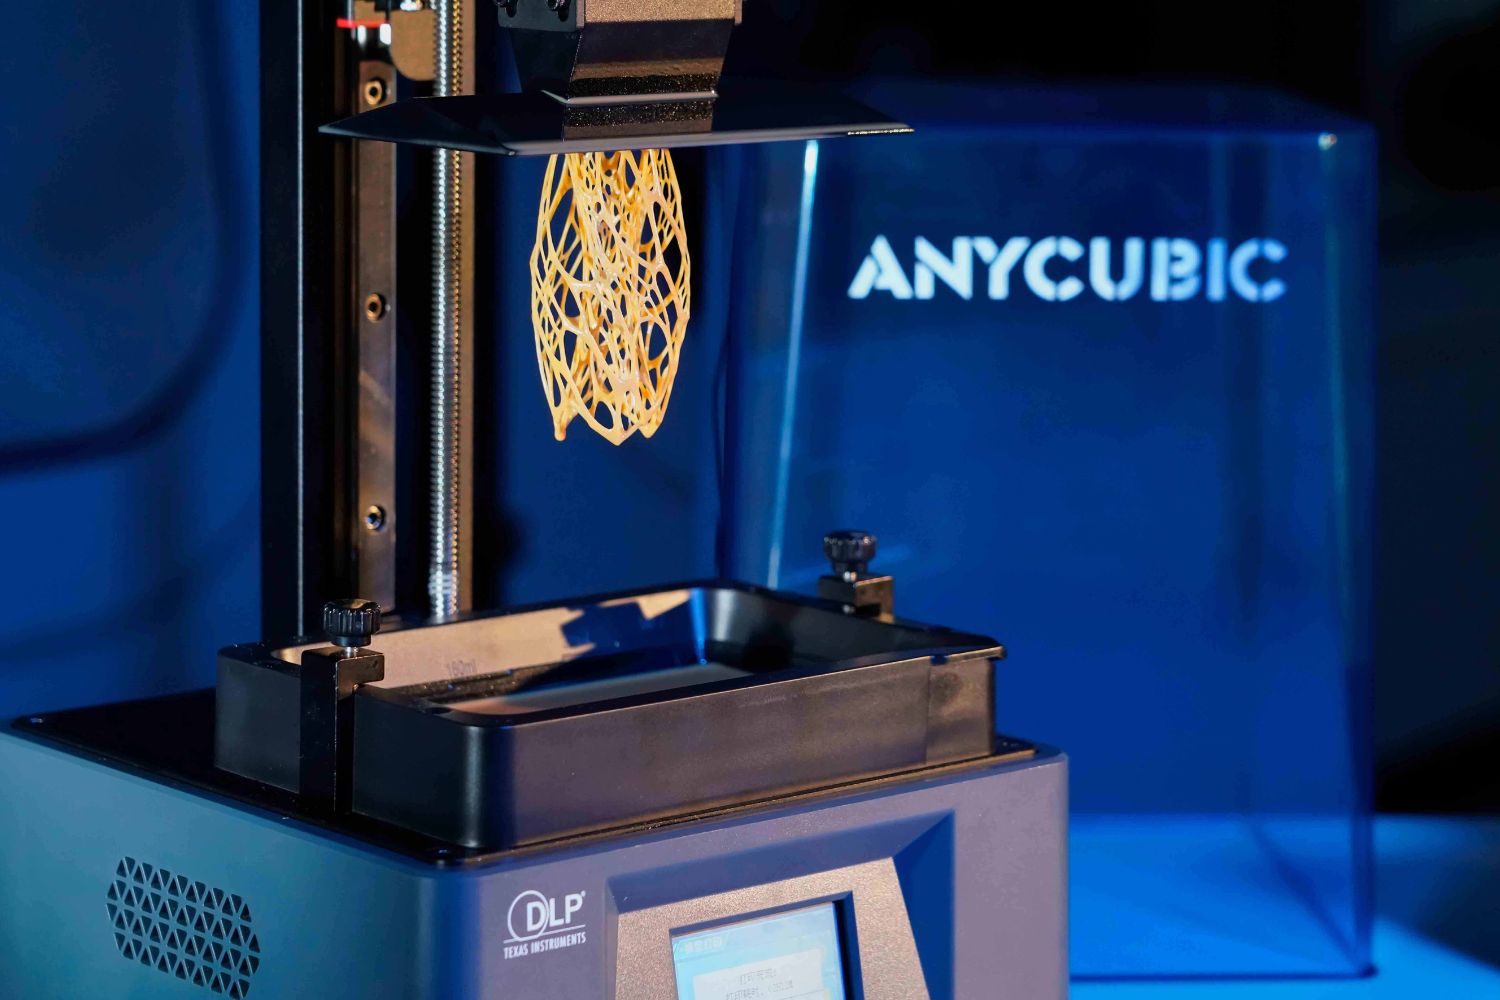
One of the main advantages of a resin 3D printer is its ability to produce highly detailed and smooth prints with intricate features. The smaller layer heights achievable with resin printing allow for greater accuracy and finer details compared to filament-based printers. This level of detail makes resin 3D printers particularly popular in applications such as jewelry design, dental and medical modeling, and the production of miniatures for gaming and collectibles.
It is worth noting that resin 3D printers require some additional considerations compared to traditional filament-based printers. The resin is sensitive to UV light and, therefore, needs to be stored and handled carefully to avoid premature curing. Additionally, the printed objects need to be washed and post-processed to remove excess resin and to achieve their final desired properties.
In the next sections, we will dive into the detailed process of how a resin 3D printer works, from preparing the 3D model to cleaning and post-processing. By understanding these steps, you will gain a comprehensive understanding of the resin 3D printing process.
How does a resin 3D printer work?
A resin 3D printer operates using a process called stereolithography (SLA) or digital light processing (DLP). This technology utilizes photopolymer resin as the main printing material and employs light to selectively cure and solidify the resin, layer by layer, to create 3D objects.
The process of resin 3D printing typically involves the following steps:
- Preparing the 3D model: To start, you need a 3D model of the object you want to print. This model can be created using computer-aided design (CAD) software or obtained from online repositories. The model should be exported in a file format that is compatible with the resin printer, such as .STL or .OBJ.
- Sending the file to the printer: Once you have the 3D model file, you need to transfer it to the resin 3D printer. This can be done either through a physical connection, such as a USB cable, or wirelessly using Wi-Fi or Bluetooth.
- Calibration and leveling: Before printing, it’s important to calibrate and level the printer’s build platform. This ensures that the subsequent layers of resin adhere properly and that the printed object is accurate and stable.
- Pouring resin into the printer: Resin 3D printers typically have a resin tank or vat where the printing material is poured. The resin should be poured in a controlled manner, avoiding spillage and ensuring that there is enough resin to cover the entire build area.
- The printing process: Once the printer is ready, it starts the printing process. The printer’s light source, whether it’s a UV laser or an array of LCD or LED lights, emits a specific pattern onto the resin. This pattern is based on the cross-section of the 3D model for each layer. The light source selectively cures and solidifies the resin according to the projected pattern, forming one layer of the object.
- Cleaning and post-processing: After the printing process is complete, the printed object is removed from the build platform. It is then washed and post-processed to remove any excess uncured resin and to achieve its desired properties. Post-processing steps may include rinsing in a solvent, UV curing, and sanding or polishing for a smooth finish.
The entire resin 3D printing process requires careful attention to detail and precision. Factors such as exposure time, layer height, and resin formulation can affect the quality and accuracy of the printed objects.
By following these steps and understanding the intricacies of the resin 3D printing process, you can create highly detailed and precise objects with a resin 3D printer.
Step 1: Preparing the 3D model
Before you can begin resin 3D printing, you need a 3D model of the object you want to print. This model can be created using computer-aided design (CAD) software or obtained from online repositories that offer a wide range of pre-designed models.
If you’re creating your own 3D model, CAD software provides you with powerful tools to design and customize your object. You can create intricate geometries, adjust dimensions, add textures, and optimize the model for printing. CAD software options vary in complexity, from beginner-friendly programs to more advanced software used in professional industries.
If you’re not familiar with CAD software or prefer not to design your own model, you can explore online repositories such as Thingiverse, MyMiniFactory, and Cults 3D. These platforms offer a vast collection of 3D models created by designers and enthusiasts worldwide. Simply search for the object you have in mind, and you’re likely to find various designs to choose from.
When preparing your 3D model for resin printing, there are a few key considerations to keep in mind:
- Mesh integrity: Ensure that your model has a clean and intact mesh without any intersecting or overlapping surfaces. Mesh errors can lead to printing issues like gaps, holes, or distorted shapes. Most CAD software includes tools for mesh repair and validation to help ensure your model is suitable for printing.
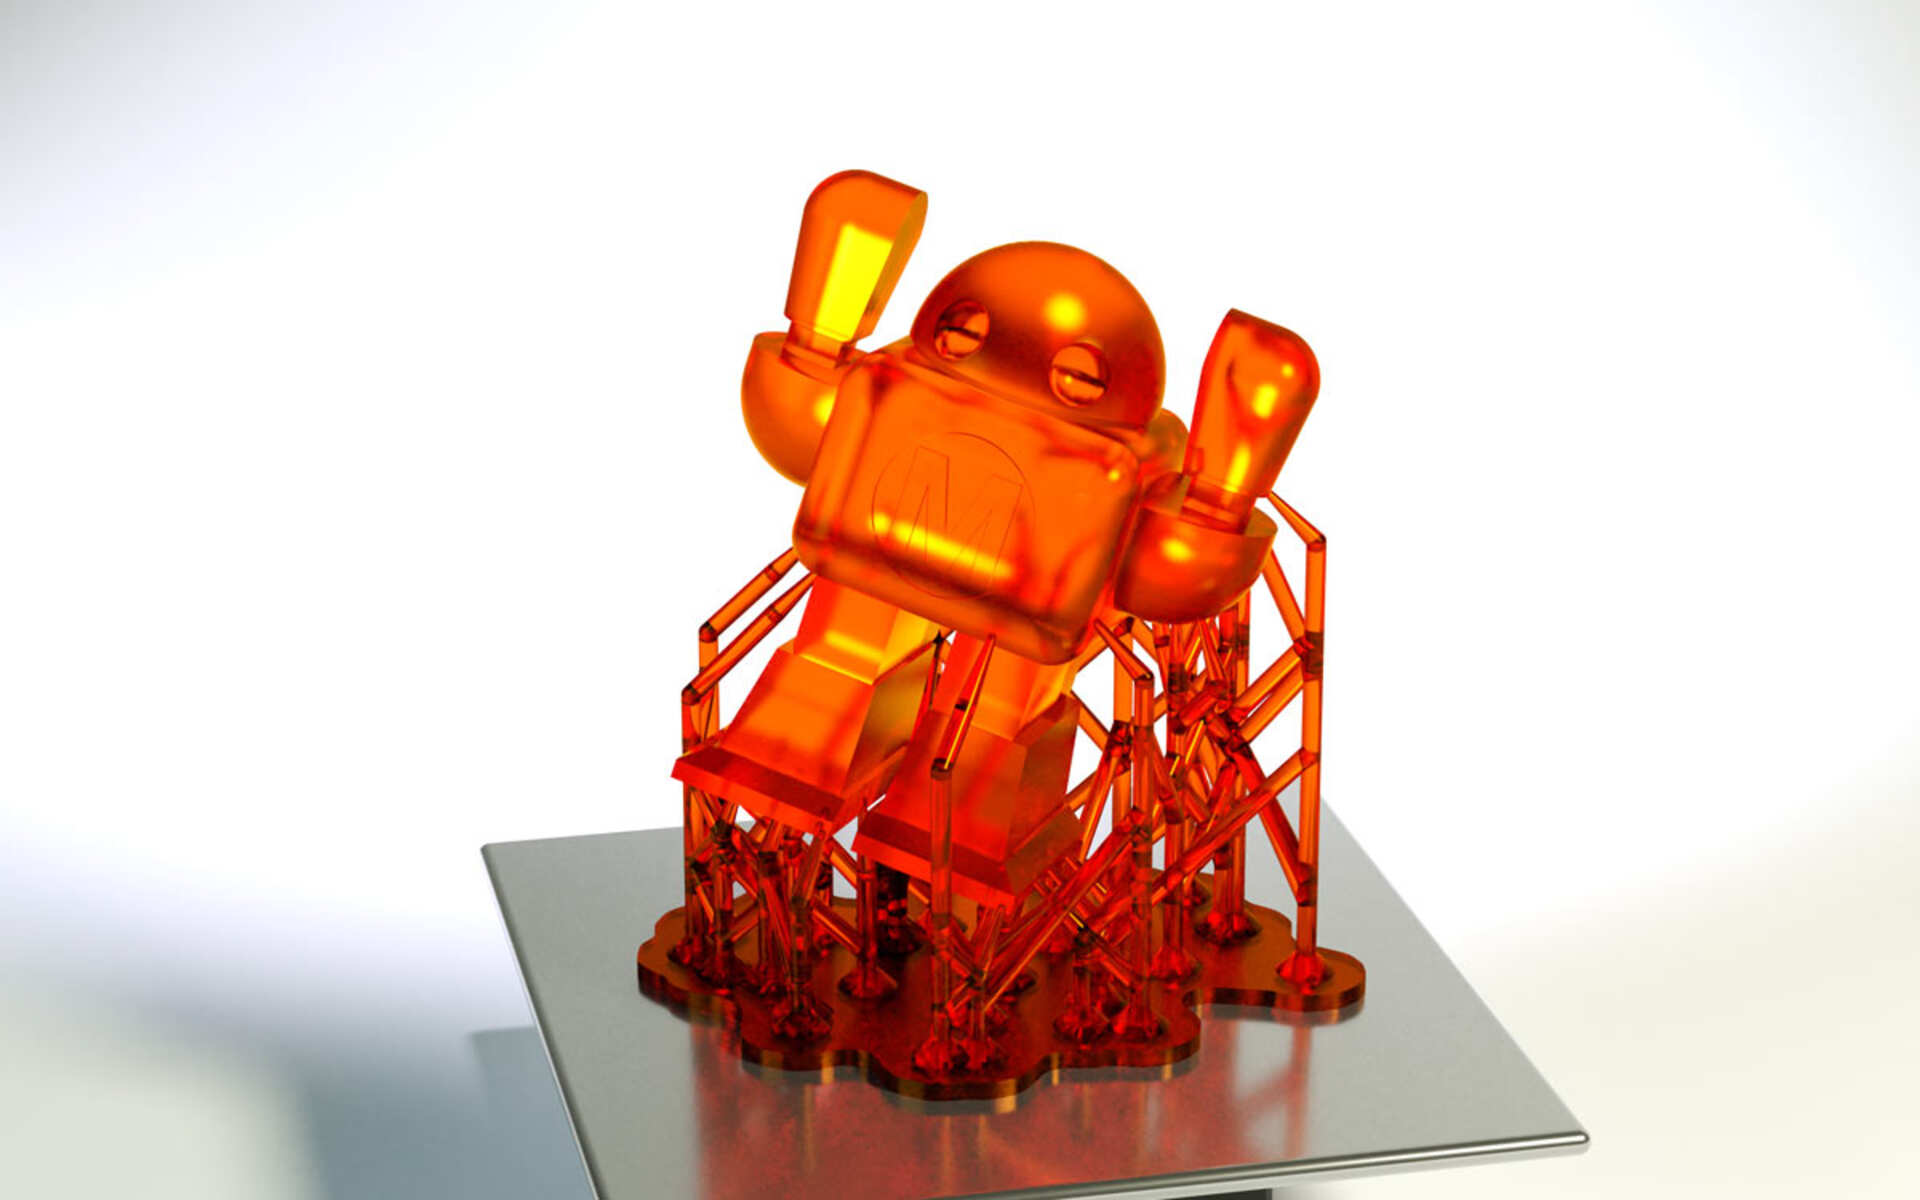
- Support structures: Depending on the design and complexity of your model, you may need to add support structures. These structures provide stability during the printing process and prevent the model from collapsing or deforming. It’s important to place the supports strategically to minimize their impact on the final print’s surface finish.
- Orientation: Consider the orientation of your model in the printing process. Certain geometries may print more successfully with specific orientations, helping to reduce the need for excessive supports or improving the overall print quality. Experimenting with different orientations can lead to better results.
- Scale and size: Check the scale and size of your model to ensure that it fits within the build volume of your resin printer. Adjust the size if necessary, keeping in mind any minimum or maximum dimensions specified by your printer. Pay attention to details and features that may become too small or fragile at different scales.
- File format: Export your 3D model in a file format that is compatible with your resin printer. The most common file formats used in 3D printing are .STL (STereoLithography) and .OBJ (Wavefront OBJ).
Once you’ve prepared and finalized your 3D model, you’re ready to proceed to the next step: sending the file to the resin 3D printer. Remember to save a backup of your model files for future reference or modifications.
Step 2: Sending the file to the printer
After preparing your 3D model, the next step in resin 3D printing is to send the file to the resin printer. This step involves transferring the digital model from your computer or storage device to the printer’s control system.
The method of transferring the file will depend on the specific resin printer you are using. Here are a few common ways to send the file to the printer:
- USB connection: Many resin printers have a USB port that allows you to connect your computer directly to the printer. Using a USB cable, you can transfer the 3D model file from your computer to the printer’s internal memory or storage.
- SD card or USB drive: Some resin printers have slots or ports for SD cards or USB drives. In this case, you can save the 3D model file onto the card or drive, plug it into the printer, and select the file from the printer’s user interface.
- Wireless transfer: Certain resin printers offer wireless connectivity options, such as Wi-Fi or Bluetooth. With these printers, you can connect your computer or mobile device to the printer wirelessly and send the 3D model file directly from your device to the printer’s control system.
Regardless of the transfer method, it’s important to ensure that the 3D model file is compatible with your resin printer. The printer may have specific file format requirements, such as .STL or .OBJ. If needed, you can use 3D modeling software or slicer software to convert and prepare the file in the appropriate format.
Once the file is successfully transferred, you can access the printer’s user interface or control panel to select the file and start the printing process. The printer will read the file and begin to process the layers based on the instructions provided in the model file.
It’s worth mentioning that some resin printers offer additional features or customization options through their user interface. These options may include adjusting print settings, fine-tuning supports, selecting the desired resolution, or even previewing the print simulation before starting the actual printing process. Familiarize yourself with your specific printer’s interface to take advantage of these capabilities.
The file transfer stage marks the completion of the second step in resin 3D printing. The next step involves calibration and leveling of the printer to ensure accurate and precise printing. We will go into detail about this step in the next section.
Step 3: Calibration and Leveling
Once the 3D model file has been transferred to the resin 3D printer, the next crucial step is calibration and leveling. Calibration ensures that the printer’s components are properly aligned and calibrated, while leveling ensures that the build platform is parallel to the printer’s light source, ensuring accurate layer deposition.
Calibration and leveling are important for achieving optimal print quality and accuracy. Here are the key steps involved:
- Check hardware components: Inspect the resin 3D printer for any loose screws, misaligned parts, or damaged components. Make sure the printer is in proper working condition before starting the calibration process.
- Calibrate the build platform: The build platform is the surface where the object is printed. It generally consists of a metal or glass plate that moves up and down during the printing process. Check the calibration method recommended by the printer manufacturer and follow the instructions to ensure the build platform is properly aligned and adjusted. Some printers use a calibration wizard that guides you through the process step by step.
- Level the build platform: Leveling refers to adjusting the build platform so that it is parallel to the resin vat or tank. This ensures that the layers of the printed object are deposited accurately. Most resin printers have built-in leveling mechanisms or indicators that assist in this process. Follow the printer’s instructions to level the build platform correctly.
- Verify z-axis homing: The z-axis refers to the vertical movement of the build platform or resin tank during the printing process. Make sure the z-axis is properly calibrated and homed, meaning that it returns to the correct starting position at the same height each time. This ensures consistency in the layer height and avoids printing errors or misalignment.
- Test printing: Once the calibration and leveling steps are complete, it’s advisable to perform a test print to confirm that the printer is operating correctly. Choose a simple model or a calibration print specifically designed for this purpose. Observe the print quality and verify that the layers adhere properly and there are no issues with overexposure or underexposure.
It’s important to note that calibration and leveling may need to be rechecked and readjusted periodically or whenever you encounter print issues. Factors such as temperature changes, transportation, or accidental bumps can affect the alignment and calibration of the printer’s components.
By ensuring proper calibration and leveling of the resin 3D printer, you set a solid foundation for successful and accurate resin prints. Once the printer is calibrated, you’re ready to move on to the next step: pouring resin into the printer.
Step 4: Pouring Resin into the Printer
After calibrating and leveling your resin 3D printer, it’s time to pour the resin into the printer’s resin tank or vat. This step is crucial as it provides the printing material necessary to create the 3D object.
Here are the key considerations and steps for pouring resin into the printer:
- Choose the right resin: Select a photopolymer resin that is compatible with your printer and suitable for your intended application. Resins come in various formulations, each with specific properties such as color, transparency, flexibility, or strength. Ensure that the resin is designed for your specific printer and read any manufacturer recommendations or guidelines.
- Prepare the resin: Resin comes in liquid form and is typically stored in tightly sealed bottles. Before pouring, gently shake the resin bottle to ensure any settled pigments are well-mixed. It’s important to handle resin in a well-ventilated area and wear appropriate gloves and protective gear as specified by the resin manufacturer.
- Secure the resin tank: In most printers, the resin tank or vat can be removed or secured with clamps or screws. Follow the printer’s instructions to securely install the resin tank to prevent any leaks during the printing process.
- Pour the resin: Carefully pour the resin into the resin tank. Take into account any minimum or maximum fill levels indicated by the printer or resin manufacturer to avoid overfilling or underfilling the tank. Pour the resin slowly and steadily, ensuring that it evenly covers the entire surface of the tank. Be careful not to spill or splash resin on the printer or surrounding area.
- Filter the resin (optional): To remove any impurities or solid particles that may have contaminated the resin, consider using a fine mesh filter or strainer when pouring the resin into the tank. This step can help ensure clean and debris-free resin, which results in better print quality.
- Close the resin tank: Once the resin is poured, securely close the resin tank using the printer’s mechanisms or closure methods. Double-check that the tank is properly sealed to prevent resin leakage or exposure to ambient light, as this may prematurely cure the resin.
It’s important to follow the printer manufacturer’s guidelines and safety recommendations when handling resin. Some printers provide additional features to assist with resin management, such as resin level sensors or automatic resin filling systems. Familiarize yourself with the specific instructions provided by your printer to ensure proper resin handling and management.
After pouring the resin into the printer, you’re ready to move on to the exciting step of the resin 3D printing process: the printing itself. In the next section, we will explore the details of the printing process, including how the resin is cured to form the 3D object layer by layer.
Step 5: The Printing Process
With the resin properly poured into the printer, it’s time to delve into the exciting printing process. This step involves the transformation of the liquid resin into a solid 3D object, layer by layer, through the curing process.
Let’s explore the key aspects of the resin 3D printing process:
- Layer slicing: To start the printing process, the printer’s software or firmware slices the 3D model into thin layers, each typically ranging from 25 to 100 microns in thickness. The slicing software determines the necessary support structures, the exposure time for each layer, and other printing parameters based on the model and user-defined settings.
- Exposure and curing: The resin 3D printer uses a light source, such as an ultraviolet (UV) laser or an array of LCD or LED lights, to selectively expose each layer of the resin. The light source emits light at a specific wavelength that matches the resin’s curing properties. When the light hits the resin, it triggers a chemical reaction that solidifies and hardens the resin in the desired areas, according to the sliced model’s pattern.
- Z-axis movement: While exposing each layer, the printer’s build platform or resin tank moves vertically in small increments, typically corresponding to the layer thickness. As each layer is cured, the build platform lowers slightly to accommodate the next layer. This process continues until the entire object is built, layer by layer.
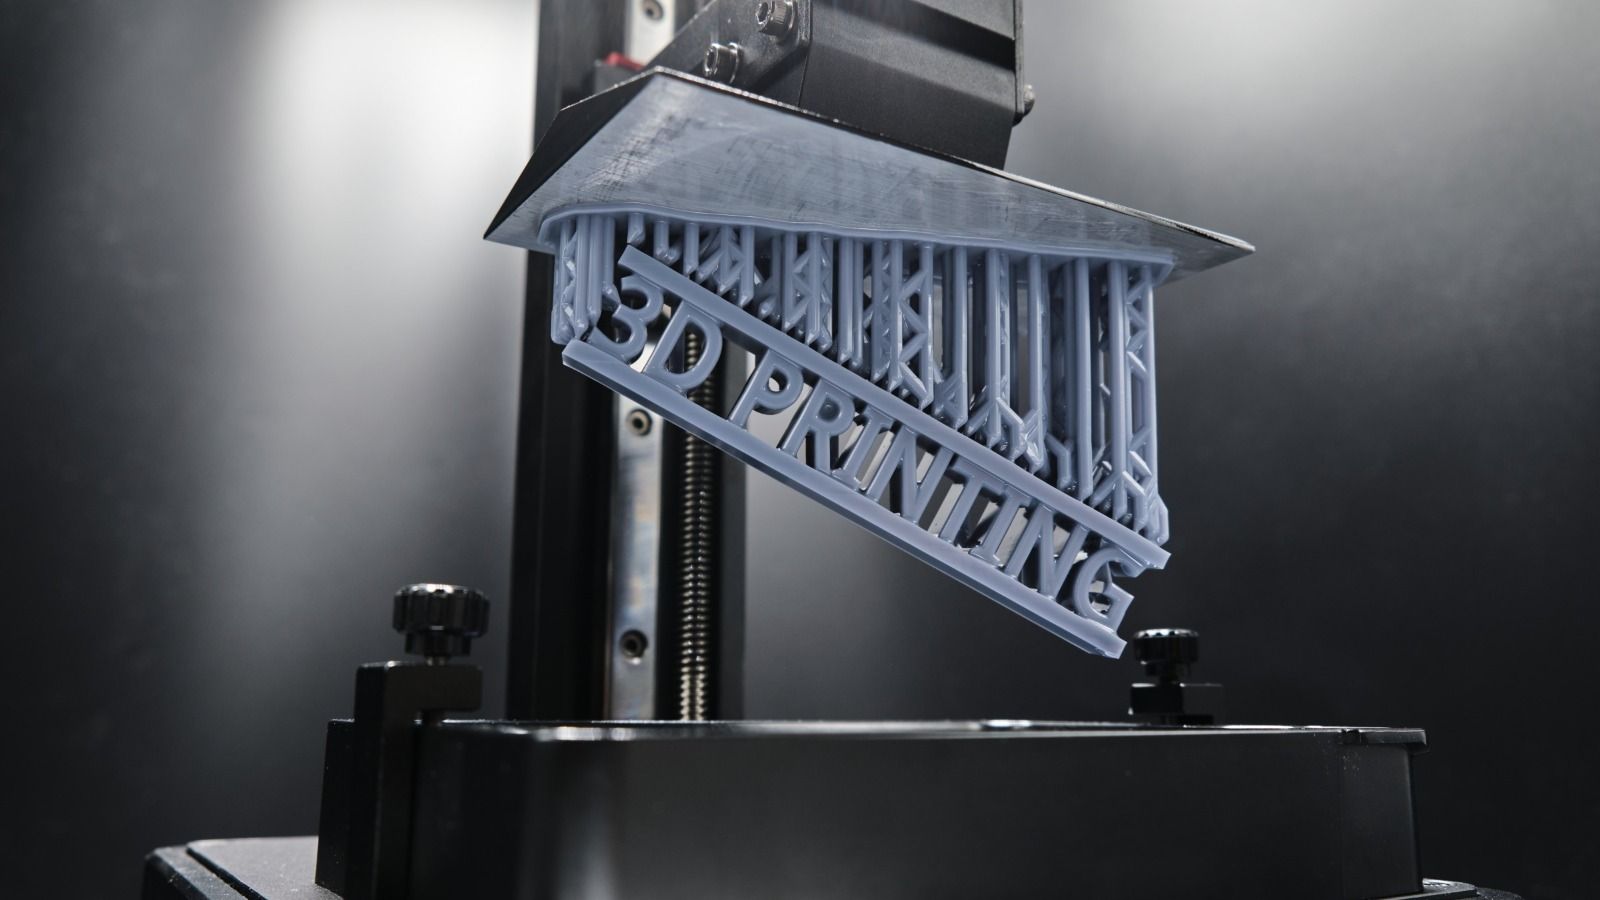
- Support structures: As mentioned earlier, support structures may be required to ensure the stability of certain features or geometries during the printing process. These structures, generated during the slicing process, help prevent sagging or deformation of overhanging or delicate parts of the model. The supports are designed to be easily removable in post-processing once the print is complete.
- Resin recoating: During the printing process, the resin tank periodically needs to be replenished with fresh resin to maintain the correct level for the next layer. Some printers have built-in mechanisms to automatically refill the tank, while others require manual intervention to add the resin as needed.
- Printing time: The time required for the printing process varies depending on multiple factors, including the size and complexity of the model, the layer thickness, the exposure settings, and the printer’s speed. Prints can range from a few minutes to several hours or even days for large and intricate designs.
Throughout the printing process, it’s important to monitor the progress and ensure that everything is functioning smoothly. Any issues, such as insufficient curing, failed adhesion of layers, or mechanical failures, should be addressed promptly to avoid compromising the quality of the final print.
Once the printing is complete, the next step involves cleaning and post-processing the printed object. We will delve into these essential steps in the following section.
Step 6: Cleaning and Post-Processing
After the resin 3D printing process is finished, the printed object needs to undergo cleaning and post-processing to remove any excess resin and achieve its final desired properties. This step is crucial for enhancing the visual appeal, mechanical strength, and overall quality of the printed object.
Let’s explore the key steps involved in cleaning and post-processing a resin 3D printed object:
- Remove the object from the build platform: Carefully detach the printed object from the build platform, ensuring not to damage or strain the object. Depending on the printer, you may need to use a spatula, scraper, or pliers to gently separate the object from the platform.
- Remove excess resin: The printed object may still have uncured or excess resin on its surface. To remove this, rinse the object in a container filled with a solvent compatible with the resin, such as isopropyl alcohol (IPA). Gently agitate the object in the solvent to remove any clinging resin. Repeat this step if necessary.
- Post-cure the object: Most resin 3D printed objects require additional curing to ensure complete polymerization and achieve their final strength. Place the washed object in a UV curing chamber or under a UV light source for a specific period of time, as recommended by the resin manufacturer. This UV exposure will help harden the resin and enhance its mechanical properties.
- Support removal: If your printed object had support structures, it’s time to remove them. Carefully break or cut away the supports, taking care not to damage the print. For hard-to-reach areas, you can use small tools, such as tweezers or needle-nose pliers, or sand the supports down to remove any remnants.
- Surface finishing: Depending on your desired finish, you may need to perform additional post-processing steps. This can include sanding the surface to smooth any rough edges or imperfections, or applying a surface primer or sealant for a more refined appearance. For particularly detailed prints, you may want to use fine-grit sandpaper, buffers, or polishing compounds to achieve a high-quality finish.
- Final inspection: Once you have completed the cleaning and post-processing steps, thoroughly inspect the printed object for any remaining blemishes, flaws, or unfinished areas. Touch up any imperfections as needed and refine the print until you are satisfied with the final result.
It’s important to handle the cleaning solvents and post-processing materials with caution, following the safety guidelines provided by the resin manufacturer. Ensure proper ventilation and wear appropriate protective gear, such as gloves and eye protection, when working with chemicals or substances.
By diligently cleaning and post-processing your resin 3D printed object, you can achieve a professional-looking finish and enhance the mechanical integrity and aesthetics of the print. Whether you’re creating functional prototypes, artistic sculptures, or intricate jewelry, these post-processing steps are essential for bringing out the full potential of your resin 3D prints.
Advantages of Using a Resin 3D Printer
Resin 3D printers offer a range of advantages that make them a popular choice among users, especially when it comes to producing high-quality, intricate, and detailed prints. Let’s explore some of the key advantages of using a resin 3D printer:
- Precision and detail: Resin printers are capable of producing incredibly detailed prints with smooth surfaces and intricate features. The ability to cure resin in thin layers allows for precise control over the printing process, resulting in high-resolution models with excellent accuracy.
- Smooth surface finish: Resin prints generally have a smooth and polished appearance, requiring less post-processing compared to other 3D printing methods. The fine layers and resin’s self-leveling properties contribute to a clean and aesthetically pleasing surface finish.
- Wide range of materials: Resin printers offer a variety of material options, allowing users to choose resins with specific characteristics based on their application requirements. There are resins available for different purposes, such as high strength, flexibility, transparency, or heat resistance, providing versatility in material selection.
- Functional prototyping: Resin 3D printers are well-suited for functional prototyping due to their ability to produce intricate parts and complex geometries. Resin prints can accurately replicate details and tolerances needed for testing form, fit, and functionality, making them valuable tools in engineering and product development.
- Miniature and jewelry production: The fine detail and smooth surface finish of resin prints make them ideal for creating miniatures, figurines, and jewelry designs. Artists, hobbyists, and gaming enthusiasts benefit from resin printing’s ability to bring small-scale models to life with exceptional detail and intricacy.
- Dental and medical applications: Resin 3D printing finds extensive use in the dental and medical fields due to its ability to produce highly accurate models and custom dental appliances, like crowns, aligners, and surgical guides. The smooth and precise prints can assist in diagnostics, treatment planning, and patient education.
- Reduced print time: Compared to some other 3D printing technologies, resin printing typically offers faster print times for similar levels of detail and resolution. The curing process allows for the simultaneous solidification of each layer, reducing the overall print duration in many cases.
These advantages make resin 3D printers a valuable tool in various industries and applications. However, it’s important to consider the limitations and specific requirements of resin printing before embarking on a project. Understanding the strengths and weaknesses of any 3D printing technology helps to leverage its full potential and achieve the desired results.
Limitations and Considerations
While resin 3D printers offer many advantages, it’s important to be aware of their limitations and considerations before diving into resin printing. Understanding these factors can help you make informed decisions and optimize your printing experience. Let’s explore some of the key limitations and considerations:
- Higher cost: Resin printers tend to be more expensive compared to filament-based printers, both in terms of the initial investment and ongoing costs. Resin itself is more expensive than filaments, and the printers often require additional accessories like resin tanks and specialized cleaning tools.
- Smell and ventilation: Resin printing produces a distinct odor that some users may find unpleasant. The fumes emitted during the printing and post-curing process can also be potentially harmful if not properly ventilated. It’s important to use resin printers in a well-ventilated area or invest in additional ventilation systems.
- Handling and safety: Resin can be messy and sticky, and it requires proper handling and safety precautions. Direct contact with uncured resin should be avoided, and protective gear like gloves, safety glasses, and lab coats should be worn when working with resin. It’s also essential to dispose of unused or cured resin properly and according to local regulations.
- Print size limitations: Resin printers typically have smaller build volumes compared to filament-based printers, limiting the size of prints that can be produced. Large-scale prints may require segmenting the object into separate pieces and assembling them post-print.
- Print durability: While resin prints can have excellent surface detail, they may be more brittle compared to prints produced with certain filaments. This can make them more prone to breakage under stress or impact. However, there are specialized resins available that offer enhanced strength and durability.
- Post-processing requirements: Resin prints often require more post-processing steps compared to filament-based prints. This includes washing the prints in solvents, post-curing them under UV lights, and removing support structures. It’s important to allocate sufficient time and resources for proper post-processing to achieve the desired final result.
- Limited resin compatibility: Resin printers are typically designed to work with specific resins recommended by the manufacturer. Using incompatible or uncertified resins may result in poor print quality or damage to the printer. It’s essential to carefully select resins that are compatible with your specific printer model.
By considering these limitations and taking the necessary precautions, you can still reap the benefits of resin 3D printing while mitigating potential challenges. It’s advisable to thoroughly research your specific printer model, resin options, and best practices to maximize your success in resin printing.
Conclusion
Resin 3D printing is a fascinating technology that offers numerous advantages for creating high-quality, detailed, and precise objects. Whether you’re an artist, engineer, or hobbyist, understanding how a resin 3D printer works and the process involved can help you unleash your creativity and bring your ideas to life.
In this article, we explored the various steps of resin 3D printing, from preparing the 3D model and sending it to the printer, to calibration, leveling, pouring resin, and the printing process itself. We discussed the advantages of using a resin 3D printer, including its ability to produce intricate designs, smooth surface finishes, and wide material options for different applications.
However, we also highlighted the important limitations and considerations to keep in mind when working with resin printers. These considerations range from the higher cost of resin printing compared to filament-based printing, to the need for proper ventilation, handling precautions, and post-processing requirements.
By understanding the strengths, weaknesses, and considerations of resin 3D printing, you can navigate the technology with confidence and achieve impressive results. Whether you’re creating functional prototypes, artistic sculptures, or custom jewelry, resin 3D printing offers a versatile and powerful tool for turning your imagination into tangible objects.
Remember to stay curious, explore different materials and techniques, and continue to refine your skills and knowledge in resin 3D printing. Embrace the endless possibilities that this technology brings and embrace the joy of creating and innovating through resin 3D printing.