Reasons to Change Your Wifi Name and Password
Changing your wifi name and password is not just a mundane task; it is an essential step in maintaining the security and performance of your home network. While it may seem like an inconvenience, there are several important reasons why you should regularly update your wifi credentials. Here are some compelling reasons to change your wifi name and password:
- Enhanced Security: One of the primary reasons to change your wifi name and password is to strengthen the security of your network. Using default names and passwords can make your network more vulnerable to unauthorized access. By changing your credentials, you make it harder for hackers and intruders to gain access to your network and compromise your personal information.
- Prevent Unauthorized Network Usage: Changing your wifi name and password helps prevent unauthorized individuals from connecting to your network. By doing so, you can ensure that only approved devices and users can access your network, reducing the risk of bandwidth hogging and improving the overall performance of your network.
- Protect Personal Privacy: Your wifi network contains sensitive personal information, including passwords, financial details, and personal communications. By regularly changing your wifi name and password, you can protect your privacy and prevent unauthorized individuals from intercepting your data.
- Eliminate Interference: If you notice a decrease in network performance or suspect that someone is using your wifi without your permission, changing your wifi name and password can help eliminate interference. This ensures that only your authorized devices can connect to your network, providing you with faster and more reliable wifi.
- Stay up to Date: Regularly changing your wifi name and password can also help you stay up to date with the latest security protocols and firmware updates. Many routers require a password change during the setup process, and by following this practice, you ensure that your network is using the latest security standards.
By considering these compelling reasons, you can see the importance of changing your wifi name and password. It’s a simple and effective way to enhance your network security, protect your privacy, and ensure optimal wifi performance.
Step 1: Accessing Your Router’s Settings
To change your wifi name and password, you need to access your router’s settings. This can be done by following these steps:
- Connect to Your Router: Start by connecting your computer or device to your wifi network. Ensure that you are connected to the same network that you want to make changes to.
- Open a Web Browser: Once connected, open a web browser on your device. It can be Google Chrome, Firefox, Safari, or any other browser you prefer.
- Enter the Router’s IP Address: In the address bar of your browser, type in the IP address of your router. The default IP address is usually “192.168.0.1” or “192.168.1.1”. If you are unsure about the IP address, you can find it on the back or underside of your router or consult the router’s documentation.
- Enter Your Router’s Login Credentials: After entering the IP address, you will be prompted to enter your router’s login credentials. This typically includes a username and password. If you haven’t changed these credentials before, you can find the default login information in the router’s manual or on the manufacturer’s website.
- Access the Router’s Settings: Once successfully logged in, you will be directed to the router’s settings page. This page may vary depending on your router brand and model.
By following these steps, you can access your router’s settings and prepare to make changes to your wifi name and password. Remember to keep your router’s login credentials secure and avoid sharing them with unauthorized individuals to ensure the privacy and security of your network.
Step 2: Login to the Router
After accessing your router’s settings page, the next step is to log in to your router. This will allow you to access and modify the configuration settings, including the wifi name and password. Follow these steps to login to your router:
- Locate the Login Section: Look for the login section on the router’s settings page. It is typically displayed prominently and can be found on the main page or under a tab labeled “Administration” or “Login.”
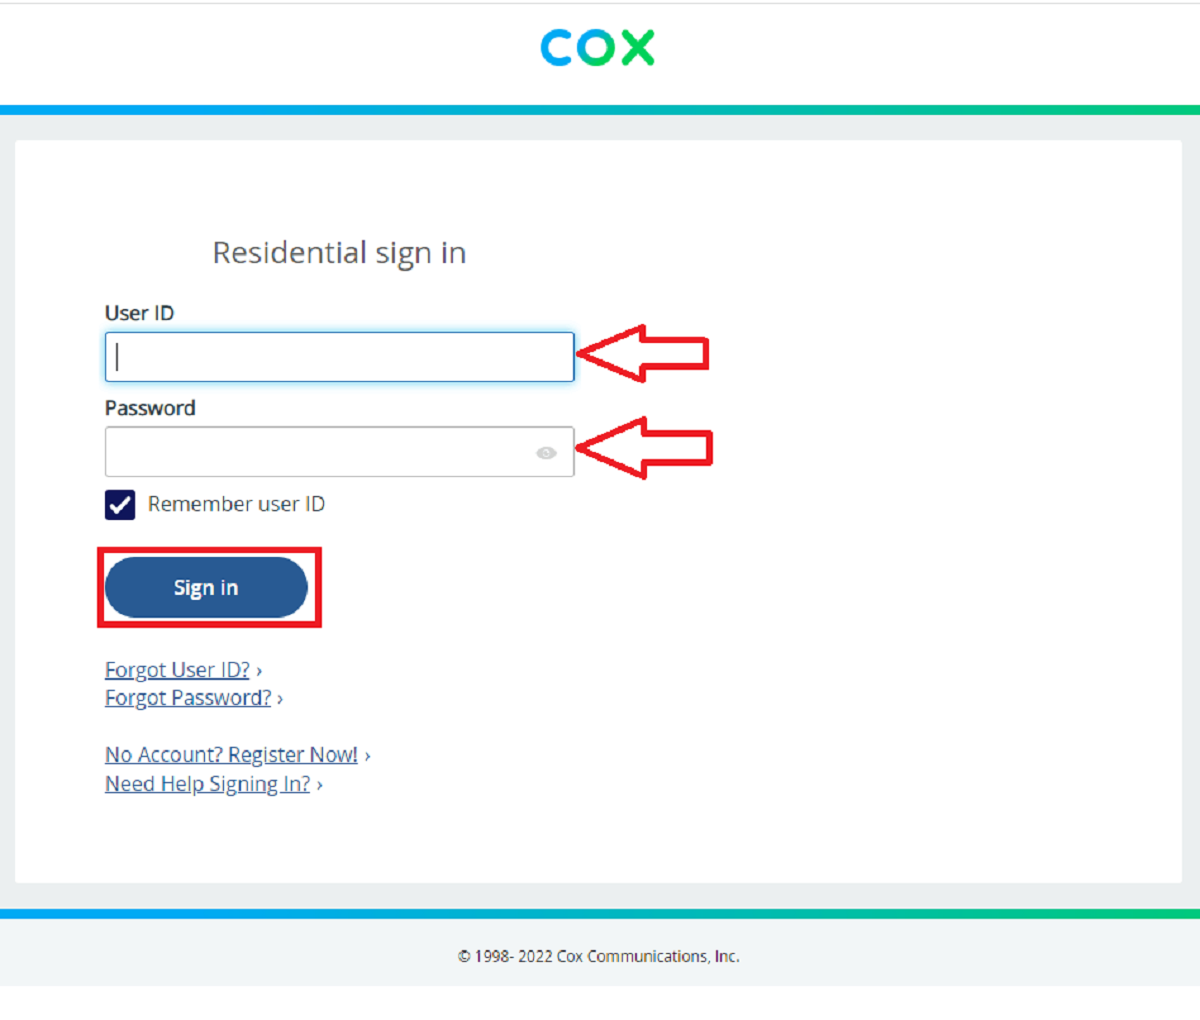
- Enter the Username and Password: In the login section, enter the username and password for your router. If you haven’t changed them before, refer to the router’s documentation or look for the default login information on the manufacturer’s website. Common default usernames include “admin,” “user,” or leaving the field blank, and the default password may be “password” or “admin.”
- Click “Login” or “Submit”: After entering the correct username and password, click the “Login” or “Submit” button to proceed.
If the login credentials are correct, you will be granted access to the router’s settings. However, if you enter incorrect login information, you may receive an error message or be redirected back to the login page. In such cases, double-check your username and password and try again.
It’s important to note that some routers may have additional security measures, such as requiring a security code or a security question, to prevent unauthorized access. If prompted for any additional information, follow the on-screen instructions and provide the necessary details to proceed with the login process.
Once you have successfully logged in to your router, you are ready to proceed with the next steps to change your wifi name and password. Remember to log out of the router’s settings page after making the desired changes to ensure the security of your network configuration.
Step 3: Locating the Name and Password Settings
After logging in to your router’s settings, the next step in changing your wifi name and password is to locate the appropriate settings. The exact steps may vary depending on your router’s brand and model, but here is a general guide to finding the name and password settings:
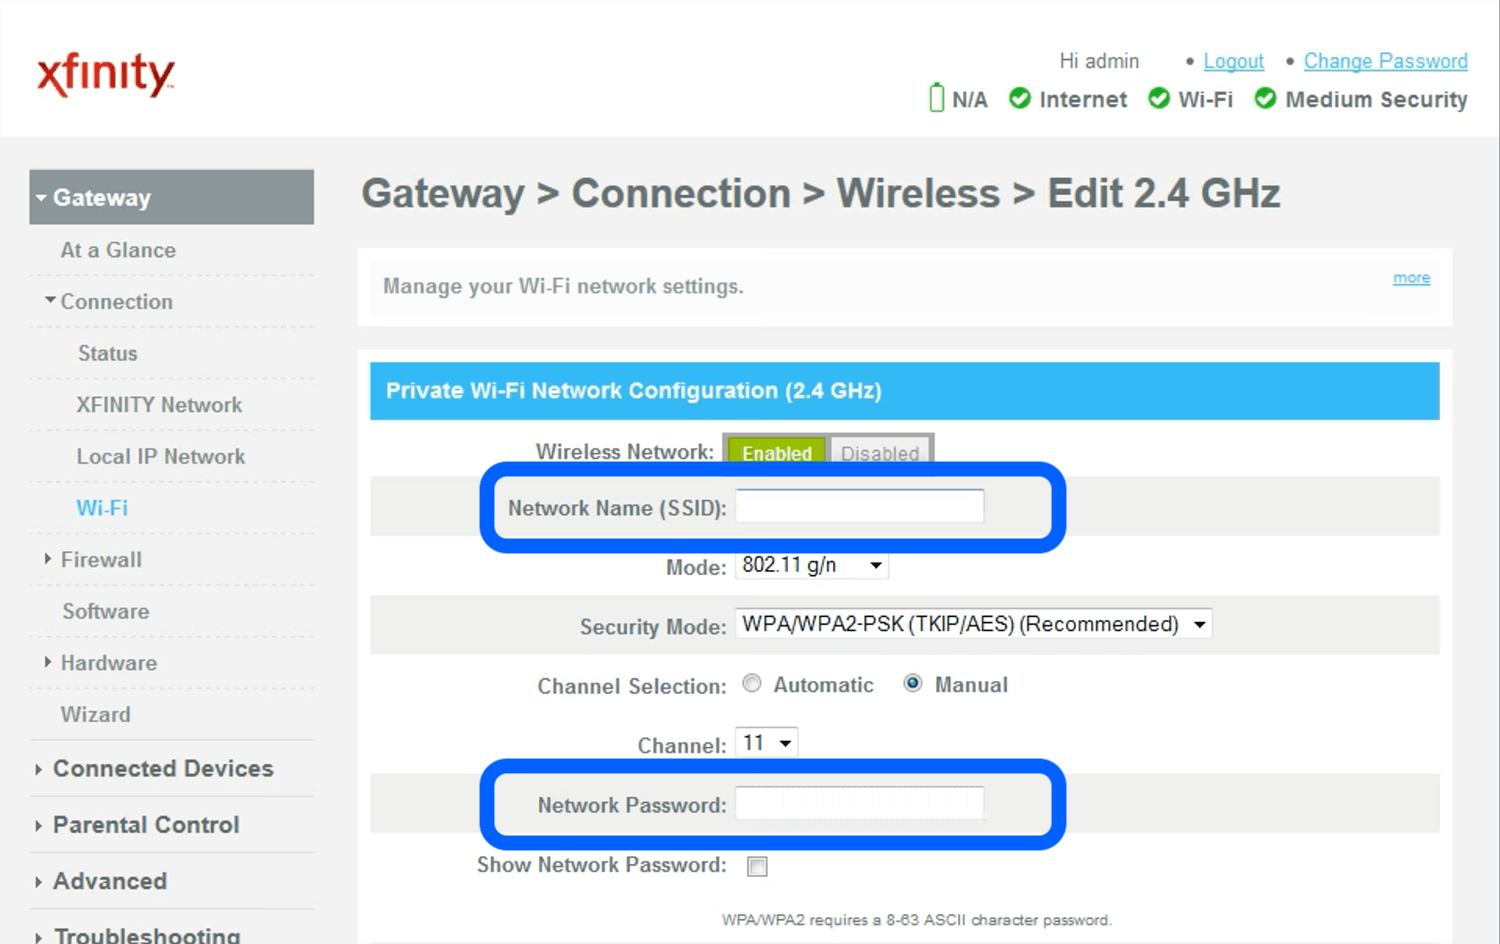
- Look for the Wireless or Wi-Fi Settings: On the router’s settings page, navigate to the section labeled “Wireless” or “Wi-Fi.” This is where you will find the settings related to your wifi network.
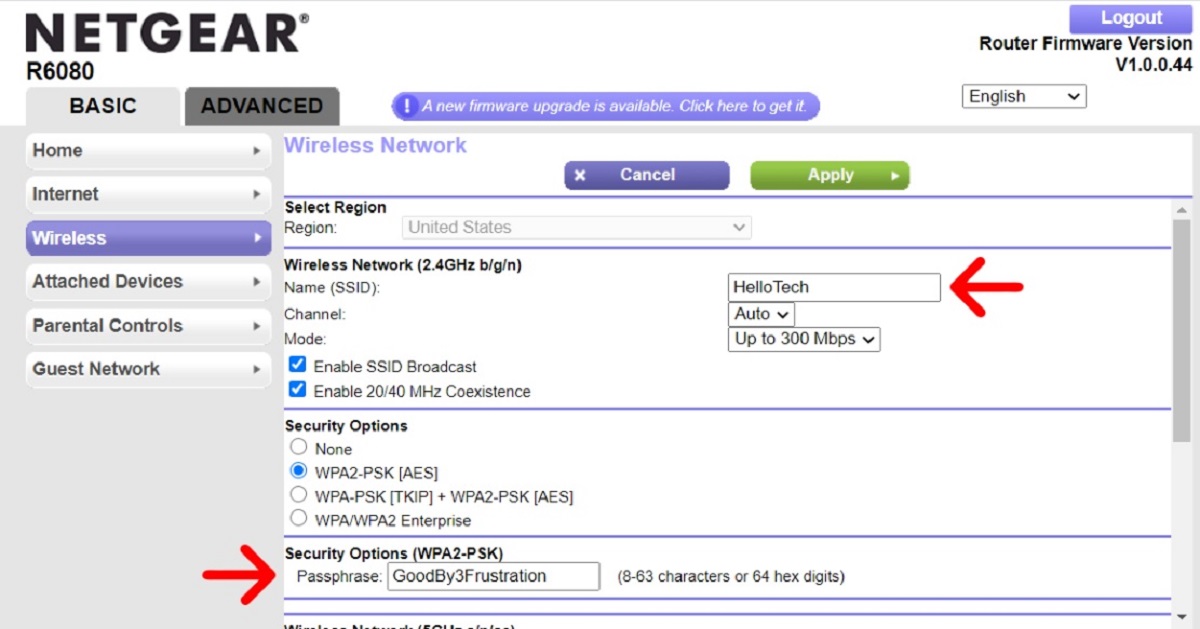
- Find the Network Name (SSID): Within the wireless settings section, look for the field that mentions “Network Name” or “SSID” (Service Set Identifier). The SSID is the name of your wifi network that appears when you search for available networks on your devices.
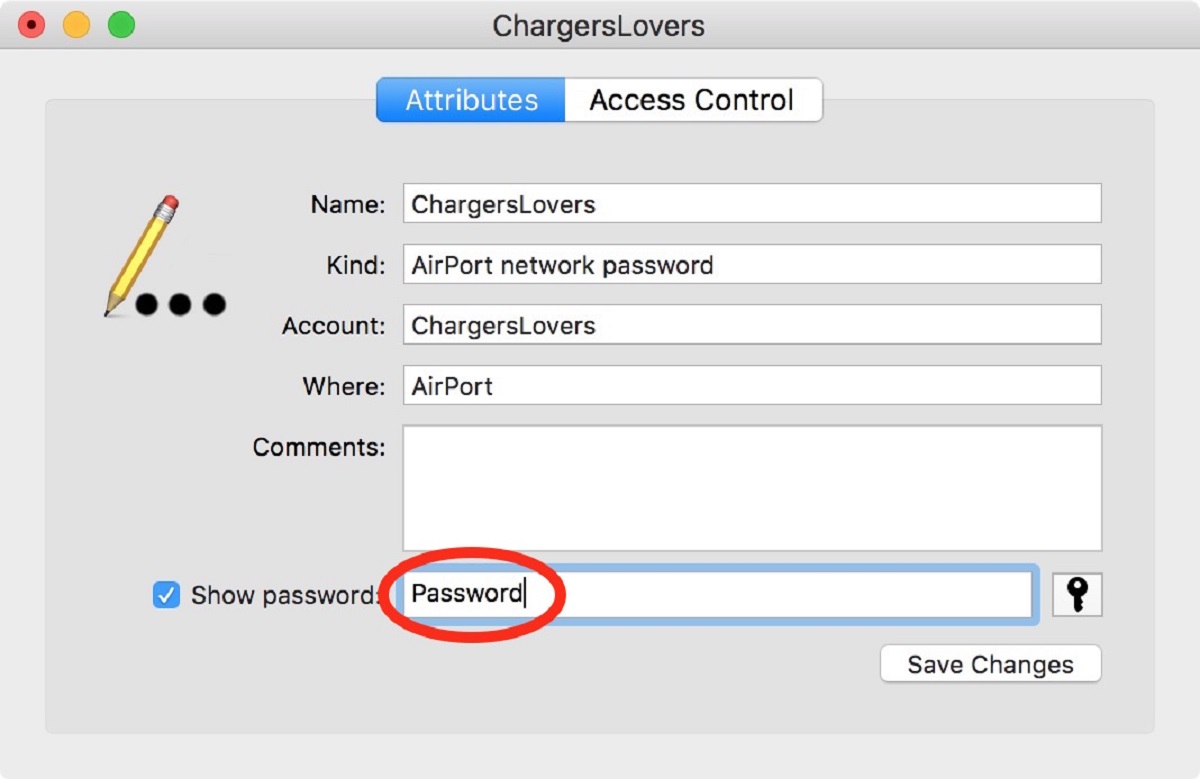
- Locate the Password or Security Key: In the same wireless settings section, locate the field that refers to the wifi password or security key. This is the password that devices need to connect to your wifi network.
Depending on your router’s interface, you may need to expand or collapse certain sections or click on tabs to reveal the name and password settings. Refer to your router’s manual or online documentation for specific instructions if you are having trouble finding the settings.
Once you have located the name (SSID) and password settings, you are ready to proceed with changing your wifi name and password in the following steps. Keep in mind that it is recommended to choose a unique and secure wifi name and password to ensure the privacy and security of your network.
Step 4: Changing the Wifi Name (SSID)
Changing the wifi name, also known as the SSID (Service Set Identifier), allows you to personalize and easily identify your wifi network. Follow these steps to change the wifi name:
- Locate the Network Name (SSID) field: Within the router’s wireless settings, find the field that displays the current network name or SSID.
- Enter your new wifi name: Clear the existing name and enter the desired name for your wifi network. Keep in mind that the name should be unique, easy to remember, and avoid using any personal or sensitive information.
- Save the changes: After entering the new wifi name, look for a “Save,” “Apply,” or “Submit” button in the wireless settings section. Click or select it to save the changes you made.
Once the changes are saved, your router will update the wifi name, and it will be visible to devices searching for available networks. It may take a moment for the changes to take effect, so give your devices a moment to detect the updated wifi name.
Remember to choose a wifi name that is easy to recognize and differentiate from neighboring networks. This will help you identify your network quickly and prevent connectivity issues with similarly named networks in crowded areas.
Changing the wifi name does not affect the password or other network settings. Keep in mind that updating the wifi name does require you to reconnect your devices to the newly named network. This can be done in the final steps outlined in this guide.
Step 5: Changing the Wifi Password
Changing your wifi password is a crucial step in protecting your network from unauthorized access. Follow these steps to change your wifi password:
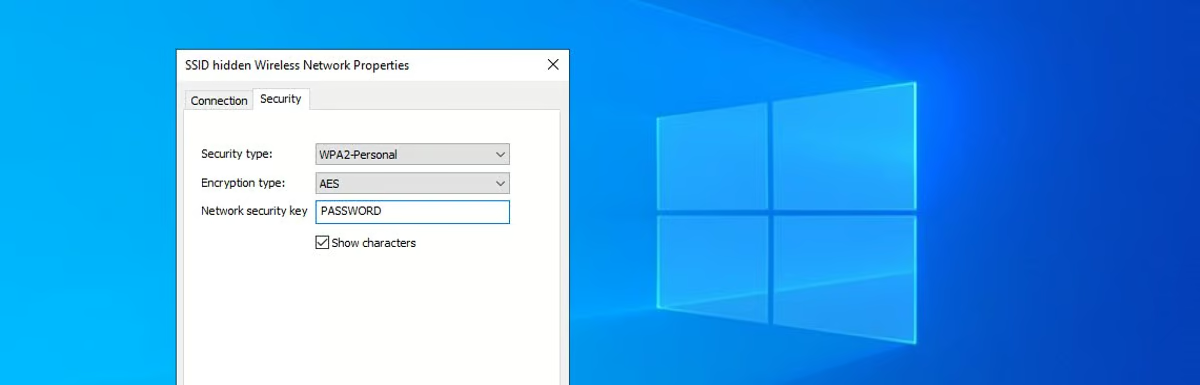
- Locate the Password or Security Key field: Within the router’s wireless settings, find the field that displays the current password or security key.
- Generate a Strong Password: Create a strong and secure password for your wifi network. It is recommended to use a combination of uppercase and lowercase letters, numbers, and special characters. Avoid using common words, predictable sequences, or personal information that could be easily guessed.
- Enter the new password: Clear the existing password and enter your newly generated password in the designated field. Make sure to enter the password accurately to prevent connectivity issues later.
- Save the changes: Once you have entered the new password, locate the “Save,” “Apply,” or “Submit” button in the wireless settings section. Click or select it to save the changes you made.
After saving the changes, your router will update the wifi password. It’s important to note that changing the password will disconnect any devices currently connected to the network. To reconnect your devices, you will need to enter the new password on each device that connects to your wifi network.
Changing your wifi password periodically is a good security practice, as it decreases the chances of someone gaining unauthorized access to your network. Additionally, it is recommended to use a different password for your wifi network than what you use for other accounts or services to enhance your overall online security.
Remember to securely store your new wifi password in a safe place or use a password manager to ensure that you can easily access it when needed.
Step 6: Saving and Applying the Changes
After making the necessary changes to your wifi name (SSID) and password, it is essential to save and apply the changes to ensure they take effect. Follow these steps to save and apply the changes:
- Locate the Save or Apply button: Look for a button or option that allows you to save or apply the changes you made to the router’s settings. This button is usually located at the bottom or top of the settings page.
- Click Save or Apply: Once you have found the appropriate button, click or select it to save and apply the changes you made to the wifi name and password. The router may take a moment to process the changes.
- Wait for the changes to take effect: After saving and applying the changes, give your router a few moments to update its configuration. This includes broadcasting the new wifi name (SSID) and implementing the new password.
It’s crucial to be patient during this process, as it may take some time for the changes to propagate. While waiting, avoid manually restarting the router or interrupting its operation, as this can prevent the changes from taking effect properly.
Once the changes have been applied, your router will now be using the new wifi name and password. It’s important to reconnect your devices to the updated wifi network to ensure they can continue to access the internet seamlessly.
Next, proceed to the final step, which involves reconnecting your devices to the newly updated wifi network.
Step 7: Reconnecting Devices to the Updated Wifi Network
After changing your wifi name (SSID) and password, the final step is to reconnect your devices to the updated wifi network. Here’s how you can do that:
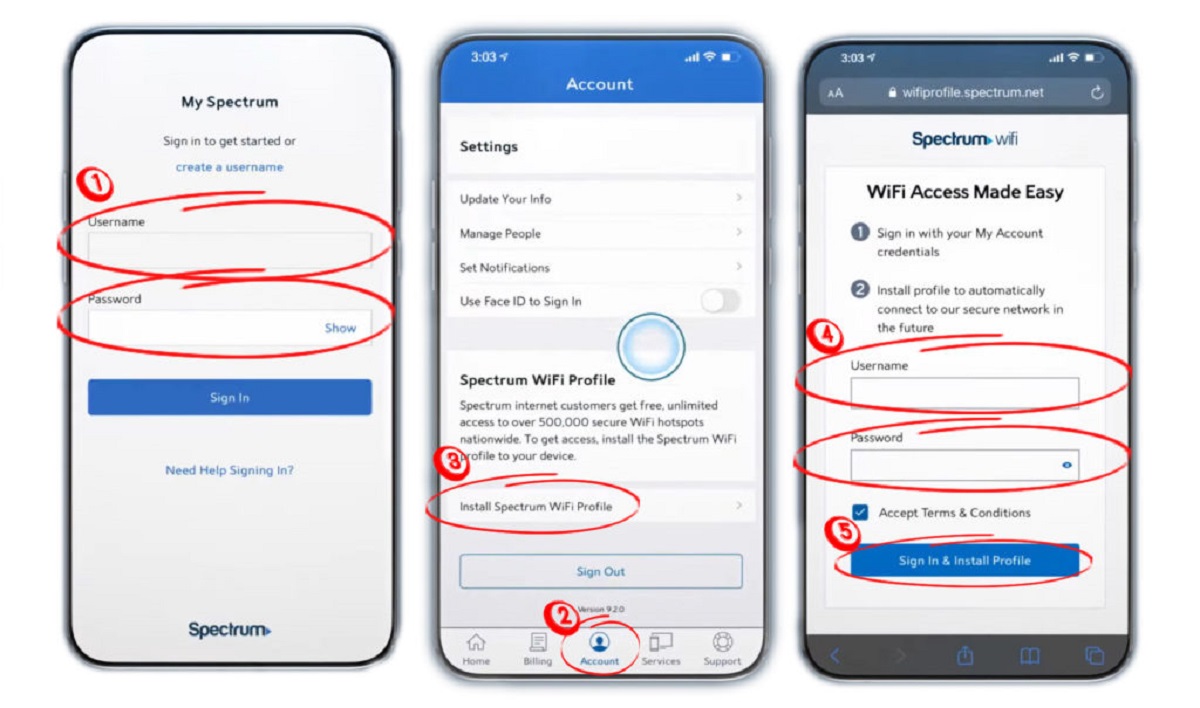
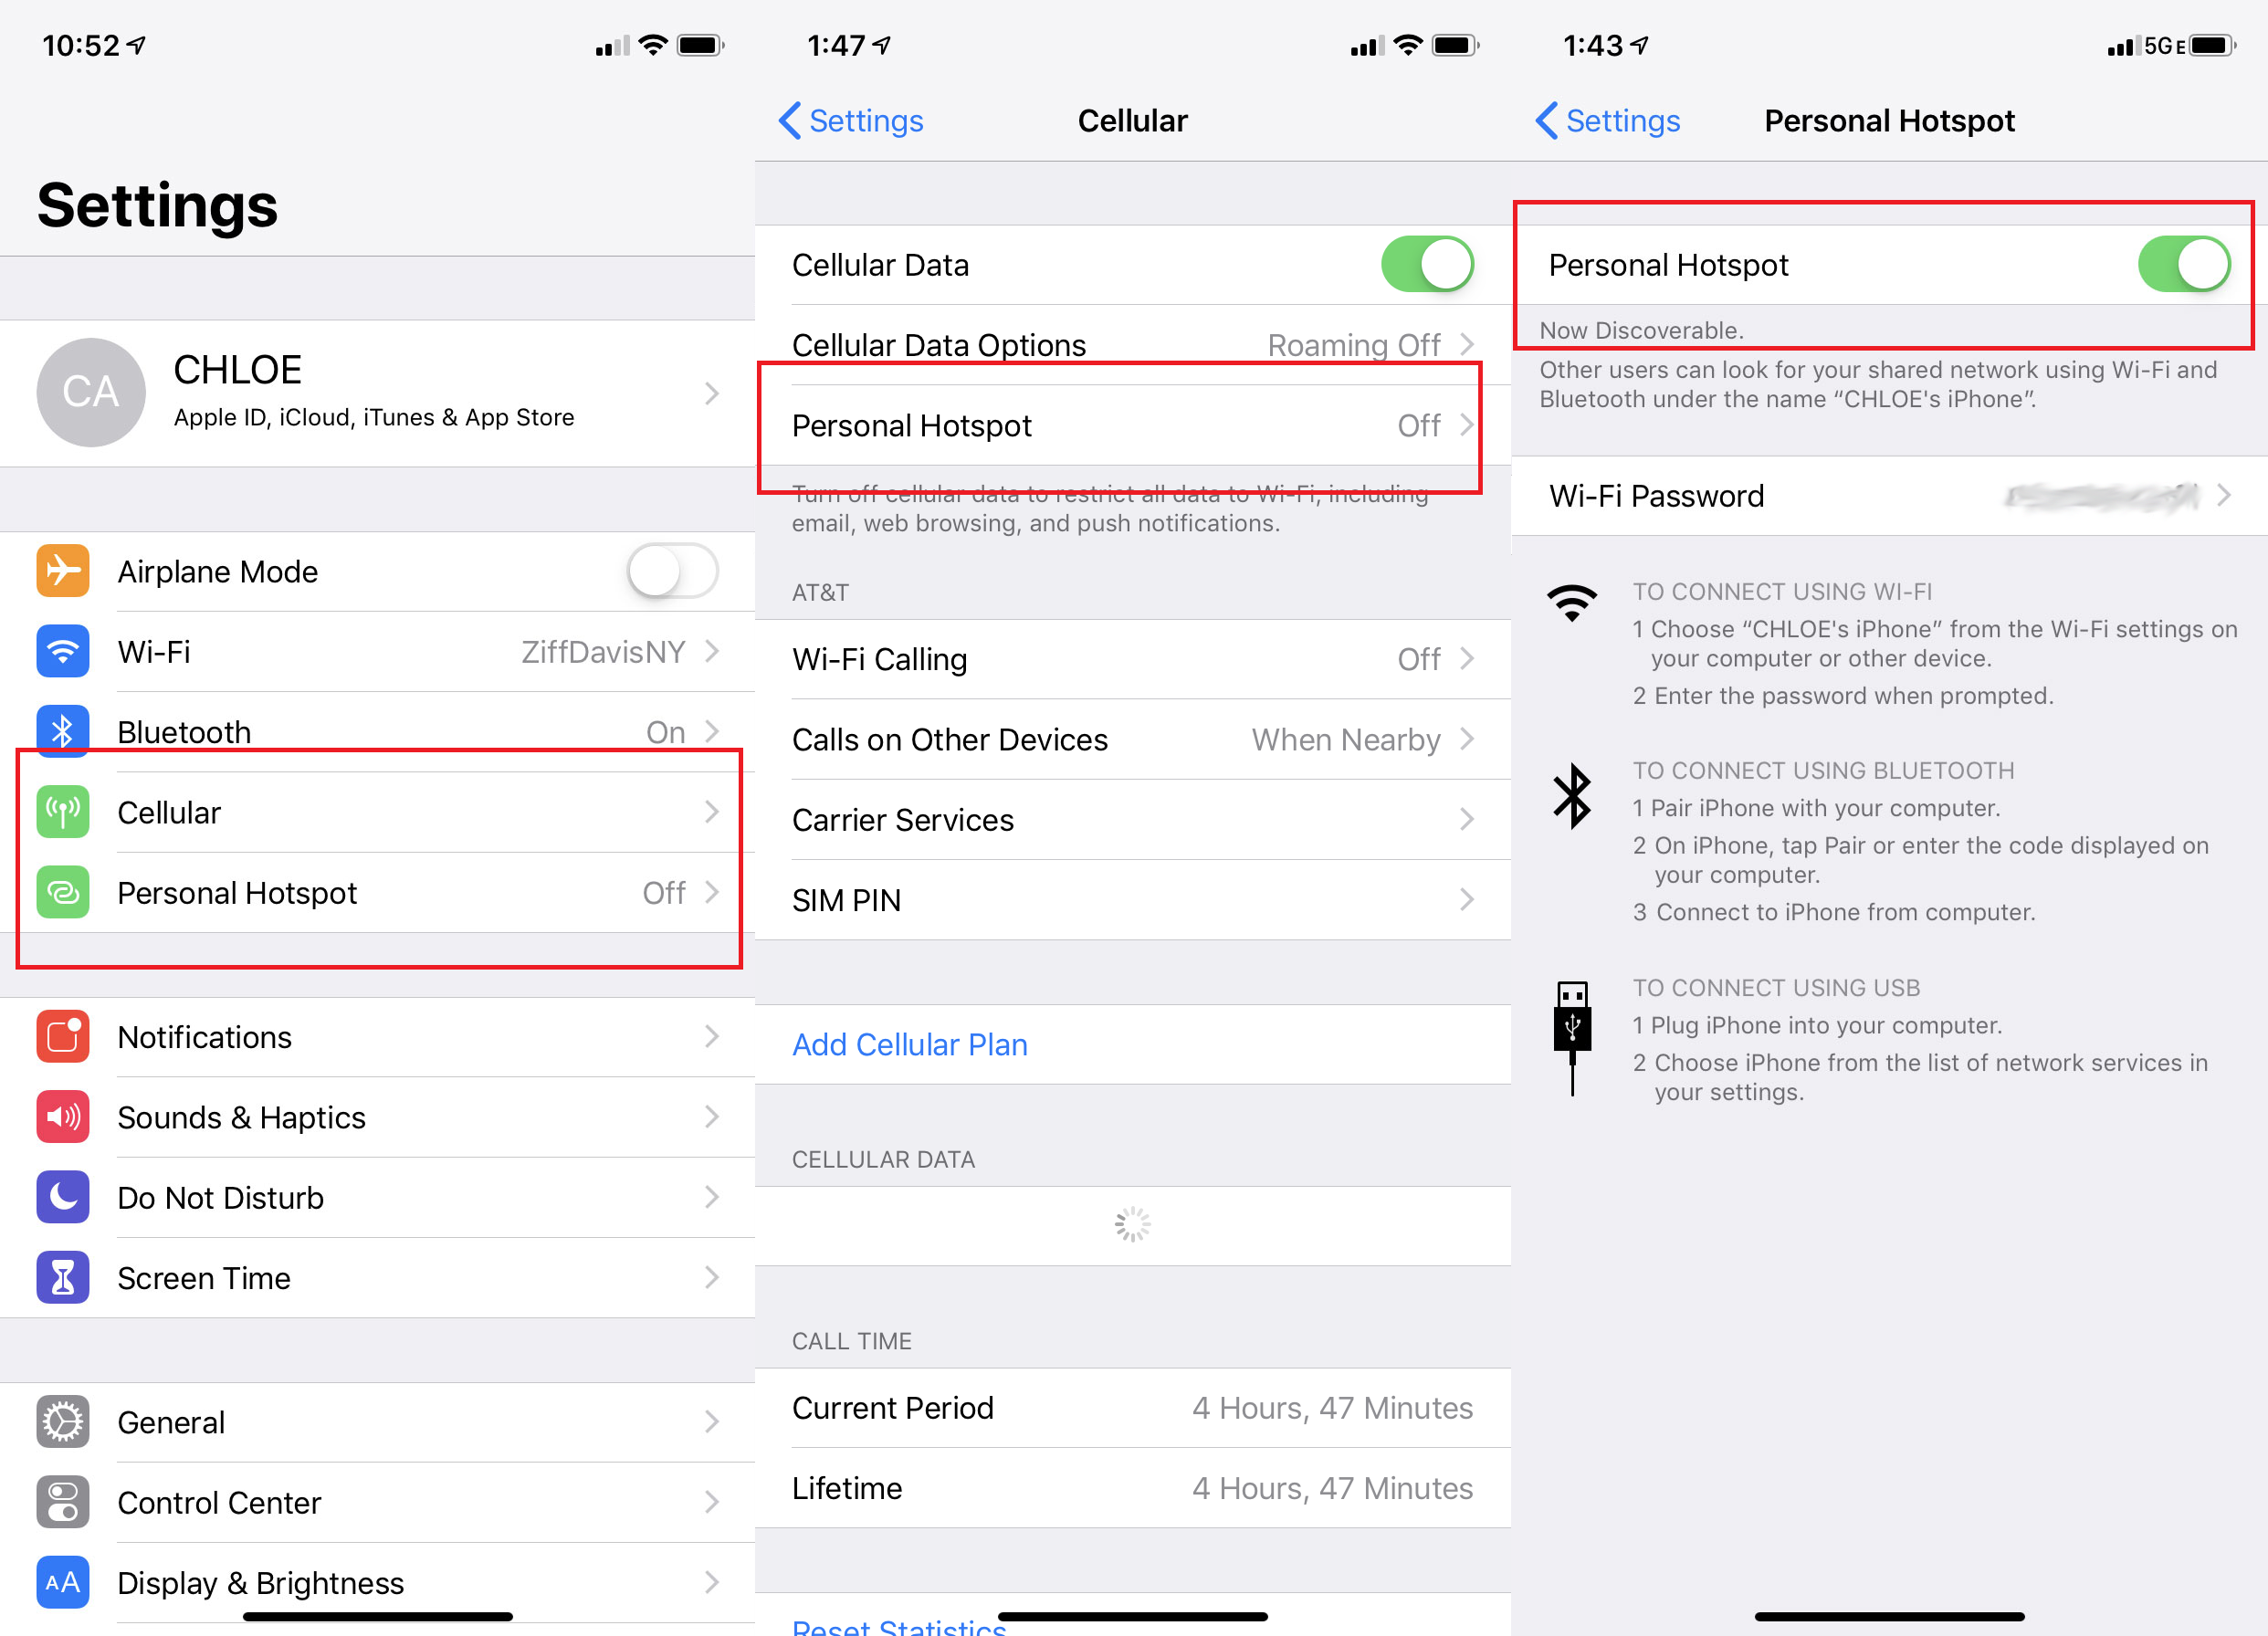
- On your device, open the Wi-Fi settings: Go to the settings menu on your device, and locate the Wi-Fi settings. This can usually be found in the “Network” or “Connections” section.
- Locate your newly updated wifi network: In the list of available wifi networks, look for the new wifi name (SSID) that you set for your network. The name should match the one you entered in the router’s settings.
- Select the wifi network: Tap or click on the newly updated wifi network to connect to it.
- Enter the new wifi password: If prompted, enter the new wifi password that you set during the password change process. Make sure to enter it correctly, paying attention to uppercase and lowercase letters, numbers, and special characters.
- Connect to the updated network: Once you have entered the correct password, your device should connect to the updated wifi network. You should see a success message or an indication that you are now connected.
- Repeat the process for other devices: Repeat these steps on each of your devices that were previously connected to your wifi network. Make sure to input the new wifi password on each device to establish the connection.
It’s normal for devices to take a moment to establish the connection to the updated wifi network. If you encounter any issues, double-check that you entered the correct wifi password and ensure that the new wifi name (SSID) matches the one set on your router.
By reestablishing the connection between your devices and the updated wifi network, you can now enjoy a secure and reliable internet connection using the new network name and password.
Best Practices for Creating a Strong Wifi Password
Having a strong wifi password is crucial for protecting your network from unauthorized access. By following these best practices, you can create a strong and secure wifi password:
- Length: Aim for a password that is at least 12 characters long. The longer the password, the more difficult it is for attackers to crack.
- Complexity: Use a combination of uppercase and lowercase letters, numbers, and special characters. Avoid using easily guessable patterns or common phrases.
- Avoid Personal Information: Do not use any personal information or easily guessable details, such as your name, address, or birthdate, as part of your wifi password.
- Unique Passwords: Create a unique password for your wifi network instead of using the same password you use for other online accounts. This way, if one account is compromised, your entire online presence won’t be at risk.
- Regular Updates: Change your wifi password periodically, such as every few months or after any suspected security breaches. Regularly updating your password adds an extra layer of security to your network.
- Avoid Dictionary Words: Avoid using common dictionary words or easily guessable phrases as part of your wifi password. Hackers often use automated tools that can quickly try common words to gain unauthorized access.
- Password Manager: Consider using a password manager tool that securely stores your wifi password and other online credentials. This helps you generate and manage strong passwords across multiple devices without the need to remember them all.
- Share Selectively: Be cautious about sharing your wifi password. Only share it with trusted individuals who require access to your network. Avoid sharing it with strangers or posting it publicly.
By following these best practices, you can create a strong and secure wifi password that helps safeguard your network from potential threats.
Troubleshooting Tips
While changing your wifi name and password is a straightforward process, you may encounter some issues along the way. Here are some troubleshooting tips to help you address common problems:
- Double-check the Password: If you are having trouble connecting to your wifi network after changing the password, ensure that you have entered the new password correctly. Pay attention to uppercase and lowercase letters, numbers, and special characters.
- Reboot Your Router: If you’re experiencing connectivity issues or devices are unable to connect to the updated wifi network, try rebooting your router. Simply unplug the power cable, wait for a few seconds, and then plug it back in.
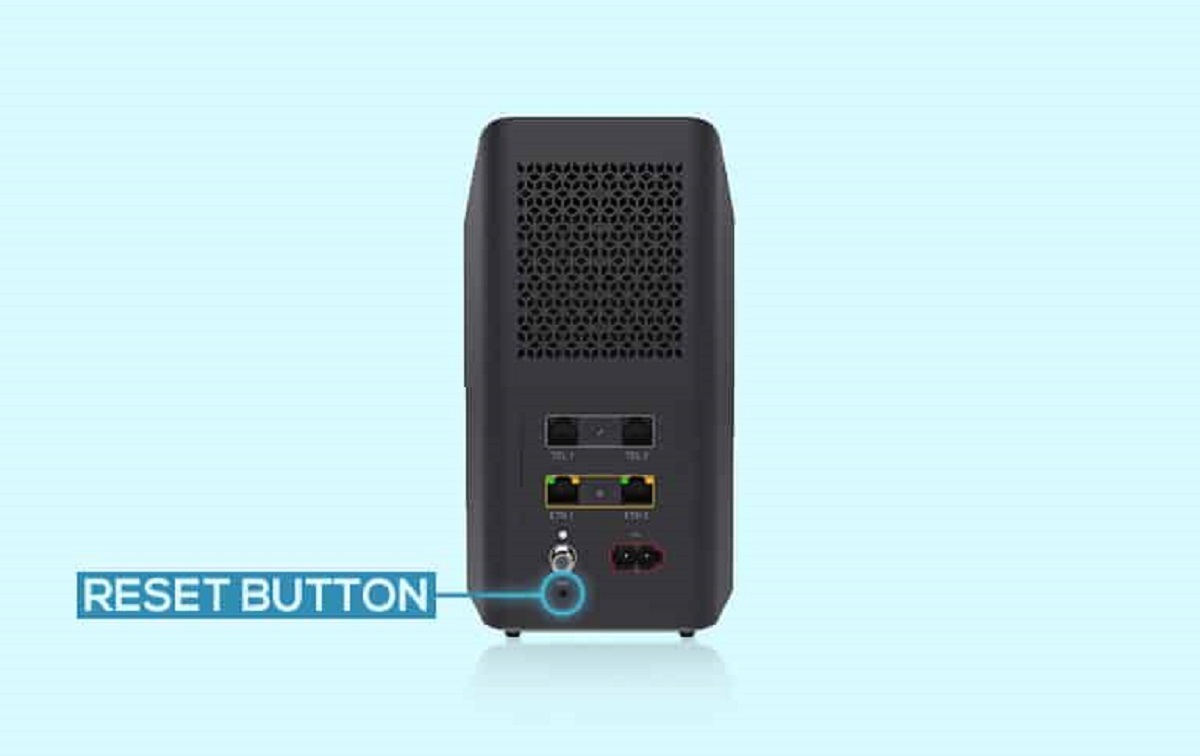
- Factory Reset as a Last Resort: If you are unable to access your router’s settings, cannot remember the login credentials, or encounter persistent issues, you may need to perform a factory reset. However, keep in mind that a factory reset will reset all your router’s settings to default, so proceed with caution.
- Check Router Firmware Updates: Regularly check for firmware updates for your router. Outdated firmware can sometimes cause compatibility issues or security vulnerabilities. Visit the manufacturer’s website or consult the router’s documentation for instructions on updating the firmware.
- Consult the Router’s Manual: If you are unsure about any specific settings or troubleshooting options for your router, refer to the router’s manual or online documentation. It provides detailed information and specific instructions for your router model.
- Contact Customer Support: If you have exhausted all troubleshooting options and are still experiencing problems, contact the customer support of your router’s manufacturer. They can provide further assistance and guidance to resolve any issues you may be facing.
Remember, troubleshooting steps may vary depending on your router’s brand and model. Consider consulting the router’s manual or seeking help from customer support for tailored solutions to your specific situation.
By following these troubleshooting tips, you can overcome any hurdles you encounter while changing your wifi name and password and ensure a smooth and successful transition.
Conclusion
Changing your wifi name and password is a critical step in maintaining the security and performance of your home network. By following the steps outlined in this guide, you can easily update your wifi credentials and enjoy a more secure and reliable wireless connection.
We discussed the importance of changing your wifi name and password, including enhancing security, preventing unauthorized network usage, protecting personal privacy, eliminating interference, and staying up to date with the latest security protocols. These reasons emphasize the significance of regularly updating your wifi credentials.
We also provided a step-by-step guide to help you through the process, from accessing your router’s settings and logging in to locating the name and password settings, changing the wifi name (SSID), saving and applying the changes, and reconnecting your devices to the updated wifi network. Additionally, we shared best practices for creating a strong wifi password and troubleshooting tips to address common issues.
Remember, the security of your wifi network is crucial, and regularly changing your wifi name and password is an essential part of protecting your network from potential threats. By following the guidelines outlined in this article, you can ensure the privacy, security, and optimal performance of your wifi network.
So, take the necessary steps to change your wifi name and password and enjoy a secure and seamless wireless experience.