Introduction
Upgrading to a solid-state drive (SSD) can significantly improve the performance and responsiveness of your computer. Unlike traditional hard drives, SSDs have no moving parts and use flash memory to store data, resulting in faster boot times, quicker file transfers, and smoother overall system operation. If you’re tired of waiting for applications to load or experiencing sluggish performance, it may be time to make the switch to an SSD.
In this guide, we will walk you through the steps to change to an SSD. We’ll cover everything from backing up your data to cloning your old hard drive and setting up the SSD as your computer’s boot drive. Whether you’re a tech-savvy individual or a beginner, we’ve got you covered. So, let’s dive in and get started with the transformation of your computer’s storage system.
Before we begin, it’s important to note that while we strive to provide accurate and comprehensive information, it is always recommended to consult your computer’s manufacturer or seek professional assistance if you are unsure about any of the steps involved. Additionally, be aware that opening your computer and making changes to its hardware may void any warranty you have, so proceed at your own risk.
Step 1: Backup your data
Before you begin the process of changing to an SSD, it’s crucial to backup all your important data. While the chances of data loss during the upgrade process are minimal, it’s always better to be safe than sorry. By backing up your data, you can ensure that you have a copy of everything in case of any unforeseen issues.
There are several ways to back up your data, depending on your preference and the amount of data you have. Here are a few options you can consider:
- External hard drive: Connect an external hard drive to your computer and copy all your important files, folders, and documents to the drive. This method is highly recommended for its simplicity and reliability.
- Cloud storage: Upload your files to a cloud storage service, such as Google Drive, Dropbox, or OneDrive. This option allows you to access your files from anywhere and provides additional security for your data.
- Network backup: If you have a network-attached storage (NAS) device, you can back up your data to the NAS server. This is a convenient option if you have multiple devices connected to the same network.
Whichever method you choose, make sure to verify that your data has been successfully backed up and can be accessed. Double-check important files and folders to ensure that nothing is missing or corrupted.
Remember, the purpose of this step is to safeguard your data and provide peace of mind in case anything goes wrong during the SSD installation process. Taking the time to back up your data now can save you from a lot of headaches and potential data loss later.
Step 2: Choose the right SSD for your needs
When it comes to selecting an SSD, there are a few factors to consider to ensure you choose the right one for your needs. Here are some key points to keep in mind:
Capacity: Determine how much storage space you require. SSDs come in various capacities ranging from a few hundred gigabytes to several terabytes. Consider the size of your current hard drive and how much data you currently have. It’s advisable to choose an SSD with a capacity equal to or larger than your existing hard drive to accommodate all your files and future storage needs.
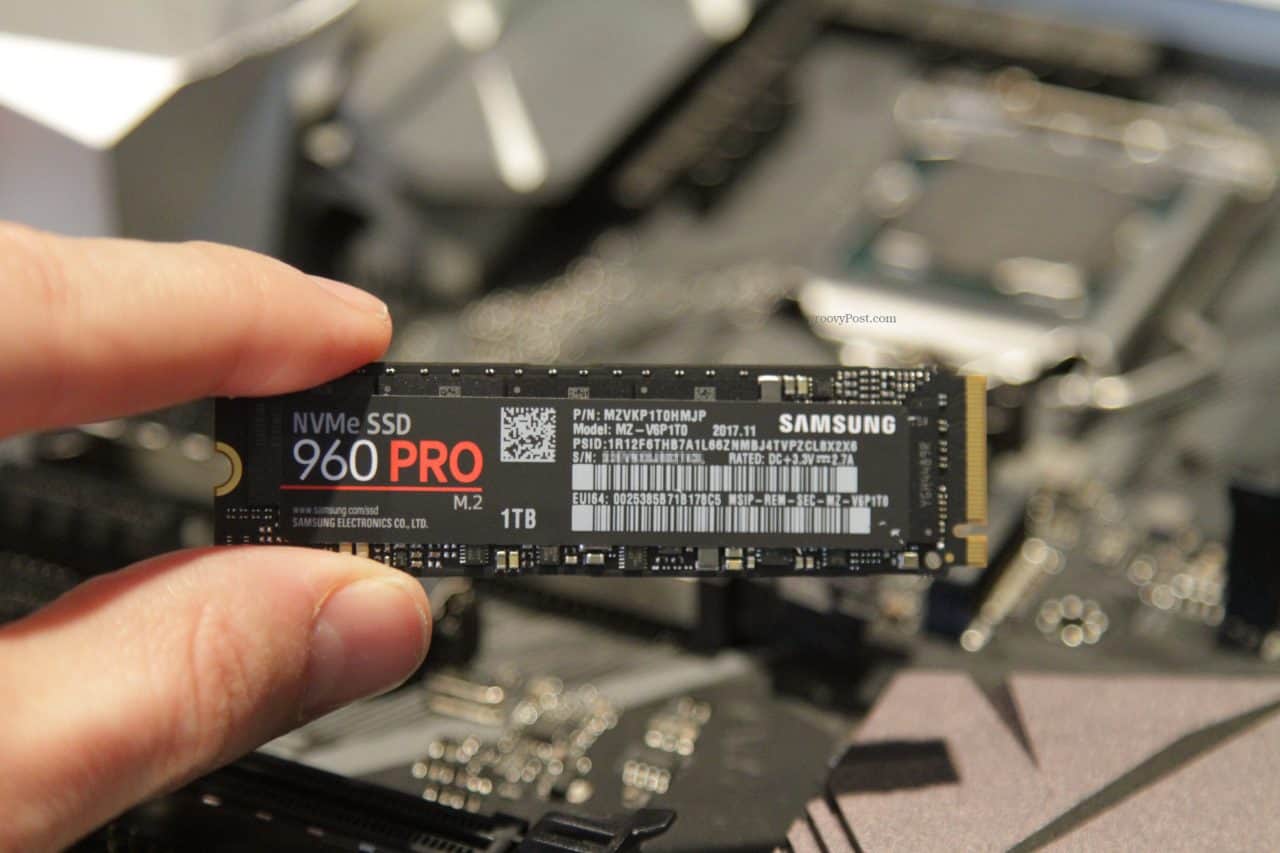
Form Factor: SSDs are available in different form factors, including 2.5-inch, M.2, and SATA Express. The form factor you choose should match the compatibility of your computer’s storage slots. If you’re unsure, consult your computer’s documentation or manufacturer’s website for information on which form factor is supported.
Speed and Performance: Look into the read and write speeds of the SSD you’re considering. Higher speeds generally translate to faster performance and snappier operation. Consider your computing needs – if you frequently work with large files or run resource-intensive applications, opt for an SSD with faster speeds to ensure optimal performance.
Brand and Reliability: Choose a reputable brand known for producing high-quality SSDs. Research customer reviews and ratings to gauge the reliability and durability of the SSD you’re interested in. A reliable SSD will ensure long-term performance and data integrity.
Price: SSD prices have significantly decreased over the years, but they still tend to be more expensive than traditional hard drives. Set a budget and find an SSD that offers a good balance between price and performance. Don’t forget to compare prices from different retailers to ensure you get the best deal.
By considering these factors, you can make an informed decision and choose an SSD that suits your needs and budget. Keep in mind that upgrading to an SSD is an investment in your computer’s performance, so it’s worth taking the time to research and select the right one for you.
Step 3: Acquire the necessary tools
Before you proceed with changing to an SSD, it’s important to gather the necessary tools to ensure a smooth installation process. Here are the tools you’ll need:
- Screwdriver: Depending on the type of computer or laptop you have, you may need a small Phillips screwdriver or a Torx screwdriver to remove the screws holding your current hard drive in place.
- Data transfer cable: If you don’t plan on cloning your old hard drive and want to transfer your data directly from one drive to another, you’ll require a data transfer cable. This cable connects your new SSD to your computer for data transfer.
- External enclosure (optional): If you plan on cloning your old hard drive to the new SSD, an external enclosure can be helpful. This allows you to connect your new SSD to your computer temporarily, enabling you to clone the data before installing the SSD internally.
- Static-free work surface: To prevent electrical damage to your computer or SSD, it’s best to work on a static-free surface. Use an anti-static wristband or work on an anti-static mat to protect your components.
Make sure you have all these tools readily available before you start the installation process. It’s essential to have the right tools on hand to avoid any unnecessary delays or damage to your hardware.
Additionally, it’s always a good idea to refer to your computer’s manufacturer documentation or support website to see if they have any specific recommendations or tools they suggest using. Each computer model may have different requirements, so it’s important to be prepared accordingly.
By gathering and preparing the necessary tools beforehand, you’ll be well-equipped to move forward with installing your new SSD smoothly and efficiently. Remember to handle the tools with care and take necessary precautions to prevent any accidental damage during the process.
Step 4: Shut down your computer and disconnect all cables
Before you begin working on your computer’s internal components, it’s crucial to shut down your computer properly and disconnect all cables. This ensures your safety and prevents any accidental damage to the hardware or data loss. Follow these steps to proceed:
1. Save your work and close all applications: Before shutting down your computer, make sure to save any open files and close all running applications. This will prevent any data loss or potential file corruption.
2. Shut down your computer: Click on the “Start” or “Windows” button, then select “Shut down” from the options. Allow your computer to completely shut down before moving to the next step. If your computer is not responding, you can perform a forced shutdown by pressing and holding the power button until the computer turns off.
3. Unplug all cables: Once your computer is fully shut down, disconnect all cables connected to it. This includes the power cord, keyboard, mouse, monitor, and any other peripheral devices. Be gentle and ensure that all cables are unplugged securely to avoid any damage to the connectors.
4. Ground yourself: It’s important to ground yourself to prevent any static electricity from damaging your computer’s sensitive components. You can do this by touching a grounded metal surface or wearing an anti-static wristband. This step is crucial to protect your computer from electrostatic discharge.
Ensuring that your computer is shut down, cables are disconnected, and you’re properly grounded sets the stage for a safe and successful SSD installation. Take your time and double-check that everything is in order before proceeding to the next step. Don’t rush; a careful and methodical approach will yield the best results.
Step 5: Remove the old hard drive
Now that your computer is shut down and all cables are disconnected, it’s time to remove the old hard drive. Follow these steps to safely remove the old hard drive:
1. Open your computer: Depending on the type of computer you have, this step may vary. For desktop computers, you usually need to remove the side panel by unscrewing the screws on the back or sliding a latch to release the panel. For laptops, check the manufacturer’s documentation or support website for specific instructions on how to access the internal components.
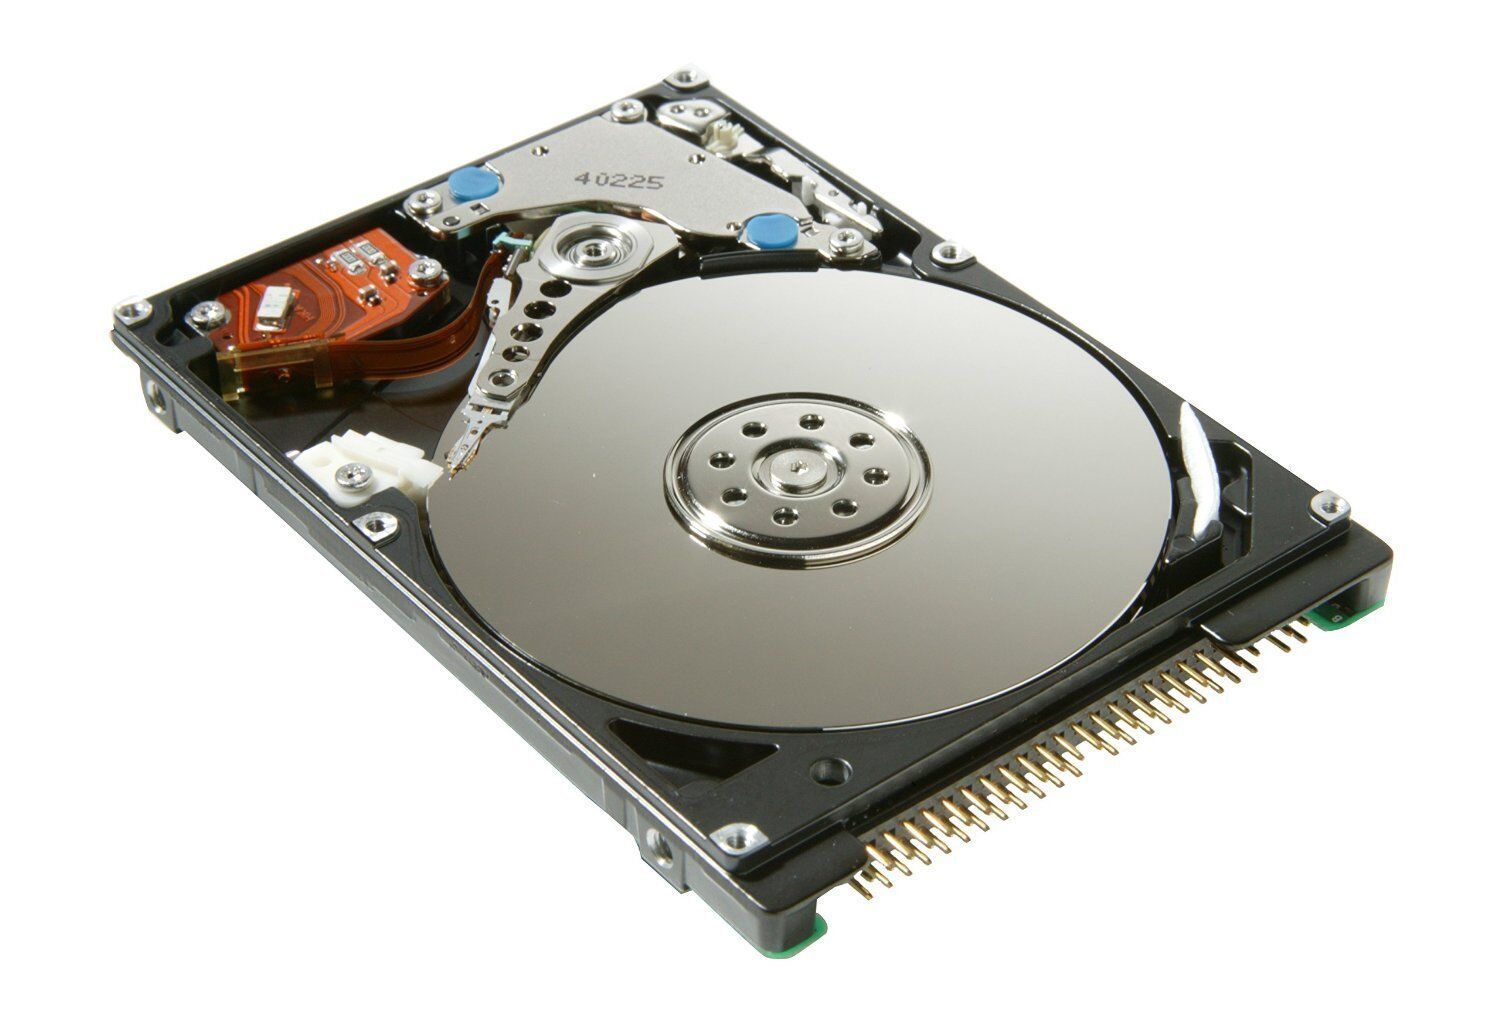
2. Locate the old hard drive: Once you have the computer open, locate the old hard drive. It’s usually a rectangular-shaped device with cables connected to it and secured by screws or brackets. Carefully inspect the layout and configuration of your computer to identify the hard drive.
3. Disconnect cables: Gently unplug the cables connected to the old hard drive. There are usually two cables: a data cable and a power cable. Disconnect them by firmly grasping the connectors and pulling them straight out. Pay attention to how the cables are connected so that you can replicate the connections when installing the SSD.
4. Remove screws or brackets: Most hard drives are secured in place with screws or brackets. Use a screwdriver to remove the screws or release the brackets holding the old hard drive. Keep the screws or brackets in a safe place, as you may need them later to secure the new SSD.
5. Take out the old hard drive: Once the cables and screws/brackets are removed, carefully slide the old hard drive out of its housing. Be cautious not to force it or damage any surrounding components.
By following these steps, you successfully remove the old hard drive from your computer. Take your time and exercise caution throughout the process to avoid any accidental damage. Keep the old hard drive in a safe place, as you may need it for data transfer or as a backup option. In the next step, we’ll install the new SSD to replace the old hard drive.
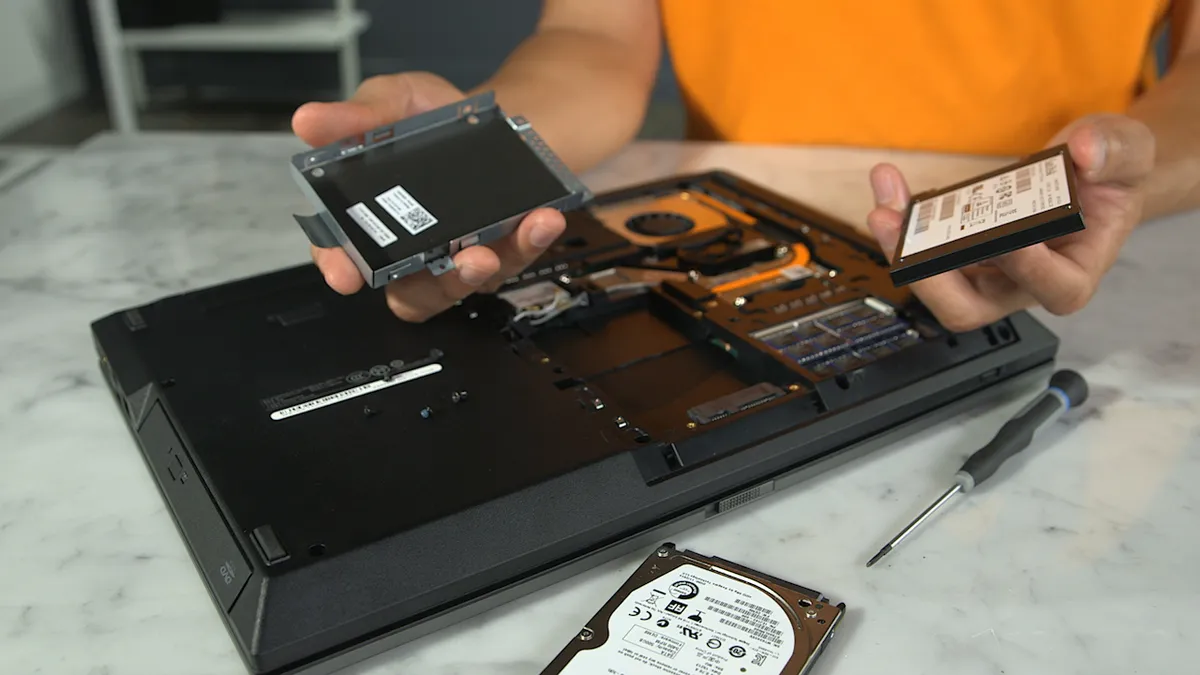
Step 6: Install the SSD
Now that you have removed the old hard drive, it’s time to install the new SSD into your computer. Follow these steps to ensure a proper installation:
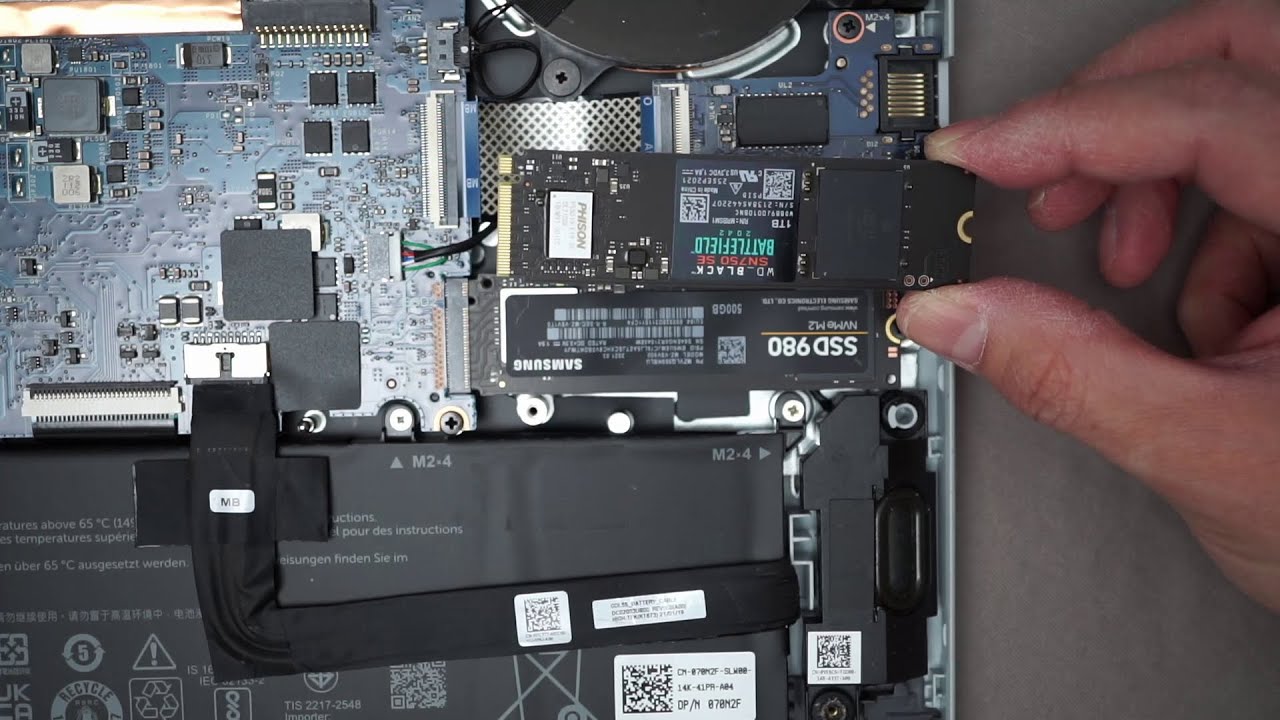
1. Prepare the SSD: If your SSD comes in an external enclosure, remove it from the enclosure. Carefully handle the SSD by the sides, avoiding contact with the gold connectors or any circuitry on the drive.
2. Align the SSD: Locate the slot or bay where the old hard drive was previously installed. Align the new SSD in the same orientation as the old hard drive. Be sure to match the connectors on the SSD with the corresponding ports in the computer.
3. Secure the SSD: Use the screws or brackets that you removed from the old hard drive to secure the new SSD in place. Make sure to tighten the screws firmly but not excessively, as overtightening can damage the SSD or the computer’s housing.
4. Connect the cables: Reconnect the data and power cables to the new SSD. Ensure that they are firmly plugged in and properly aligned with the connectors. Take care to connect them securely but gently to avoid any damage.
5. Double-check the connections: Once the SSD is secured and the cables are connected, take a moment to double-check all the connections. Ensure that the data and power cables are properly seated and aligned with the connectors on the SSD. This step helps prevent any issues with data transfer or power supply.
By following these steps, you have successfully installed the new SSD into your computer. Take a moment to admire your progress, but remember that there are a few more steps before completing the SSD installation process. In the next step, we will connect the new SSD to your computer and adjust the BIOS settings.
Step 7: Connect the new SSD to your computer
Now that you’ve installed the new SSD, it’s time to connect it to your computer. Follow these steps to ensure a proper connection:
1. Locate the SATA port: Identify the SATA port on your computer’s motherboard where you will connect the new SSD. SATA ports are usually labeled and can be found near the storage slots or along the edge of the motherboard.
2. Connect the SATA cable: Take the SATA cable that came with your SSD or use a spare SATA cable. Connect one end of the cable to the SATA port on the motherboard and the other end to the corresponding port on the SSD. Ensure that the cable is firmly connected and aligned with the connectors.
3. Secure the SSD: If there are mounting brackets or screws available that came with your computer or SSD, use them to secure the SSD in place. This will help prevent any movement or disconnection of the SATA cable during the operation of your computer.
4. Power connection: Locate the SATA power connector from your computer’s power supply. Connect the power cable to the SSD, ensuring that it is properly aligned with the connector pins. The power cable provides the necessary power for your SSD to function.
5. Double-check the connections: Once you have connected the SATA and power cables, double-check all the connections. Ensure that the cables are securely connected, aligned properly, and seated correctly. This step is essential to ensure a stable and reliable connection.
By following these steps, you have successfully connected the new SSD to your computer. Take a moment to ensure that all the connections are secure before proceeding to the next step. In the following step, we will power on your computer and access the BIOS settings to configure the SSD.
Step 8: Power on your computer and access BIOS settings
Now that you have connected the new SSD to your computer, it’s time to power it on and access the BIOS settings. The BIOS (Basic Input/Output System) is a firmware that controls the computer’s hardware and allows you to configure various settings. Follow these steps to access the BIOS settings:
1. Power on your computer: Connect the power cable to your computer and press the power button to turn it on. Ensure that all cables are securely connected and that the SSD is receiving power.
2. Access the BIOS: As soon as the computer starts, look for a message on the screen indicating which key to press to access the BIOS settings. Common keys include F2, Delete, or Esc. Press the specified key repeatedly (usually within the first few seconds of startup) until the BIOS setup utility appears.
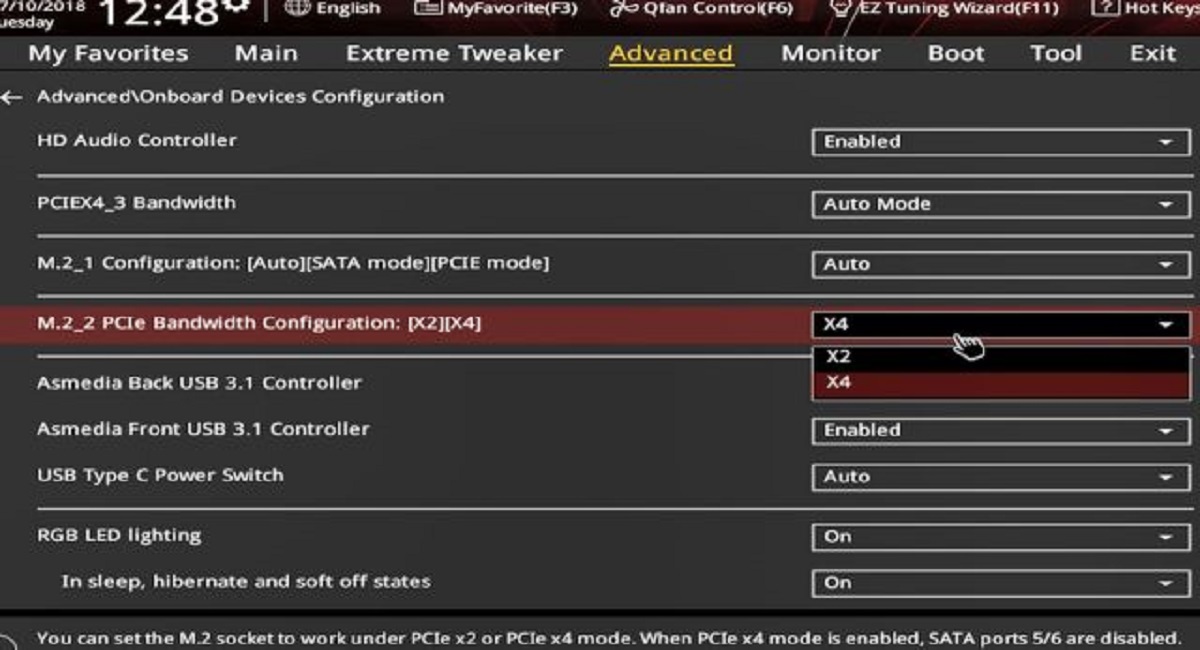
3. Navigate the BIOS: Once in the BIOS setup utility, use the arrow keys on your keyboard to navigate through the menus. The exact layout and options may vary depending on your computer’s manufacturer and BIOS version.
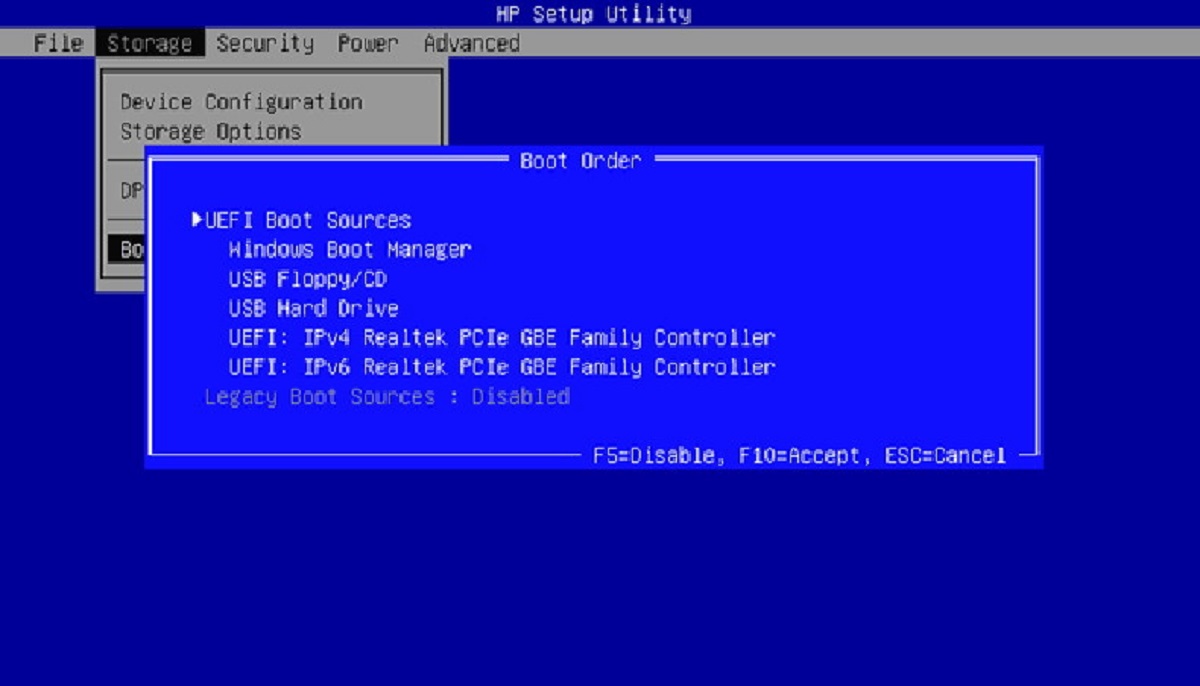
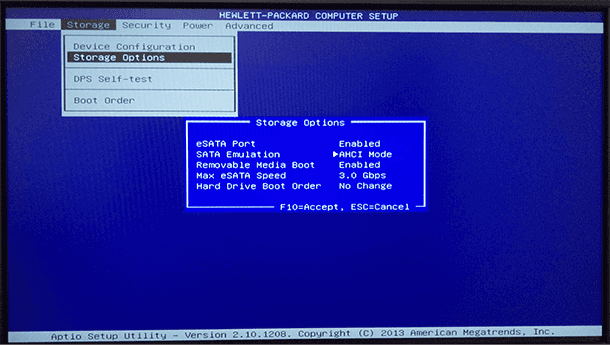
4. Locate the storage options: Look for a menu or section related to storage or SATA settings. This is where you can configure the SSD and set it as the boot drive.
5. Set the SSD as the boot drive: Within the storage options, locate the boot order or boot priority settings. Change the boot order to prioritize the SSD as the primary boot device. This ensures that your computer will boot from the SSD and take advantage of its improved performance.
6. Save and exit: After making the necessary changes to the BIOS settings, save the changes and exit. Look for an option such as “Save and Exit” or “Exit Setup.” The computer will then restart.
By following these steps, you have successfully powered on your computer and accessed the BIOS settings. Configuring the BIOS to recognize the new SSD as the boot drive is an essential step in the installation process. In the next step, we’ll discuss how to clone your old hard drive to the new SSD for a seamless transition of your data and operating system.
Step 9: Clone your old hard drive to the new SSD
Now that you have set up the new SSD and configured the BIOS settings, it’s time to clone your old hard drive to the SSD. Cloning allows you to transfer all your data, including the operating system, applications, and files, from the old hard drive to the new SSD. Follow these steps to complete the cloning process:
1. Choose a cloning tool: There are several reliable cloning software options available, such as Acronis True Image, EaseUS Todo Backup, or Clonezilla. Choose the one that suits your needs and download/install it on your computer.
2. Connect the new SSD: If you haven’t already, connect the new SSD to your computer using the necessary cables. Ensure that the SSD is securely connected via the SATA and power cables.
3. Launch the cloning software: Open the cloning software you installed and launch it. Select the cloning option or feature within the software interface to start the process.
4. Choose the source and destination drives: In the cloning software, select your old hard drive as the source drive and the new SSD as the destination drive. Double-check these selections to ensure that you’ve chosen the correct drives.
5. Start the cloning process: Follow the instructions provided by the cloning software to begin the cloning process. This may involve selecting specific partitions or data to clone. Start the cloning process and wait for it to complete. The time required will depend on the size of your data.
6. Verify the cloned data: Once the cloning process is complete, verify that the data has been successfully cloned to the new SSD. Check that all your files, applications, and the operating system are intact on the SSD.
7. Test the new SSD: Before proceeding further, it’s a good idea to test the new SSD by booting your computer from it. Restart your computer and enter the BIOS settings again. Ensure that the SSD is set as the primary boot device. Save the changes and exit the BIOS.
By following these steps, you have successfully cloned your old hard drive to the new SSD. This ensures that all your data and the operating system have been transferred effectively, allowing for a seamless transition. In the next step, we will remove the old hard drive and set the SSD as the primary boot drive.
Step 10: Remove the old hard drive and set the SSD as the boot drive
Now that you have successfully cloned your old hard drive to the new SSD, it’s time to remove the old hard drive and set the SSD as the primary boot drive. Follow these steps to complete the process:
1. Shut down your computer: Ensure that your computer is turned off completely before proceeding. This ensures your safety and prevents any accidental damage to the hardware.
2. Disconnect the old hard drive: Open your computer and locate the old hard drive that you want to remove. Carefully disconnect the cables connected to it, including the SATA data and power cables. Unscrew any screws or brackets holding the old hard drive in place and slide it out of its bay.
3. Install the new SSD: Take the new SSD and insert it into the empty bay where the old hard drive was previously located. Secure the SSD in place using the screws or brackets that came with your computer or SSD.
4. Connect the cables: Connect the SATA data and power cables to the new SSD, ensuring that they are securely plugged in and aligned with the connectors. Double-check all the connections to ensure a proper fit.
5. Close your computer: Once the new SSD is securely installed and all cables are connected, close your computer by reattaching the side panel or cover. Make sure that all screws or latches are properly tightened to secure the housing.
6. Power on your computer: Connect the power cable to your computer and press the power button to turn it on. Your computer will now boot from the new SSD, which is set as the primary boot drive.
7. Verify the SSD as the boot drive: Once your computer has booted up, confirm that the new SSD is set as the primary boot drive. You can check this in the BIOS settings or by checking the system information in your operating system.
Congratulations! You have successfully removed the old hard drive and set the new SSD as the primary boot drive. Your computer should now benefit from improved performance and faster startup times. Enjoy the speed and responsiveness of your upgraded system!
Conclusion
Congratulations on successfully changing to an SSD! By following the steps outlined in this guide, you have transformed your computer’s storage system and can now enjoy the benefits of improved performance, faster boot times, and smoother operation.
Throughout the process, you learned the importance of backing up your data before making any changes. This crucial step ensures that your valuable files and documents are safe and easily accessible. Additionally, you discovered how to choose the right SSD for your needs, considering factors such as capacity, form factor, speed, brand, and price.
You also acquired the necessary tools and learned how to safely shut down your computer, remove the old hard drive, and install the new SSD. Properly connecting the SSD to your computer and configuring the BIOS settings allowed you to boot your computer from the SSD.
The cloning process enabled you to transfer all your data, including the operating system, applications, and files, seamlessly to the new SSD. Finally, you removed the old hard drive and set the SSD as the primary boot drive.
By following these steps, you have successfully completed the transformation to an SSD and have unlocked the full potential of your computer. Enjoy the improved speed and responsiveness of your system as you navigate through your daily tasks and activities.
Remember that upgrading to an SSD is just one aspect of maintaining a high-performing system. Regularly updating software, performing system maintenance, and managing your files will help ensure the longevity and continued optimal performance of your computer.
Thank you for trusting this guide to change to an SSD. We hope it has been helpful in enhancing your computer experience and boosting your productivity. If you have any further questions or need additional assistance, don’t hesitate to seek professional help or refer to your computer manufacturer’s documentation.