Introduction
Welcome to the world of solid-state drives (SSDs)! These incredibly fast and efficient storage devices have revolutionized the way we store and access data. However, like any technology, SSDs can encounter issues that need to be addressed. One common issue is the read-only mode, where the SSD becomes inaccessible for writing new data or making changes. This can be frustrating and hinder your ability to use your SSD effectively.
In this article, we will explore the reasons behind SSDs getting stuck in read-only mode and provide you with the necessary steps to resolve the issue. Whether you are a tech enthusiast or a professional dealing with SSDs on a daily basis, understanding how to change an SSD from read-only is essential to maximize the lifespan and performance of your storage device.
We will start by explaining the concept of read-only mode in SSDs and the potential causes behind it. Subsequently, we will guide you through the process of checking for a physical write protection switch and disabling write protection through software. Additionally, we will explore using the Command Prompt to change the SSD from read-only and the importance of keeping your SSD firmware up-to-date.
Throughout this article, we will also provide troubleshooting tips and solutions to common issues you may encounter when attempting to change your SSD from read-only mode. By the end, you will be equipped with the knowledge and tools needed to overcome the read-only obstacle and regain full control over your SSD.
Understanding Read-Only Mode in SSDs
Read-only mode in solid-state drives (SSDs) is a state where the drive becomes inaccessible for writing new data or making any changes. Essentially, the SSD turns into a “read-only” device, allowing only the retrieval of existing data without the ability to modify or delete it. This can occur due to various reasons and typically indicates an underlying issue that needs to be addressed.
There are several potential causes for an SSD entering read-only mode. One common reason is a physical write protection switch located on the device itself. This switch, if accidentally triggered, prevents any write operations on the SSD. Additionally, certain software settings or configurations may enable read-only mode to protect the data from unintended modifications or corruption.
Another possible cause is firmware-related issues. SSD firmware acts as the drive’s operating software and controls its functionality. If the firmware becomes corrupted or outdated, it can trigger read-only mode as a protective measure. In some cases, read-only mode may also be activated due to internal errors within the drive or as a result of drive failure.
Understanding why your SSD is in read-only mode is crucial in order to determine the most appropriate solution. While some situations may require simple adjustments or software changes, others may need more advanced troubleshooting and technical expertise to resolve.
In the next sections, we will guide you through step-by-step instructions on how to check for a physical write protection switch and disable write protection through software. We will also cover using the Command Prompt to change the SSD from read-only and highlight the importance of keeping your SSD firmware up-to-date. Additionally, we will provide troubleshooting tips to help you identify and address any potential issues that may arise while attempting to change your SSD from read-only mode.
Now that we have a better understanding of read-only mode in SSDs and its potential causes, let’s dive into the solutions that will help us overcome this obstacle and restore full functionality to our SSDs.
Check for Physical Write Protection Switch
If your solid-state drive (SSD) is stuck in read-only mode, it’s important to check for a physical write protection switch on the device itself. This switch, if present, can accidentally get triggered, rendering the SSD read-only and preventing any write operations.
The physical write protection switch is a small mechanism usually located on the side or bottom of the SSD. Its purpose is to provide a hardware-based write protection feature. When the switch is in the write-protected position, it prevents any modifications to the data on the SSD, effectively putting it in read-only mode.
To determine if your SSD has a physical write protection switch, carefully examine the device and its documentation. Look for any labels, markings, or indications of a switch that can be toggled. Once you locate the switch, ensure that it is not in the write-protected position.
If the switch is in the write-protected position, it is often as simple as flipping it back to the unlocked position to disable the read-only mode. Remember to handle the switch gently and avoid excessive force to prevent any damage.
After adjusting the physical write protection switch, power on your computer and check if the SSD is now functioning normally without read-only restrictions. If the problem persists, there may be other factors causing the read-only mode and further troubleshooting is required.
Keep in mind that not all SSDs have a physical write protection switch. In such cases, you will need to explore other methods to resolve the read-only issue.
In the next section, we will guide you through the process of disabling write protection through software, which can be another potential solution to change your SSD from read-only mode.
Disable Write Protection through Software
If your solid-state drive (SSD) is stuck in read-only mode and there is no physical write protection switch, you can try disabling write protection through software. This method involves adjusting certain settings or configurations to regain write access to your SSD.
Here are a few steps you can follow to disable write protection through software:
- First, open the “Disk Management” utility on your Windows computer. To do this, right-click on the “Start” button and select “Disk Management” from the menu.
- In the Disk Management window, locate your SSD. It should be listed as a disk with a corresponding volume below it.
- Right-click on the volume of your SSD and select “Properties” from the context menu.
- In the Properties window, navigate to the “General” tab and ensure that the “Read-only” option is unchecked. If it is checked, uncheck it and click “OK” to save the changes.
- Restart your computer and check if the SSD is now functioning normally without read-only restrictions.
If the above steps do not resolve the read-only issue, you can also try accessing the registry editor to modify the write protection settings:
- Open the Run dialog box by pressing the Windows key + R.
- Type “regedit” and hit Enter to open the Windows Registry Editor.
- Navigate to the following registry key: HKEY_LOCAL_MACHINE\SYSTEM\CurrentControlSet\Control\StorageDevicePolicies
- In the right-hand pane, look for a DWORD value named “WriteProtect” and double-click on it.
- Set the value of “WriteProtect” to 0 (zero) to disable write protection.
- Click “OK” to save the changes and exit the Registry Editor.
- Restart your computer and check if the SSD is now able to write data as usual.
If the read-only mode persists even after trying these software-based solutions, it is recommended to seek further assistance from a professional or contact the SSD manufacturer for additional support.
In the next section, we will explore using the Command Prompt to change the SSD from read-only, which can be another effective method to resolve the issue.
Use Command Prompt to Change SSD from Read-Only
If you’re facing the read-only issue with your solid-state drive (SSD), using the Command Prompt can be an effective method to change the SSD from read-only mode. Command Prompt allows you to execute specific commands to modify settings and configurations on your computer, including the write protection status of your SSD.
Follow these steps to use the Command Prompt to change your SSD from read-only:
- First, open the Command Prompt as an administrator. To do this, right-click on the Start button and select “Command Prompt (Admin)” from the menu.
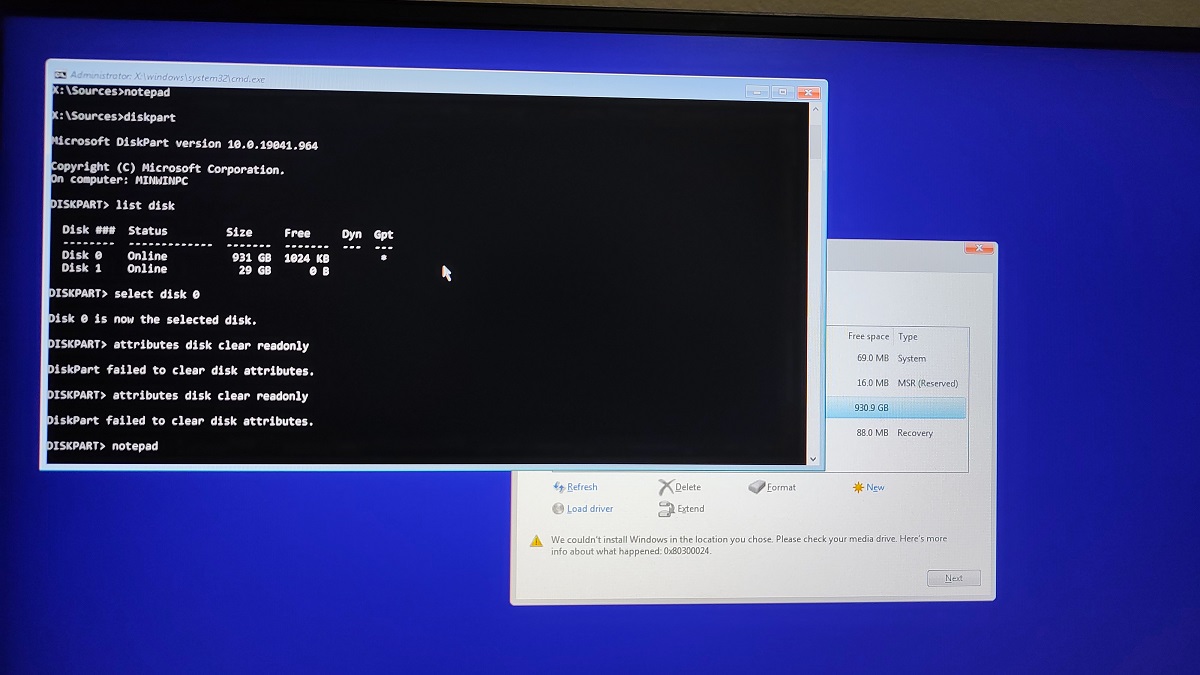
- In the Command Prompt window, type the command “diskpart” and press Enter. This will launch the DiskPart utility.
- Within DiskPart, type “list disk” and press Enter to view a list of disks connected to your computer.
- Identify your SSD from the list of disks. Make sure to note the disk number associated with your SSD.
- Type “select disk X” (replace X with the actual disk number of your SSD) and press Enter. This will select your SSD.
- Next, type “attributes disk clear readonly” and press Enter. This command will attempt to clear the write protection attribute from your SSD.
- Once the process is complete, close the Command Prompt window and restart your computer.
After restarting, check if your SSD is now functioning normally and allows write operations. If the read-only mode is no longer active, you have successfully used the Command Prompt to change your SSD from read-only.
However, if the issue persists or if you encounter any errors during the process, it’s recommended to seek further assistance from a professional or contact the SSD manufacturer for support.
Now that you know how to use the Command Prompt to change your SSD from read-only, let’s move on to an equally important aspect – updating your SSD firmware to ensure optimal performance and functionality.
Updating SSD Firmware
Updating your solid-state drive (SSD) firmware is an essential step in maintaining its optimal performance and resolving potential issues, including read-only mode. SSD manufacturers regularly release firmware updates to improve compatibility, fix bugs, and enhance overall reliability.
Here’s how you can update your SSD firmware:
- Visit the official website of your SSD manufacturer and locate the support or downloads section.
- Search for the firmware update specific to your SSD model and download it to your computer. It’s crucial to ensure that you download the correct firmware version to avoid any compatibility issues.
- Once the firmware update file is downloaded, extract its contents if required.
- Before proceeding with the firmware update, it’s important to back up any crucial data stored on your SSD. Firmware updates can sometimes result in data loss or unexpected behavior.
- Close all applications and ensure that no ongoing processes are accessing your SSD.
- Run the firmware update executable file as an administrator. Follow the on-screen instructions provided by the firmware updater.
- During the firmware update process, it’s crucial not to interrupt the process or turn off your computer. Doing so can lead to potential issues or even permanent damage to your SSD.
- Once the firmware update is complete, restart your computer to apply the changes.
After updating your SSD firmware, check if the read-only mode issue is resolved. In most cases, updating the firmware can address compatibility issues and fix potential bugs that may have caused the read-only mode.
Keep in mind that the firmware update process may vary slightly depending on the manufacturer and SSD model. Always refer to the documentation provided by the manufacturer for specific instructions related to updating your SSD firmware.
If you encounter any difficulties during the firmware update process or the read-only mode persists even after the update, it is recommended to seek further assistance from the SSD manufacturer’s technical support team.
Now that we have discussed the process of updating SSD firmware, let’s move on to troubleshooting common issues you may encounter when attempting to change your SSD from read-only mode.
Troubleshooting Read-Only Issues
While attempting to change your solid-state drive (SSD) from read-only mode, you may encounter various issues that hinder your progress. Troubleshooting these issues can help you identify the root cause and find appropriate solutions. Let’s explore some common troubleshooting steps:
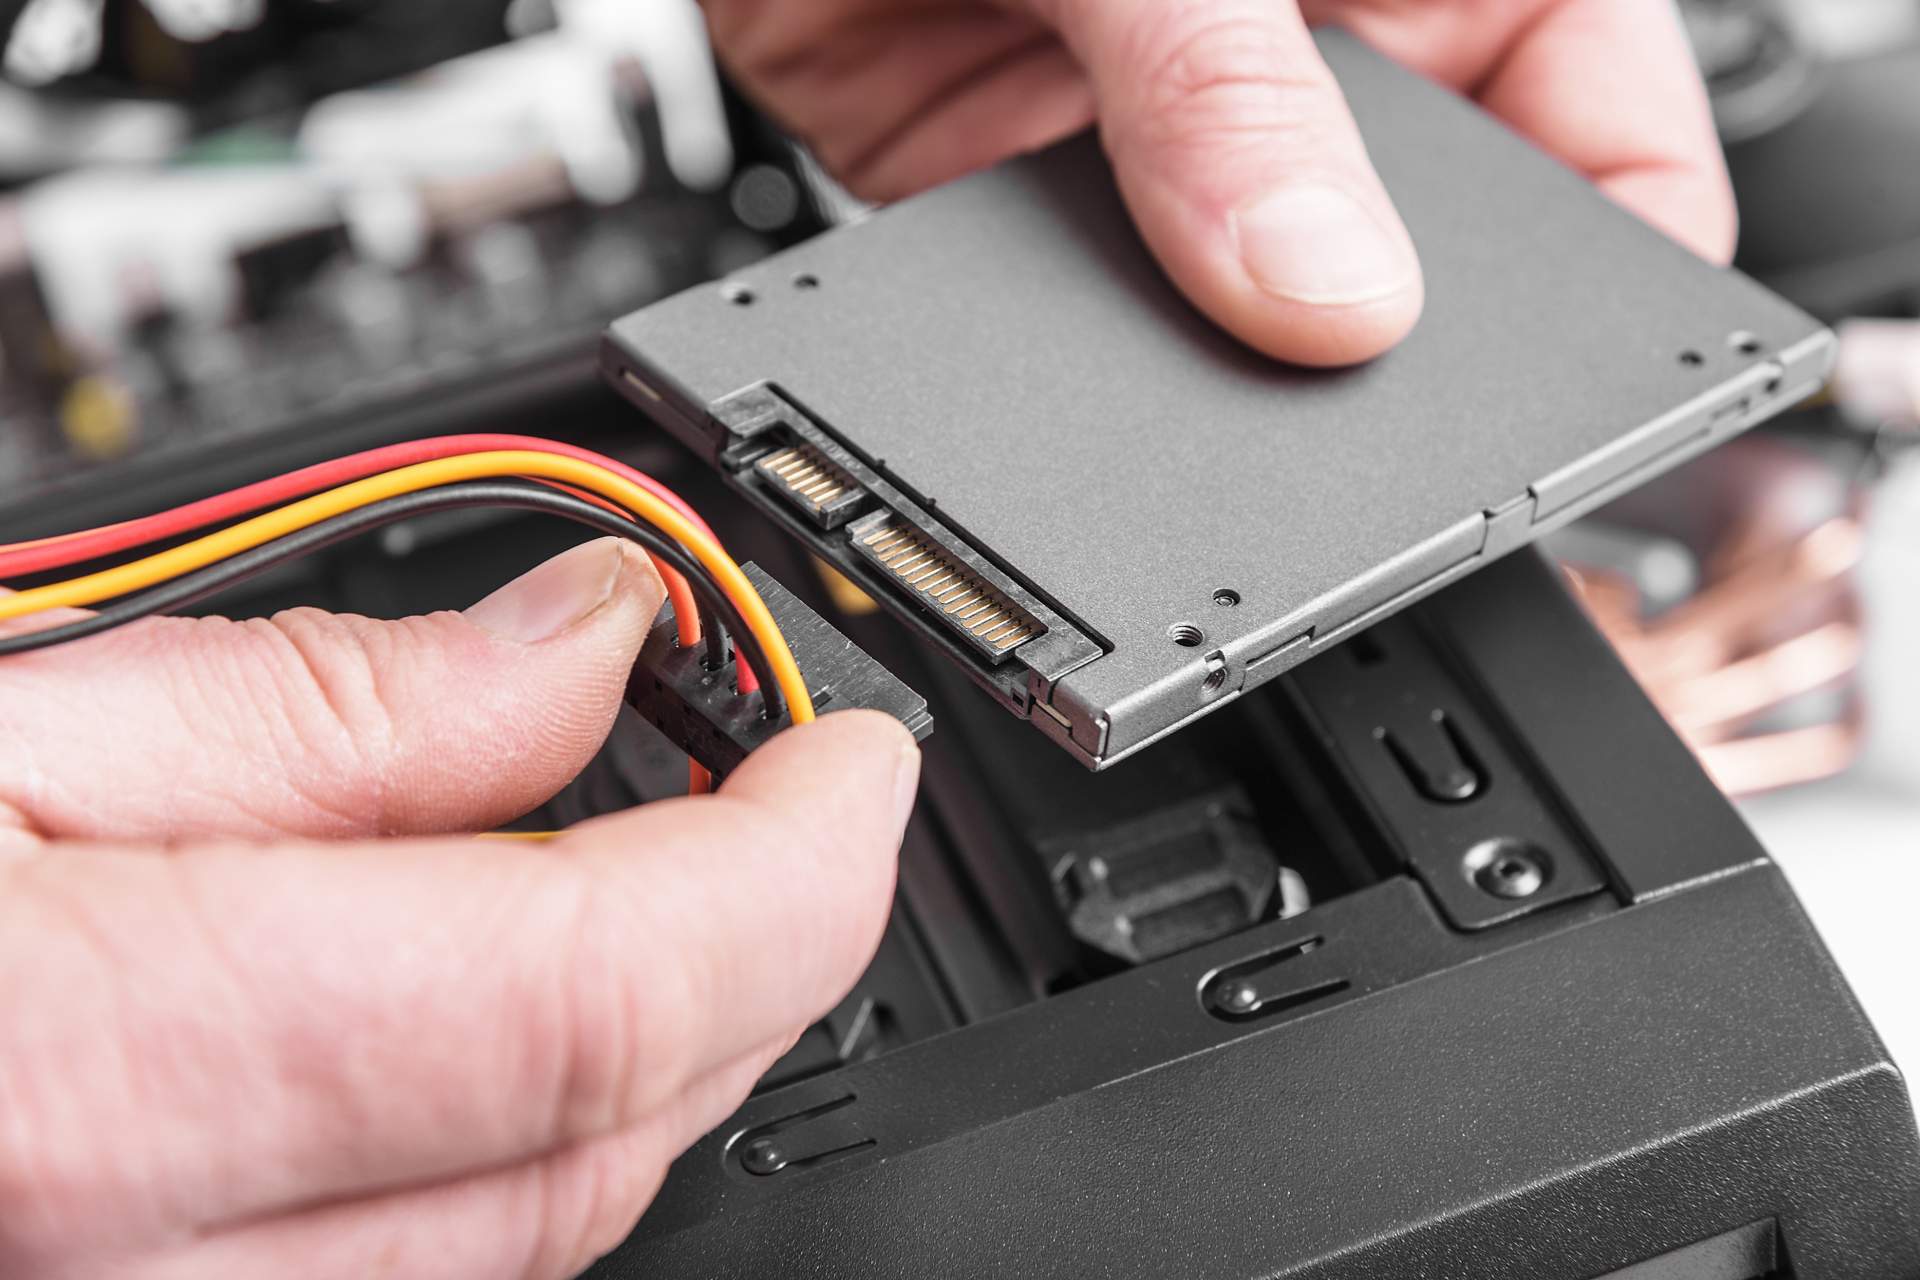
1. Check cables and connections: Ensure that all cables connecting your SSD, including power and data cables, are securely plugged in. Loose or faulty connections can cause read-only mode issues.
2. Update device drivers: Outdated or incompatible device drivers can lead to read-only mode problems. Update the drivers for your SSD and related hardware components, such as the SATA controller, by downloading the latest versions from the manufacturer’s website.
3. Scan for malware or viruses: Malicious software or viruses can sometimes cause your SSD to enter read-only mode. Perform a thorough scan of your system using reputable antivirus software to detect and remove any potential threats.
4. Test the SSD on another system: Connect your SSD to another computer to determine if the read-only issue persists. If the problem is resolved on the other system, it may indicate a compatibility or configuration issue on your original computer.
5. Perform a system restore: If the read-only issue started occurring after recent software installations or system changes, consider performing a system restore to a point before the problem began. This can help revert any problematic changes and restore your SSD to a working state.
6. Contact SSD manufacturer support: If all other troubleshooting steps fail to resolve the issue, it is advisable to reach out to the SSD manufacturer’s technical support team. They can provide specialized guidance and assist in diagnosing and resolving the read-only mode problem.
Attempting to troubleshoot and resolve read-only issues can sometimes be complex. It’s important to exercise caution and backup any important data before making any changes to your system or SSD.
By following these troubleshooting steps, you can address common issues that cause SSDs to enter read-only mode and work towards resolving the problem to regain full functionality and control over your drive.
Next, let’s conclude this article with a summary of the key takeaways and a reminder of the importance of addressing read-only mode issues effectively.
Conclusion
In conclusion, dealing with read-only mode in solid-state drives (SSDs) can be frustrating, but with the right knowledge and steps, you can regain control over your storage device. Understanding the reasons behind read-only mode, such as physical write protection switches, software settings, firmware issues, or internal errors, is crucial in troubleshooting and resolving the problem.
We discussed various methods to change an SSD from read-only mode. Checking for a physical write protection switch and ensuring it is properly positioned can be a simple solution. If a physical switch is not present, disabling write protection through software, using tools like Disk Management or the Command Prompt, can offer effective alternatives.
Updating your SSD firmware is also important to address potential compatibility issues and bugs that may be causing read-only mode. Regularly checking for firmware updates from your SSD manufacturer’s website and following the recommended update process is essential.
If troubleshooting steps do not solve the read-only issue, it is best to seek further assistance from a professional or contact the SSD manufacturer’s support team for specialized guidance.
It’s worth emphasizing the importance of backing up your data before attempting any changes or troubleshooting steps. While rare, there is always a small risk of data loss or system malfunction during the process.
By following the steps and guidelines provided in this article, you can effectively address read-only mode issues in SSDs and restore full functionality to your storage device. Remember to stay proactive in maintaining your SSD and periodically check for firmware updates to ensure optimal performance.
We hope this article has been informative and helpful in guiding you through the process of changing SSDs from read-only mode. Don’t let the read-only mode hinder your experience with your SSD – take action and regain control over your valuable data.