Introduction
Welcome to the world of GPU mining rigs! If you’re fascinated by the idea of mining cryptocurrencies like Bitcoin or Ethereum, building your own mining rig can be a cost-effective and rewarding venture. With the right components and a little know-how, you can harness the power of graphics processing units (GPUs) to generate income while supporting the blockchain network.
In this guide, we will walk you through the process of building a GPU mining rig from scratch. Whether you’re a tech-savvy individual looking to expand their mining operations or a beginner interested in entering the world of cryptocurrency mining, this article will provide you with valuable information to get started.
Before we dive into the nitty-gritty details, it’s important to understand the basic concept behind GPU mining. Essentially, cryptocurrency mining involves solving complex mathematical problems to verify transactions on the blockchain network. GPUs, known for their exceptional parallel processing power, outperform traditional central processing units (CPUs) in this computational task.
Now that you have a general understanding of GPU mining, let’s discuss the steps involved in building a mining rig. We’ll cover everything from choosing the right GPU to assembling the rig, setting up the operating system and mining software, optimizing performance, managing power consumption, and troubleshooting common issues.
Building a mining rig requires careful planning and consideration of various factors such as budget, power consumption, cooling, and future scalability. With the right approach and the willingness to learn, you can create a mining rig that maximizes your mining potential and generates a steady income. So let’s get started on this exciting journey!
Choosing the Right GPU
When it comes to building a GPU mining rig, selecting the right graphics processing unit (GPU) is crucial. The GPU is the heart of your mining rig, responsible for performing the complex calculations necessary for cryptocurrency mining. It’s essential to choose a GPU that strikes the right balance between performance, power consumption, and price.
There are several factors to consider when selecting a GPU for mining:
- Hashrate: The hashrate refers to the speed at which a GPU can perform the mining calculations. A higher hashrate means more calculations can be done, resulting in faster mining and higher profitability.
- Energy Efficiency: Energy costs can significantly impact your mining profitability. Look for GPUs that offer a good balance between hashrate and power consumption. Energy-efficient GPUs can save you money in the long run.
- Availability and Cost: The availability and cost of GPUs can vary, especially during high demand periods. Research the market and compare prices to find a GPU that fits your budget without compromising on performance.
- Compatibility: Ensure that the chosen GPU is compatible with the mining software you plan to use. Different mining algorithms may require specific GPU models or firmware versions.
- Brand and Warranty: Opt for reputable GPU brands known for their reliability and quality. Look for GPUs with a good warranty period to protect your investment.
Popular choices among miners include GPUs from AMD and NVIDIA. AMD cards often excel in terms of raw hashrate and price, making them appealing options for budget-conscious miners. NVIDIA cards, on the other hand, tend to offer better energy efficiency and compatibility with certain mining algorithms.
It’s important to note that the mining landscape is constantly evolving, with new GPU models entering the market regularly. Stay updated with mining communities and forums to learn about the latest GPU releases and recommendations.
Ultimately, the choice of GPU for your mining rig depends on your specific requirements and budget. Consider factors such as the cryptocurrency you plan to mine, the mining algorithm it uses, and your electricity costs. By carefully weighing these factors and conducting thorough research, you can select a GPU that optimizes your mining performance and profitability.
Essential Components for Building a Mining Rig
Building a mining rig requires a combination of essential components that work together to maximize mining performance. Let’s take a closer look at the key components you’ll need:
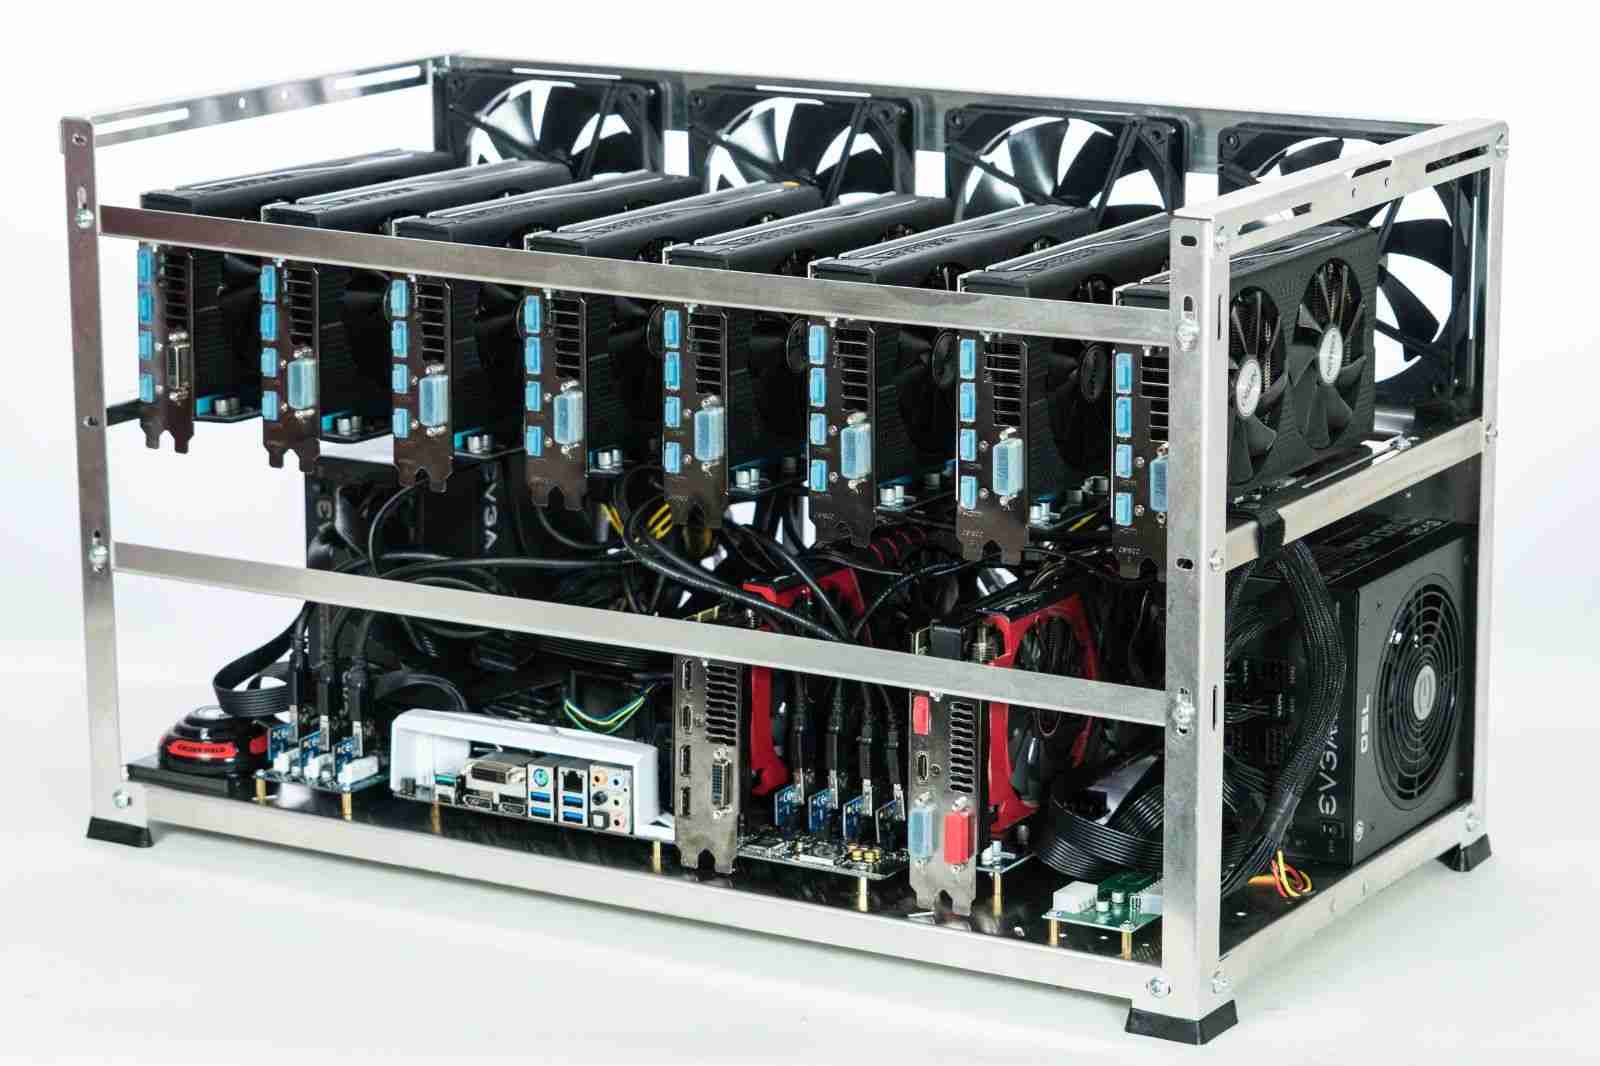
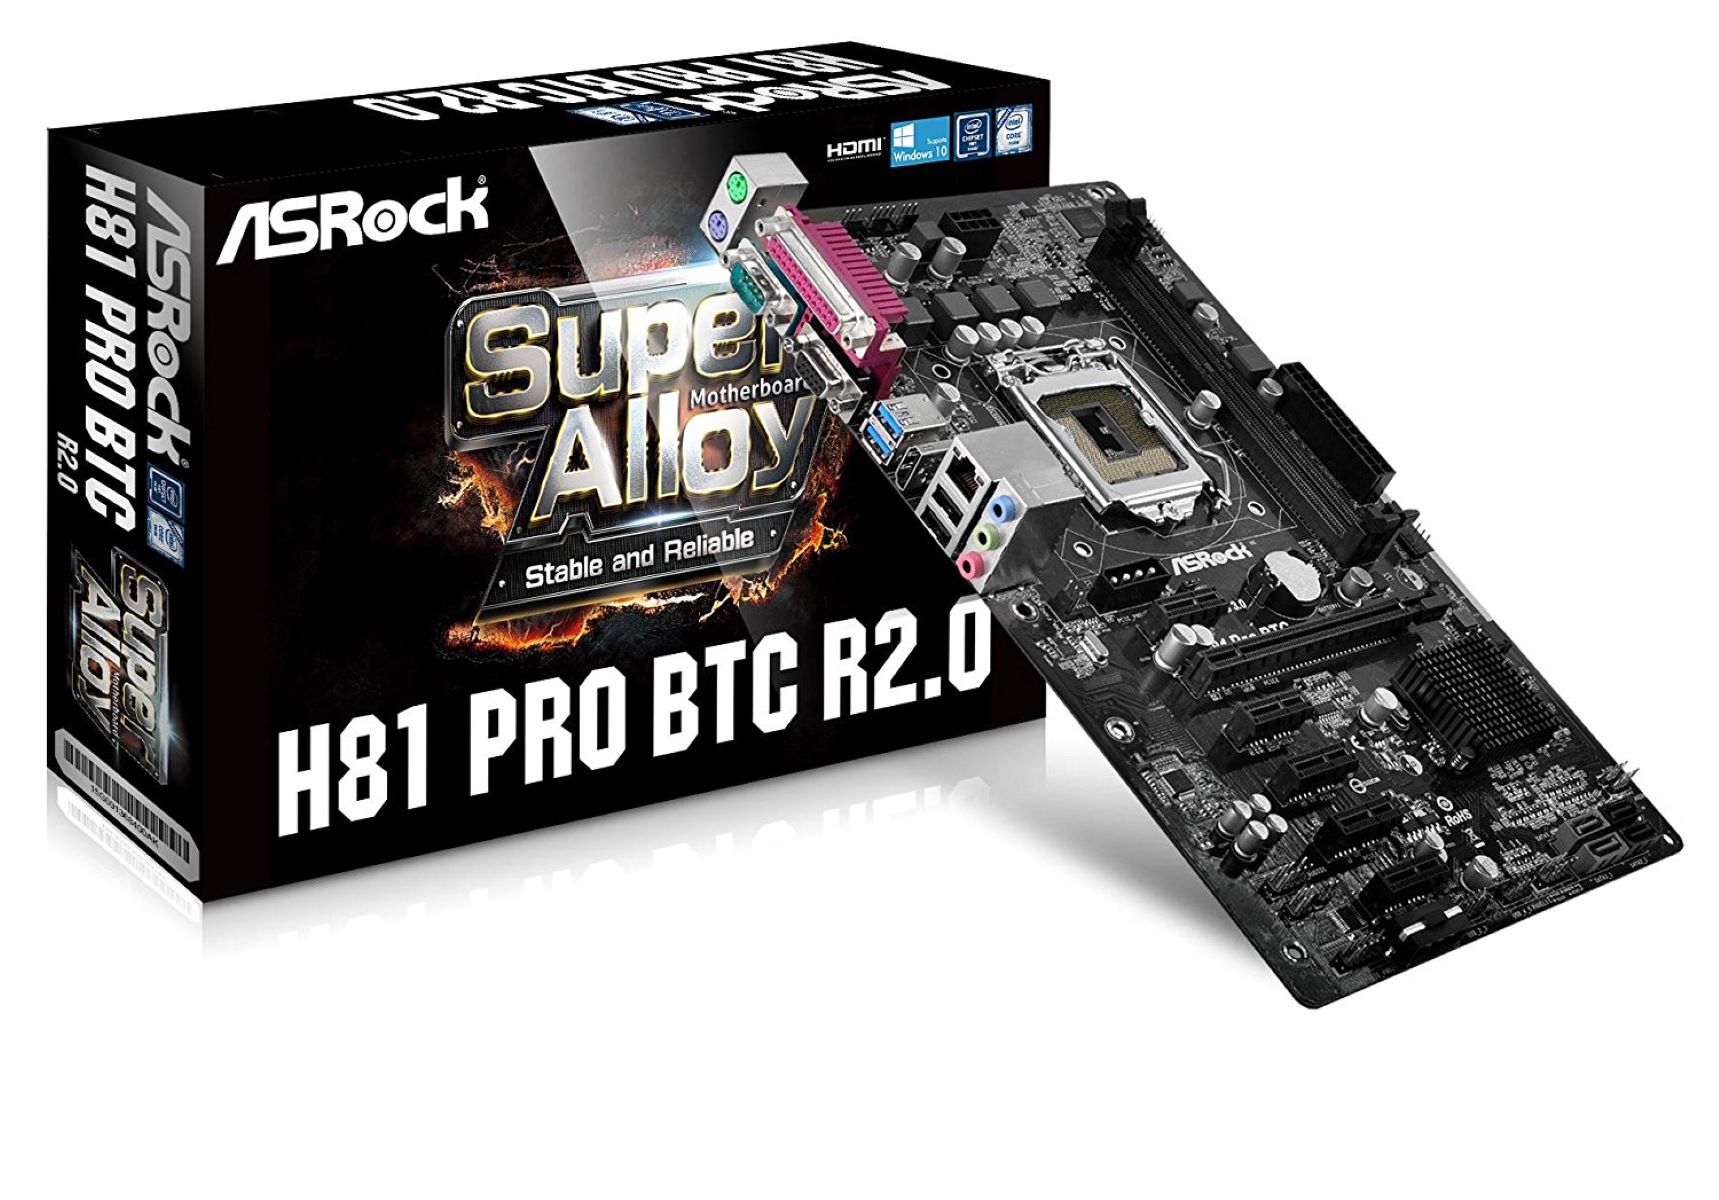
- Motherboard: Choose a motherboard that supports multiple GPUs and offers sufficient PCIe slots. This will allow you to expand your mining rig in the future without requiring a complete overhaul.
- Processor (CPU): While the CPU’s role in mining is minimal, it’s still important to choose a processor that is compatible with your motherboard and offers adequate power to support the mining rig.
- Graphics Processing Unit (GPU): As discussed earlier, the GPU is the main workhorse of your mining rig. Depending on your budget and preferences, select suitable GPUs based on factors such as hashrate, energy efficiency, and compatibility.
- Power Supply Unit (PSU): A reliable PSU is essential to power your mining rig, ensuring stable and efficient operation. Choose a high-quality PSU with sufficient wattage to meet the power requirements of your GPUs and other components.
- Memory (RAM): Opt for at least 4GB of RAM to ensure smooth operation of your mining rig. Though mining doesn’t heavily rely on RAM, having enough memory is essential for running the operating system and mining software.
- Storage: A solid-state drive (SSD) or hard disk drive (HDD) is necessary to install the operating system and mining software. SSDs are generally faster and more reliable, but HDDs can suffice if you’re on a tight budget.
- Cooling System: The continuous operation of a mining rig generates considerable heat, so proper cooling is crucial to maintain optimal performance and prevent overheating. Consider installing multiple case fans or even liquid cooling if you plan to mine intensively.
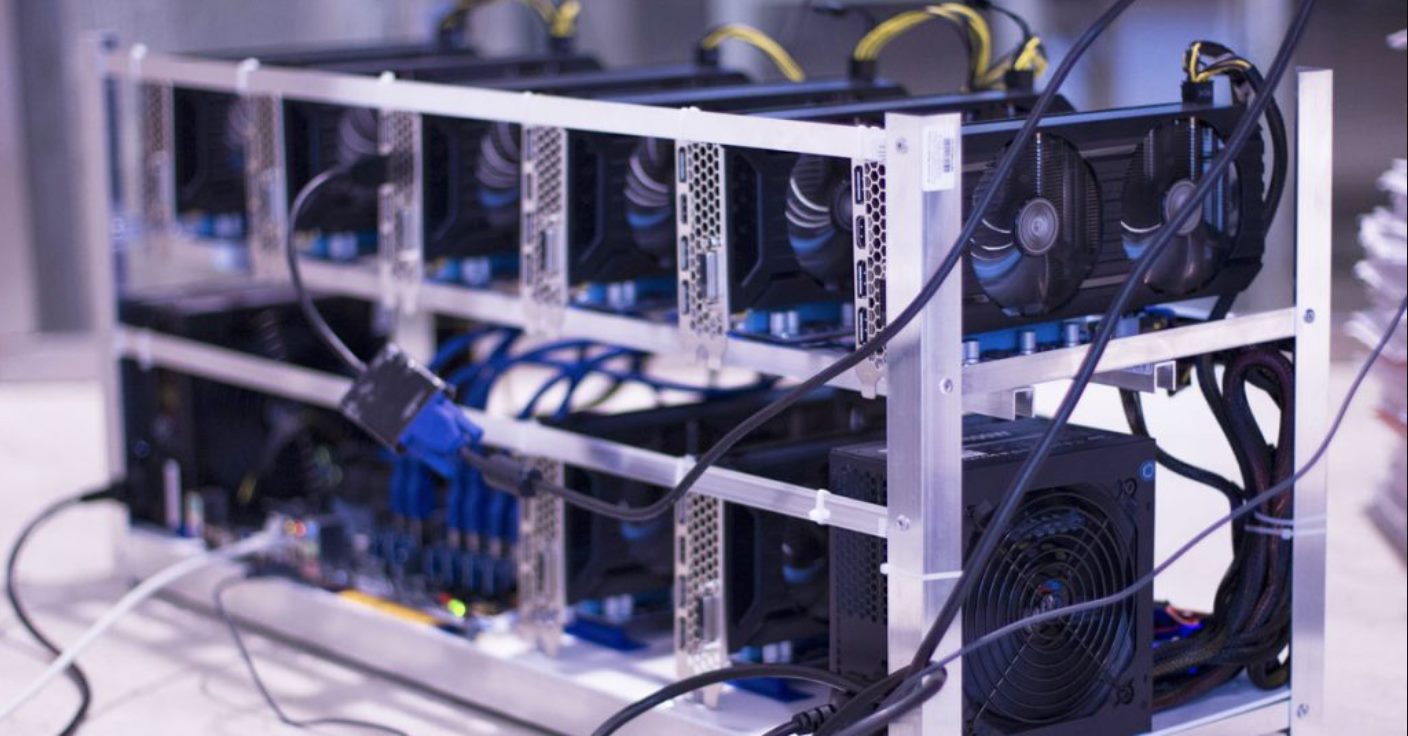
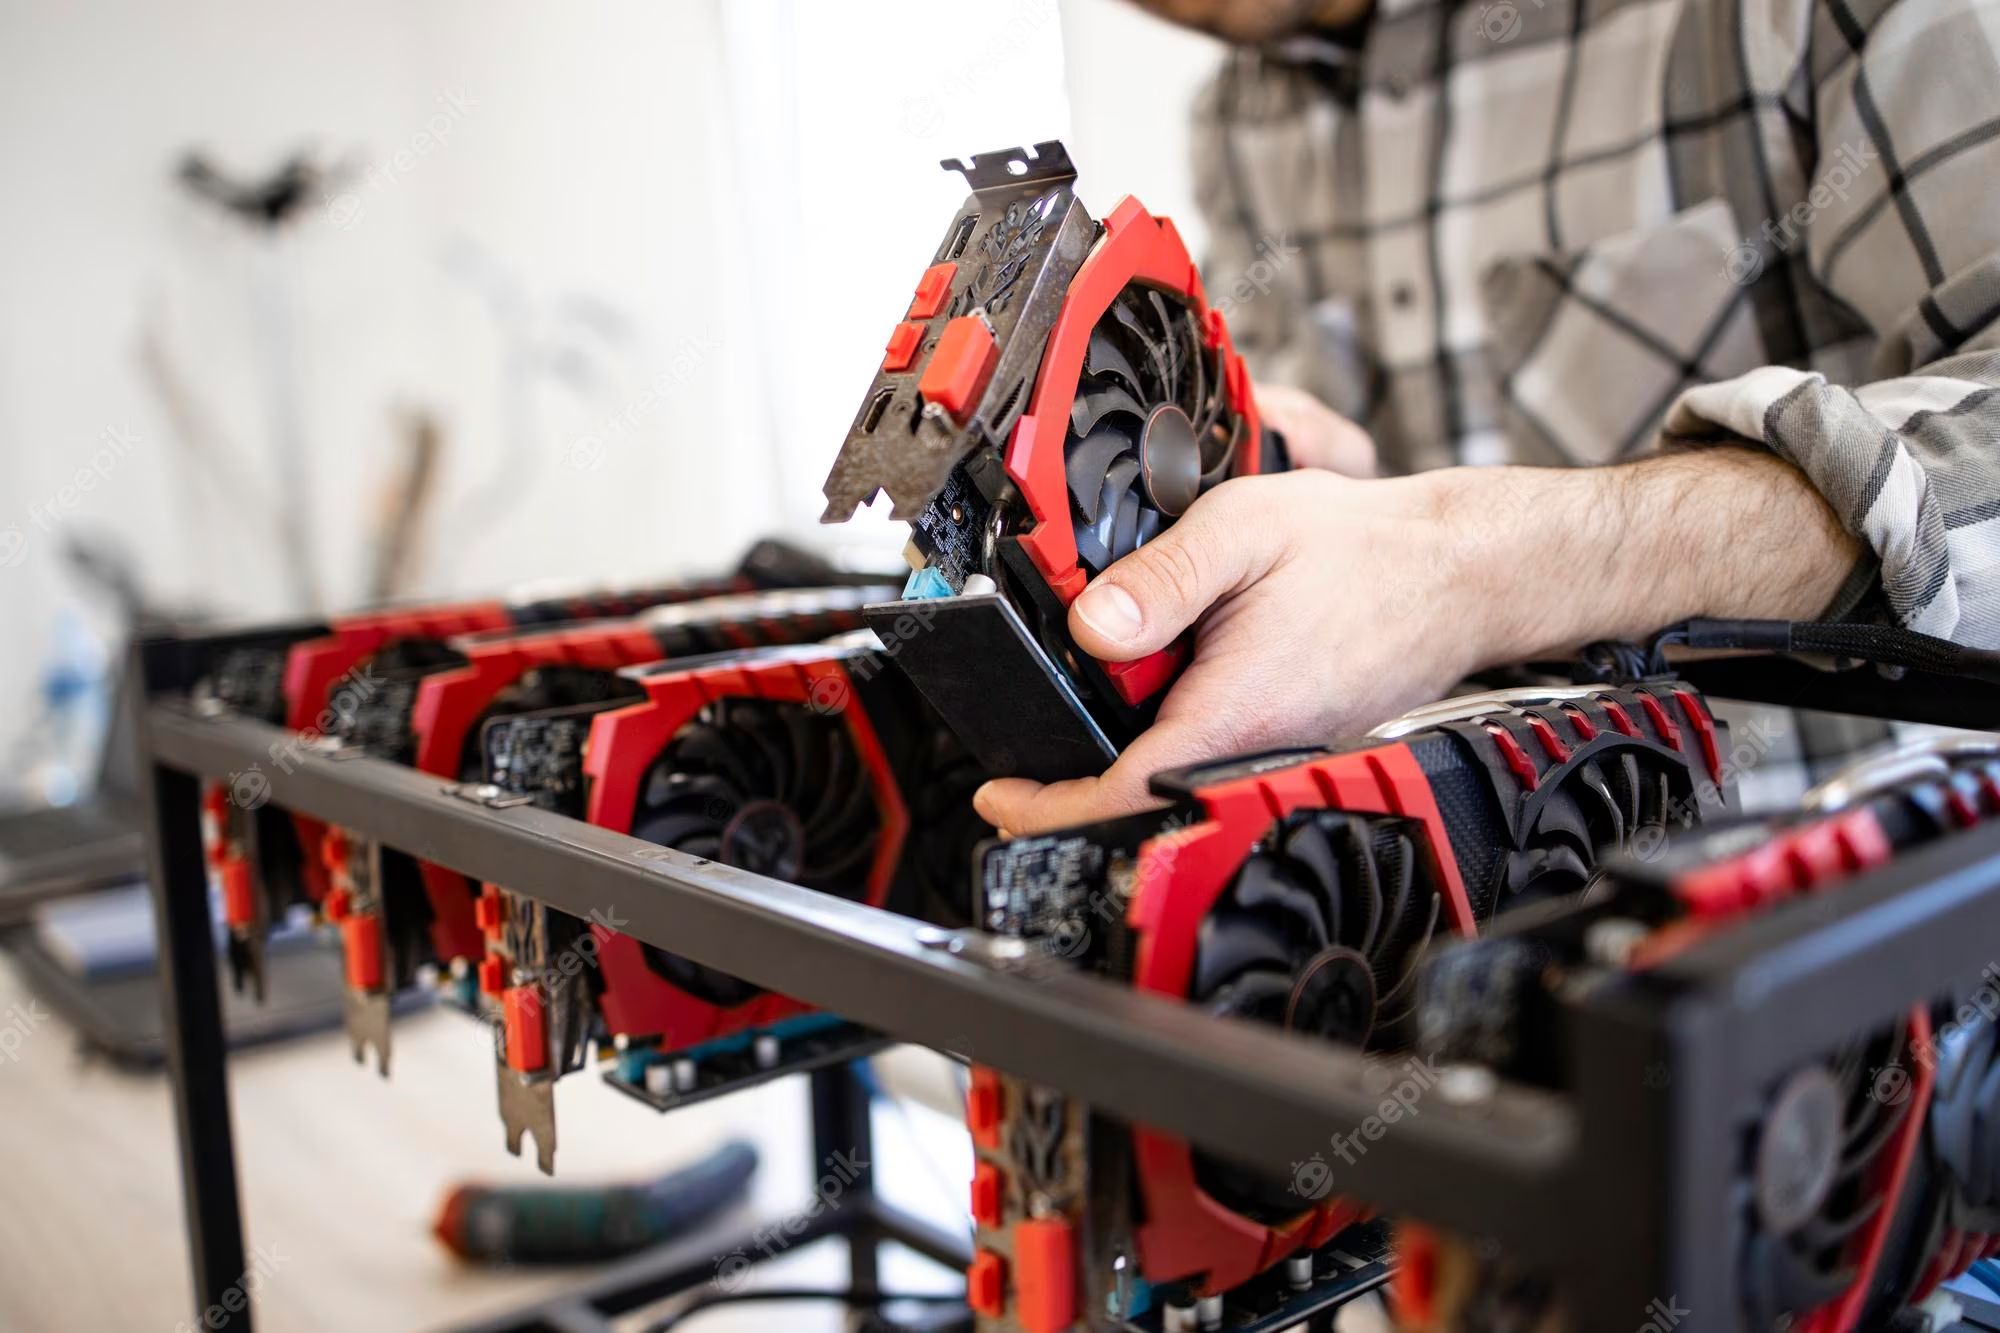
- Riser Cards: Riser cards allow you to connect multiple GPUs to your motherboard, expanding the number of GPUs your rig can support. Choose reliable riser cards to ensure stable data transfer.
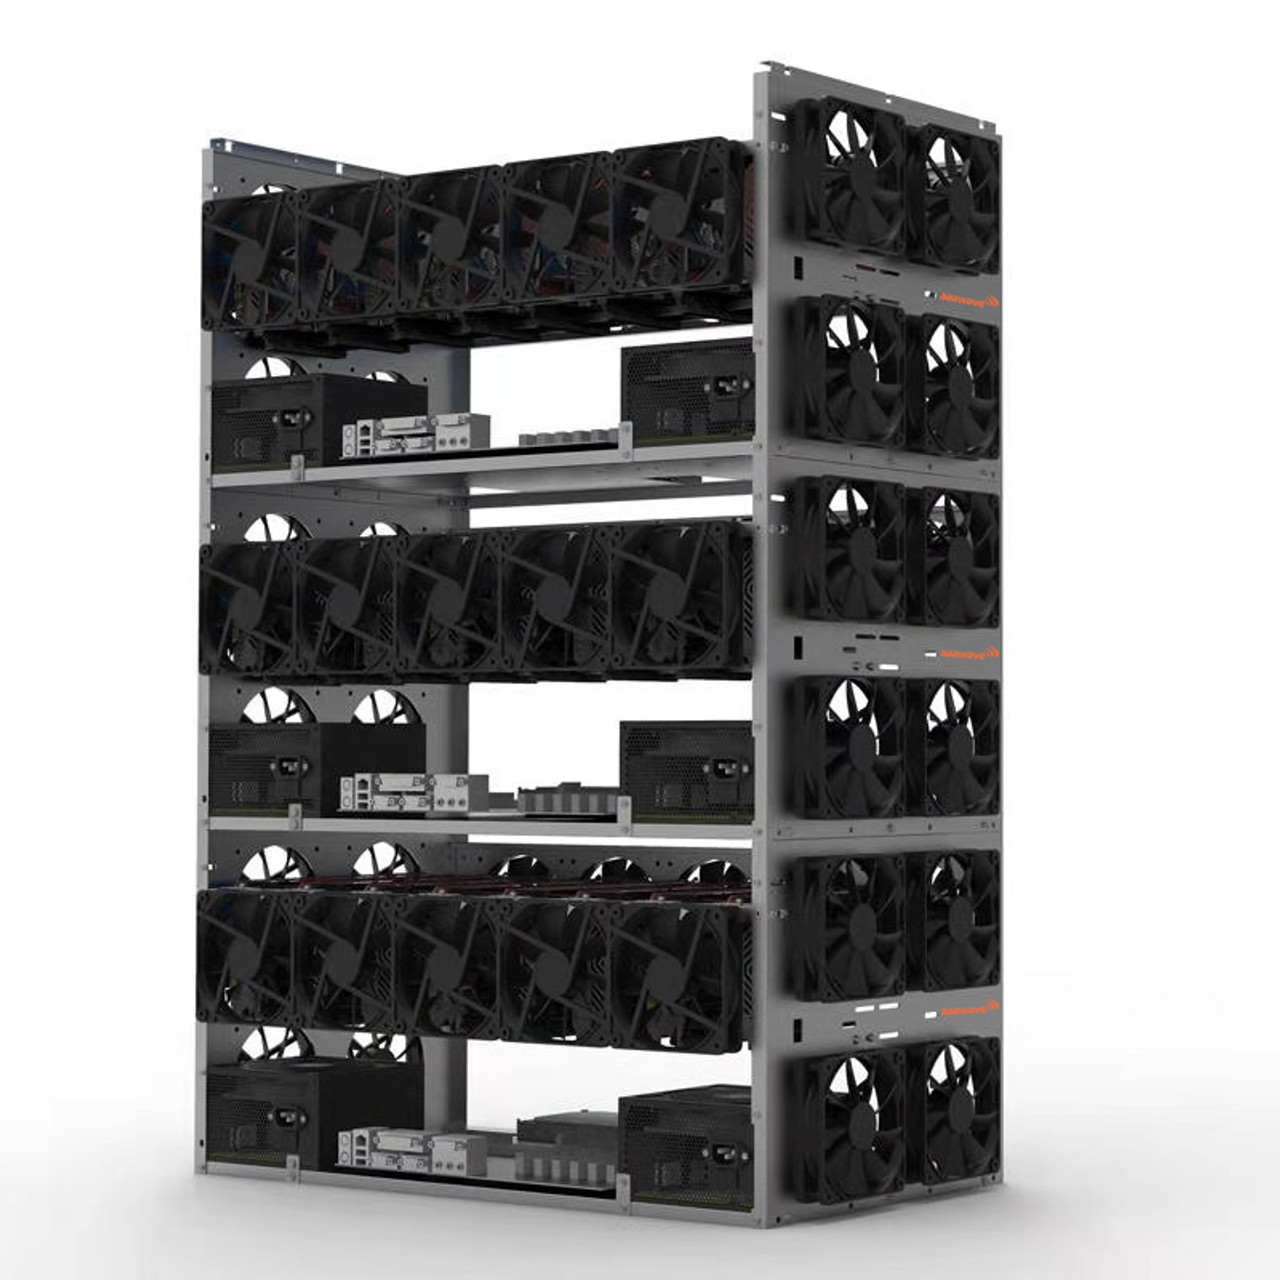
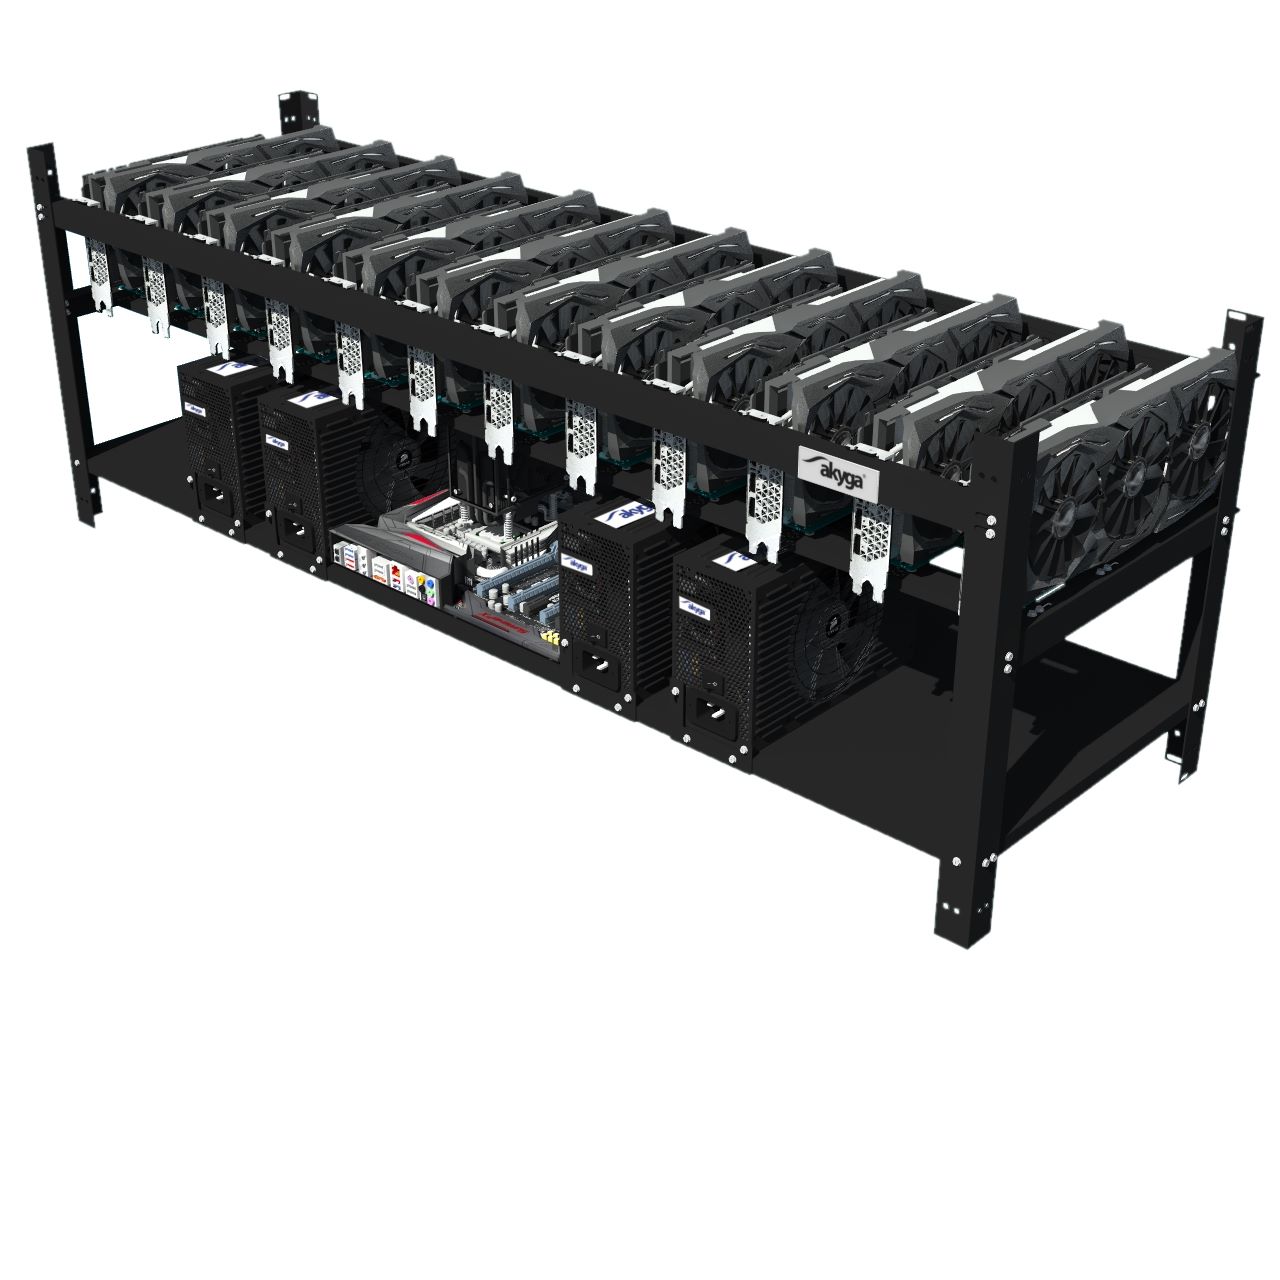
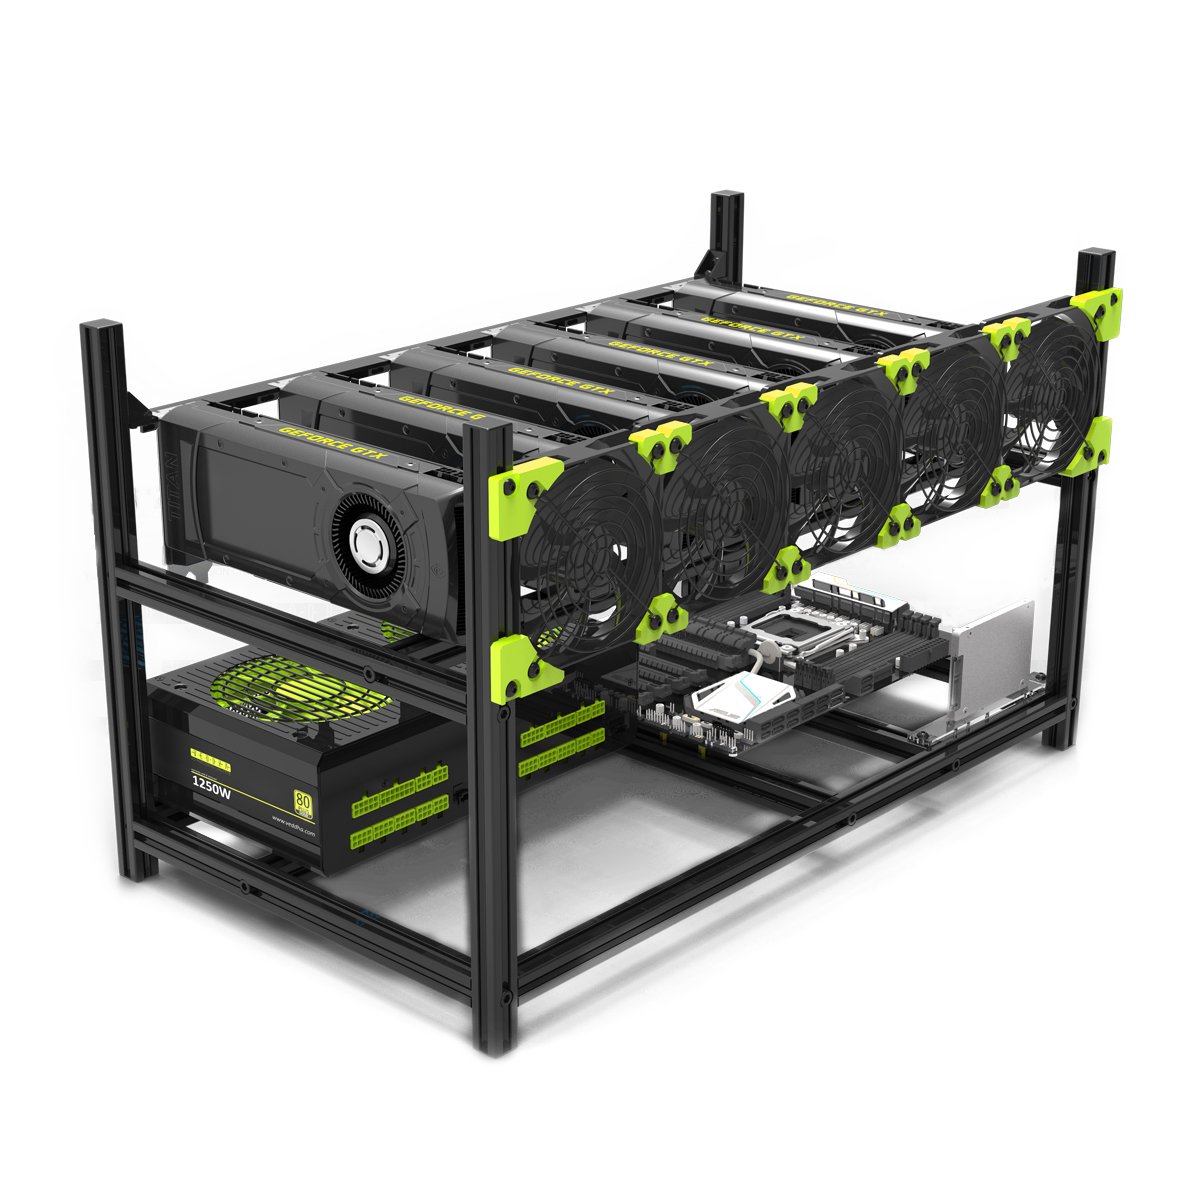
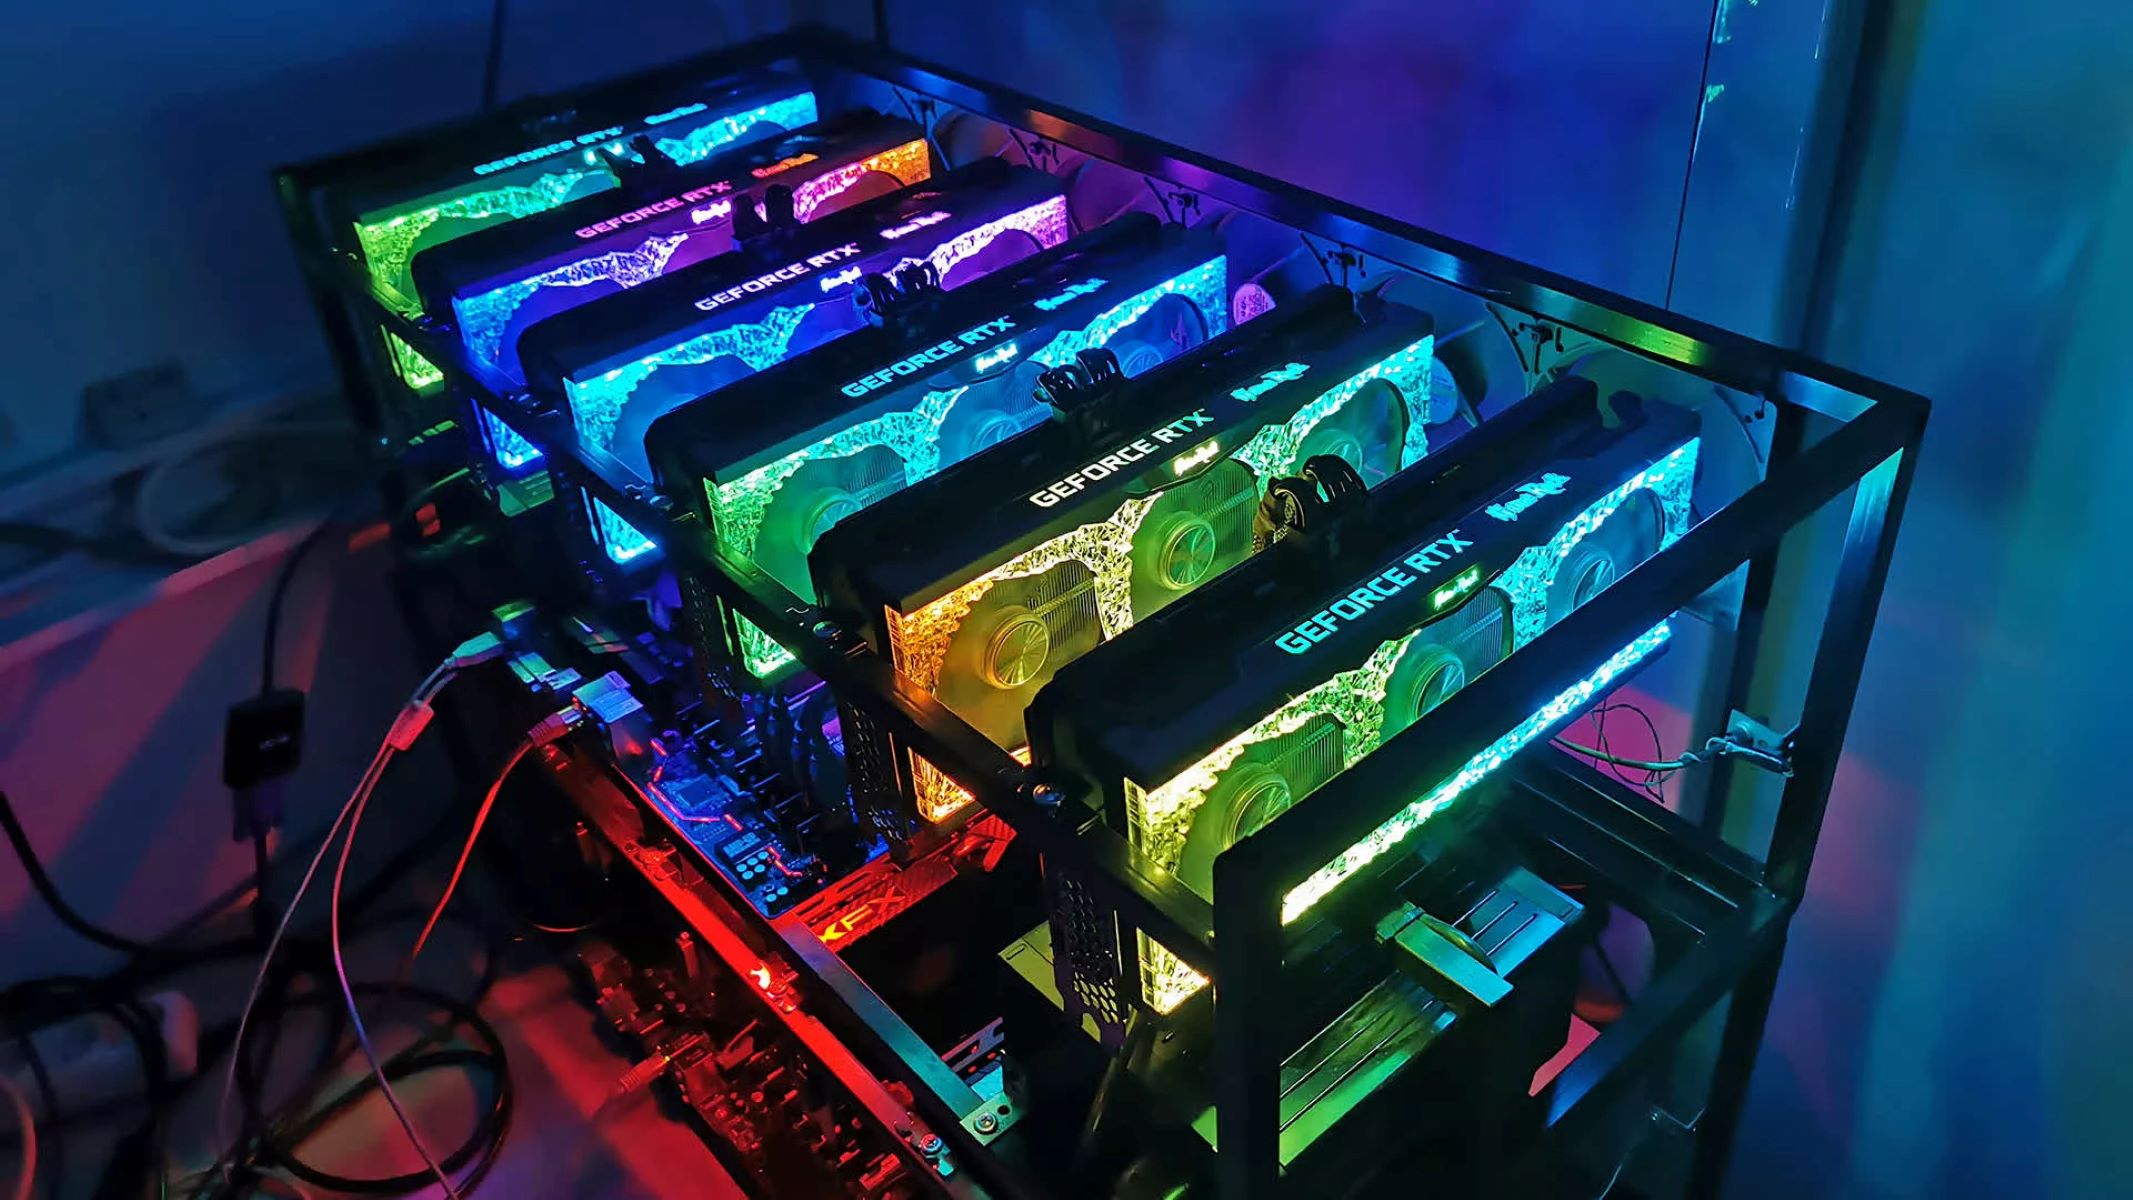
- Mining Frame: While not essential, a mining frame can greatly simplify the assembly and organization of your mining rig. You can either purchase a pre-made mining frame or build your own using materials like aluminum or PVC pipes.
Remember to consider compatibility and power consumption when selecting components for your mining rig. Additionally, ensure you have all the necessary cables, connectors, and screws to securely connect and mount the components.
Before purchasing the components, it’s advisable to calculate the total power consumption of your mining rig and choose a PSU with adequate wattage to handle the load. This will prevent power-related issues and ensure the stability of your mining setup.
Now that you have a clear understanding of the essential components required for building a mining rig, it’s time to move on to the next step: assembling the components into a fully functional mining rig.
Assembling the Mining Rig
Now that you have gathered all the essential components for your mining rig, it’s time to put everything together. Follow these step-by-step instructions to assemble your mining rig:
- Prepare the Mining Frame: If you are using a mining frame, assemble it according to the manufacturer’s instructions. Ensure that it provides adequate space and ventilation for your GPUs and other components.
- Install the Motherboard: Place the motherboard on the mining frame or inside the case and secure it using the provided screws. Make sure it is aligned with the standoffs on the frame to prevent grounding issues.
- Attach the CPU and Cooler: Install the CPU into the motherboard’s CPU socket and secure it according to the manufacturer’s instructions. Apply thermal paste to the CPU, then attach the CPU cooler to keep temperatures under control.
- Insert the RAM: Insert the RAM sticks into the appropriate slots on the motherboard. Ensure that they are securely seated and locked into place.
- Connect the Power Supply: Install the power supply in the designated space in the mining frame or case. Connect the necessary power cables to the motherboard, CPU, PCIe riser cards, and other components as required.
- Mount the GPUs: Attach the GPUs to the riser cards and secure them to the mining frame or case using screws or brackets. Connect the PCIe power cables from the power supply to each GPU.
- Connect Storage and Other Peripherals: Connect the storage device (SSD or HDD) to the motherboard using the appropriate cables. Connect the keyboard, mouse, and monitor to the motherboard if needed.
- Check Connections: Double-check all the connections to ensure everything is properly connected and secured. Ensure that there are no loose cables or components that may cause issues.
- Power Up: Connect the power cable from the power supply to the wall outlet, and then switch on the power supply. The mining rig should start powering on, and you should see the motherboard’s BIOS screen.
- Configure BIOS Settings: Access the BIOS settings by pressing the designated key during startup (typically Del or F2). Configure the BIOS to boot from the storage device where you have installed the operating system.
- Install Operating System and Mining Software: Insert the installation media (USB or DVD) containing the operating system, and follow the prompts to install it. After the operating system installation, install the mining software of your choice.
Once you have completed these steps, your mining rig will be assembled and ready to start mining cryptocurrencies. Make sure to regularly monitor and maintain your rig to ensure its optimal performance and longevity.
Note: It’s essential to practice proper safety precautions while assembling the mining rig. Ensure that the rig is powered off and disconnected from the power source before making any adjustments or installations. Be mindful of static electricity, and handle the components with care to prevent damage.
Setting Up the Operating System and Mining Software
After assembling your mining rig, the next step is to set up the operating system (OS) and install the mining software. Here’s a guide to help you through the process:
- Choose an Operating System: There are various operating systems you can use for mining, including Windows, Linux, or dedicated mining OS such as ethOS or Simplemining. Evaluate the pros and cons of each and select the one that best suits your needs.
- Prepare Installation Media: Depending on your chosen OS, create a bootable USB drive or DVD containing the installation files. Download the ISO file for the OS and use software like Rufus or Etcher to create the bootable media.
- Configure BIOS Settings: Access the BIOS of your mining rig by pressing the designated key during startup (often Del or F2). Ensure that the boot priority is set to the USB drive or DVD, so the installation process can begin.
- Install the Operating System: Insert the bootable USB drive or DVD and restart your mining rig. Follow the on-screen prompts to install the operating system onto your mining rig’s storage device. Once the installation is complete, remove the installation media.
- Install Device Drivers: After installing the operating system, you’ll need to install the appropriate drivers for your GPUs. Visit the manufacturer’s website or use automatic driver installation tools to download and install the latest drivers for optimal performance.
- Configure Network Settings: Connect your mining rig to the internet via Ethernet or Wi-Fi. Configure network settings, such as setting a static IP address or configuring DHCP, as required. Make sure you have a stable internet connection for mining and software updates.
- Install Mining Software: Depending on the cryptocurrency you plan to mine, choose mining software that supports the mining algorithm. Popular options include CGMiner, BFGMiner, Claymore’s Dual Miner, and PhoenixMiner. Configure the software with your mining pool and wallet details.
- Start Mining: Launch the mining software and monitor the mining rig’s performance. Ensure that the GPUs are detected and properly configured. Join a mining pool if you prefer to combine hashing power with other miners for more consistent payouts.
- Optimize Mining Settings: Experiment with different mining settings and parameters to maximize your mining profitability. Adjust GPU clock speeds, memory timings, and fan speeds to find the optimal balance between hashrate and power consumption.
It’s important to stay updated with the latest releases and updates for both the operating system and mining software. Regularly check for updates that may improve performance, stability, or security.
Keep in mind that mining software settings can vary depending on the cryptocurrency and mining algorithm you choose. Explore online resources, mining communities, and forums to learn about recommended settings and optimizations specific to your chosen cryptocurrency.
Now that you have set up your operating system and mining software, your mining rig is ready to dig for cryptocurrencies. Regularly monitor and fine-tune your settings to ensure the optimal performance of your mining rig.
Overclocking and Optimizing the GPU
One of the key factors in maximizing the performance of your mining rig is overclocking and optimizing the GPUs. By tweaking certain settings, you can achieve higher hashrates and improve the efficiency of your mining operation. Here are some steps to overclock and optimize your GPUs:
- Research and Understand the GPU: Start by understanding the capabilities and limitations of your specific GPU model. Look for online resources, forums, and guides that provide overclocking recommendations and tips for your particular GPU.
- Install GPU Monitoring Software: Download and install GPU monitoring software, such as GPU-Z or HWiNFO, to monitor the temperature, fan speed, and other vital stats of your GPU during the overclocking process. This will help ensure your GPU remains within safe operating limits.
- Incrementally Increase Clock Speeds: Begin by increasing the GPU core clock speeds in small increments, such as 25 MHz at a time. Test the stability of each increment by running a mining algorithm for a sufficient amount of time and monitoring for crashes or artifacts.
- Optimize Memory Clock Speeds: After tweaking the core clock, focus on optimizing the memory clock speeds. Similarly, increase the memory clock in small increments and test for stability. It’s important to find the balance between memory clock speed and memory errors.
- Adjust Power Limits and Voltage: Some GPUs allow you to adjust power limits and voltage settings. Increasing the power limit can provide more headroom for overclocking, while adjusting the voltage can help stabilize higher clock speeds. However, be cautious when manipulating these settings, as improper adjustments may cause damage.
- Maintain Optimal GPU Temperatures: Overclocking can increase GPU temperatures. Ensure that your mining rig has adequate cooling to keep the GPUs within safe operating temperatures. This may involve increasing fan speeds, optimizing airflow, or adding additional cooling solutions like case fans or liquid cooling.
- Monitor and Benchmark: As you overclock, monitor the performance and stability of your GPUs. Benchmark your hashrates and compare them to the default settings to assess the improvements in mining performance. Ensure that the overclocked GPUs are producing stable results without excessive hardware errors or crashes.
- Continuously Fine-Tune: Overclocking is an ongoing process that requires patience and fine-tuning. Keep experimenting with different clock speeds, voltage settings, and memory timings to find the optimal settings for your specific GPU model and mining algorithm.
It’s important to note that overclocking can increase power consumption and may void the warranty of your GPU. Proceed with caution and take responsibility for any potential risks associated with overclocking.
Finally, keep in mind that not all GPUs are created equal. Some GPU models may overclock better than others, so the results may vary. Take the time to find the sweet spot where your GPU achieves maximum performance without sacrificing stability or longevity.
By properly overclocking and optimizing your GPUs, you can squeeze out extra hashing power and improve the efficiency of your mining rig, resulting in higher profitability in your cryptocurrency mining endeavors.
Managing Power Consumption
In mining, power consumption plays a significant role as it directly affects the profitability of your operation. By implementing effective strategies to manage power consumption, you can optimize your mining rig’s efficiency and reduce operating costs. Here are some tips to help you manage power consumption:
- Choose Energy-Efficient Components: When building your mining rig, prioritize energy-efficient components, especially GPUs. Look for models with high hash rates and low power consumption. This will help lower electricity costs and improve your mining profitability.
- Undervolt your GPUs: Most GPUs can be undervolted, meaning you can reduce their power consumption without sacrificing performance. Find the optimal balance between voltage and clock speeds to achieve maximum efficiency.
- Optimize GPU Settings: Adjusting GPU settings like core clock, memory clock, and power limit can impact power consumption. Experiment with these settings to find the optimal balance between performance and power efficiency.
- Manage Fan Speeds: Running the GPU fans at higher speeds can improve cooling but also increases power consumption. Find the right balance between fan speed and temperatures to prevent overheating while minimizing power usage.
- Configure Power-Saving Features: Most mining software allows you to enable power-saving features, such as putting GPUs in a low-power state during idle periods. Take advantage of these features to reduce power consumption when your GPUs aren’t actively mining.
- Monitor Power Usage: Install power metering devices to accurately measure the power consumption of your mining rig. Monitoring power usage helps identify any abnormalities or inefficiencies and allows you to make adjustments accordingly.
- Implement Smart Scheduling: Depending on your electricity rates, consider mining during off-peak hours or when electricity costs are lower. This can result in substantial savings on your energy bills.
- Utilize Smart Power Strips: Smart power strips or surge protectors allow you to control the power supply to your mining rig. You can set timers or use remote switches to turn off the rig when not in use, further reducing power consumption.
- Consider Renewable Energy: If possible, explore alternative energy sources such as solar panels or wind turbines to power your mining rig. Utilizing renewable energy can significantly reduce your environmental footprint and lower long-term energy costs.
- Regular Maintenance: Keep your mining rig clean and well-maintained to ensure optimum power efficiency. Dust accumulation can hinder airflow and increase power consumption. Regularly clean the fans, vents, and heat sinks to prevent overheating.
Remember, managing power consumption is an ongoing process. Continuously monitor and adjust your mining rig’s settings as necessary to maintain optimal power efficiency. By implementing these power-saving strategies, you can reduce your environmental impact and improve the profitability of your mining operation.
Troubleshooting and Maintenance
Like any complex technology, mining rigs may encounter issues from time to time. Being able to troubleshoot and perform regular maintenance is essential to keep your mining operation running smoothly. Here are some troubleshooting tips and maintenance practices to help you overcome common challenges:
- Monitor Temperature and Cooling: Overheating is a common issue in mining rigs. Regularly monitor the temperature of your GPUs and ensure proper cooling. Clean the dust filters, fans, and heat sinks regularly to prevent overheating and maintain efficient cooling.
- Check Hardware Connections: Periodically inspect and reseat hardware connections, including cables and riser cards. Loose connections can lead to instability and performance issues. Ensure all components are firmly connected and securely mounted.
- Update Drivers and Software: Keep your drivers and mining software up to date. Regularly check for updates from manufacturers or the mining software developers. Updated software often includes bug fixes, performance improvements, and compatibility enhancements.
- Monitor and Manage Power Supply: Check the power supply unit (PSU) regularly for signs of wear or failure. Verify that all cables and connectors are securely plugged in. If you experience power-related issues, consider upgrading to a higher-quality PSU.
- Address Networking and Connectivity Issues: Instability in internet connectivity can cause mining interruptions. Ensure a reliable network connection by troubleshooting network settings, replacing faulty cables, or upgrading to a more reliable internet service provider.
- Monitor Mining Pool and Wallet: If you’re mining in a pool, monitor its performance and payout consistency. Also, verify the correct wallet address is provided to receive your mining rewards. Ensure your mining pool is reputable and has a reliable infrastructure.
- Backup Wallets and Mining Configurations: Regularly backup your cryptocurrency wallets and mining configurations. Store the backups securely in multiple locations, such as external hard drives or cloud storage. In the event of hardware or software failure, you won’t lose important data.
- Stay Informed: Keep yourself updated with the latest mining news, technology advancements, and security practices. Join mining communities, follow forums and blogs, and engage with fellow miners. Learning from others’ experiences can help you troubleshoot and identify potential issues.
- Professional Help: If you encounter persistent issues or are unsure about troubleshooting steps, consider seeking professional help or contacting technical support. Experienced technicians can provide specific guidance tailored to your mining rig and help resolve complex problems.
Regular maintenance is crucial to extend the lifespan of your mining rig. Develop a routine maintenance schedule that includes cleaning, inspecting connections, updating software, and backing up data. By proactively addressing issues and performing necessary maintenance, you can minimize downtime and maximize your mining rig’s efficiency.
Remember, troubleshooting and maintenance are ongoing tasks. Stay vigilant and proactive to ensure the longevity of your mining operation and to overcome any challenges that may arise.
Conclusion
Congratulations! You’ve reached the end of this guide on building and optimizing a GPU mining rig. Throughout this article, we covered the essential components for building a mining rig, assembling the rig, setting up the operating system and mining software, overclocking and optimizing the GPU, managing power consumption, and troubleshooting and maintenance.
Building a mining rig can be a challenging yet rewarding endeavor. It requires careful planning, research, and continuous monitoring to ensure optimal performance and profitability. By selecting the right components, configuring them properly, and implementing power-saving techniques, you can maximize your mining potential while minimizing costs.
Remember to stay updated with the latest news, developments, and best practices in the cryptocurrency mining community. The mining landscape is constantly evolving, and new technologies and techniques may emerge that can further enhance your mining rig’s performance.
As you embark on your mining journey, it’s important to approach mining with a realistic mindset. Mining cryptocurrencies is a dynamic and competitive field, and success depends on factors such as market conditions, mining difficulty, and electricity costs. It’s crucial to regularly evaluate your mining operation’s profitability and make necessary adjustments accordingly.
Lastly, always prioritize safety and adhere to electrical and safety guidelines while working on your mining rig. Properly manage heat dissipation, avoid electrical hazards, and handle components with care to prevent damage or injury.
We hope that this guide has provided you with valuable insights and guidance to help you build and optimize your own GPU mining rig. As you gain experience and immerse yourself in the mining community, continue to learn and adapt to the ever-changing landscape of cryptocurrency mining. Good luck on your mining journey!