Introduction
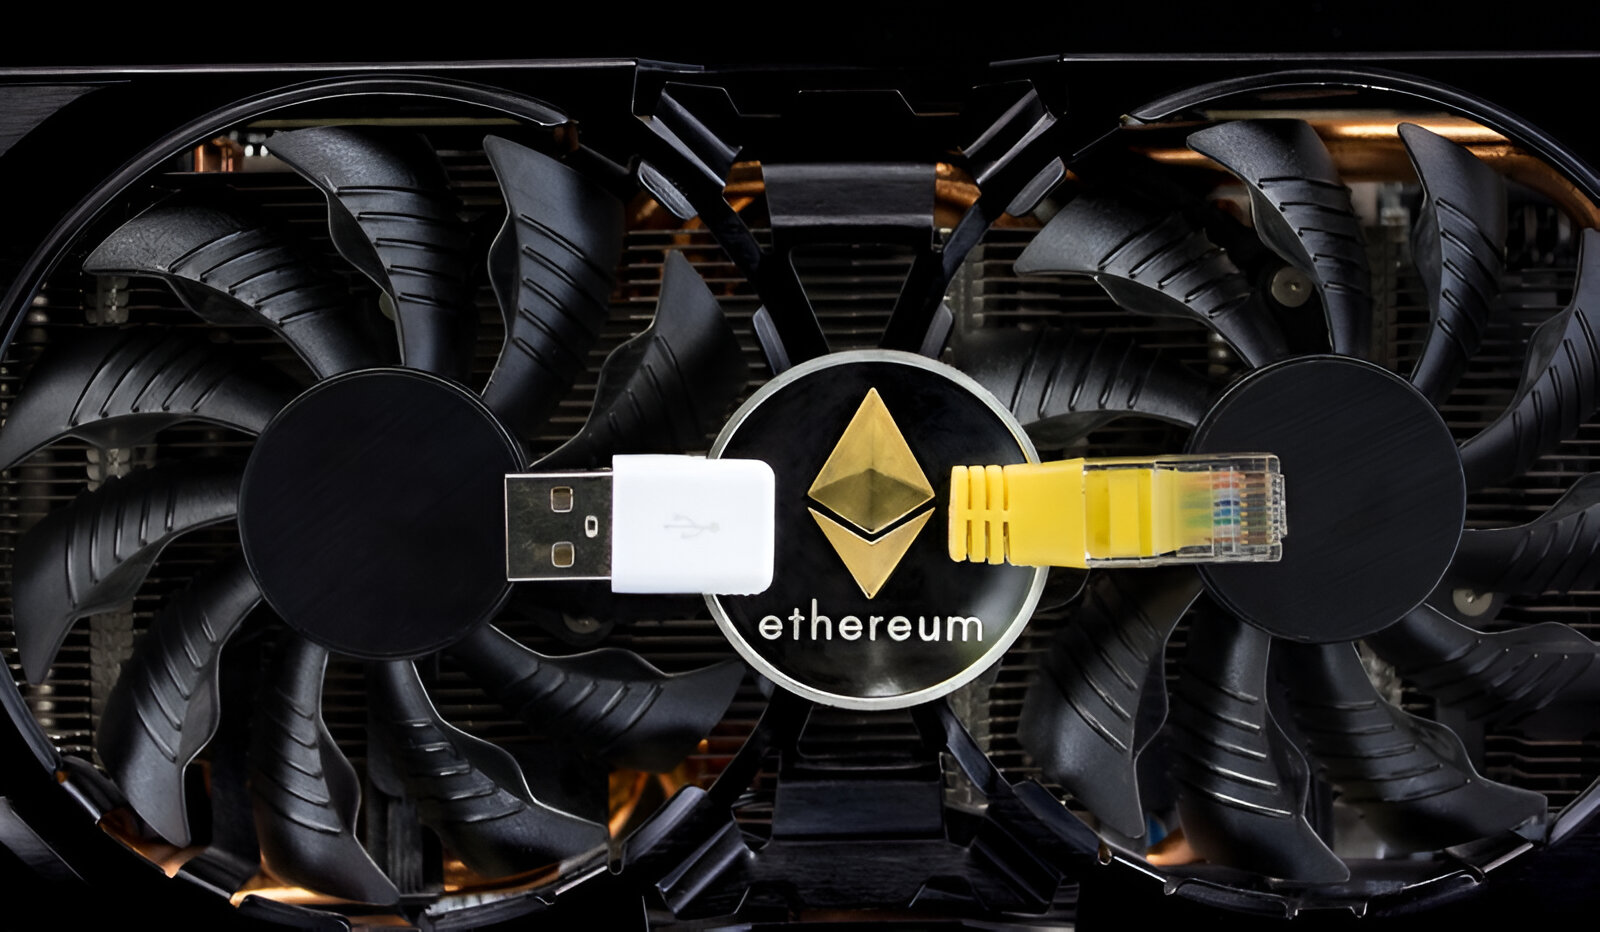
Ethereum mining has become an increasingly popular venture as cryptocurrencies continue to gain traction in the digital world. It involves the process of validating and recording transactions on the Ethereum blockchain, and in return, miners are rewarded with Ether, the native cryptocurrency of the Ethereum network.
With the potential for substantial financial returns, many individuals and even businesses are eager to jump on the Ethereum mining bandwagon. However, building an efficient and effective mining rig can be quite a daunting task, especially for those who are new to the concept.
This comprehensive guide aims to demystify the process of building an Ethereum mining rig, providing step-by-step instructions and valuable insights along the way. Whether you are a seasoned crypto enthusiast or a complete novice, this guide will equip you with the knowledge and information needed to set up your own mining rig and start your mining journey.
Before we delve into the technical aspects, it is important to note that mining Ethereum is not without its challenges and considerations. The mining landscape is constantly evolving, and profitability is influenced by factors such as electricity costs, hardware availability, and the skyrocketing level of competition. Therefore, it is essential to have a clear understanding of the risks, costs, and potential rewards involved in Ethereum mining.
That being said, if you’re ready to embark on this exciting venture and are willing to put in the time, effort, and resources, building an Ethereum mining rig can be a rewarding and profitable endeavor. So, let’s dive into the world of Ethereum mining and discover the essential steps to building your own mining rig.
What is Ethereum Mining?
Ethereum mining is the process through which new Ether (ETH) is created and transactions are validated on the Ethereum blockchain. Unlike traditional fiat currencies, which are issued and regulated by central authorities like banks or governments, Ethereum operates on a decentralized network, allowing individuals to participate in the verification and validation of transactions.
Mining Ethereum involves utilizing computational power to solve complex mathematical problems. Miners compete with each other to solve these problems, and the first miner to find a valid solution is rewarded with a certain amount of Ether. This process, known as proof-of-work, ensures that the transactions occurring on the Ethereum network are secure, valid, and trustworthy.
At its core, Ethereum mining is a combination of computer hardware and software working together to create a decentralized network. Miners use specialized hardware, such as powerful graphics processing units (GPUs), to perform the necessary calculations to mine Ethereum.
As Ethereum gains popularity and its blockchain grows larger, the difficulty of mining increases. This means that it requires more computational power and energy to mine new Ether. Miners must continuously upgrade their hardware and adapt their mining strategies to remain competitive in the ever-evolving mining landscape.
Mining Ethereum not only allows individuals to earn ETH as a reward but also plays a crucial role in the security and stability of the entire Ethereum network. Miners help validate and record transactions, ensuring that the blockchain remains secure from malicious attacks or double-spending.
It is worth noting that Ethereum has plans to transition from proof-of-work to proof-of-stake consensus mechanism in the future. This shift will change the way Ethereum is mined, relying less on computational power and more on the ownership of Ether. This transition, known as Ethereum 2.0, aims to improve scalability and reduce energy consumption.
Now that we have a basic understanding of what Ethereum mining entails, let’s explore the hardware requirements and components needed to build an efficient Ethereum mining rig.
Choosing the Right Hardware
When it comes to building an Ethereum mining rig, selecting the right hardware is a critical decision that can greatly impact your mining efficiency and profitability. The hardware you choose should meet certain specifications to ensure optimal performance in mining Ether.
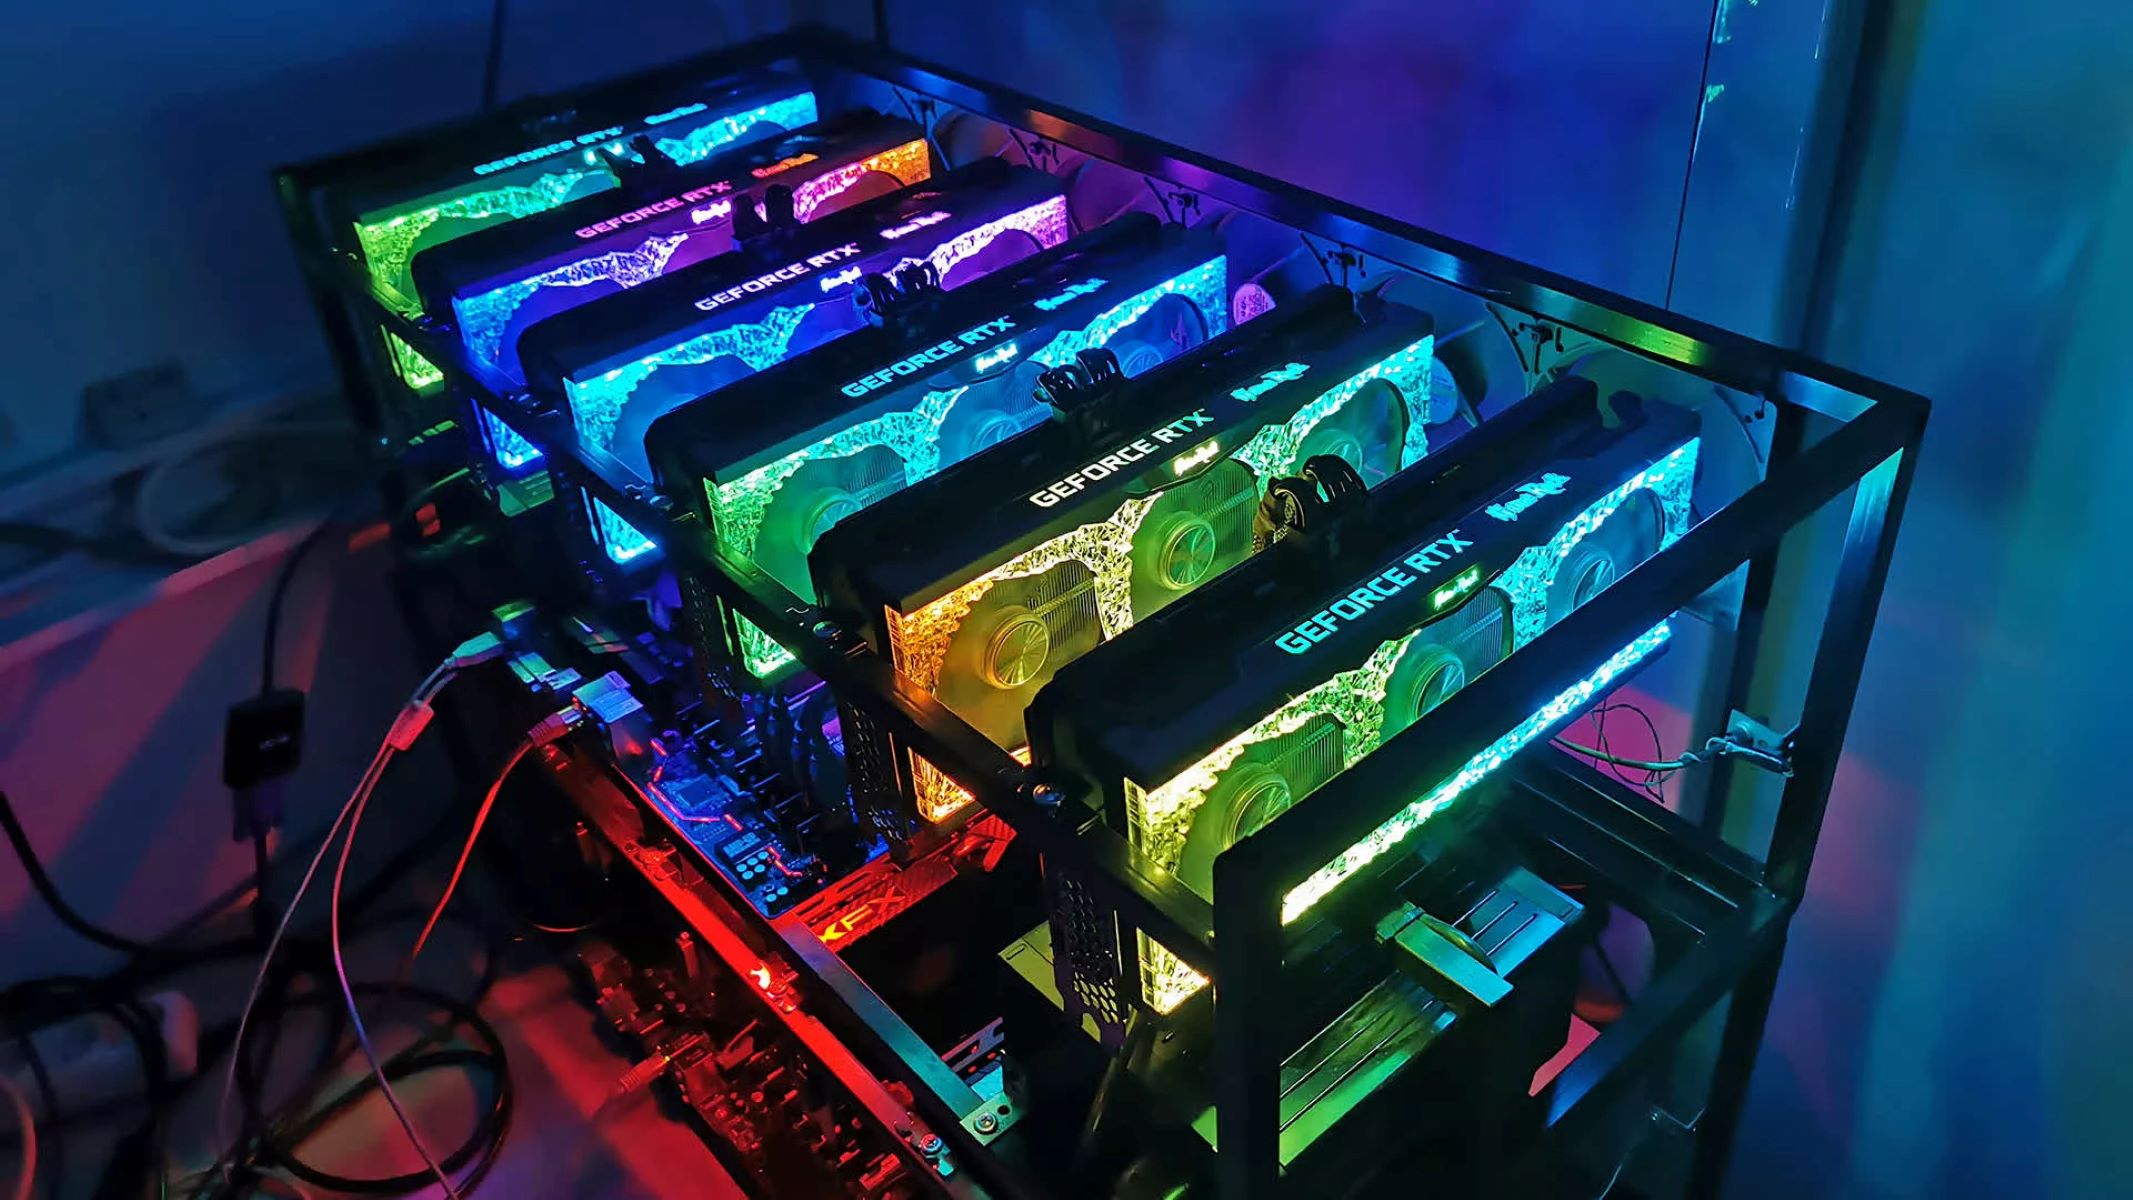
One of the key components of your mining rig is the graphics processing unit (GPU). GPUs are essential for mining Ethereum as they are capable of performing the complex calculations required to solve cryptographic puzzles. When choosing a GPU, there are several factors to consider, including the hash rate, power consumption, and cost.
Hash rate refers to the speed at which a GPU can solve the mathematical problems required for mining. Higher hash rates result in faster mining and increased chances of earning Ether. However, higher hash rate GPUs also tend to consume more power and generate more heat, leading to higher electricity costs and the need for better cooling mechanisms.
Power consumption is an important consideration as it directly affects the cost of running your mining rig. Opting for energy-efficient GPUs can help reduce electricity costs and improve your overall profitability. Additionally, GPUs with lower power consumption will produce less heat, which helps maintain a stable mining environment.
The cost of the GPU is another aspect to evaluate. While it may be tempting to go for the most powerful and expensive GPU, it is crucial to strike a balance between performance and cost. Consider the budget and the potential return on investment (ROI) when determining the most suitable GPU for your mining rig.
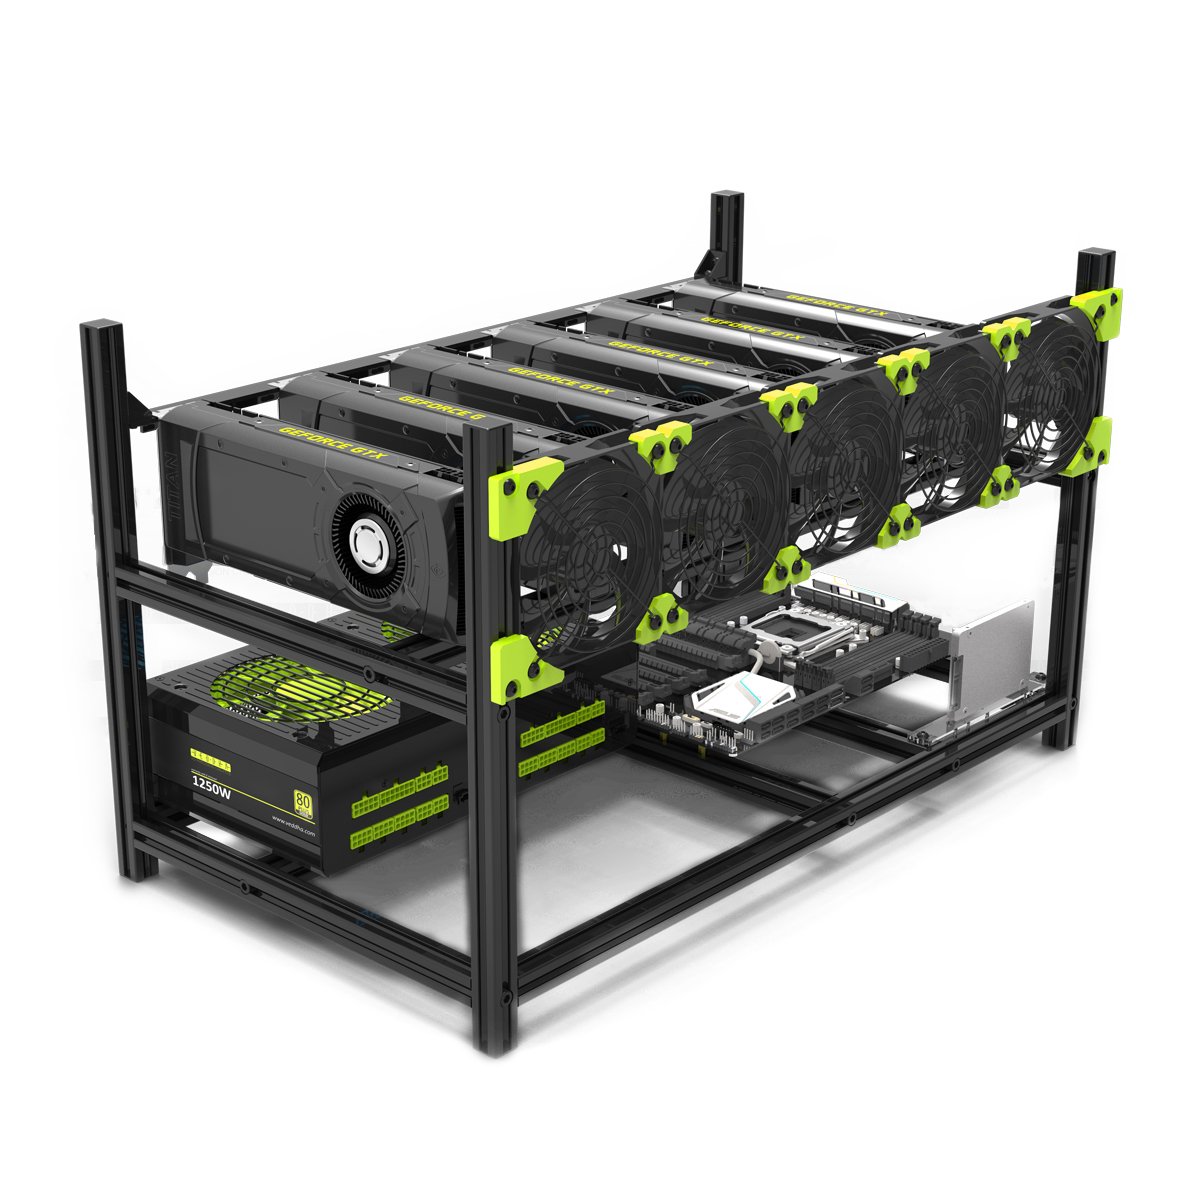
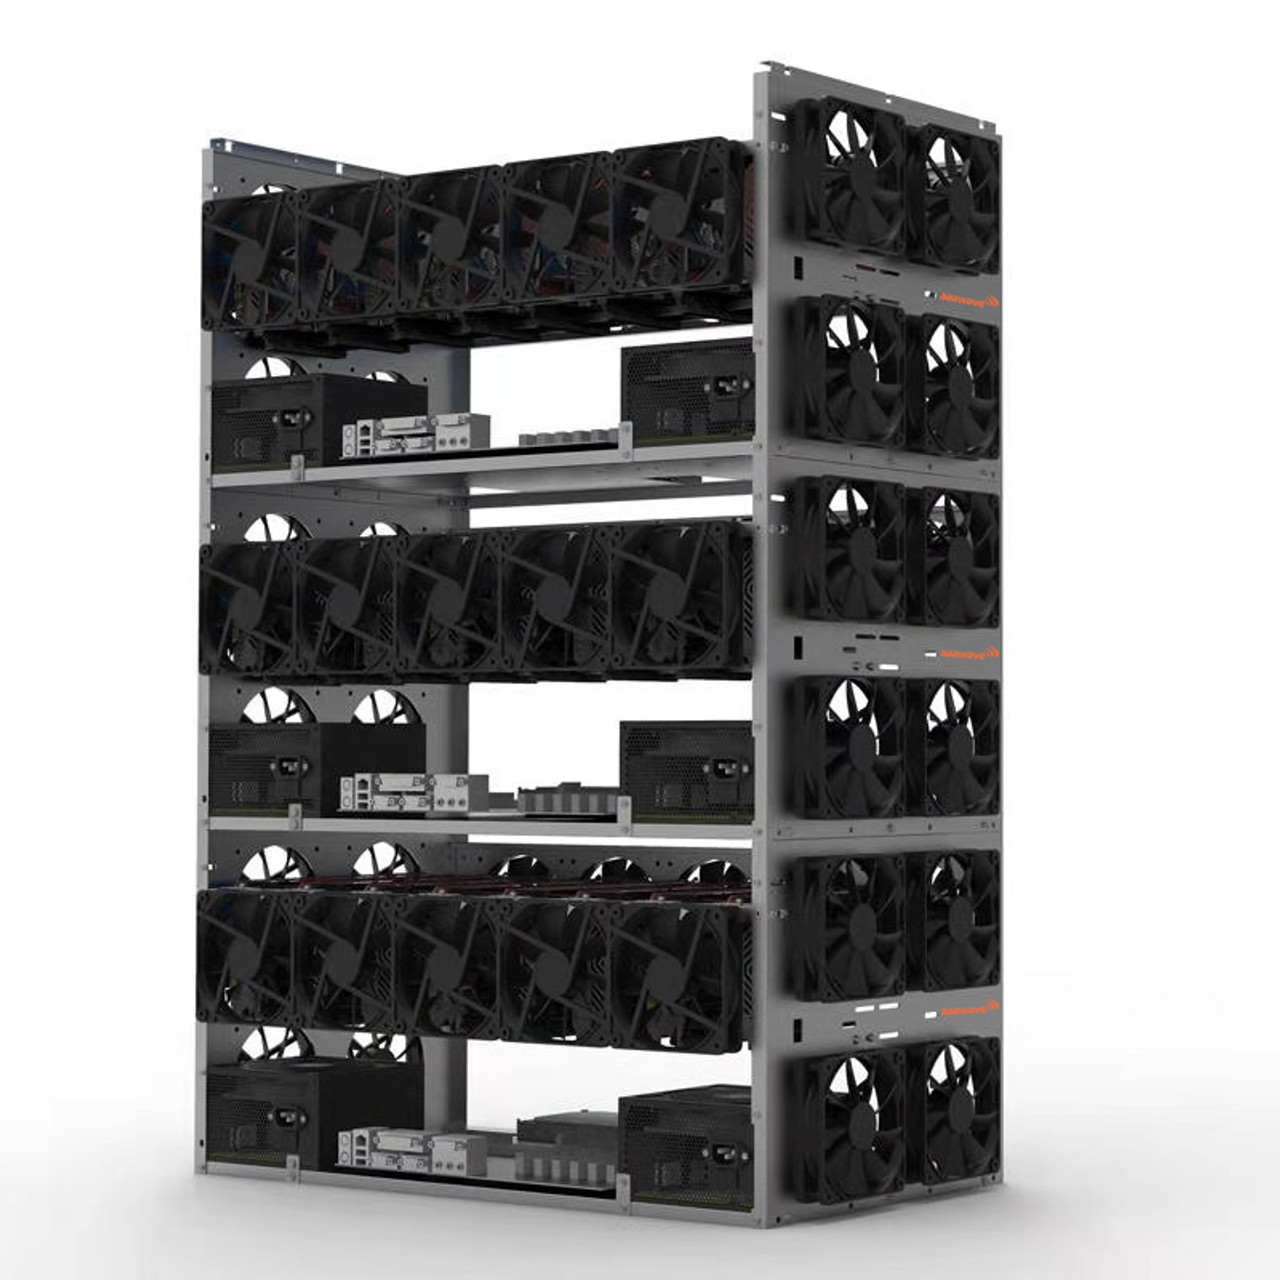
In addition to GPUs, other components such as the motherboard, power supply unit (PSU), and storage drive should also be carefully selected. The motherboard should have enough PCIe slots to accommodate the GPUs and support the desired number of GPUs for your mining rig. The PSU should have sufficient wattage to power all the components reliably, taking into account the power requirements of the GPUs and other hardware.
Storage is often overlooked but is essential for storing the mining operating system and software. An SSD offers faster load times and better overall system performance compared to traditional hard disk drives (HDD). Furthermore, having enough RAM (Random Access Memory) is crucial to ensure smooth mining operations and prevent bottlenecks in data processing.
When building an Ethereum mining rig, it is essential to consider the compatibility of the hardware components. Ensure that all the chosen components are compatible with each other and with the mining software you will be using. Incompatible hardware can lead to system instability and lower mining performance.
By carefully selecting the right hardware for your Ethereum mining rig, you can maximize your mining efficiency and increase the chances of earning substantial amounts of Ether. However, choosing the hardware is only the first step. In the next section, we will explore the required components and provide a detailed step-by-step guide to build your Ethereum mining rig.
Required Components for Building an Ethereum Mining Rig
Building an Ethereum mining rig requires careful consideration of the necessary components to ensure smooth and efficient mining operations. Here are the essential components you will need:
- Graphics Processing Units (GPUs): GPUs are the heart of your mining rig as they perform the calculations required for mining Ethereum. Choose GPUs with high hash rates and energy efficiency for optimal performance.
- Motherboard: Select a motherboard that has enough PCIe slots to accommodate the desired number of GPUs for your mining rig. Ensure compatibility with the chosen GPUs and other components.
- Power Supply Unit (PSU): A reliable and efficient PSU is crucial to provide sufficient power to all the components. Consider the power requirements of the GPUs and other hardware when choosing a PSU.
- Storage: An SSD (Solid State Drive) is recommended for faster load times and overall system performance. It should have enough capacity to accommodate the mining operating system and software.
- RAM (Random Access Memory): Sufficient RAM is necessary for smooth mining operations and efficient data processing. Ensure that you have enough RAM to handle the mining software and other applications.
- CPU (Central Processing Unit): While the CPU plays a minimal role in Ethereum mining, it is still required to run the mining software and manage system operations. A mid-range or higher CPU should suffice for most mining rigs.
- Riser Cables: Riser cables are necessary to connect the GPUs to the motherboard. Opt for high-quality riser cables to ensure a stable and reliable connection.
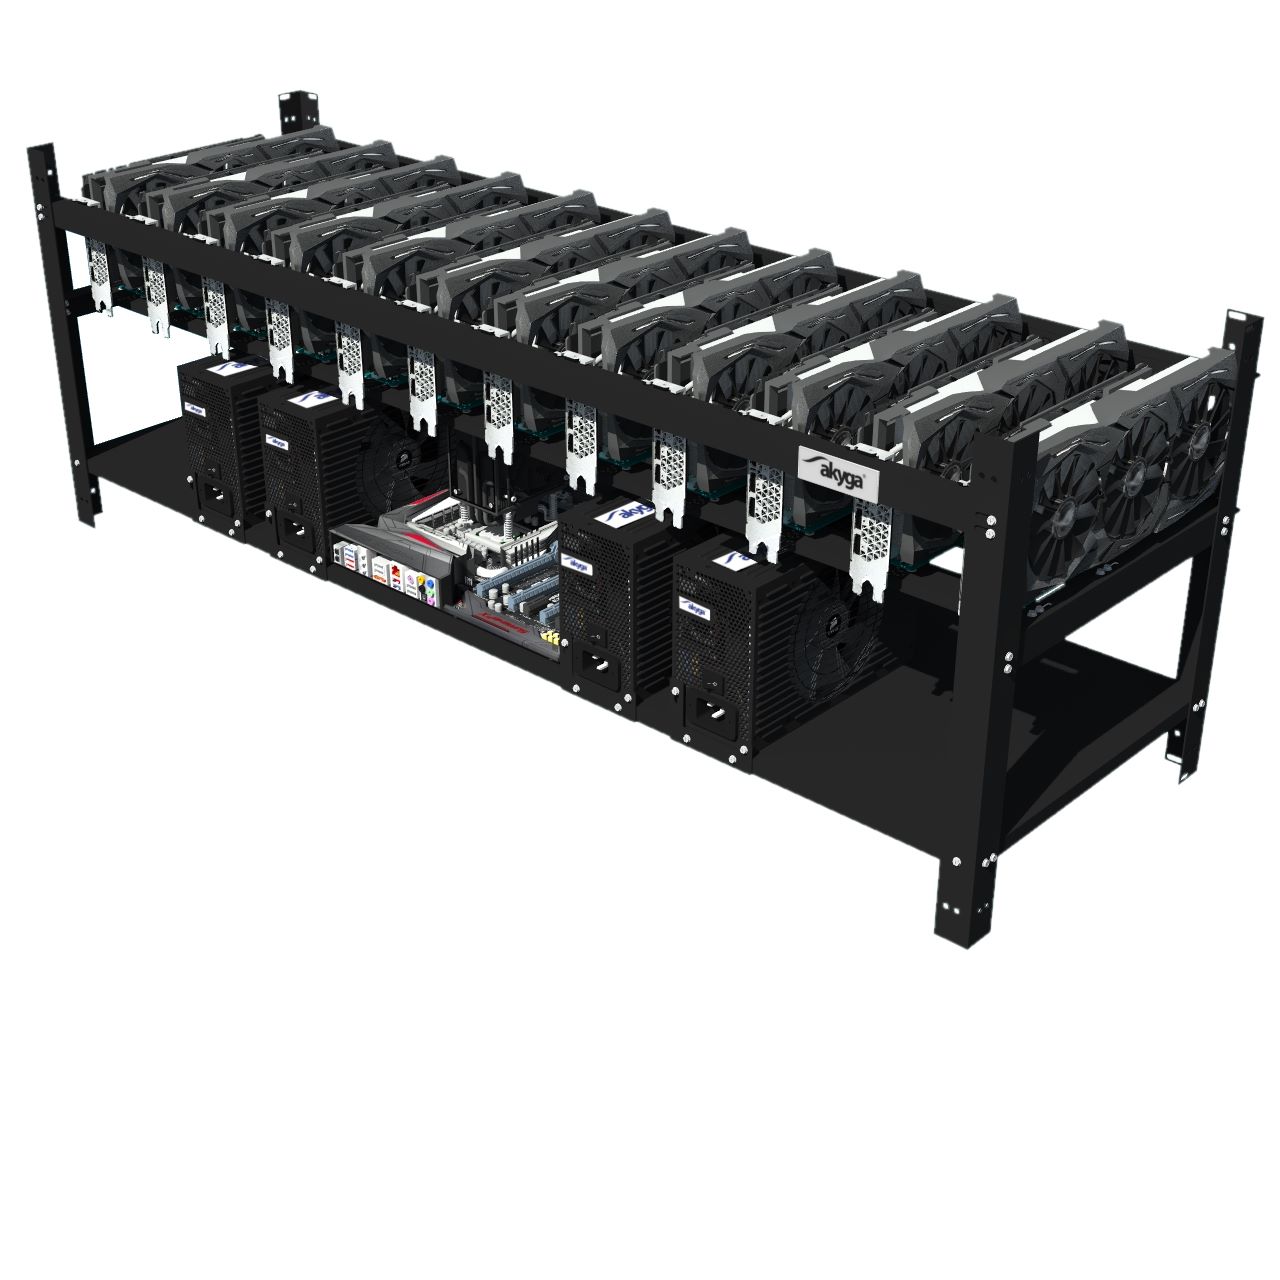
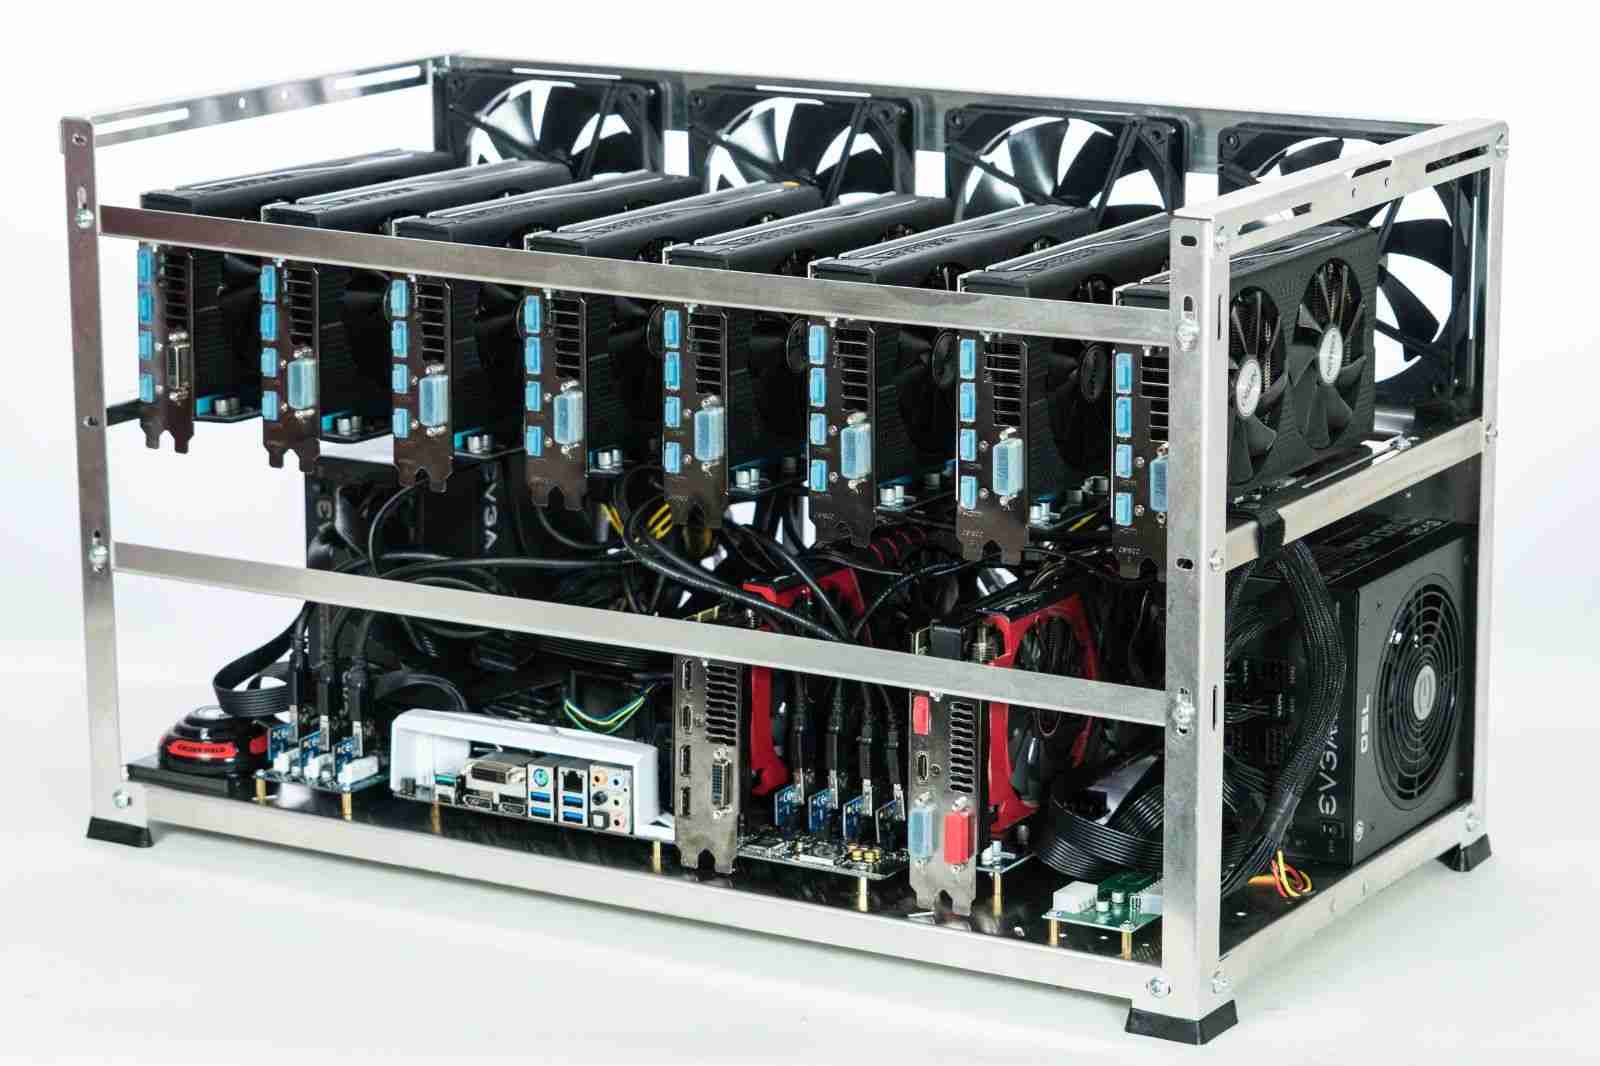
- Frame or Case: A sturdy frame or case is essential to securely mount and organize all the components of your mining rig. There are various options available, including open-air frames or enclosed cases with proper ventilation.
- Cooling System: Mining generates a significant amount of heat, so a reliable cooling system is crucial to prevent overheating and maintain optimal performance. Consider using multiple fans, heatsinks, and proper airflow management.
- Internet Connection: A stable and reliable internet connection is necessary to download updates, communicate with mining pools, and monitor your mining rig remotely.
It is important to carefully research and select high-quality components that meet your budget and performance requirements. Additionally, ensure compatibility between the components and the mining software you will be using, as well as the operating system.
Once you have acquired all the necessary components, you are ready to start building your Ethereum mining rig. The next section will provide a step-by-step guide to help you assemble and configure your mining rig effectively.
Step-by-Step Guide to Building an Ethereum Mining Rig
Building an Ethereum mining rig may seem like a complex task, but with the right guidance, it can be a straightforward process. Follow these steps to assemble and configure your mining rig:
- Prepare the Workspace: Find a well-ventilated area with sufficient space to assemble your mining rig. Ensure it has access to power outlets and a stable internet connection.
- Install the CPU and RAM: Install the CPU and RAM onto the motherboard according to the manufacturer’s instructions. Make sure they are properly seated and secured.
- Mount the Motherboard: Carefully mount the motherboard onto the frame or case. Ensure it is securely fastened and aligned with the mounting holes.
- Connect the Power Supply: Connect the necessary power cables from the PSU to the motherboard, CPU, and other components. Make sure the connections are secure and the PSU is properly grounded.
- Install the GPUs: Install the GPUs into their respective PCIe slots on the motherboard. Use riser cables for a secure and stable connection. Ensure that the GPUs are properly secured and aligned.
- Connect the GPUs: Connect the necessary power cables from the PSU to the GPUs. Ensure that each GPU has sufficient power supply and that the connections are secure.
- Mount Storage and Connect Peripherals: Mount the SSD onto the frame or case and connect it to the motherboard using the appropriate cables. Connect the keyboard, mouse, and monitor to the motherboard.
- Check all Connections: Double-check all connections to ensure they are secure and properly aligned. Inspect for any loose cables or components. Avoid any potential short circuits.
- Install the Operating System: Boot up the mining rig and install the operating system of your choice. Opt for popular mining-specific operating systems, such as ethOS or SimpleMiningOS, for ease of use.
- Configure the Mining Software: Install the mining software, such as Claymore Miner or Phoenix Miner, and configure it with your mining pool credentials. Adjust the settings based on your hardware and preferences.
- Test and Optimize: Run test mining operations to ensure that all components are functioning correctly. Monitor the temperatures and hash rates of your GPUs and adjust the settings as needed to optimize performance.
- Monitor and Maintain: Regularly monitor your mining rig to ensure stable operation. Keep an eye on temperatures, power consumption, and mining performance. Clean dust from components periodically to prevent overheating.
Remember to research and follow safety precautions during the building process. Avoid static electricity, use proper grounding techniques, and be cautious when handling sensitive components.
Once your Ethereum mining rig is fully assembled and configured, you are ready to start mining Ether and potentially earn rewards. However, the process doesn’t end here. In the next section, we will explore how to set up the operating system and configure the mining software for optimal performance.
Setting Up the Operating System
After assembling the hardware components of your Ethereum mining rig, the next step is to set up the operating system (OS) to ensure stable and efficient mining operations. The choice of OS depends on your preferences and familiarity with different systems.
There are several popular options for mining-specific operating systems, such as ethOS, SimpleMiningOS, and HiveOS. These OSs are designed specifically for mining and come preconfigured with the necessary software and drivers for optimal performance. They offer user-friendly interfaces and simplified management of your mining rig.
To set up the operating system for your mining rig, follow these steps:
- Download the Mining OS: Visit the respective website of the mining operating system you have chosen and download the latest stable version.
- Create a Bootable Drive: Use a program like Rufus or Etcher to create a bootable USB drive with the downloaded mining OS image. Make sure to follow the instructions provided by the program and select the correct USB drive.
- Insert the Bootable Drive: Power off your mining rig and insert the bootable USB drive into one of the USB ports on your motherboard.
- Boot from the USB Drive: Power on your mining rig and enter the BIOS settings by pressing the designated key (usually F2, Del, or F12) during bootup. Configure the BIOS to boot from the USB drive as the primary boot device.
- Install the Mining OS: Save the BIOS settings and restart your mining rig. The mining OS installation process should now begin. Follow the instructions provided by the mining OS to complete the installation.
- Configure Network Settings: Once the mining OS is installed, you will need to configure the network settings. This involves connecting to your Wi-Fi network or Ethernet and obtaining an IP address for your mining rig.
- Access the Management Interface: Using another device on the same network, open a web browser and enter the IP address of your mining rig to access the management interface of the mining OS. Here, you can customize settings, monitor mining activity, and manage your mining rig remotely.
Remember to configure your mining pool credentials in the mining OS interface to ensure that your mining rig is properly connected to the desired mining pool. You may also need to update drivers and perform other system optimizations depending on the mining OS you are using.
Setting up the operating system is a crucial step in the process of building your Ethereum mining rig. Once the OS is properly installed and configured, you can move on to installing and configuring the mining software, which we will explore in the next section.
Configuring the Software
After setting up the operating system on your Ethereum mining rig, the next step is to configure the mining software. The mining software allows your rig to connect to the Ethereum network, join a mining pool, and start mining Ether. The specific configuration process may vary based on the mining software you choose, but here are some general steps to get you started:
- Choose Mining Software: Select a mining software that is compatible with your chosen operating system and supports the mining hardware you have installed. Popular options include Claymore Miner, Phoenix Miner, and CGMiner.
- Download and Install the Mining Software: Visit the official website for your chosen mining software and download the latest stable version. Follow the provided instructions to install the software on your mining rig.
- Configure the Mining Pool: Register and create an account with a reputable mining pool of your choice. Obtain the pool’s mining server address and port number.
- Edit the Configuration File: Locate the configuration file for your mining software. This file is often named config.txt or a similar variation. Open the file using a text editor and enter the necessary information, including the mining pool address, port number, your pool username or worker name, and password.
- Set GPU Settings: Depending on the mining software, you may have options to optimize the GPU settings. This includes adjusting parameters such as power limits, memory overclocking, and fan speeds to achieve better mining performance and temperature control.
- Save and Run the Mining Software: Save the changes made to the configuration file and exit the text editor. Run the mining software executable file to start the mining process.
- Monitor and Fine-tune: Observe the mining software’s output to ensure that your mining rig is successfully connected to the mining pool. Monitor the hash rates, accepted shares, and temperature of your GPUs. Fine-tune the GPU settings if necessary to achieve optimal performance and temperature control.
Remember to always keep your mining software up to date by checking for any available updates. Mining software developers often release updates to improve performance, fix bugs, and provide compatibility with new versions of the Ethereum network.
Configuring the mining software is a critical step in the process of setting up your Ethereum mining rig. Once properly configured, your mining software will allow your rig to contribute to the mining network and potentially earn Ether rewards. In the next section, we will explore how to optimize your Ethereum mining rig for better performance and efficiency.
Optimizing Your Ethereum Mining Rig
Optimizing your Ethereum mining rig is crucial to maximize its performance and efficiency, ultimately increasing your chances of earning more Ether. Here are some key strategies to optimize your mining rig:
1. Overclocking: Overclocking your GPUs can increase their hash rates and mining performance. However, it also increases power consumption and heat generation. Find a balance between increased hash rates and acceptable power consumption and thermal levels. Use reliable software, such as MSI Afterburner or AMD Wattman, to adjust GPU clock speeds and voltages.
2. Undervolting: Undervolting reduces the power consumption of your GPUs while maintaining stable mining performance. This can lead to lower electricity costs and cooler operating temperatures. Experiment with gradually reducing the voltage while monitoring stability and hash rates.
3. Optimize GPU Memory: Fine-tuning the memory settings of your GPUs can result in better mining performance. Reduce memory latency and increase memory clock speeds to achieve higher hash rates. However, be cautious and ensure stability by testing changes incrementally.
4. Adjust Fan Curve: Adjusting the fan curve of your GPUs can help maintain lower operating temperatures. This can prevent thermal throttling and prolong the lifespan of your components. Use software like MSI Afterburner or GPU manufacturer software to create a more aggressive fan curve while balancing noise levels.
5. Improve Cooling: Proper cooling is critical for the longevity and stability of your mining rig. Ensure proper airflow within the rig by using high-quality case fans, optimizing the positioning of GPUs, and removing any obstructions. Consider using additional cooling solutions like aftermarket coolers or water-cooling systems for improved heat dissipation.
6. Keep Software Up to Date: Regularly update your mining software to benefit from performance improvements and bug fixes. Stay informed about new releases from software developers and update your mining software accordingly.
7. Optimize Power Settings: Configure your operating system to maximize power efficiency. Adjust power settings to minimize energy consumption during periods of inactivity. Additionally, consider using a smart plug or power management tool to automatically turn off or suspend your mining rig during non-profitable periods.
8. Monitor and Analyze: Continuously monitor the performance of your mining rig using software tools such as GPU-Z, HWiNFO, or dedicated mining management software. Monitor core temperatures, hash rates, power consumption, and fan speeds to identify any abnormalities or inefficiencies.
9. Experiment and Learn: Every mining rig is unique, so don’t be afraid to experiment and tweak settings to find the optimal configuration for your specific hardware. Join mining forums and communities to learn from experienced miners and gain insights into advanced optimization techniques.
Remember that while optimization can improve mining efficiency, it may also void warranties and increase the risk of hardware failure if not executed properly. Proceed with caution and take gradual steps when making changes to your mining rig configurations.
By implementing these optimization strategies, you can maximize the performance, efficiency, and profitability of your Ethereum mining rig. Regularly monitor and fine-tune your rig to adapt to changing conditions and to ensure the best possible mining results.
Monitoring and Troubleshooting
Monitoring and troubleshooting your Ethereum mining rig is essential to ensure its stability and performance. By actively monitoring your rig, you can identify and resolve issues promptly, preventing potential downtime and loss of mining opportunities. Here are some key steps to effectively monitor and troubleshoot your mining rig:
1. Use Monitoring Software: Install and utilize monitoring software to keep an eye on vital statistics such as GPU temperatures, fan speeds, hash rates, and power consumption. Popular monitoring tools include MSI Afterburner, GPU-Z, and HWiNFO. Set up alerts or notifications to be informed of any unusual activity or sudden drops in hash rates.
2. Monitor Hardware Temperature: Overheating can lead to reduced mining performance and potential damage to your hardware. Keep a close watch on GPU temperatures and ensure they remain within safe operating limits. Adjust fan speeds, optimize airflow, or consider additional cooling solutions if temperatures are consistently high.
3. Check Hash Rates and Shares: Regularly monitor your mining software’s output to ensure consistent hash rates and accepted shares. Sudden drops in hash rates or increased rejected shares may indicate hardware or software issues, such as GPU or connection problems. Take necessary troubleshooting steps to address the issue promptly.
4. Maintain Cleanliness: Dust accumulation can impede proper airflow, leading to increased temperatures and reduced mining performance. Regularly clean your mining rig, paying attention to GPU fans, heatsinks, and case fans. Use compressed air or gentle cleaning tools to remove dust and keep components clean.
5. Address Stability Issues: If your rig experiences frequent crashes, freezes, or reboots, it may indicate stability issues. Check for driver updates, ensure proper power supply connections, and consider adjusting overclocking settings. Test different configurations and be cautious when pushing hardware beyond its limits to maintain stable operation.
6. Troubleshoot Internet Connectivity: Ensure a stable and reliable internet connection for your mining rig. If you experience intermittent or dropped connections, check network cables, router settings, and signal strength. Consider using a wired Ethernet connection for improved stability.
7. Stay Informed: Keep yourself updated with the latest news, developments, and mining-related information. Follow cryptocurrency and mining forums, join mining communities, and participate in discussions. Learning from experienced miners can help you troubleshoot issues and discover optimization techniques.
8. Seek Professional Help if Needed: If you encounter persistent issues or technical challenges that exceed your knowledge and expertise, don’t hesitate to seek assistance from professionals or experienced miners. They can provide valuable insights and guidance in resolving complex problems.
Remember that mining rigs operate under demanding conditions, and occasional troubleshooting is part of the process. By actively monitoring your rig and promptly addressing issues, you can ensure its smooth operation and improve your overall mining experience.
Continuously fine-tuning and optimizing your mining rig, combined with vigilant monitoring and timely troubleshooting, will contribute to the long-term success of your Ethereum mining endeavors.
Conclusion
Building and optimizing an Ethereum mining rig requires careful planning, research, and attention to detail. By following the steps outlined in this guide, you can set up a powerful and efficient mining rig to start earning Ether. From choosing the right hardware components to configuring the software and optimizing your mining rig, each step plays a crucial role in achieving optimal mining performance and profitability.
Throughout the process, it is important to stay informed about the latest trends and developments in the world of Ethereum mining. Keep an eye on changes in mining algorithms, network upgrades, and new mining software releases. Regularly update your miners and stay connected with the mining community for valuable insights and troubleshooting tips.
Remember that Ethereum mining is a dynamic and ever-evolving field. As the network grows, mining difficulty increases, and new technologies emerge, it is essential to adapt and adjust your mining rig’s configuration accordingly. Regular monitoring, troubleshooting, and optimization will contribute to the longevity and success of your mining operations.
Furthermore, always consider the economic aspects of mining, such as electricity costs, mining pool fees, and the overall profitability of mining in your specific location. Conduct thorough cost-benefit analyses to ensure that your mining endeavors remain financially viable.
Lastly, keep in mind the environmental impact of mining. As mining requires a significant amount of energy, consider using renewable energy sources or opt for more energy-efficient hardware to minimize your carbon footprint.
Building and operating an Ethereum mining rig can be a rewarding and profitable venture for those willing to put in the time, effort, and resources. It offers an opportunity to participate in the decentralized Ethereum network and contribute to the validation of transactions. By following this guide, you are equipped with the knowledge and tools to embark on your mining journey with confidence and success.