Introduction
Netflix has revolutionized the way we consume television shows and movies, providing a vast library of content available at our fingertips. However, as a responsible parent or an individual with specific preferences, there might be certain shows or movies that you wish to block from appearing on your Netflix account. Whether it’s to protect your children from inappropriate content or to avoid certain genres that you find unappealing, there are several methods you can employ to block a show on Netflix.
In this article, we will explore different techniques that allow you to restrict access to specific shows or movies on Netflix, whether using parental controls, dedicated profiles, or third-party browser extensions. These methods will help you customize your Netflix experience, ensuring that only the content you want to watch is readily available.
By implementing these blocking measures, you can have peace of mind knowing that you have control over what content is accessible on your Netflix account. Whether you want to shield your kids from mature or inappropriate material, or simply curate a tailored viewing experience for yourself, blocking shows on Netflix is an effective way to achieve this.
So, if you’re ready to take control of your Netflix account and limit the content that is visible, let’s dive into the various methods you can use to block a show on Netflix.
Why would you want to block a show on Netflix?
There are several reasons why you might want to block a show on Netflix. Let’s explore some of the common scenarios:
1. Parental Control: As a parent, you may want to protect your children from accessing inappropriate or mature content on Netflix. By blocking certain shows or movies, you can ensure that your kids only have access to age-appropriate content.
2. Personal Preferences: Everyone has different tastes when it comes to entertainment. You may have specific genres or themes that you find unappealing or even triggering. Blocking shows within those genres allows you to have a more enjoyable and personalized viewing experience.
3. Avoiding Spoilers: If you’re planning to watch a series or movie and don’t want to be spoiled by accidental glimpses or recommendations, blocking the relevant content can help you maintain a surprise-filled viewing experience.
4. Removing Unwanted Content: Sometimes, Netflix’s algorithm might suggest shows or movies that you have no interest in watching. By blocking these recommendations, you can clear the clutter and focus on discovering content that aligns with your preferences.
5. Preparing for Guests: When guests visit and use your Netflix account, you may want to temporarily block certain shows or movies that you feel might not be suitable for them. This way, you can ensure a more comfortable and appropriate viewing experience for your guests.
Blocking a show on Netflix provides you with the flexibility and control to curate your streaming experience to suit your needs. Whether it’s for parental control, personal preferences, avoiding spoilers, decluttering your recommendations, or creating a curated experience for guests, the ability to block shows on Netflix is a valuable feature.
Now that we understand the various reasons why you might want to block a show on Netflix, let’s explore the different methods you can use to implement this restriction.
How to block a show on Netflix using parental controls
Netflix offers a built-in parental control feature that allows you to block specific shows or movies based on their content ratings. Here’s a step-by-step guide on how to use parental controls to block a show on Netflix:
Step 1: Set up a parental control PIN
To begin, you’ll need to set up a parental control PIN. This PIN will be required whenever you want to modify the parental control settings or access specific blocked content. To set up a PIN, follow these steps:
- Log in to your Netflix account and click on your profile icon in the top-right corner of the screen.
- Select “Account” from the dropdown menu.
- Scroll down to the “Profile & Parental Controls” section and click on the profile you want to set up parental controls for.
- Click on the “Change” button next to “Parental Controls.”
- Create a 4-digit PIN and enter your Netflix account password for verification purposes.
- Click “Save” to set up the parental control PIN.
Step 2: Access your account settings
Once you’ve set up a parental control PIN, you can proceed to access your account settings in order to modify the parental control restrictions. Follow these steps:
- Sign in to your Netflix account and click on your profile icon in the top-right corner.
- Select “Account” from the dropdown menu.
- Scroll down to the “Profile & Parental Controls” section and click on the profile you want to apply the parental control restrictions to.
- Click on the “Change” button next to “Parental Controls.”
Step 3: Modify the parental control settings
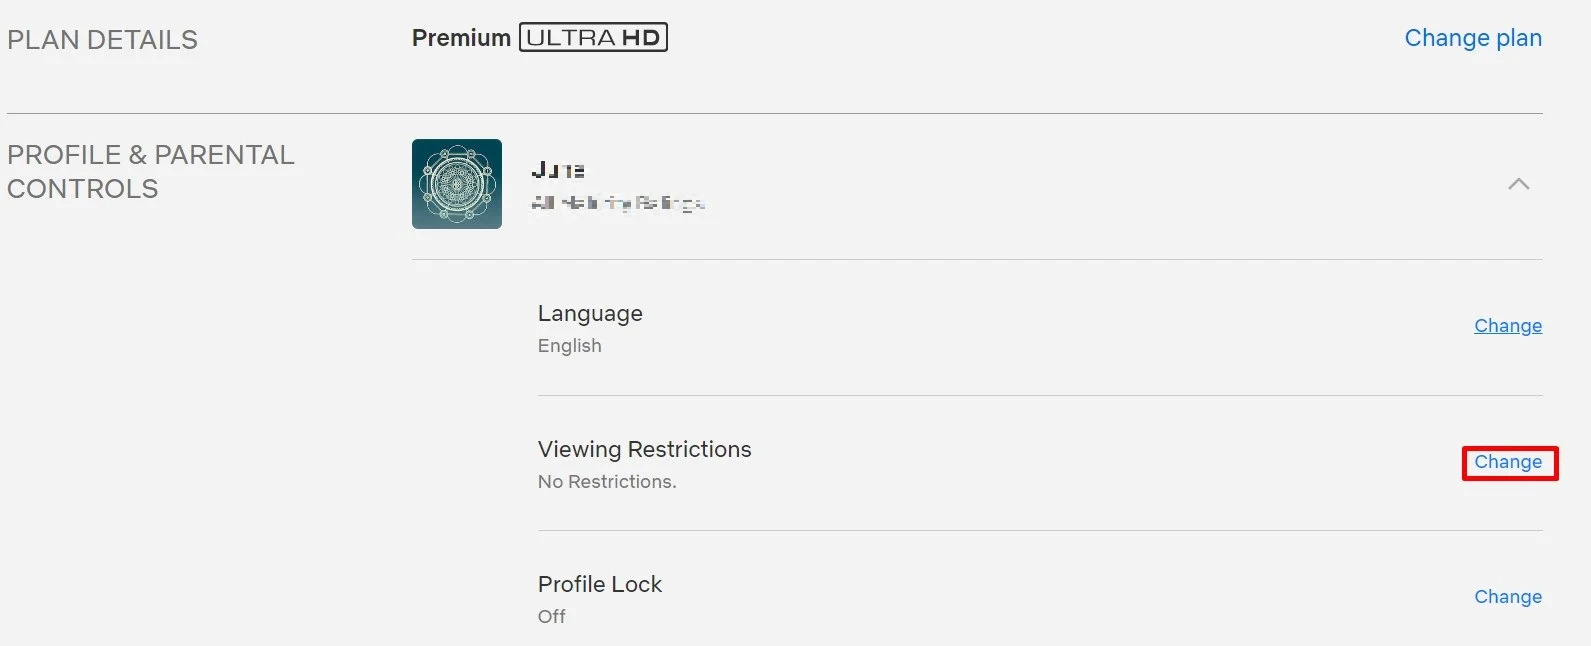
Once you’ve accessed the parental control settings, you can customize the content restrictions according to your preferences. Netflix provides various maturity levels and content categories to choose from. Follow these steps:
- Under the “Title Restrictions” section, select the desired maturity level for the profile. You can choose from “Little Kids,” “Older Kids,” “Teens,” “Adults,” or “All.”
- If you want to block specific content categories, enable the “Specific Categories” option and select the categories you wish to block.
Step 4: Block specific shows or movies
Now that you’ve customized your parental control settings, you can proceed to block specific shows or movies based on their content ratings. Follow these steps:
- Navigate to the Netflix homepage and search for the show or movie you want to block.
- Click on the show or movie to open its details page.
- Scroll down to the “Details” section and click on the “More Info” button.
- On the details page, click on the “View Details” button under the “Rating” section.
- Click on the “Block This Show” or “Block This Movie” button to prevent it from appearing in your profile’s viewing options.
By following these steps, you can successfully block specific shows or movies on Netflix using parental controls. This enables you to maintain control over the content that is accessible in your Netflix account, ensuring a safer and more customized viewing experience.
Step 1: Set up a parental control PIN
The first step in blocking a show on Netflix using parental controls is to set up a parental control PIN. This PIN will provide an extra layer of security and control, ensuring that only authorized individuals can modify the parental control settings or access blocked content. Here’s how you can set up a parental control PIN:
- Log in to your Netflix account using your preferred web browser.
- Once you’re logged in, click on the profile icon in the top-right corner of the screen. This will open a dropdown menu.
- From the dropdown menu, select “Account.” This will take you to the Account settings page.
- Scroll down to the “Profile & Parental Controls” section. In this section, you’ll see a list of profiles associated with your Netflix account. Click on the profile for which you want to set up the parental control PIN.
- Next to the selected profile, you’ll see a “Change” button next to “Parental Controls.” Click on this button.
- A window will pop up asking you to enter your Netflix account password. This is to ensure that only authorized individuals can modify the parental control settings. Enter your password and click “Continue.”
- In the next window, you’ll be prompted to create a 4-digit parental control PIN. Enter a PIN of your choice that is easy for you to remember but not easily guessable by others. Confirm the PIN by entering it again in the designated field.
- Once you’ve entered and confirmed your parental control PIN, click on the “Save” button to save your settings.
Congratulations! You’ve successfully set up a parental control PIN for your Netflix account. This PIN will now be required whenever you want to modify the parental control settings or access blocked content.
Remember to choose a PIN that is unique and not easily guessable by others. Also, take care to keep your PIN confidential and only share it with authorized individuals who need access to the parental control settings.
Setting up a parental control PIN is an essential first step in blocking a show on Netflix using parental controls. This PIN ensures that you have full control over the content accessible on your Netflix account, providing a safer and more tailored viewing experience for you and your family.
Step 2: Access your account settings
After setting up a parental control PIN, the next step in blocking a show on Netflix using parental controls is to access your account settings. By accessing your account settings, you can modify the parental control restrictions and customize the content that is accessible on your Netflix profile. Follow these steps to access your account settings:
- Sign in to your Netflix account using your preferred web browser.
- Once you’re logged in, click on the profile icon in the top-right corner of the screen. This will open a dropdown menu.
- From the dropdown menu, select “Account.” This will take you to the Account settings page.
- Scroll down the Account settings page until you reach the “Profile & Parental Controls” section. In this section, you’ll see a list of profiles associated with your Netflix account.
- Choose the profile for which you want to apply the parental control restrictions and click on it.
- After selecting the profile, you’ll notice a “Change” button next to “Parental Controls.” Click on this button to proceed.
By following these steps, you will reach the parental control settings page specific to the chosen profile. This page allows you to modify the content restrictions and tailor the viewing experience according to your preferences. From here, you can further customize the parental control restrictions on your Netflix account.
Accessing your account settings is crucial in the process of blocking a show on Netflix using parental controls. It allows you to conveniently access and make changes to the parental control settings, ensuring that only approved content is accessible on your Netflix profile. With quick access to your account settings, you’re empowered to have full control over the content that you and your family can view on Netflix.
Step 3: Modify the parental control settings
Once you have accessed your account settings and entered the parental controls section, you can proceed to modify the settings according to your preferences. Netflix provides various options for customizing the parental control restrictions to ensure that the content accessible on your profile aligns with your desired maturity level. Here’s how you can modify the parental control settings:
- Under the “Title Restrictions” section, you will find a dropdown menu that allows you to select the desired maturity level for the profile. Netflix offers several options to choose from, including “Little Kids,” “Older Kids,” “Teens,” “Adults,” or “All.”
- Select the maturity level that best matches the content you want to allow on the profile. For example, if you want to restrict access to mature content, you can choose “Older Kids” or “Teens.” Selecting a higher maturity level will automatically block content rated for younger audiences.
- If you want to further restrict specific content categories, Netflix provides an option to enable “Specific Categories.” Enabling this option allows you to individually select categories to block.
- To enable specific category blocking, check the box next to “Specific Categories.” This will reveal a list of content categories, such as violence, drugs, or sexuality.
- Review the list of content categories and check the boxes next to the categories you want to block. By checking a category, you are preventing any content within that category from being accessible on the profile.
Take some time to consider which categories align with your desired level of content restriction. It is important to strike a balance between blocking content that may be inappropriate while still allowing access to enjoyable and educational material.
By modifying the parental control settings, you can ensure that only content within your desired maturity level and category preferences is accessible on your Netflix profile. This level of customization enables you to tailor the viewing experience to your specific needs and preferences, making Netflix a safer and more enjoyable platform for all.
Step 4: Block specific shows or movies
After customizing the parental control settings, you might want to go a step further and block specific shows or movies on Netflix. This allows you to have even more control over the content that is accessible on your profile. Here’s how you can block specific shows or movies:
- Navigate to the Netflix homepage or use the search function to find the show or movie that you want to block from appearing on your profile.
- Click on the thumbnail or title of the show or movie to open its details page.
- Scroll down to the “Details” section, and you will find the content rating and additional information about the show or movie.
- Click on the “More Info” button located next to the content rating. This will open a new page providing further details about the show or movie.
- On the details page, you will see an option labeled “View Details” under the content rating section. Click on this option to proceed.
- After clicking on “View Details,” a confirmation dialog box will appear. This dialog box will inform you that blocking the show or movie will prevent it from appearing in your profile’s viewing options.
- Click on the “Block This Show” or “Block This Movie” button to confirm your decision and prevent the show or movie from appearing on your profile.
By following these steps, you can effectively block specific shows or movies from appearing on your Netflix profile. This ensures that the blocked content is not visible or accessible to you or other users of your Netflix account.
Repeat these steps for any additional shows or movies that you want to block. This allows you to curate a personalized Netflix experience by excluding content that you find unappealing, inappropriate, or simply uninteresting.
Blocking specific shows or movies on Netflix enables you to have complete control over the content that is available on your profile. Whether it’s to prevent spoilers, avoid unwanted recommendations, or create a more tailored viewing experience, this feature empowers you to personalize your Netflix account according to your preferences.
How to block a show on Netflix using profiles
In addition to using parental controls, another effective method to block a show on Netflix is by utilizing dedicated profiles. Creating a separate profile allows you to apply specific maturity level settings and block shows or movies tailored to your preferences. Here’s how you can block a show on Netflix using profiles:
- Step 1: Create a dedicated profile
- Step 2: Configure the profile’s maturity level
- Step 3: Block specific shows or movies
To begin, log in to your Netflix account using your preferred web browser. Once you’re logged in, navigate to the account settings page by clicking on the profile icon in the top-right corner and selecting “Account” from the dropdown menu. Scroll down to the “Profile & Parental Controls” section. Click on the “Add Profile” button to create a new profile. Give the profile a name and select an avatar that distinguishes it from other profiles on your account.
After creating the new profile, click on the profile icon again and select “Manage Profiles” from the dropdown menu. Choose the newly created profile from the list. In the profile’s settings, you’ll find an option to set the maturity level. Select the appropriate level that aligns with your desired content restrictions for this profile. This will automatically block shows or movies that exceed the selected maturity level.
To block specific shows or movies on the profile, follow the steps outlined in the previous section, “Step 4: Block specific shows or movies.” By blocking a show or movie using the dedicated profile, it will only be blocked on that particular profile. Other profiles on your account will not be affected.
By utilizing dedicated profiles with customized maturity level settings, you can effectively block shows or movies that you want to restrict from appearing on your Netflix account. This provides a tailored viewing experience that aligns with your preferences and ensures that only the content you desire is available.
Creating separate profiles for different family members or individuals sharing your Netflix account offers a practical solution for personalizing content access. This way, each person can have their own profile with customized block settings, curated to their respective preferences and age appropriateness.
Utilizing profiles for blocking shows on Netflix is an effective and user-friendly method to tailor your viewing experience. It provides flexibility and control, allowing you to have a more enjoyable and personalized streaming experience.
Step 1: Create a dedicated profile
The first step in blocking a show on Netflix using profiles is to create a dedicated profile. By creating a separate profile, you can establish specific content preferences and apply different parental control settings. Follow these steps to create a dedicated profile:
- Sign in to your Netflix account using your preferred web browser.
- Once you’re logged in, click on the profile icon in the top-right corner of the screen. A dropdown menu will appear.
- From the dropdown menu, select the option that says “Manage Profiles.” This will take you to the profiles management page.
- On the profiles management page, you will see a button labeled “Add Profile” or “Create Profile.” Click on this button to create a new profile.
- A form will appear where you can input a name for the new profile. Enter a name that represents the person or purpose of the profile. For example, you can create a profile named “Kids” or “Restricted.”
- Choose an avatar or profile picture that helps you identify the profile easily. Netflix provides a range of pre-made icons to choose from.
- Once you’ve selected a name and an avatar, click on the “Continue” or “Save” button to create the profile.
Congratulations! You have successfully created a dedicated profile on your Netflix account. This profile will now appear as a separate option within your account and can be customized to suit your specific blocking preferences.
Creating dedicated profiles allows you to have different settings and preferences for each individual or purpose. For example, you can have separate profiles for kids, adults, or guests, each with their own unique content restrictions and customization options.
By creating a dedicated profile, you can establish a separate space within your Netflix account that can be configured to block specific shows or movies. This provides a more personalized and controlled streaming experience for you and others who share your account.
Step 2: Configure the profile’s maturity level
After creating a dedicated profile on Netflix, the next step is to configure the maturity level setting for that profile. This setting determines the age-appropriate content that will be displayed on the profile. By customizing the maturity level, you can ensure that only suitable shows and movies are accessible. Here’s how you can configure the profile’s maturity level:
- Sign in to your Netflix account using your preferred web browser.
- Once you’re logged in, click on the profile icon in the top-right corner of the screen to access the dropdown menu.
- From the dropdown menu, select the option that says “Manage Profiles.” This will take you to the profiles management page.
- On the profiles management page, locate the dedicated profile you created in the previous step.
- Click on the profile you want to configure to access its settings.
- In the profile settings, locate the “Maturity Level” or “Content Restrictions” option. This option allows you to set the maturity level for the profile.
- Choose the appropriate maturity level from the available options, such as “Little Kids,” “Older Kids,” “Teens,” “Adults,” or “All.”
- Once you’ve selected the desired maturity level, save the changes by clicking on the “Save” or “Continue” button.
By configuring the profile’s maturity level, you ensure that only shows and movies suitable for the selected age range will be visible on the profile. Netflix will automatically filter and block content with a higher maturity rating, providing a safer and more appropriate viewing experience.
It’s important to select a maturity level that aligns with the intended audience or purpose of the profile. For example, if the profile is for children, choosing the “Kids” or “Older Kids” maturity level will block access to content that may not be suitable for their age group.
By customizing the maturity level of the profile, you have control over the type of content that can be accessed on that particular profile, creating a curated viewing experience tailored to your preferences and requirements.
Step 3: Block specific shows or movies
Once you have created a dedicated profile and configured the maturity level, the next step is to block specific shows or movies on Netflix. This allows you to further customize the content that is accessible on the profile. Here’s how you can block specific shows or movies:
- Navigate to the Netflix homepage: Go to the Netflix homepage by opening your preferred web browser and entering www.netflix.com in the address bar. Ensure that you’re signed in to your Netflix account.
- Search for the show or movie: Use the search function on the Netflix homepage to find the specific show or movie that you want to block from appearing on the profile. Alternatively, you can browse through the available categories to locate the content you wish to block.
- Open the details page: Click on the thumbnail or title of the show or movie to open its details page. This will provide you with information about the content, including the cast, synopsis, and viewer reviews.
- Block the show or movie: Scroll down to the “Details” section of the page. Here, you will find the content rating and additional information about the show or movie. Look for the option that says “Hide” or “Remove from [Profile Name].” By selecting this option, you can block the show or movie from appearing on the dedicated profile.
- Confirm the blocking: After clicking on the “Hide” or “Remove from [Profile Name]” option, a confirmation dialog box may appear. Verify that you want to block the show or movie by selecting “Confirm” or similar wording. This action will ensure that the content is no longer visible on the dedicated profile.
Repeat these steps for any additional shows or movies that you want to block on the profile. By selectively blocking specific content, you can curate a personalized viewing experience that aligns with your preferences and requirements.
Blocking specific shows or movies on Netflix using dedicated profiles allows you to have control over the content that is accessible on the profile. It provides you with the ability to remove unwanted shows or movies and create a tailored streaming experience that best suits your viewing preferences.
How to block a show on Netflix using third-party browser extensions
In addition to using Netflix’s built-in features, another way to block a show on Netflix is by utilizing third-party browser extensions. These extensions provide additional functionalities and options to enhance your streaming experience. Here’s how you can block a show on Netflix using third-party browser extensions:
- Step 1: Find and install a suitable browser extension
- Step 2: Enable the extension and configure blocking preferences
- Step 3: Block specific shows or movies
Start by searching for browser extensions that are designed to enhance or modify Netflix. Look for extensions that specifically mention the ability to block or hide shows. Popular browsers, such as Google Chrome or Mozilla Firefox, have extension marketplaces where you can find a wide range of options. Once you find a suitable extension, follow the instructions provided to install it in your browser.
After installing the browser extension, enable it in your browser’s extension settings. Access the settings for the extension and look for options related to blocking or hiding shows on Netflix. These settings may vary depending on the specific extension you’ve installed. Configure the preferences according to the shows or movies you want to block or hide. Some extensions allow you to block entire genres or specific content types.
Once you’ve enabled and configured the extension, you can proceed to block specific shows or movies on your Netflix account. When you encounter a show or movie that you want to block, use the options provided by the extension to hide or block it from appearing in your Netflix library or recommendations. The extension will override Netflix’s default settings and prevent the blocked content from being visible to you.
By using third-party browser extensions, you can have additional control and capabilities to block shows on Netflix that may not be available through the platform’s built-in features. These extensions allow for a more personalized and customized streaming experience according to your preferences.
Remember to regularly update the browser extension to ensure compatibility and access to the latest blocking features. Also, be cautious when installing third-party extensions and only download from trusted sources to protect your browsing experience.
Using third-party browser extensions provides an alternative method to block shows on Netflix, granting you more control over your streaming experience and allowing you to curate the content that you want to see.
Step 1: Find and install a suitable browser extension
The first step in blocking a show on Netflix using third-party browser extensions is to find and install a suitable extension that offers the desired blocking functionality. These extensions are separate programs that can be added to your browser to enhance its capabilities. Here’s how you can find and install a suitable browser extension:
- Identify your browser: Determine which web browser you are using, such as Google Chrome, Mozilla Firefox, or Microsoft Edge. It is important to note that browser extensions are typically specific to a particular browser or browser family.
- Visit the extension marketplace: Open your web browser and go to the official extension marketplace or add-ons gallery for your browser. For example, for Google Chrome, visit the Chrome Web Store (chrome.google.com/webstore), or for Firefox, visit the Firefox Browser Add-ons gallery (addons.mozilla.org).
- Search for relevant extensions: Use the search function within the extension marketplace to search for Netflix blocking extensions. Keywords such as “Netflix blocker” or “Netflix hiding extension” can help you find suitable options.
- Check extension details and reviews: Before installing any extension, carefully review its details and user reviews. This will give you an idea of its functionality, reliability, and user satisfaction. Look for extensions that have a decent number of positive reviews and high ratings.
- Install the chosen extension: Once you have found a suitable extension, click on the “Install” or “Add to [Browser Name]” button. Follow any prompts or instructions to complete the installation process. Be sure to grant any necessary permissions required by the extension to function correctly.
By following these steps, you can find and install a suitable browser extension that enables you to block shows on Netflix. It is important to choose reputable extensions from trusted sources to ensure the security and reliability of your browsing experience.
Remember to regularly update your browser extensions to benefit from the latest features, bug fixes, and security enhancements. Keeping your extensions up to date will help ensure compatibility with the latest version of your browser and Netflix platform.
With a suitable browser extension installed, you can proceed to the next steps to configure and utilize the blocking functionality to enhance your Netflix streaming experience.
Step 2: Enable the extension and configure blocking preferences
After successfully installing the browser extension for blocking shows on Netflix, the next step is to enable the extension and configure its blocking preferences. This step allows you to customize the extension’s settings according to your specific blocking requirements. Follow these steps to enable and configure the extension:
- Access the browser’s extension settings: Open your browser and click on the extension icon, typically located near the upper-right corner of the browser window. This will open a dropdown menu with a list of installed extensions.
- Locate the Netflix blocking extension: Find the extension you installed for blocking shows on Netflix in the list of installed extensions. The name or logo of the extension should be recognizable.
- Enable the extension: If the extension is disabled, click on the toggle switch or checkbox next to the extension name to enable it. This will activate the blocking functionality of the extension.
- Access the extension’s configuration settings: Look for an option or button that allows you to access the configuration or settings of the extension. It may be labeled as “Settings,” “Options,” or a similar term.
- Configure the blocking preferences: Within the extension’s settings, you should find options related to blocking preferences. This may include options to block specific genres, hide certain shows or movies, or customize the level of blocking based on content ratings or keywords. Adjust these settings according to your preferences and requirements.
- Save the changes: Once you have configured the blocking preferences to your satisfaction, click on the “Save” or “Apply” button to save the changes. The extension will now be configured to block shows on Netflix based on your specified preferences.
By enabling and configuring the extension, you are empowering it to block shows on Netflix according to your desired preferences. These settings give you control over the content you want to hide or block from appearing in your Netflix library or recommendations.
Remember to periodically review and adjust the extension’s blocking preferences if your preferences change or if new shows or movies are released that you wish to block. Regularly updating and maintaining the extension’s settings will help ensure that your Netflix streaming experience remains personalized and in line with your preferences.
With the extension successfully enabled and configured, you are now ready to proceed with blocking specific shows on Netflix using the features provided by the extension.
Step 3: Block specific shows or movies
Now that you have successfully enabled and configured the browser extension for blocking shows on Netflix, you can proceed to block specific shows or movies according to your preferences. This step allows you to have more control over the content that appears on your Netflix account. Here’s how you can block specific shows or movies using the installed browser extension:
- Access your Netflix account: Open your preferred web browser and log in to your Netflix account by visiting www.netflix.com.
- Search for the show or movie you want to block: Use the search function on the Netflix homepage or browse through different categories to find the specific show or movie you wish to block.
- Block the show or movie: Once you locate the show or movie, look for the extension’s interface or options that allow you to block or hide it. This can typically be done by right-clicking on the show’s thumbnail or accessing a context menu provided by the extension. Click on the relevant option to block the show or movie from appearing on your Netflix account.
- Confirm the blocking: Some extensions may display a confirmation message or provide additional options to customize the blocking. Follow the prompts to confirm and finalize the blocking of the selected show or movie. The extension will apply the necessary blocking settings to prevent the content from being visible on your Netflix account.
- Repeat the process for other shows or movies: If there are additional shows or movies you want to block, repeat the same process for each one, utilizing the extension’s blocking functionality.
By following these steps, you can effectively block specific shows or movies on your Netflix account using the installed browser extension. The extension’s features override Netflix’s default settings and ensure that the blocked content remains hidden from your library and recommendations.
Remember to keep your browser extension up to date to access the latest blocking features and improvements. Additionally, review and adjust the blocking settings within the extension’s configuration as needed to customize your Netflix streaming experience according to your preferences.
Blocking specific shows or movies using a third-party browser extension allows for a more tailored and personalized streaming experience, giving you the ability to curate the content that appears on your Netflix account.
Conclusion
Blocking a show on Netflix can be a valuable tool for maintaining control over your streaming experience. Whether you want to protect your children from inappropriate content, curate a personalized viewing experience for yourself, or create a safe and comfortable environment for guests, there are various methods to achieve this. In this article, we explored two primary approaches to block shows on Netflix: using parental controls and utilizing dedicated profiles. Additionally, we discussed how third-party browser extensions can further enhance your ability to block specific shows or movies.
By setting up a parental control PIN and modifying the parental control settings, you can establish age-appropriate restrictions and block specific content based on its rating. This ensures a safer and more controlled environment for children and others accessing your Netflix account. Creating dedicated profiles allows for individualized content customization, allowing you to apply different maturity level settings and block specific shows or movies based on each profile’s preferences. Lastly, third-party browser extensions provide additional capabilities for blocking or hiding shows on Netflix, offering a more tailored streaming experience.
It’s important to note that while these methods can effectively block shows on Netflix, they are not foolproof. Content availability and ratings may vary across different regions, and the effectiveness of third-party browser extensions can depend on their compatibility and updates. It’s crucial to stay vigilant, regularly review and adjust your settings, and consider using a combination of methods to achieve the desired level of blocking.
With the ability to block shows on Netflix, you can take control of your streaming experience, customize content accessibility, and create an environment that aligns with your preferences and requirements. Whether it’s for parental control, personal preferences, or a comfortable guest experience, blocking shows on Netflix enhances your ability to curate the content that suits your needs and ensures a more enjoyable and tailored streaming experience.