Introduction
Slack is a powerful collaboration tool that allows teams to communicate and share files seamlessly. Whether you’re working on a project, collaborating with colleagues, or simply sharing important documents, attaching files in Slack is an essential feature that streamlines workflows and improves productivity. In this article, we will guide you through the steps to attach a file in Slack, making it easier for you to share and access important documents on the platform.
With Slack, you can attach a variety of file types, including documents, images, videos, and more. Whether you’re sharing a presentation for a meeting, a design file for feedback, or an important memo to your team, attaching files ensures easy access for everyone involved.
Attaching files in Slack is not only simple, but it also provides additional context and makes it easier for team members to understand the specific purpose or message behind the shared file. By following the steps outlined in this article, you’ll be able to attach files in Slack effortlessly and effectively, enhancing collaboration and communication within your team.
So, whether you’re a seasoned Slack user or just getting started, let’s dive into the step-by-step process of attaching files in Slack.
Step 1: Open the desired channel or conversation
The first step to attaching a file in Slack is to open the channel or conversation where you want to share the file. Slack allows you to attach files in both public channels and private conversations, ensuring that you can easily share files with the appropriate audience.
To open a channel or conversation in Slack, simply navigate to the left sidebar where all your channels and conversations are listed. If you’re using Slack in a web browser, you’ll see the list of channels on the left-hand side. If you’re using the Slack desktop or mobile app, you can find the channels and conversations under the “Channels” or “Direct Messages” section.
Once you’ve located the desired channel or conversation, click on it to open the chat window. This will display the conversation history and any previous files that have been shared within that channel or conversation.
It’s important to select the appropriate channel or conversation to ensure that the file reaches the intended recipients and can be easily accessed by the relevant individuals. Pay attention to whether you need to share the file in a specific channel or with a particular group of team members.
By opening the correct channel or conversation, you’ll be ready to proceed to the next step of attaching your file in Slack.
Step 2: Click on the attachment icon
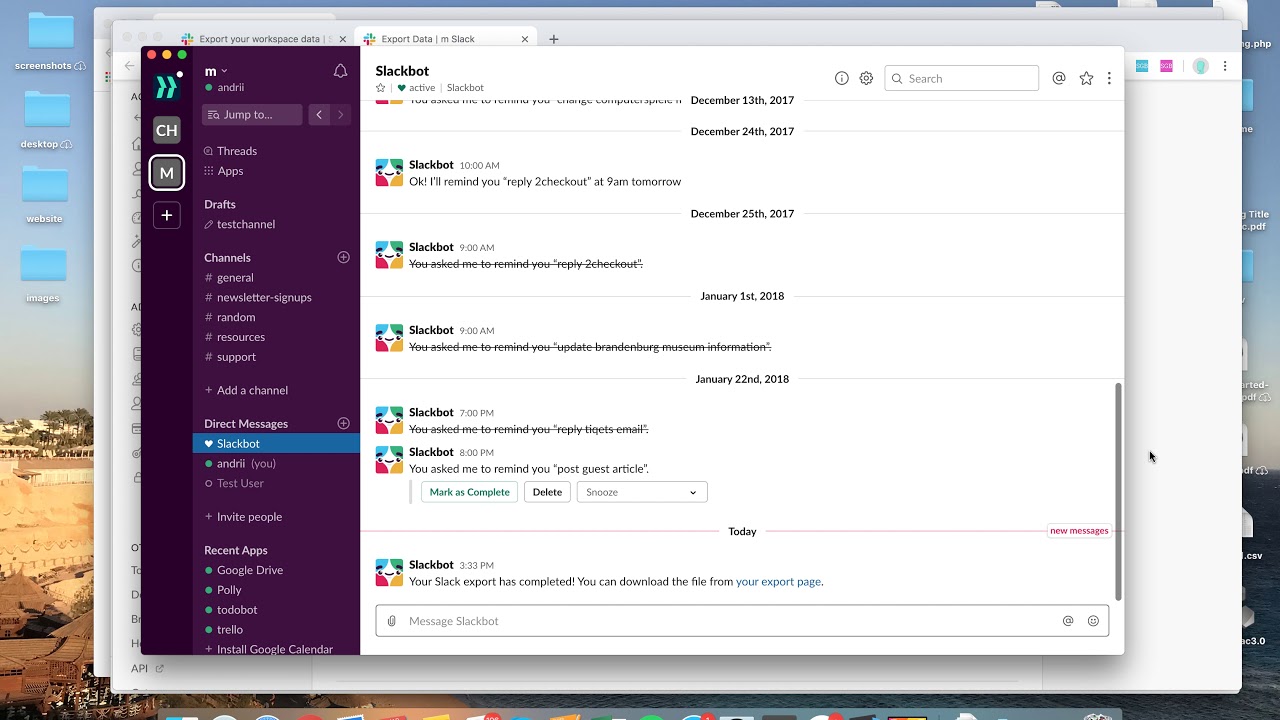
Once you have opened the desired channel or conversation in Slack, the next step is to click on the attachment icon. This icon is prominently displayed in the chat window and is represented by a paperclip or a “+” sign.
Locating and clicking on the attachment icon will open a menu or prompt that allows you to select the file you wish to attach. The attachment icon is usually located near the message input box, making it easily accessible while you’re composing your message.
By clicking on the attachment icon, you’re indicating to Slack that you want to share a file within the channel or conversation. This step is crucial to initiating the file attachment process and ensures that your selected file will be shared with your intended recipients.
It’s important to note that the appearance and placement of the attachment icon may vary slightly depending on the version of Slack you’re using and the platform you’re accessing it from. However, you can generally expect to find the attachment icon in a prominent and easily identifiable location within the chat window.
Now that you have clicked on the attachment icon, you’re ready to move on to the next step of choosing the file you want to attach in Slack.
Step 3: Choose files to attach
After clicking on the attachment icon in Slack, you will be prompted to choose the files you want to attach. This step allows you to browse your computer or device to select the file you wish to share with your team.
Slack offers a user-friendly file selection interface that makes it easy to locate and choose the desired file. Depending on the platform you’re using (web browser, desktop app, or mobile app), the interface may vary slightly. However, the basic process remains the same.
When selecting files to attach in Slack, you can navigate through your device’s file directory to find the file you want to share. This can include documents, images, videos, presentations, spreadsheets, and more. Slack supports a wide range of file types, allowing you to share various types of content with your team.
In addition to choosing a file from your local device, Slack also provides options to attach files from cloud storage services like Google Drive and Dropbox. This feature allows you to easily share files that are stored in your preferred cloud storage platform without having to download them to your local device first.
Once you have selected the file you wish to attach, Slack will begin the process of uploading the file to the platform. Depending on the file size and your internet connection speed, the uploading process may take a few moments. Slack will provide progress indicators to keep you informed about the upload status.
After the file has been successfully uploaded, you will see it displayed in the chat window, ready to be shared with your team members. At this point, you can proceed to the next step or add additional context or messages to accompany the file if desired.
Step 4: Add additional context or messages (optional)
Once you have attached the desired file in Slack, you have the option to add additional context or messages to provide more information about the file you’re sharing. This step is optional but can be helpful in providing clarity and context to your team members.
Adding context or messages allows you to explain the purpose of the file, provide instructions, or ask for specific feedback or actions from your team. This additional information enhances communication and ensures that your team members have a clearer understanding of the file’s relevance and how it relates to the ongoing discussions or tasks.
To add additional context or messages, simply type in the message input box below the attached file. You can share your thoughts, ask questions, or provide any other relevant information that you deem necessary. This text input area functions like a regular chat box, allowing you to compose messages with formatting options such as bold text, italics, bullet points, and more.
It’s worth noting that you can also tag specific team members using the “@” symbol followed by their username. This feature alerts them to your message and ensures that they receive a notification regarding the attached file and your accompanying message.
By adding additional context or messages, you ensure that the file you’re sharing is not only visually present but also accompanied by relevant information that aids in the comprehension and utilization of the shared content.
Once you have typed in your additional context or messages, you can proceed to the final step of sending the file in Slack.
Step 5: Send the file in Slack
After attaching the file and optionally adding additional context or messages, the final step is to send the file in Slack. Sending the file makes it visible to your team members and allows them to access and download it for their use.
To send the file, simply click on the “Send” button or press the Enter key on your keyboard. This action will transmit the file and any accompanying messages to the selected channel or conversation in Slack.
Once the file is sent, it will appear in the chat window for all participants to see. Depending on the file type, Slack might display a preview or thumbnail of the file. Team members can click on the file to view its contents, download it to their devices, or leave comments and feedback.
If you attached multiple files, each file will be sent individually, appearing as separate attachments in the chat window. This ensures that your team members can easily identify and access each file without confusion.
It’s important to note that once a file is sent in Slack, it becomes a part of the chat history in the channel or conversation. This means that even if someone joins the channel later or if you need to refer back to the file at a later time, it will be easily accessible within the Slack platform.
By completing this final step and sending the file, you have successfully attached and shared the document, image, video, or any other file type in Slack. Your team members can now view, download, and engage with the file, contributing to seamless collaboration, improved workflows, and effective communication within your team.
Conclusion
Attaching files in Slack is a straightforward and indispensable feature that enables teams to collaborate effectively and share important documents seamlessly. By following the simple steps outlined in this article, you can easily attach and share files in Slack, enhancing communication and productivity within your team.
Slack provides a user-friendly interface for attaching files, allowing you to choose from various file types and even attach files directly from cloud storage services. The ability to add additional context or messages further enhances the clarity and comprehension of the shared files.
By sending the file in Slack, you make it accessible to your team members, enabling them to view, download, and engage with the shared content. This promotes seamless collaboration, feedback exchange, and efficient workflows.
Remember to be mindful of the channel or conversation where you want to share the file, ensuring that it reaches the intended recipients. Additionally, providing relevant context or messages helps your team members understand the purpose and relevance of the shared file.
By leveraging the file attachment feature in Slack, you can streamline your team’s communication and collaboration process, making it easier to exchange information and work together seamlessly.
So, next time you need to share an important document, an inspiring design, or any other file, follow these simple steps and enjoy the convenience and efficiency of attaching files in Slack.