Introduction
Welcome to our guide on how to apply a CPU cooler and thermal paste! If you’re new to building or upgrading your own computer, this is an essential process that ensures your CPU stays cool and functions optimally. In this article, we’ll explain what a CPU cooler and thermal paste are, why they’re important, and provide a step-by-step guide to help you apply them correctly.
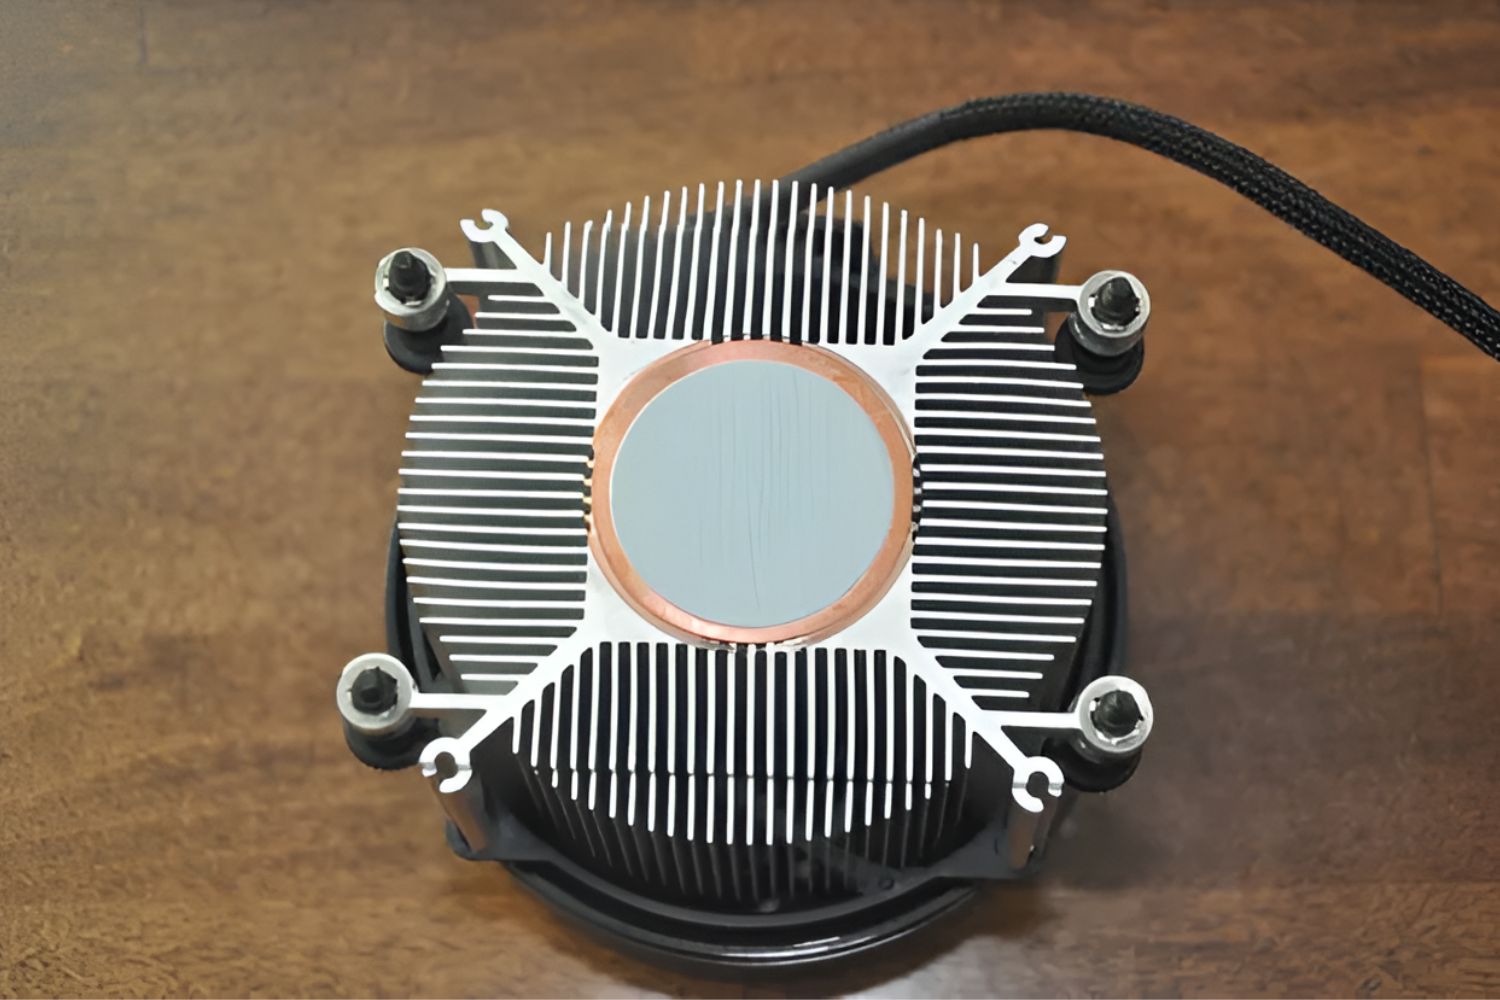
A CPU cooler is a hardware component designed to dissipate the heat generated by the central processing unit (CPU) of your computer. It consists of a heatsink, which absorbs the heat, and a fan or liquid cooling system to expel it. Without a CPU cooler, your processor can quickly reach high temperatures, leading to performance issues and even hardware damage.
Thermal paste, also known as thermal compound or grease, is a heat conductive substance. Its purpose is to fill microscopic gaps and imperfections between the CPU and the heatsink, improving thermal conductivity and ensuring efficient transfer of heat from the CPU to the cooler.
Now, you might be wondering why it’s so important to apply a CPU cooler and thermal paste correctly. Well, improper installation can lead to inadequate cooling, which results in higher CPU temperatures. This can cause the processor to throttle or even shut down completely to prevent damage. Over time, excessive heat can also degrade the longevity and performance of your CPU.
By following the correct procedures outlined in this guide, you can ensure that the CPU cooler is properly attached and the thermal paste is correctly applied, creating an optimal thermal interface between the CPU and the cooler. This will help maintain lower temperatures, improve CPU performance, and prolong the life of your processor.
Now that you understand the importance of applying a CPU cooler and thermal paste correctly, let’s move on to the preparation steps before the installation process. Grab your tools and let’s get started!
What is a CPU Cooler and Thermal Paste?
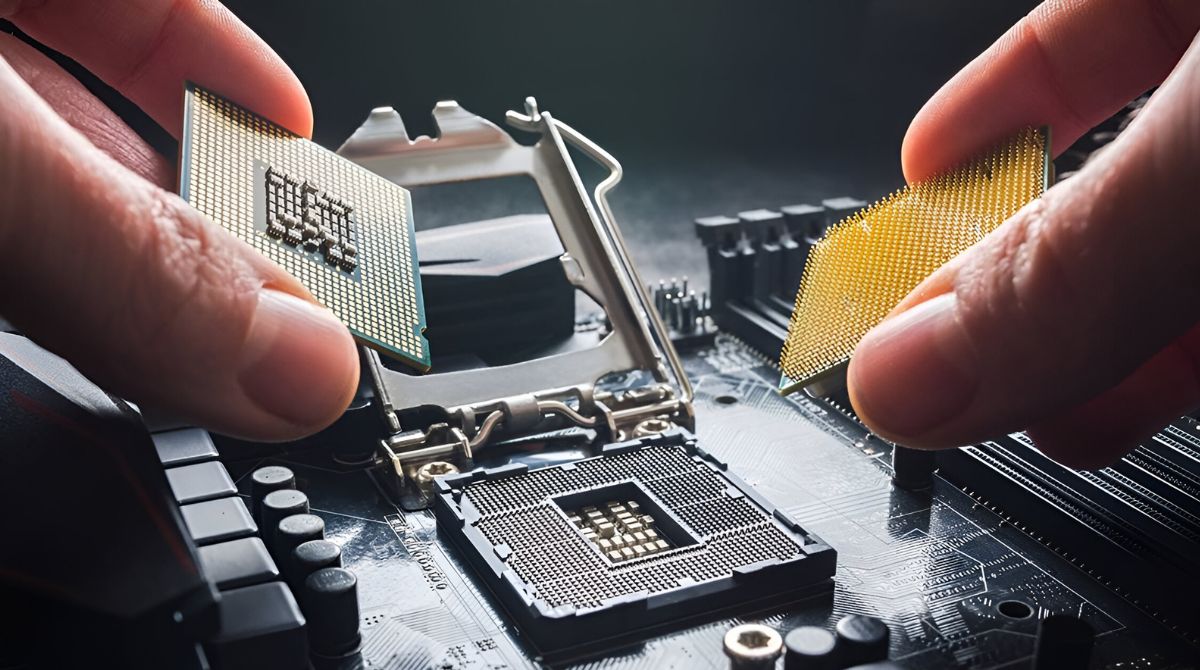
A CPU cooler is a vital component in computer systems that helps dissipate the heat generated by the central processing unit (CPU). As the CPU performs various tasks, it generates heat due to the electrical resistance within its circuits. The CPU cooler’s primary function is to transfer this heat away from the processor and maintain it at a safe operating temperature.
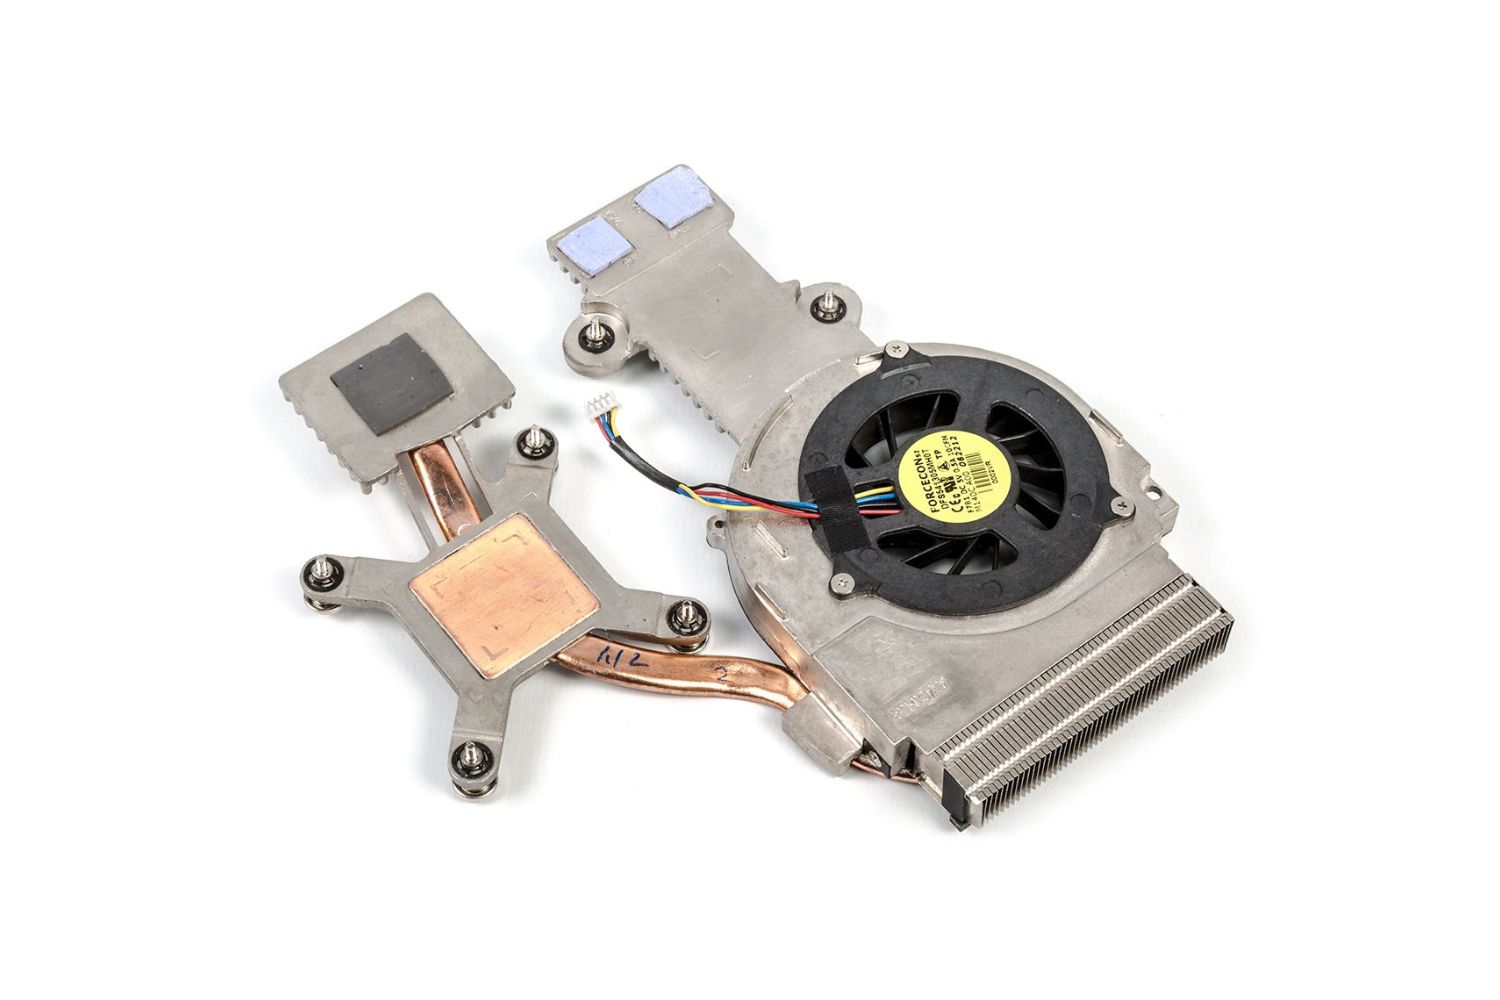
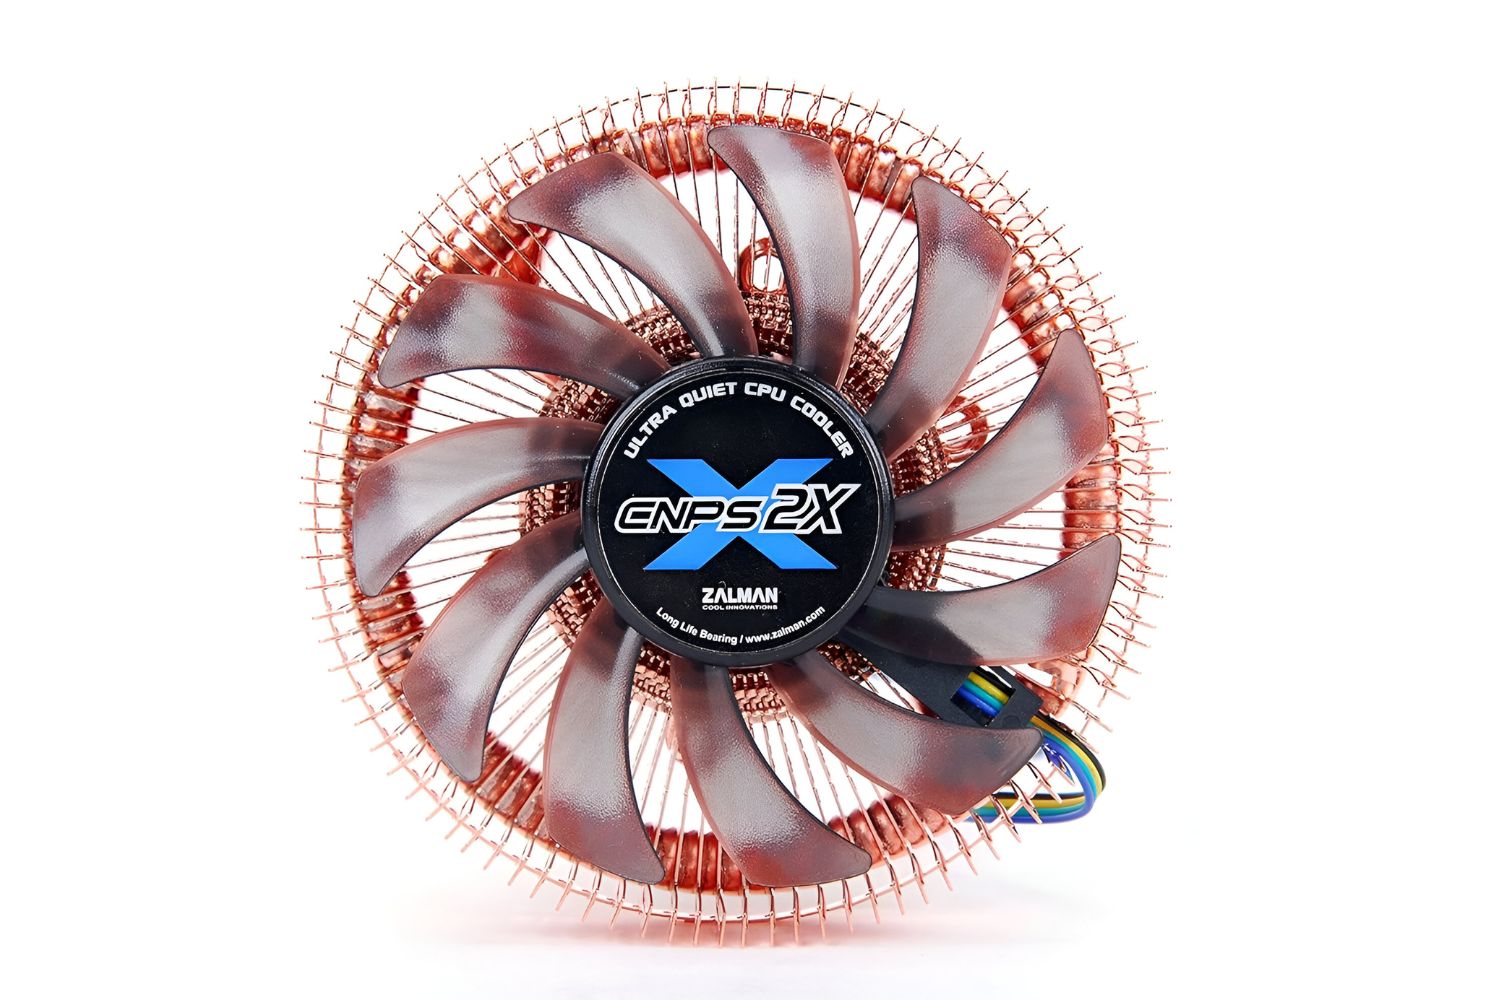
There are different types of CPU coolers available on the market, including air coolers and liquid coolers. Air coolers consist of a heatsink, which is usually made of metal, and a fan or multiple fans attached to it. These coolers work by transferring heat from the CPU to the heatsink, and the fan(s) then blow cool air across the heatsink to dissipate the heat.
Liquid coolers, on the other hand, use a closed-loop system that circulates a coolant through tubes connected to a radiator. The coolant absorbs heat from the CPU block and transports it to the radiator, where it is cooled by fans before being circulated again. Liquid coolers are preferred by many enthusiasts and overclockers as they tend to offer more efficient cooling and can be quieter than air coolers.
Thermal paste, also known as thermal compound or grease, is a viscous substance that serves as a thermal interface between the CPU and the cooler. It is typically applied onto the surface of the CPU before mounting the cooler. The purpose of thermal paste is to fill in microscopic imperfections and gaps between the CPU and the cooler to ensure maximum contact and heat transfer.
Thermal paste is designed to have high thermal conductivity, helping to bridge the microscopic gaps between the CPU and cooler’s surfaces. By eliminating air pockets and creating a smooth connection, thermal paste enables efficient heat transfer and reduces the risk of hotspots, where heat accumulates in specific areas.
Both the CPU cooler and thermal paste play critical roles in maintaining the CPU’s temperature within safe limits, preventing overheating and potential damage to the processor. Proper installation and application of a CPU cooler and thermal paste are essential for optimal thermal management and ensuring the longevity and performance of your CPU.
Why is it important to apply a CPU Cooler and Thermal Paste correctly?
Properly applying a CPU cooler and thermal paste is crucial for several reasons. Let’s explore why it’s important to get this process right:
1. Temperature Regulation: CPUs generate a significant amount of heat during operation. Without an effective CPU cooler, the processor can quickly reach high temperatures, leading to thermal throttling and reduced performance. Over time, excessive heat can also cause the CPU to degrade and fail. Applying a CPU cooler correctly ensures efficient heat dissipation and helps maintain optimal temperatures for the CPU.
2. Overclocking Potential: Overclocking is the process of running a CPU at a higher clock speed than its default setting to achieve increased performance. However, overclocking also generates more heat. Proper cooling, including an appropriately sized CPU cooler and sufficient thermal paste, is essential for managing the increased heat generated by an overclocked CPU. Without adequate cooling, attempting to overclock can result in instability and potential damage to the processor.
3. Longevity of the CPU: Excessive heat is a major factor that can shorten the lifespan of a CPU. High temperatures can cause the CPU’s delicate internal components to degrade more quickly, reducing its overall longevity. By correctly applying a CPU cooler and thermal paste, you help ensure the processor operates within safe temperature limits, prolonging its lifespan and reliability.
4. Performance Optimization: CPUs perform at their best when operating within their specified temperature range. When a CPU is running too hot, it can throttle its clock speed or even shut down to protect itself from damage. By applying a CPU cooler and thermal paste correctly, you help maintain an efficient cooling system, allowing the CPU to consistently operate at its intended performance levels without any interruptions.
5. Consistent and Silent Operation: Proper cooling also contributes to a quieter and more pleasant computing experience. An incorrectly installed CPU cooler can create noisy vibrations or rattling sounds, causing unwanted distractions. By following the correct installation procedures and ensuring a secure attachment, you minimize the risk of noise issues and maintain consistent and silent operation.
By understanding the importance of correctly applying a CPU cooler and thermal paste, you can prevent overheating, optimize CPU performance, and extend the lifespan of your processor. Now that we’ve covered the significance, let’s move on to the preparation steps before the installation process.
Preparing for the Installation
Before diving into the installation process, it is essential to prepare your workspace and gather the necessary tools and components. Following these preparation steps will help ensure a smooth and successful installation of your CPU cooler and thermal paste.
1. Clear Workspace: Start by clearing a clean and well-lit workspace. Ensure you have enough room to comfortably work on your computer without any obstructions. A clutter-free area reduces the chances of accidentally misplacing or damaging any components.
2. Read the Manuals: Take the time to carefully read the manuals or installation guides provided by the CPU cooler and thermal paste manufacturers. Familiarize yourself with the specific installation instructions and any precautions or recommendations they provide.
3. Gather the Tools and Components: Make sure you have all the tools and components required for the installation. Typically, you will need a screwdriver (depending on the cooler), rubbing alcohol or thermal paste cleaner, lint-free cloth or cotton swabs, and of course, the CPU cooler and thermal paste. Depending on your specific cooler, additional accessories may be included, so double-check the contents of the package.
4. Power Off and Disconnect: Before starting the installation, shut down your computer and disconnect the power cable. This precaution ensures your safety and prevents any accidental damage to the components.
5. Antistatic Precautions: To avoid any potential damage from static electricity, follow antistatic precautions. Wear an antistatic wrist strap or ensure you touch a grounded metal object before handling any components.
6. Remove Any Obstructions: Take a moment to assess and remove any obstacles that may hinder the installation process. In some cases, removing the computer case’s side panel or other components may be required to access the CPU socket area.
7. Take Photos or Notes: It’s always a good idea to take photos or make notes of how your current CPU cooler is installed. This will serve as a reference if you encounter any difficulties during the reinstallation process.
By following these preparation steps, you set yourself up for a smooth and efficient installation process. With everything ready, it’s time to move on to the next step: removing the old CPU cooler and thermal paste.
Step 1: Removing the Old CPU Cooler and Thermal Paste
Before installing a new CPU cooler and applying fresh thermal paste, it is necessary to remove the old components. Here’s a step-by-step guide on how to remove the old CPU cooler and thermal paste:
1. Power Off and Disconnect: Ensure your computer is powered off and disconnected from the power source. This step is crucial to avoid any electrical hazards during the removal process.
2. Unplug Fan and Disconnect Wires: If your CPU cooler has an attached fan, unplug it from the motherboard. Similarly, disconnect any other wires or cables connected to the CPU cooler, such as the power cable or any RGB lighting cables.
3. Loosen Mounting Screws: Locate the mounting screws or clips securing the CPU cooler to the motherboard. Depending on your cooler’s design, there might be two or more screws holding it in place. Use a screwdriver to loosen these screws in a cross-pattern to ensure even pressure is applied.
4. Gently Remove the CPU Cooler: Once the mounting screws are loosened, carefully lift the CPU cooler off the CPU. Be cautious not to exert too much force or twist the cooler, as this can damage the CPU or motherboard. If the cooler seems stuck, gently twist it from side to side to break any adhesive seal.
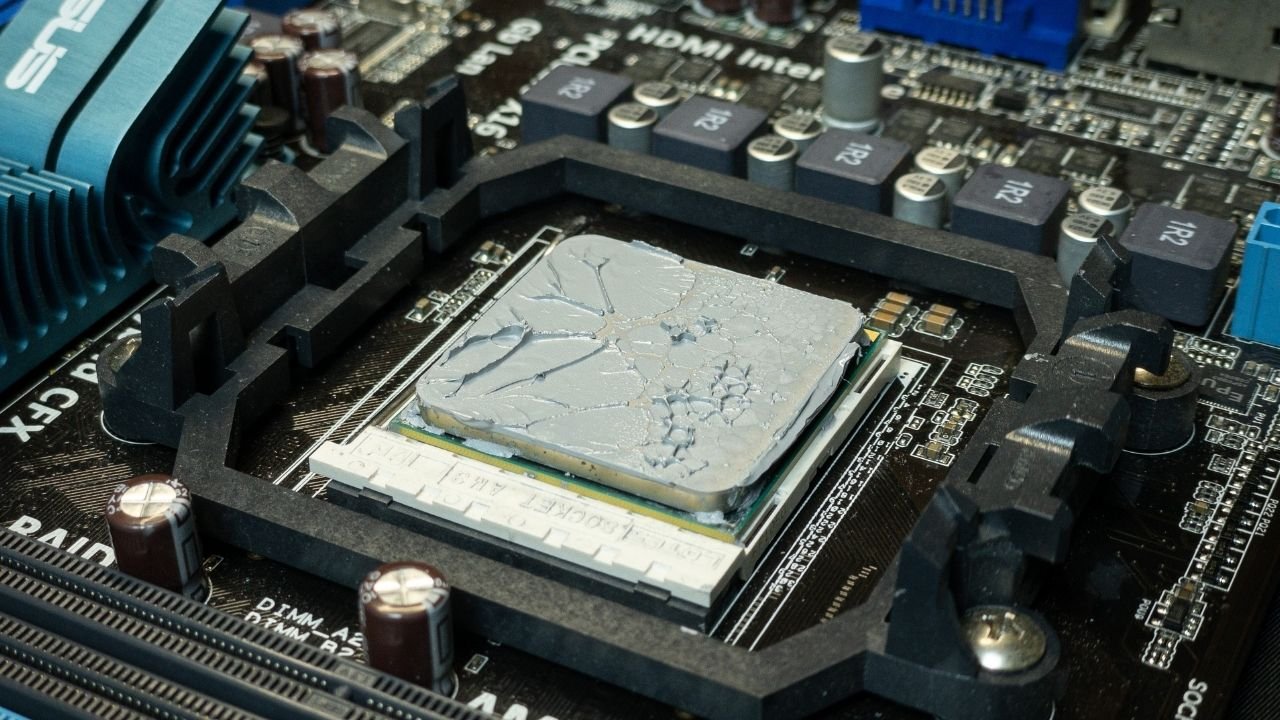
5. Clean the CPU Surface: Using rubbing alcohol or a thermal paste cleaner, apply a small amount to a lint-free cloth or cotton swab. Gently wipe off the old thermal paste from the surface of the CPU. Ensure all residue from the previous thermal paste is completely removed. Take care not to scratch or damage the CPU surface.
6. Clean the Cooler: Thoroughly clean the cooler’s contact surface using the same method as cleaning the CPU. Remove any residual thermal paste or debris to ensure optimal contact between the cooler and the CPU.
7. Inspect and Prepare: After cleaning both the CPU and cooler, inspect for any signs of damage or worn-out components. Check if any mounting brackets or screws need replacement. Additionally, ensure you have the new thermal paste ready for application before proceeding to the next step.
By following these steps, you can safely remove the old CPU cooler and thermal paste. The next step will focus on cleaning the CPU and heatsink surfaces to prepare them for the application of fresh thermal paste.
Step 2: Cleaning the CPU and Heatsink
Once you have removed the old CPU cooler and thermal paste, the next step is to clean the CPU and heatsink surfaces. Proper cleaning ensures that the fresh thermal paste can make optimal contact for efficient heat transfer. Here’s a step-by-step guide on how to clean the CPU and heatsink:
1. Prepare Cleaning Supplies: Gather rubbing alcohol or thermal paste cleaner, lint-free cloth or cotton swabs, and a clean, dry cloth or paper towel. These supplies will help you effectively clean the surfaces without leaving any residue behind.
2. Apply Isopropyl Alcohol: Moisten the lint-free cloth or cotton swab with a small amount of rubbing alcohol or thermal paste cleaner. Be careful not to soak it, as excess liquid can cause damage. Use the cloth or swab to gently wipe the surface of the CPU, removing any remaining thermal paste or debris. Take care not to apply excessive pressure or touch the gold or copper contact pins on the CPU.
3. Clean the Heatsink: Similarly, clean the contact surface of the heatsink using the same method as cleaning the CPU. Ensure that all old thermal paste and residue are thoroughly removed. Pay special attention to the areas where the CPU and heatsink make contact, as this is where the fresh thermal paste will be applied.
4. Allow Time for Drying: After cleaning the surfaces, allow them to air dry for a few minutes. This ensures that any remaining alcohol or cleaner evaporates completely before applying the new thermal paste.
5. Inspect for Residue or Debris: Before proceeding, inspect both the CPU and heatsink surfaces to ensure they are clean and free of any residue or debris. If needed, repeat the cleaning process until both surfaces are spotless.
6. Use a Dry Cloth or Paper Towel: Once the surfaces are dry, use a clean, dry cloth or paper towel to gently blot any remaining moisture. This step ensures that no lint or fibers are left on the surfaces, which could affect the application of thermal paste.
By following these steps, you can effectively clean the CPU and heatsink surfaces, removing any old thermal paste or debris. With the surfaces clean and dry, you are now ready to move on to the next step: applying the thermal paste.
Step 3: Applying the Thermal Paste
With the CPU and heatsink surfaces properly cleaned, it’s time to apply the thermal paste. Applying the thermal paste correctly ensures efficient heat transfer between the CPU and the cooler. Follow these steps to apply the thermal paste:
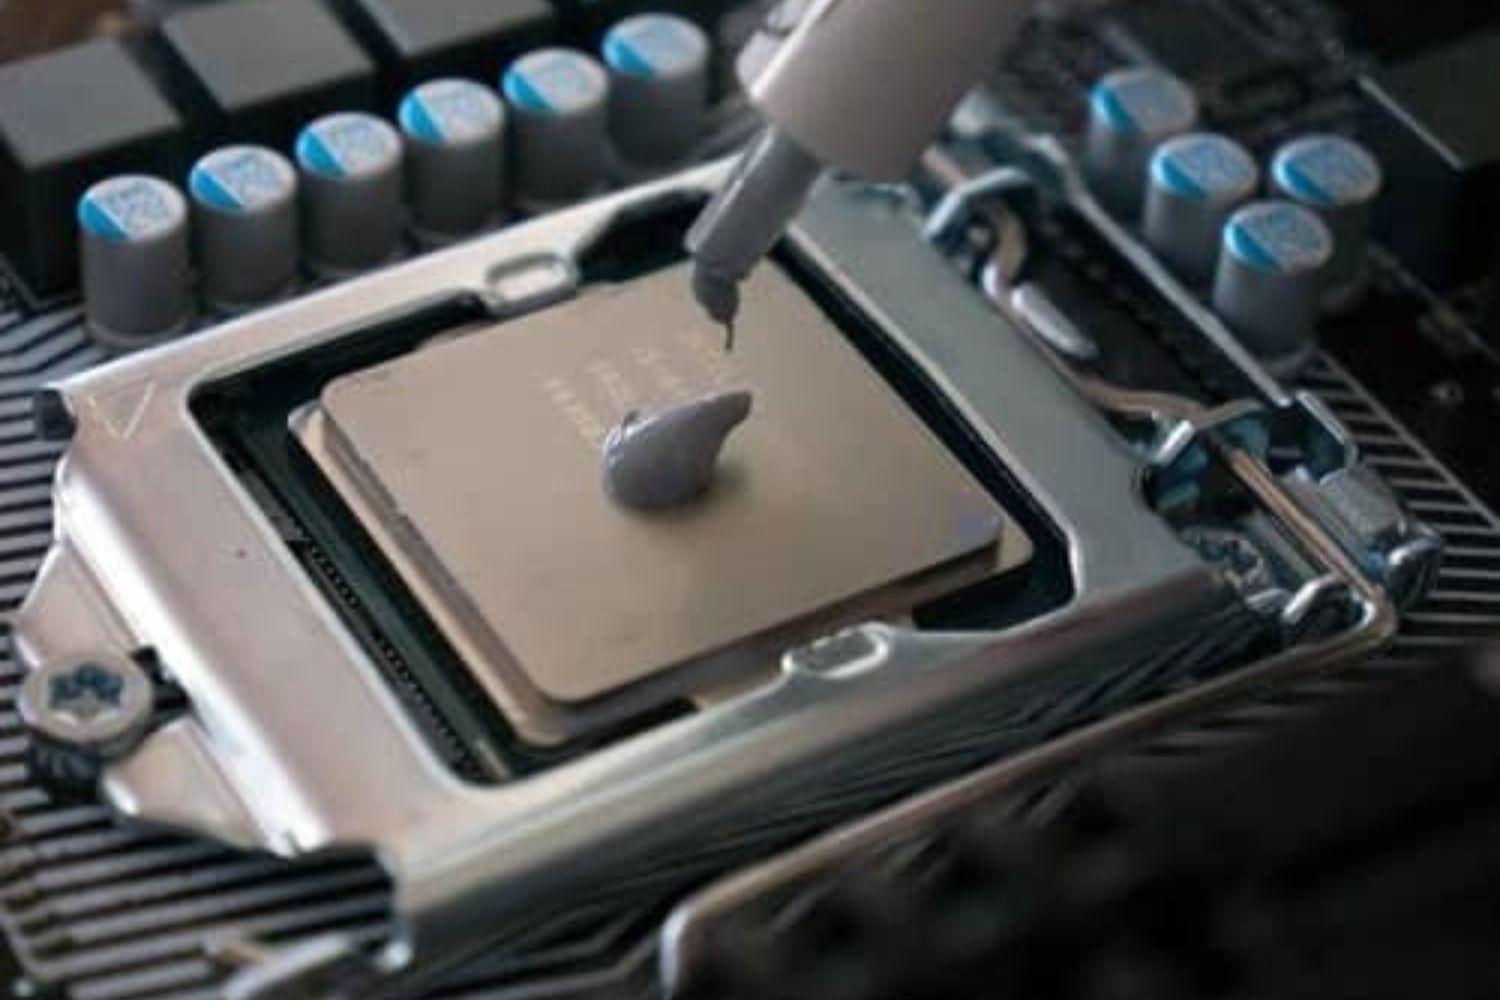
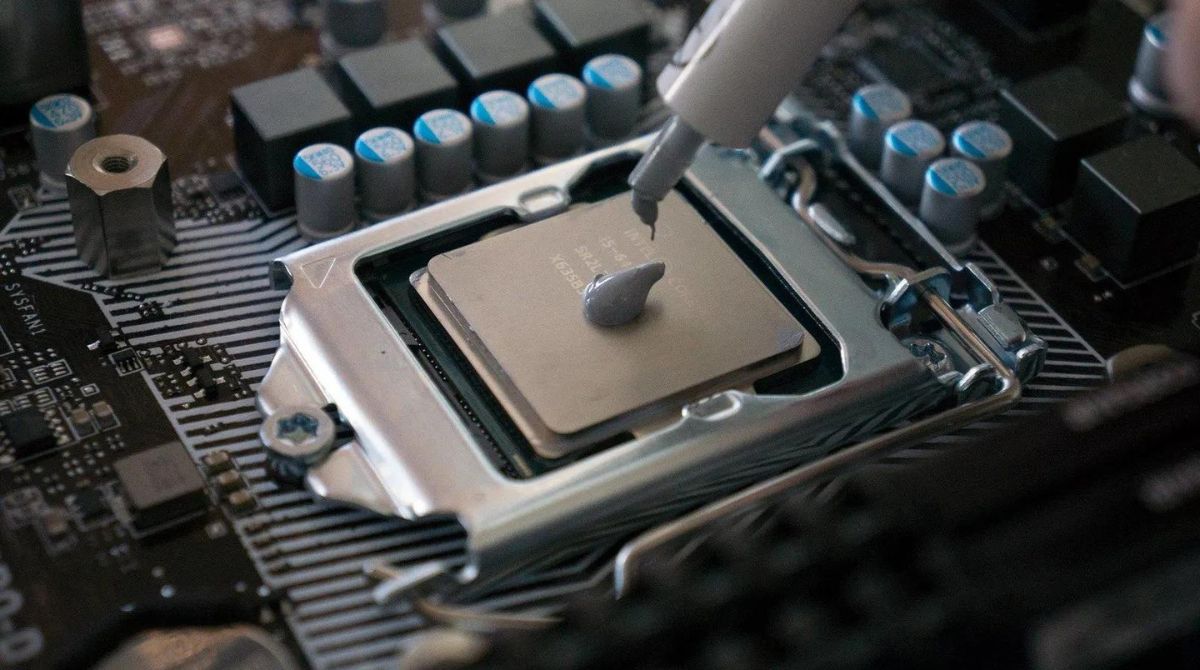
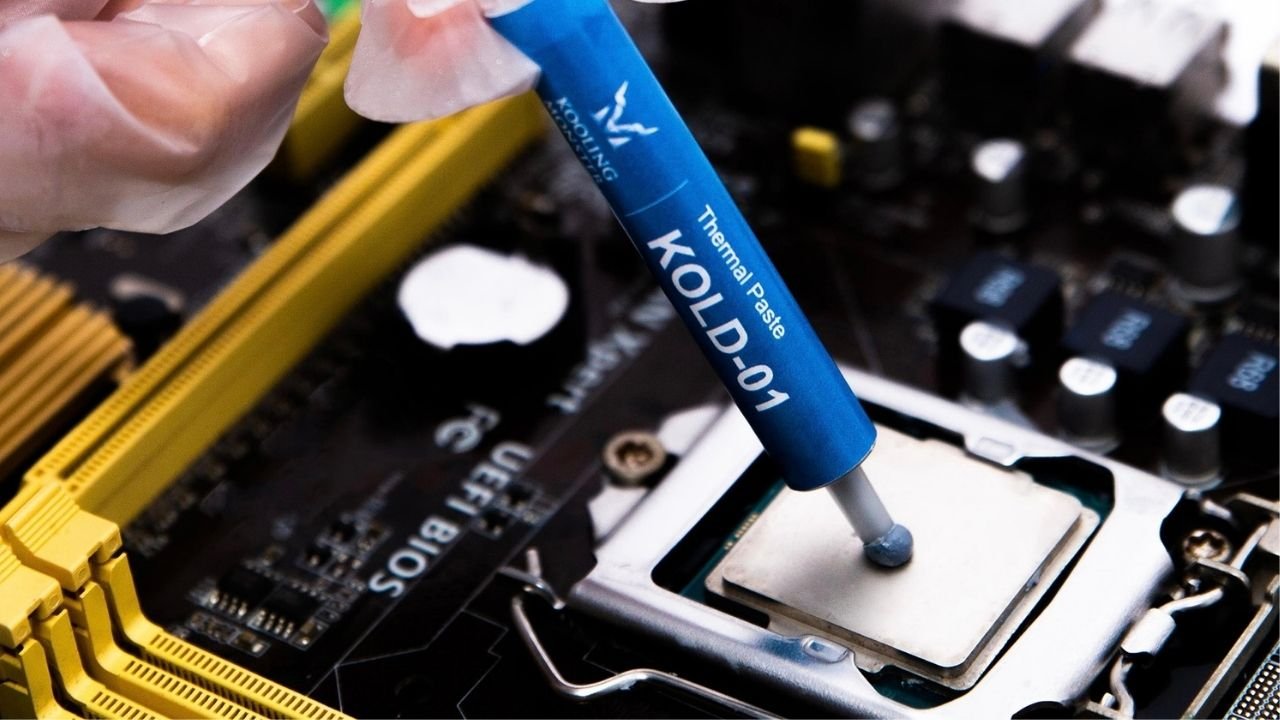
1. Determine the Amount: Check the thermal paste manufacturer’s guidelines to ascertain the appropriate amount of thermal paste to apply. In most cases, a small pea-sized dot or a thin line across the center of the CPU is sufficient. Avoid applying too much paste, as it can lead to excessive squeeze-out and poor heat transfer.
2. Center the Thermal Paste: Carefully position the syringe or thermal paste applicator over the center of the CPU. Gently squeeze or apply the thermal paste, allowing it to spread evenly across the surface. Keep in mind that some pastes may require manual spreading using a plastic spatula or thermal paste spreader.
3. Spread the Paste: If manual spreading is required, use a plastic spatula or spreader to evenly distribute the thermal paste across the CPU surface. Use gentle and smooth motions, ensuring the paste covers the entire area without any gaps or excess build-up. Remember, an even and thin layer is key to achieving effective thermal transfer.
4. Be Mindful of CPU Orientation: When applying the thermal paste, consider the orientation of the CPU cooler. Some coolers have a specific directionality, indicated by arrows or notches, which should align with corresponding markings on the CPU. Aligning the cooler correctly ensures optimal contact and heat transfer.
5. Avoid Touching the Paste: Once the thermal paste is applied, avoid touching it with bare hands or any foreign objects. Fingerprints or contaminants can interfere with its thermal properties and negatively affect heat transfer. Always handle the CPU and thermal paste with clean and dry hands.
6. Double Check the Application: Before proceeding with the cooler installation, check that the thermal paste is evenly spread and covers the CPU surface adequately. Ensure there are no gaps or clumps of paste that could impede proper contact between the CPU and cooler.
By following these steps, you can confidently apply the thermal paste to the CPU surface. With the thermal paste applied correctly, it’s time to move on to the next step: attaching the CPU cooler.
Step 4: Attaching the CPU Cooler
Attaching the CPU cooler properly ensures secure mounting and optimal thermal performance. Here’s a step-by-step guide on how to attach the CPU cooler:
1. Locate Mounting Bracket: Depending on your CPU cooler model, locate the appropriate mounting bracket or system for your motherboard. These brackets are designed to securely hold the cooler in place.
2. Apply Pressure Distribution Material: Some CPU coolers come with a pressure distribution material, such as foam or rubber pads. If provided, apply these materials to the mounting bracket. They help distribute pressure evenly across the CPU, ensuring proper contact and minimizing stress on the processor.
3. Align the Cooler: Position the CPU cooler carefully over the CPU, aligning the mounting holes on the cooler with the corresponding holes in the mounting bracket. Make sure the cooler is oriented correctly, with the fan facing the desired direction for optimal airflow.
4. Mounting Mechanism: Depending on your CPU cooler, there may be different mounting mechanisms. Follow the manufacturer’s instructions to secure the cooler onto the mounting bracket. This typically involves using screws, clips, or a latch system to lock the cooler in place. Tighten the mounting screws in a cross-pattern to achieve even pressure.
5. Avoid Over-tightening: Exercise caution not to over-tighten the mounting screws, as excessive pressure can damage the CPU or motherboard. Follow the manufacturer’s recommended torque specifications, ensuring a secure and balanced installation.
6. Connect Cooling Fan: If the CPU cooler has an attached fan, connect it to the appropriate motherboard fan header. Ensure the fan cable is securely plugged in, allowing it to operate and cool the CPU effectively.
7. Check Clearance and Orientation: Once the CPU cooler is installed, double-check that there is adequate clearance around the CPU socket area. Ensure no cables, components, or obstructions interfere with the cooler’s operation. Additionally, make sure the cooler is properly aligned and sits flat on the CPU surface.
By following these steps, you can securely attach the CPU cooler to your motherboard. With the cooler properly installed, it’s time to move on to the final step: conducting checks and testing the system.
Step 5: Final Checks and Testing
Before considering the CPU cooler and thermal paste installation complete, it’s important to conduct some final checks and perform system testing. These steps ensure that everything is in order and that the cooling system is functioning correctly. Follow these steps for the final checks and testing:
1. Review Connections: Double-check all the connections, including the CPU fan cable, power cables, and any other components that were disconnected during the installation. Ensure everything is securely connected and properly seated.
2. Replace the Side Panel: If you removed the computer’s side panel during the installation process, reattach it securely. This helps ensure proper airflow within the case and prevents any dust or debris from entering the system.
3. Power On the System: Connect the power cable and power on your computer. Listen for any unusual sounds or vibrations coming from the CPU cooler. If you notice anything out of the ordinary, such as loud or irregular fan noises, double-check the installation and connections.
4. Monitor CPU Temperatures: After the system boots up, monitor the CPU temperatures using software or the BIOS. Ensure that the CPU stays within acceptable temperature ranges during idle and under load conditions. Higher temperatures under load are normal; however, excessively high temperatures or rapid temperature spikes may indicate an installation or cooling issue.
5. Stress Test the CPU: To further test the cooling system’s effectiveness, consider running a stress test on the CPU. Several software applications, such as Prime95 or AIDA64, simulate high CPU loads. Monitor the temperatures during the stress test to ensure they remain within safe ranges and do not exceed the CPU’s thermal specifications.
6. Monitor Performance and Stability: Use the computer as you normally would and observe the overall performance and stability. Ensure that the system operates smoothly, without any signs of overheating, stuttering, or freezing. Performance issues or instability may indicate inadequate cooling or incorrect installation.
7. Periodic Maintenance: Lastly, remember that over time, dust and debris can accumulate on the CPU cooler and affect its performance. Regularly clean the cooler and its fans to maintain optimal cooling efficiency. Follow the manufacturer’s guidelines for cleaning and maintenance to ensure longevity and reliability.
By following these final checks and conducting system testing, you can confidently ensure that the CPU cooler and thermal paste installation are successful. Enjoy a well-cooled and reliable system for all your computing needs!
Conclusion
Congratulations! You have successfully learned how to apply a CPU cooler and thermal paste. By following the step-by-step guide outlined in this article, you have acquired the knowledge and skills to ensure optimal thermal management for your CPU.
Properly applying a CPU cooler and thermal paste is crucial for maintaining the temperature of your CPU within safe limits, preventing overheating, and optimizing its performance. A well-cooled CPU leads to improved system stability, increased longevity, and enhanced overall computing experience.
Throughout this guide, we discussed the importance of CPU coolers and thermal paste, their functions, and why it is necessary to apply them correctly. We also covered the preparation steps, removal of the old CPU cooler and thermal paste, cleaning the CPU and heatsink surfaces, applying the fresh thermal paste, attaching the CPU cooler, performing final checks, and conducting system testing.
Remember, when working with delicate components like CPUs and thermal paste, always exercise caution, follow manufacturer instructions, and take antistatic precautions. Handle the components carefully to prevent any damage during installation.
Lastly, periodic maintenance is essential to maintain optimal cooling performance. Regularly clean the CPU cooler and its fans to remove dust and debris accumulation. This will help to ensure continued efficient heat dissipation and extend the lifespan of your CPU.
Now that you have completed the installation and testing process, enjoy the benefits of a well-cooled CPU and an optimized computing experience. Whether you’re gaming, video editing, or performing intensive tasks, you can now have confidence in knowing that your CPU is running at its best.
Thank you for following this guide, and we hope it has been helpful in your CPU cooler and thermal paste installation journey. Happy computing!