Introduction
Welcome to the world of Chromebooks, where simplicity and efficiency meet. Chromebooks have gained popularity in recent years due to their fast and secure operating system, seamless integration with Google services, and affordable price tags. One of the key components that make Chromebooks so efficient is the solid-state drive (SSD) that they rely on for storage.
SSDs, unlike traditional hard disk drives (HDDs), use flash memory to store data. This means faster data access, improved boot times, and a more responsive overall experience. However, as with any storage device, SSDs can fail or become full over time. In such cases, it may be necessary to replace the SSD in your Chromebook to ensure optimal performance.
In this guide, we will walk you through the process of replacing a solid-state drive in a Chromebook. Whether you’re looking to upgrade to a larger capacity SSD or simply need to replace a faulty one, this step-by-step tutorial will provide you with the knowledge and guidance you need to get the job done.
Before we dive into the nitty-gritty of SSD replacement, it’s important to note that not all Chromebooks allow for user-replaceable SSDs. Some models have the SSD soldered directly onto the motherboard, making it difficult or impossible to replace. Therefore, it’s crucial to determine if your Chromebook has a replaceable SSD before proceeding.
Now that you have a brief overview of what we’ll be covering, let’s begin by exploring how to determine if your Chromebook’s SSD is replaceable.
Understanding Solid State Drives (SSDs)
Before we delve into the process of replacing your Chromebook’s SSD, it’s essential to have a basic understanding of what a solid-state drive is and how it differs from traditional hard disk drives (HDDs).
A solid-state drive, often referred to as an SSD, is a storage device that uses flash memory technology to store data. Unlike HDDs, which utilize spinning disks and moving parts, SSDs have no moving components. Instead, they rely on integrated circuits to store data electronically.
One of the main advantages of SSDs over HDDs is their speed. The absence of mechanical components allows SSDs to access and retrieve data much faster, resulting in improved overall performance and quicker boot times. This can be especially beneficial for Chromebooks, as it enables a faster and more responsive user experience.
Additionally, SSDs are more resistant to physical shock and have a lower risk of data loss due to impact or accidental drops. This makes SSDs a more reliable choice for portable devices like Chromebooks.
Another significant benefit of SSDs is their energy efficiency. Compared to traditional HDDs, SSDs consume less power, resulting in improved battery life for Chromebooks. This is especially important for users who rely on their Chromebooks for extended periods without access to a power source.
One potential downside of SSDs is their limited lifespan. While modern SSDs are designed to be durable and reliable, they do have a finite number of write cycles. However, for typical usage scenarios, this is not a concern, as SSDs are expected to last for several years before reaching their rated lifespan.
Overall, solid-state drives offer numerous advantages over traditional HDDs, including faster speed, enhanced durability, improved energy efficiency, and a more responsive user experience. Understanding these benefits is crucial when considering whether to upgrade or replace the SSD in your Chromebook.
Now that we have a better understanding of SSDs, let’s move on to the next section, where we’ll discuss how to determine if your Chromebook’s SSD is replaceable.
How to Determine if Your Chromebook’s SSD is Replaceable
Not all Chromebooks allow for user-replaceable SSDs. Some models have the SSD soldered directly onto the motherboard, making it impossible to upgrade or replace without professional help. Therefore, before proceeding with the SSD replacement process, it’s crucial to determine if your Chromebook’s SSD is replaceable. Here are a few methods to help you find out:
- Check the manufacturer’s documentation: Start by referring to your Chromebook’s user manual or the manufacturer’s website. Look for information regarding upgradeability or replaceability of storage components. If it states that the SSD can be replaced, you’re good to go.
- Research online: Browse the internet for your specific Chromebook model and look for user forums or community discussions. Often, fellow Chromebook users will share their experiences or provide instructions on how to replace the SSD on your particular model.
- Physically check the Chromebook: Some Chromebooks have easily accessible upgrade panels on the bottom, allowing you to remove and replace the SSD without disassembling the entire device. Look for any markings or indications that suggest the presence of an upgrade panel.
- Contact the manufacturer or support: If you are unable to find conclusive information about the replaceability of your Chromebook’s SSD, it’s best to reach out to the manufacturer or their support team. They will be able to provide you with accurate information regarding the SSD’s replaceability.
It’s important to note that if your Chromebook’s SSD is not replaceable, attempting to open the device and replace the SSD could potentially damage it or void your warranty. Therefore, it’s crucial to proceed with caution and seek professional assistance if necessary.
Once you have determined that your Chromebook’s SSD is indeed replaceable, you can proceed with the next steps of preparing your workspace and backing up your data, which we will discuss in the upcoming sections.
What You Will Need
Before you begin the process of replacing your Chromebook’s SSD, it’s important to gather the necessary tools and equipment. Here’s a list of what you will need:
- Replacement SSD: Ensure that you have a compatible replacement SSD for your Chromebook. Research your specific Chromebook model to determine the type of SSD it requires. You can find compatible SSDs from reputable manufacturers or through official retailers.
- Small screwdriver set: Most Chromebooks require a small Phillips or Torx screwdriver to remove the screws that secure the back cover in place. Check the user manual or research online to determine the specific screwdriver type needed for your Chromebook.
- Anti-static wrist strap: While optional, an anti-static wrist strap can help protect your Chromebook from electrostatic discharge (ESD) during the disassembly and assembly process. This is especially important if you’re working on a carpeted surface or in a static-prone environment.
- Clean and static-free workspace: Find a clean and static-free area to work on your Chromebook. Ideally, use a table or desk with ample space to lay out the components and screws properly.
- External storage device or cloud backup: Before you begin the SSD replacement, ensure that you have backed up all your important data. You can use an external storage device like a USB flash drive or an external hard drive. Alternatively, you can choose to back up your data to a cloud storage service like Google Drive.
- Patience and caution: SSD replacement requires careful handling and precision. Take your time and proceed with caution to avoid damaging any components or connectors during the process.
Having these tools and equipment readily available will help you streamline the SSD replacement process and ensure a smooth transition to the new SSD.
Now that you know what you need, let’s move on to the crucial step of backing up your data before proceeding with the SSD replacement.
Step 1: Back Up Your Data
Before you embark on the process of replacing the SSD in your Chromebook, it is crucial to back up all your important data. This step ensures that none of your files or settings will be lost during the SSD replacement process. Follow these steps to back up your data:
- Connect an external storage device: Plug in an external storage device, such as a USB flash drive or an external hard drive, to your Chromebook.
- Open the Files app: Launch the Files app on your Chromebook. You can find it in the app launcher or on the bottom shelf.
- Select the files you want to back up: Navigate to the files and folders that you want to back up. You can select individual files or entire folders by clicking and dragging the mouse pointer over them.
- Copy the selected files to the external storage device: Right-click on the selected files and choose the “Copy” option. Then, navigate to the external storage device in the Files app and right-click on an empty space. Select the “Paste” option to transfer the files to the external storage device.
- Repeat the process for all desired files and folders: If you have multiple files or folders to back up, repeat steps 3 and 4 until you have copied all the necessary data to the external storage device.
- Verify the backups: Once the copying process is complete, double-check the contents of the external storage device to ensure that all your important files are safely backed up.
In addition to external storage devices, you can also consider backing up your data to a cloud storage service, such as Google Drive. This option allows you to access your files from any device with an internet connection and provides an extra layer of security in the event of hardware failure or loss.
Backing up your data before replacing the SSD is crucial because the replacement process involves removing the old SSD, which contains all your data, and installing a new one. By backing up your data, you can restore it to the new SSD once the replacement is complete without losing any important files or settings.
Now that you have successfully backed up your data, you are ready to move on to the next step: preparing your workspace for the SSD replacement process.
Step 2: Prepare Your Workspace
Before you start replacing the solid-state drive (SSD) in your Chromebook, it’s important to prepare your workspace to ensure a smooth and organized process. Follow these steps to properly set up your workspace:
- Find a clean and well-lit area: Choose a location that provides ample space to work comfortably and is well-lit to help you see small components and screws clearly.
- Clean your workspace: Clear the area of any clutter or unnecessary items. A clean workspace will help you keep track of all the components and tools you’ll be using during the replacement process.
- Use an anti-static mat or surface: If available, use an anti-static mat or surface to prevent static electricity buildup, which can potentially damage electronic components. This is especially important if you’re working on a carpeted surface.
- Put on an anti-static wrist strap: For extra protection against static electricity, you can wear an anti-static wrist strap. This helps channel any static electricity away from sensitive hardware components.
- Organize your tools and equipment: Gather all the necessary tools and equipment you’ll be using, such as screwdrivers and the replacement SSD. Arrange them in a way that allows easy access during the process.
- Keep track of screws and small components: Use a small tray or container to hold screws and small components as you remove them from your Chromebook. This prevents them from getting lost or mixed up.
- Have a clean cloth or towel handy: Use a clean cloth or towel to place your Chromebook on during the disassembly process. This helps protect the Chromebook’s casing from scratches or damage.
By preparing your workspace before starting the SSD replacement, you create an environment that promotes organization, cleanliness, and safety. This will help you stay focused on the task at hand and minimize the risk of misplacing or damaging any components during the process.
Now that your workspace is ready, you can proceed to the next step: removing the back cover of your Chromebook.
Step 3: Remove the Back Cover of Your Chromebook
Now that you have prepared your workspace, it’s time to remove the back cover of your Chromebook. The back cover provides access to the internal components, including the solid-state drive (SSD). Follow these steps to safely remove the back cover:
- Power off and unplug your Chromebook: Shut down your Chromebook completely and disconnect any power source or peripheral devices.
- Flip your Chromebook upside down: Carefully turn your Chromebook upside down so that the bottom side is facing up.
- Locate the screws securing the back cover: Look for the screws that hold the back cover in place. These screws are usually marked with small icons that resemble a lock or a screwdriver.
- Use the appropriate screwdriver: Select the correct screwdriver based on the type of screws used in your Chromebook. It’s usually a small Phillips or Torx screwdriver.
- Remove the screws: Carefully unscrew all the screws securing the back cover. Place them in a safe container or on a magnetic tray to prevent them from getting lost.
- Gently remove the back cover: With the screws removed, gently lift the back cover using your fingertips or a plastic opening tool. Be cautious not to force or bend the cover, as it may be attached with plastic clips.
- Set aside the back cover: Once the back cover is detached, set it aside in a safe and clean location.
It’s important to handle the back cover with care to avoid any damage. Some Chromebooks may have delicate cables or connectors attached to the back cover, so exercise caution when removing it.
With the back cover successfully removed, you now have access to the internal components of your Chromebook, including the existing solid-state drive. The next step will be to locate and disconnect the existing SSD, which we will discuss in the upcoming section.
Step 4: Locate and Disconnect the Existing SSD
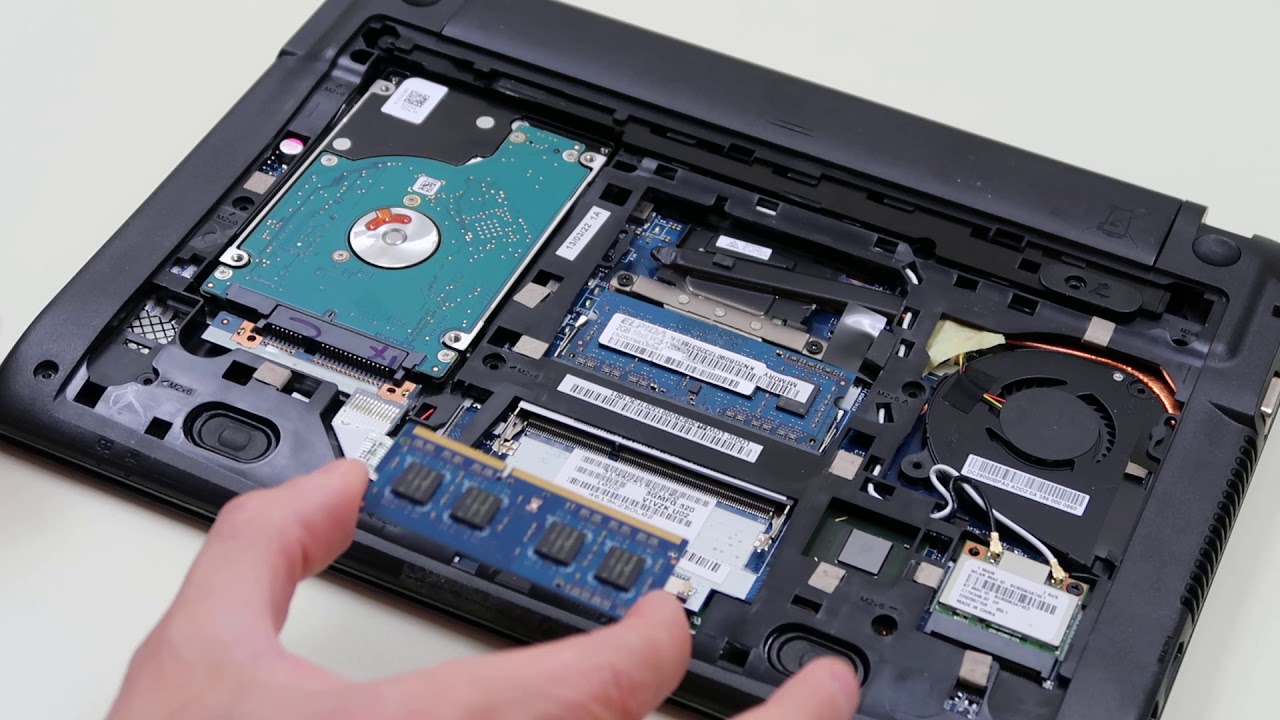
With the back cover of your Chromebook removed, it’s time to locate and disconnect the existing solid-state drive (SSD). Follow these steps to safely locate and disconnect the SSD:
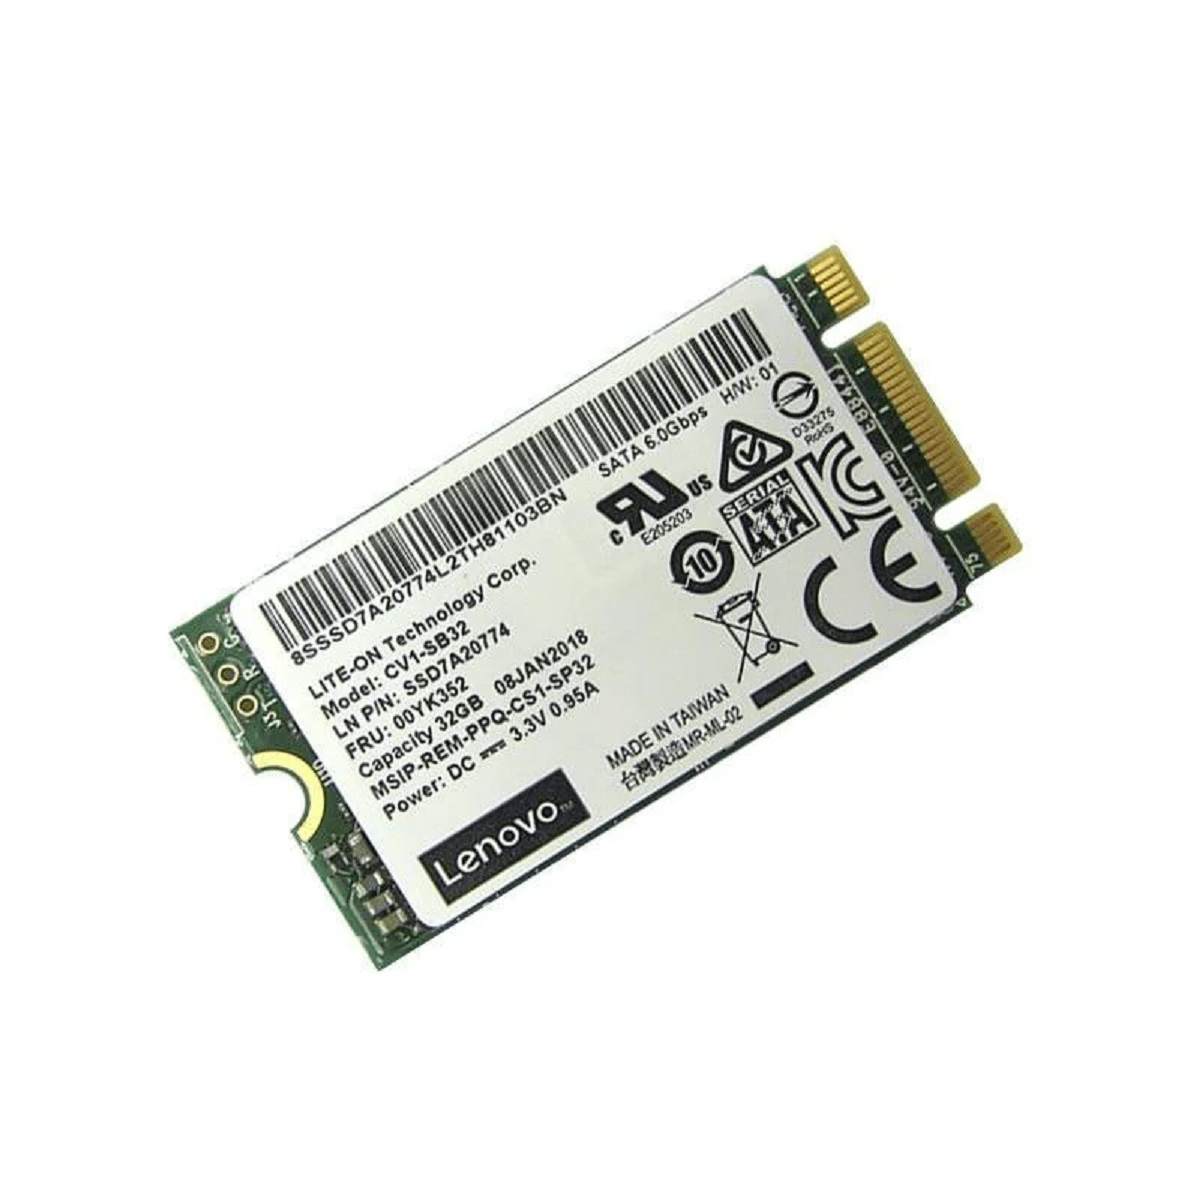
- Locate the SSD: Look for a small rectangular-shaped module that resembles a circuit board. This is the SSD. It may be positioned near the center or edge of the Chromebook, depending on the model.
- Identify the connector: The SSD is connected to the motherboard using a connector. It may be a tiny plastic or metal piece with pins or slots. Take a moment to familiarize yourself with the connector and its orientation.
- Disconnect the SSD: Gently and firmly pull the connector away from the SSD. Be careful not to pull on the connector cable, as it may get damaged. If the connector has a locking mechanism, such as a tab or latch, use your fingernail or a small tool to release it before disconnecting.
- Set aside the existing SSD: Once the SSD is disconnected, carefully set it aside in a safe place, away from static and other potential hazards.
It’s important to handle the SSD and its connector delicately to avoid any damage. If you encounter any difficulty disconnecting the SSD, consult the user manual or search online for specific instructions related to your Chromebook model.
By disconnecting the existing SSD, you have completed a crucial step in the replacement process. The upcoming step will guide you through installing the new SSD into your Chromebook, so you can enjoy improved performance and storage capacity.
Step 5: Install the New SSD
With the existing solid-state drive (SSD) disconnected, it’s time to install the new SSD into your Chromebook. Follow these steps to safely install the new SSD:
- Take out the new SSD: Carefully remove the new SSD from its packaging, being mindful of any protective covers or static-sensitive components.
- Identify the connector and its orientation: Inspect the connector on the new SSD and its corresponding slot on the Chromebook’s motherboard. Take note of the orientation of the connector to ensure proper alignment during installation.
- Align the new SSD with the slot: Position the new SSD in the appropriate slot, aligning the connector with the corresponding slot on the motherboard. Ensure a snug fit without applying excessive force.
- Connect the new SSD: Gently push the new SSD’s connector into the slot until it is fully seated. If there is a locking mechanism, such as a tab or latch, ensure it engages securely to hold the connector in place.
- Secure the new SSD: If necessary, use screws or other fasteners provided with the new SSD to secure it in place. Refer to the manufacturer’s instructions or guidelines for specific information on securing the SSD.
As you install the new SSD, it’s important to handle it with care, avoiding unnecessary pressure or rough handling that may damage the components. Take your time to ensure proper alignment, making sure the connector is fully inserted and securely seated in the slot.
Once the new SSD is installed and secured, it’s time to move on to the next step: reassembling your Chromebook.
Step 6: Reassemble Your Chromebook
With the new solid-state drive (SSD) installed, it’s time to reassemble your Chromebook. Follow these steps to ensure the proper reassembly of your device:
- Retrieve the back cover: Locate the back cover that was set aside earlier and ensure it is clean and free from any debris or loose screws.
- Align the back cover: Carefully align the back cover with the screw holes on the chassis of your Chromebook. Ensure that all edges and corners are properly aligned before proceeding.
- Secure the back cover: Insert and tighten all the screws that were removed in the earlier steps using the appropriate screwdriver. Start with one corner and work your way around, alternating diagonally to ensure even pressure on the back cover.
- Check the fit: Once all the screws are tightened, gently press down on the back cover to ensure it is securely in place. It should feel flush and not protrude or wobble.
During the reassembly process, it’s essential to exercise caution to avoid overtightening the screws, which can lead to damage or cracking of the back cover. Ensure that all screws are securely fastened but not excessively tightened.
With the back cover reassembled, your Chromebook is almost ready for use. However, there is one final step to complete the SSD replacement process: restoring your data and powering on your Chromebook.
Step 7: Restore Your Data and Power On Your Chromebook
You’re almost done! Now that you have successfully reassembled your Chromebook, it’s time to restore your data and power it on. Follow these steps to complete the SSD replacement process:
- Connect the external storage device: If you backed up your data to an external storage device, connect it to your Chromebook.
- Power on your Chromebook: Press the power button on your Chromebook to turn it on. You may need to hold down the power button for a few seconds.
- Configure your Chromebook: Follow the on-screen prompts to set up your Chromebook. Select your language, connect to a Wi-Fi network, and sign in with your Google account.
- Restore your data: Once you’re logged in, use the Files app to navigate to the external storage device where you backed up your data. Copy the files and folders back to your Chromebook’s local storage.
- Install apps and extensions: If you had any apps or extensions installed on your Chromebook, you may need to reinstall or re-enable them from the Chrome Web Store.
- Verify functionality: Test the functionality of your Chromebook by opening various apps, accessing files, and browsing the web. Ensure that everything is working properly.
During the data restoration process, it’s important to take your time and ensure that all files and settings are transferred successfully. Double-check that nothing is missing or corrupted.
Congratulations! You have successfully replaced the solid-state drive (SSD) in your Chromebook. Your Chromebook’s performance and storage capacity have been improved, providing you with a faster and more efficient computing experience.
Remember to keep your old SSD in a safe place in case you need to retrieve any data or use it as a backup in the future.
Thank you for following this step-by-step guide. We hope it has been helpful in assisting you with the SSD replacement process. Enjoy your newly upgraded Chromebook!
Conclusion
Replacing the solid-state drive (SSD) in your Chromebook can be a worthwhile endeavor to enhance its performance and storage capacity. By following the step-by-step process outlined in this guide, you can successfully replace the SSD and enjoy a faster and more efficient computing experience.
We began by understanding the importance of SSDs in Chromebooks and their advantages over traditional hard disk drives. We then discussed how to determine if your Chromebook’s SSD is replaceable, ensuring that you won’t encounter any unexpected roadblocks during the replacement process.
We then covered the essential tools and equipment you need, and emphasized the importance of backing up your data before proceeding. With a clean workspace, you were guided through removing the back cover, locating and disconnecting the existing SSD, installing the new SSD, and reassembling your Chromebook.
The final steps involved restoring your data and powering on your Chromebook, ensuring a seamless transition to the new SSD. By following these steps carefully, you have successfully completed the SSD replacement process.
We hope this guide has provided you with the knowledge and confidence to replace the SSD in your Chromebook. Remember to handle all components with care and take your time to ensure proper installation. Enjoy your upgraded Chromebook and the improved performance it brings!