What is Roku?
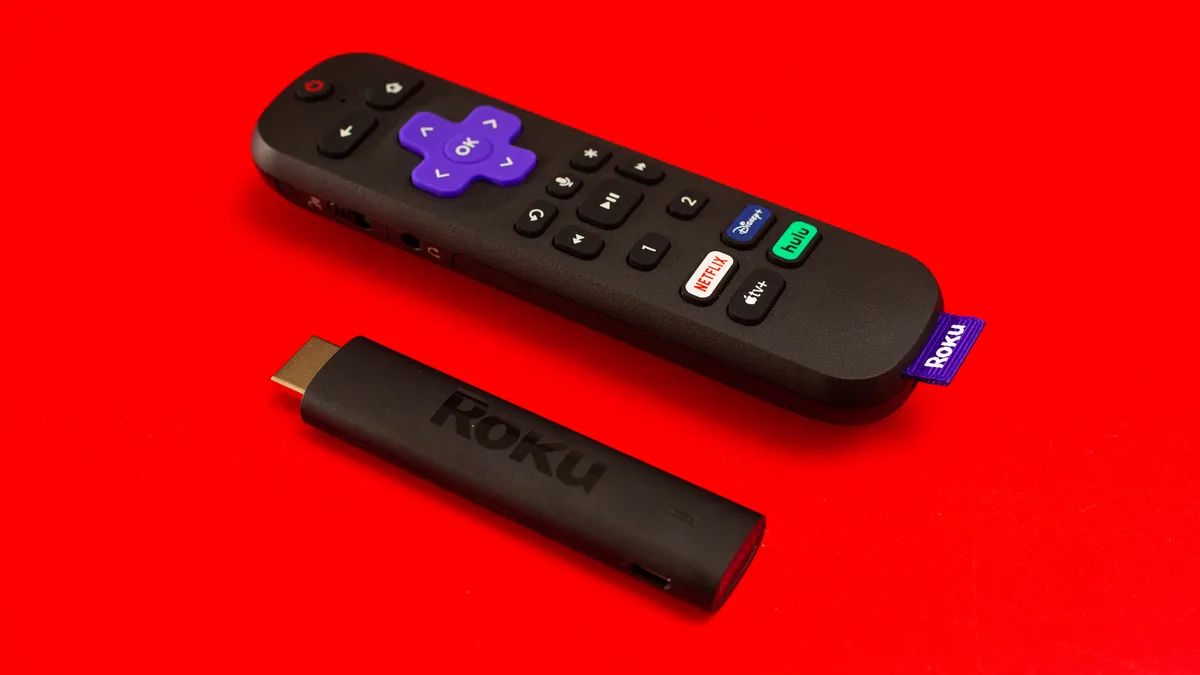
Roku is a popular streaming media player that allows you to access a wide range of online content and stream it directly to your television. It provides an easy and convenient way to enjoy your favorite movies, TV shows, music, and more, all from the comfort of your living room. Roku offers a variety of streaming devices, ranging from compact streaming sticks to robust set-top boxes, ensuring there’s an option suitable for every user’s needs.
One of the biggest advantages of Roku is its versatility. With Roku, you can access a multitude of streaming services, including popular platforms like Netflix, Hulu, Amazon Prime Video, and Disney+. Additionally, Roku offers a vast selection of free channels, providing a great variety of content without any subscription fees. You can also find channels dedicated to specific interests, such as sports, news, cooking, and more, allowing you to tailor your entertainment experience to your preferences.
Setting up and using a Roku device is incredibly simple, even for those who may not be tech-savvy. All you need is a stable internet connection and a compatible TV to get started. Roku uses a user-friendly interface that is easy to navigate, making it convenient for users of all ages and technical backgrounds.
To enjoy Roku, you will need to connect the streaming device to your TV and the internet. Once connected, you can activate your Roku device and begin browsing and adding channels to your personalized home screen. Roku offers a vast library of channels, both free and paid, ensuring there is something for everyone. Whether you’re a movie buff, a sports enthusiast, or a fan of binge-watching TV shows, Roku has you covered.
In the next sections, we will guide you through the step-by-step process of setting up your Roku device, connecting it to your TV and the internet, activating it, adding channels, and customizing your Roku home screen. We will also provide troubleshooting tips for common Roku issues. So, let’s dive in and get your Roku up and running in no time!
Setting Up Your Roku Device
Setting up your Roku device is quick and straightforward. Follow these simple steps to get started:
- Unbox your Roku device: Carefully remove your Roku device from the packaging. Inside, you will find the Roku device, a power adapter, a remote control, and batteries.
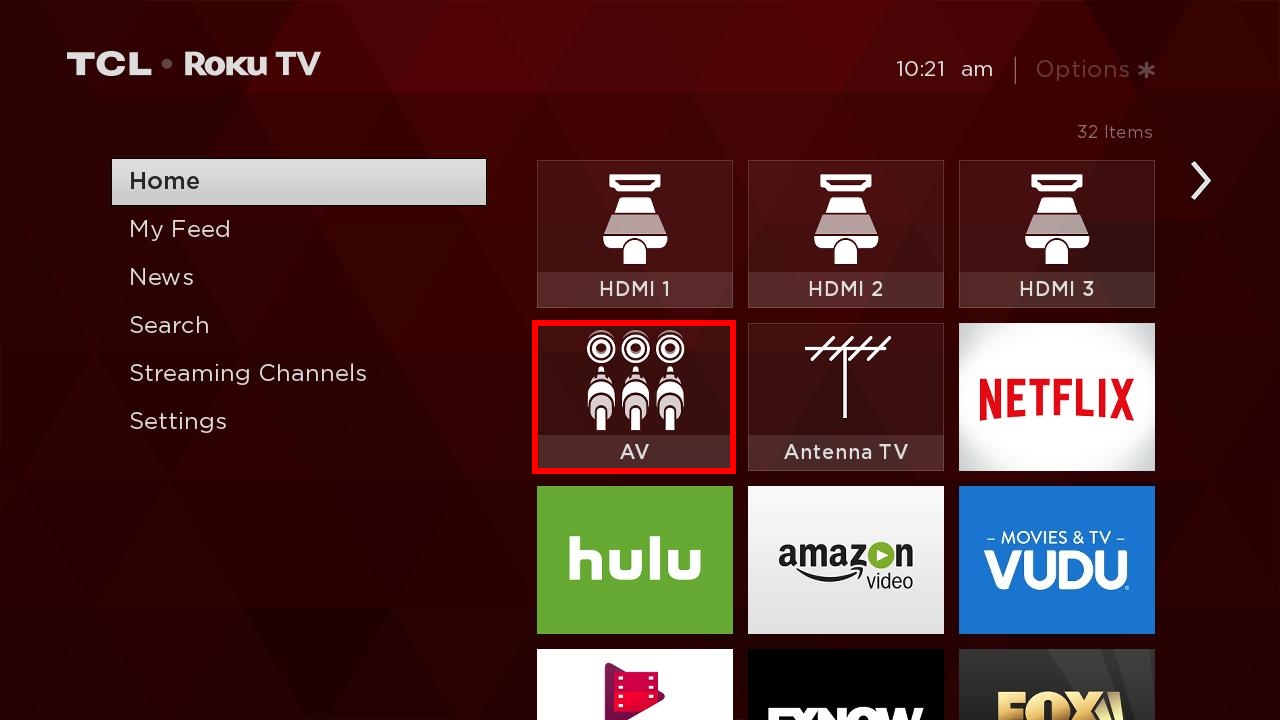
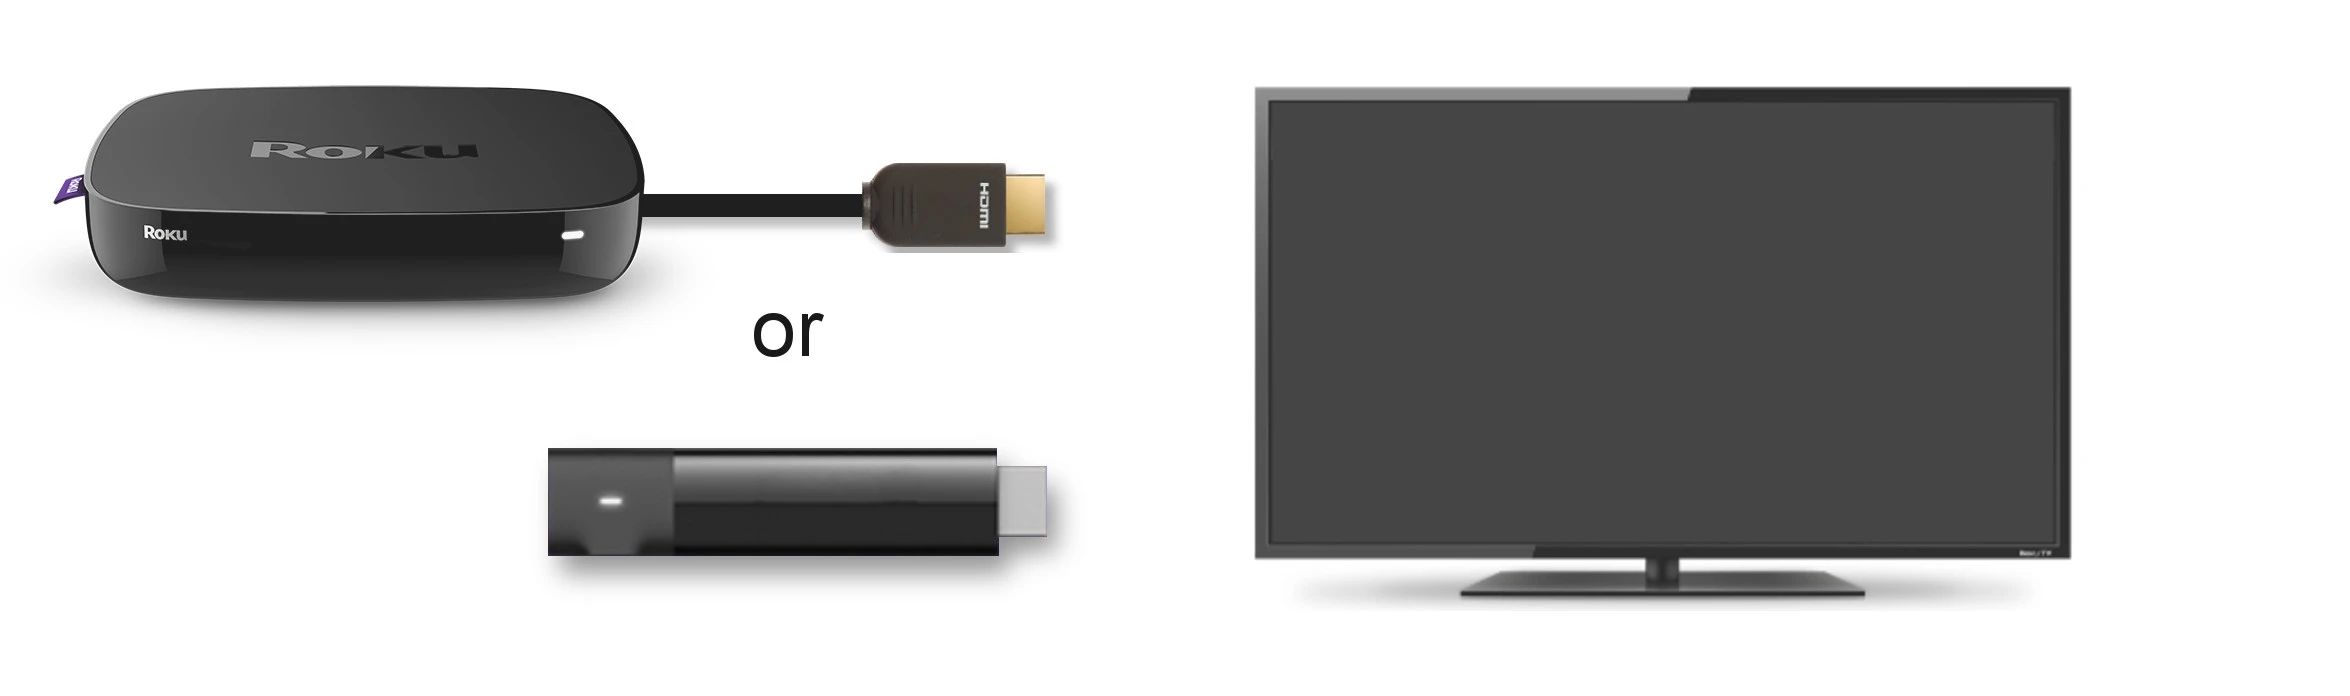
- Connect your Roku device to your TV: Depending on the model of your Roku device, you can connect it to your TV using an HDMI cable or an AV cable. Simply plug one end of the cable into the corresponding port on your TV and the other end into the Roku device.
- Power up your Roku device: Connect the power adapter to your Roku device and plug it into a power outlet. Your Roku device should power on automatically.
- Set up the remote control: Insert the batteries into the remote control provided with your Roku device. Follow the on-screen instructions to pair the remote with your Roku device.
- Select the language: Once your Roku device is on, select your preferred language using the remote control.
- Connect to your Wi-Fi network: Your Roku device will automatically search for available Wi-Fi networks. Select your network from the list and enter the Wi-Fi password when prompted. If you have an Ethernet connection available, you can also connect your Roku device using an Ethernet cable.
- Update your Roku device: After connecting to the internet, your Roku device will check for any available software updates. It is recommended to update your device to ensure it has the latest features and enhancements.
- Create or sign in to your Roku account: To activate your Roku device, you will need to create a Roku account. Visit the Roku website on your computer or smartphone and follow the instructions to create an account. If you already have a Roku account, simply sign in.
- Enter the activation code: Once you have signed in to your Roku account, your Roku device will display an activation code. Enter this code on the Roku website to link your device to your account.
- Complete the setup: After entering the activation code, your Roku device will finalize the setup process. You will be prompted to customize your settings, such as display type and screen mirroring options.
Once you have completed these steps, your Roku device is ready to use. You can now start adding channels, exploring the Roku Channel Store, and enjoying your favorite content on your TV screen. Stay tuned for the next section, where we will discuss how to connect your Roku device to the internet.
Connecting Your Roku Device to Your TV
To enjoy the streaming capabilities of your Roku device, you need to connect it to your TV. Follow these steps to ensure a seamless connection:
- Identify the available ports on your TV: Take a look at the back or side of your TV to find the available HDMI or AV ports. Make note of which port you will be using for your Roku device.
- Choose the appropriate cable: Depending on your Roku model and available TV ports, select the appropriate cable to connect your Roku. Most recent Roku models support HDMI connections, while older models may require AV cables.
- Plug one end of the cable into your Roku device: Connect one end of your chosen cable to the corresponding port on your Roku device. Ensure a secure connection, and avoid forcing the cable if it doesn’t fit.
- Connect the other end to your TV: Insert the other end of the cable into the HDMI or AV port on your TV. Again, ensure a secure connection.
- Power on your TV and Roku device: Once the cables are securely connected, turn on your TV and Roku device. Use the TV remote to select the input source that corresponds to the Roku device. For HDMI connections, choose the HDMI input that matches the port you connected the Roku device to. For AV connections, select the appropriate AV input.
- Pair your Roku remote: After your Roku device powers on, you may need to pair the remote control with the device. Follow the on-screen instructions to do so. If your Roku device and remote are already paired, you can skip this step.
- Follow the on-screen setup instructions: The Roku device will guide you through the setup process on your TV screen. This includes selecting the language, connecting to the internet, and activating your Roku device.
- Check the TV display: If all the connections were successful, you should see the Roku setup screen on your TV. If not, double-check the connections and ensure that the input source on your TV is correctly set.
Once the setup process is complete, you’re ready to start using your Roku device. You can navigate the user-friendly interface using the included remote control, access the Roku Channel Store, and begin streaming your favorite content on the big screen of your TV. In the next section, we will guide you through the process of connecting your Roku device to the internet.
Connecting Your Roku Device to the Internet
To fully enjoy the streaming capabilities of your Roku device, you need to connect it to the internet. Follow these steps to connect your Roku device to your Wi-Fi network:
- Power on your Roku device: Make sure your Roku device is turned on and connected to your TV as outlined in the previous section.
- Navigate to the settings menu: Use the Roku remote to navigate to the home screen, then scroll and select the settings option on the menu.
- Select “Network”: Within the settings menu, select the “Network” option to proceed to the network settings.
- Choose your network: From the network menu, select “Wireless (Wi-Fi)” to begin the process of connecting your Roku device to a Wi-Fi network.
- Scan for available networks: Your Roku device will begin scanning for available Wi-Fi networks in your area. Wait for the scan to complete.
- Select your network: Once the scan is complete, a list of available networks will appear on the screen. Use the remote to highlight your network from the list and press the “OK” button to select it.
- Enter your Wi-Fi password: If your Wi-Fi network is secured, you will be prompted to enter the Wi-Fi password. Use the Roku remote to enter the password using the on-screen keyboard. Double-check for accuracy before proceeding.
- Connect to the network: After entering the password, select the “Connect” button to establish a connection between your Roku device and the Wi-Fi network. Wait for the device to connect.
- Test the connection: Once connected, your Roku device will perform a connection test to ensure it is fully connected to the internet. It will display the connection status on the screen, indicating whether it was successful or not.
If the connection test is successful, your Roku device is now connected to the internet. You can proceed to the next step of activating your device. However, if the connection test fails, double-check your network name and password, ensure your Wi-Fi signal is strong, and try resetting your router if necessary.
In cases where an Ethernet connection is available, you can connect your Roku device directly to your router using an Ethernet cable instead of connecting to a Wi-Fi network. Simply connect one end of the Ethernet cable to your router and the other end to your Roku device, then follow the on-screen prompts to establish the connection.
Once your Roku device is connected to the internet, you can proceed to the activation process, which we will cover in the next section.
Activating Your Roku Device
Activating your Roku device is an essential step to access the wide range of content available on the platform. Follow these steps to activate your Roku device:
- Make sure your Roku device is connected to your TV and the internet, as described in the previous sections.
- Turn on your TV and navigate to the input source that corresponds to your Roku device.
- An activation code will appear on your TV screen. Take note of the code as you will need it during the activation process.
- On your computer or smartphone, open a web browser and visit the Roku website.
- Click on the “Sign In/Create Account” button to either sign in to your existing Roku account or create a new one. Follow the on-screen instructions to complete the process.
- Once you have signed in or created an account, you will be prompted to enter the activation code from your TV screen. Input the code accurately and click on the “Submit” button.
- Wait for the activation process to complete. Your Roku device will now be linked to your Roku account.
- On your TV screen, you will see a confirmation message indicating that your device has been successfully activated.
- To ensure a smooth activation process, make sure you have a stable internet connection. If you encounter any issues during activation, double-check your internet connection and ensure you entered the activation code correctly.
Once your Roku device is activated, you can start exploring the extensive library of channels available on the Roku Channel Store. From popular streaming services like Netflix and Hulu to free channels offering a variety of content genres, Roku provides a vast selection to cater to your entertainment preferences.
In the next section, we will discuss how to add channels to your Roku device, allowing you to personalize your streaming experience and access your favorite content with ease.
Adding Channels to Your Roku
One of the great features of Roku is its ability to add and customize channels to cater to your interests and preferences. Follow these steps to add channels to your Roku device:
- From the Roku home screen, navigate to the “Streaming Channels” option using your remote control.
- Once in the Roku Channel Store, you can browse through the various categories or use the search feature to find specific channels.
- Select a channel: When you find a channel you want to add, highlight it and press the “OK” button on your remote. This will open the channel details page.
- Add the channel: On the channel details page, click the “Add channel” or “Add” option to add the channel to your Roku device. If the channel is paid, you may be prompted for payment information or asked to subscribe to the service.
- Wait for the channel to install: Once you’ve selected “Add channel,” a prompt will appear indicating that the channel is being added. Wait for the installation to complete.
- Return to the Roku home screen: After the channel installation is complete, press the “Home” button on your remote to return to the Roku home screen.
- Locate your newly added channel: The added channel will appear at the end of your channel list on the Roku home screen. You can move its position by highlighting the channel and pressing the “Options” or “Star” button on your remote, then selecting the “Move channel” option.
- Repeat the process for additional channels: To add more channels, simply return to the Roku Channel Store and follow the same steps for each channel you want to add.
Roku offers a wide range of channels, both free and paid, catering to various interests such as movies, TV shows, sports, news, music, and more. You can personalize your Roku experience by adding channels that align with your preferences, ensuring you have plenty of content to enjoy at your fingertips.
It’s important to note that some channels may require a separate subscription or login credentials to access their content. Make sure to review the channel details and any associated costs or requirements before adding and accessing them on your Roku device.
In the next section, we will discuss how to customize your Roku home screen, allowing you to organize and manage your channels for optimal viewing pleasure.
Customizing Your Roku Home Screen
The Roku home screen serves as a hub for all your favorite channels and content. Customizing your home screen allows you to organize and manage your channels for a personalized and convenient streaming experience. Here’s how you can customize your Roku home screen:
- Access the Roku home screen: Press the “Home” button on your Roku remote to navigate to the home screen.
- Move channels: To rearrange the order of your channels, highlight a channel on the home screen, press the “Options” or “Star” button on your remote, and select “Move channel.” Use the directional buttons on your remote to move the channel to your desired position, then press “OK” to confirm.
- Create a channel shortcut: You can create shortcuts for your most frequently used channels to access them quickly. On the home screen, highlight a channel, press the “Options” or “Star” button, and select “Create shortcut.” The channel shortcut will appear at the top row of your home screen.
- Remove channels: If you want to remove a channel from your home screen, highlight the channel, press the “Options” or “Star” button, and select “Remove channel.” Confirm the removal when prompted.
- Create a channel group: To organize your channels into groups for easy navigation, highlight a channel, press the “Options” or “Star” button, and select “Create channel group.” Follow the on-screen instructions to name the group and add channels to it.
- Change theme or screensaver: Customize the look of your home screen by changing the theme or screensaver. From the home screen, go to “Settings” > “Theme” or “Screensaver” to select different options.
- Enable or disable “Featured Free” section: The “Featured Free” section on the home screen suggests free content from various channels. You can enable or disable this section by going to “Settings” > “Home Screen” > “Featured Free.”
- Manage recommendations: Roku provides personalized recommendations based on your viewing habits. To manage your recommendations, go to “Settings” > “Privacy” > “Advertising” and adjust your preferences.
By customizing your Roku home screen, you can arrange your channels in a way that suits your preferences and makes navigation effortless. Creating shortcuts, organizing channels into groups, and customizing the theme and screensaver can enhance your overall streaming experience.
Remember to explore the various settings and options available in the Roku device menu to further personalize your streaming experience. Tailor your Roku home screen to your liking and make the most of the wide range of content and features offered by Roku.
In the next section, we will address some common troubleshooting tips for Roku devices to help you resolve any issues you may encounter.
Troubleshooting Common Roku Issues
While Roku devices are known for their reliable performance, it’s not uncommon to experience occasional issues. Here are some common Roku issues and troubleshooting steps to help you resolve them:
- No power or connectivity issues:
- Ensure that the power adapter is securely plugged into both your Roku device and a working power outlet.
- Double-check all cable connections between the Roku device, TV, and any other devices in your setup.
- Try unplugging your Roku device and power cycling it by waiting for a few seconds before plugging it back in.
- If using Wi-Fi, ensure that your Roku device is within range of the wireless router and that the Wi-Fi signal is strong. Consider moving your router closer or using an Ethernet connection if possible.
- If you’re still experiencing issues, restart your router and modem to refresh the network connection.
- Internet connection problems:
- Make sure your Wi-Fi network name and password are entered correctly. Double-check for any typos or mistakes.
- If you’re using Wi-Fi, try moving your Roku device closer to the wireless router to improve the signal strength. Alternatively, consider using an Ethernet connection for a more stable connection.
- Restart your wireless router to resolve any temporary connectivity issues.
- Streaming issues:
- If you’re experiencing buffering or playback interruptions, ensure that your internet connection is stable and has sufficient bandwidth.
- Check if your Roku device and streaming service apps have the latest software updates installed.
- Restart your Roku device to clear any temporary issues affecting the streaming performance.
- If the issue persists, try lowering the video quality settings within the streaming app to reduce the demand on your internet connection.
- Audio or video problems:
- Make sure all cables connections are secure and properly inserted into the correct ports.
- Check the audio and video settings on both your Roku device and TV. Ensure they are set to the appropriate options (e.g., HDMI for video and the correct audio output option).
- Try changing the HDMI cable if you’re experiencing audio or video issues. A faulty cable can sometimes cause audio or video problems.
- If the issue continues, try a different HDMI port on your TV to rule out any port-related issues.
If none of the troubleshooting steps resolve your issue, visiting the Roku support website or contacting Roku customer support can provide you with additional assistance. They have resources and dedicated support agents to help you address specific issues and find the best solution.
By following these troubleshooting steps, you can resolve many common Roku issues and ensure a smooth streaming experience. Enjoy your favorite content without interruptions and make the most of your Roku device.
Conclusion
In conclusion, Roku devices offer a convenient and user-friendly way to stream your favorite content on your TV. From movies and TV shows to music and games, Roku provides a vast selection of channels to cater to your entertainment preferences. Whether you’re a casual viewer or a devoted binge-watcher, Roku has something for everyone.
Setting up your Roku device is a simple process that involves connecting it to your TV and the internet. The step-by-step instructions provided in this guide can help you get your Roku up and running in no time. Once activated, you can start adding channels, customizing your home screen, and exploring a world of content.
While Roku devices are generally reliable, it’s not unusual to encounter occasional issues. However, with the troubleshooting tips provided, you should be able to tackle common problems and enjoy uninterrupted streaming.
Remember to keep your Roku device and streaming apps updated to access the latest features and enhancements. Additionally, take advantage of the customization options available to personalize your Roku home screen and make your streaming experience even more enjoyable.
If you ever run into more complex issues or need further assistance, Roku provides excellent customer support and resources to help you out.
So, what are you waiting for? Start enjoying the convenience and entertainment that Roku has to offer. Sit back, relax, and stream your way to endless hours of entertainment with your Roku device.