Introduction
Welcome to the world of projector headlights! Whether you’re a car enthusiast or simply looking to improve the visibility and aesthetics of your vehicle, adjusting projector headlights is a key skill to master.
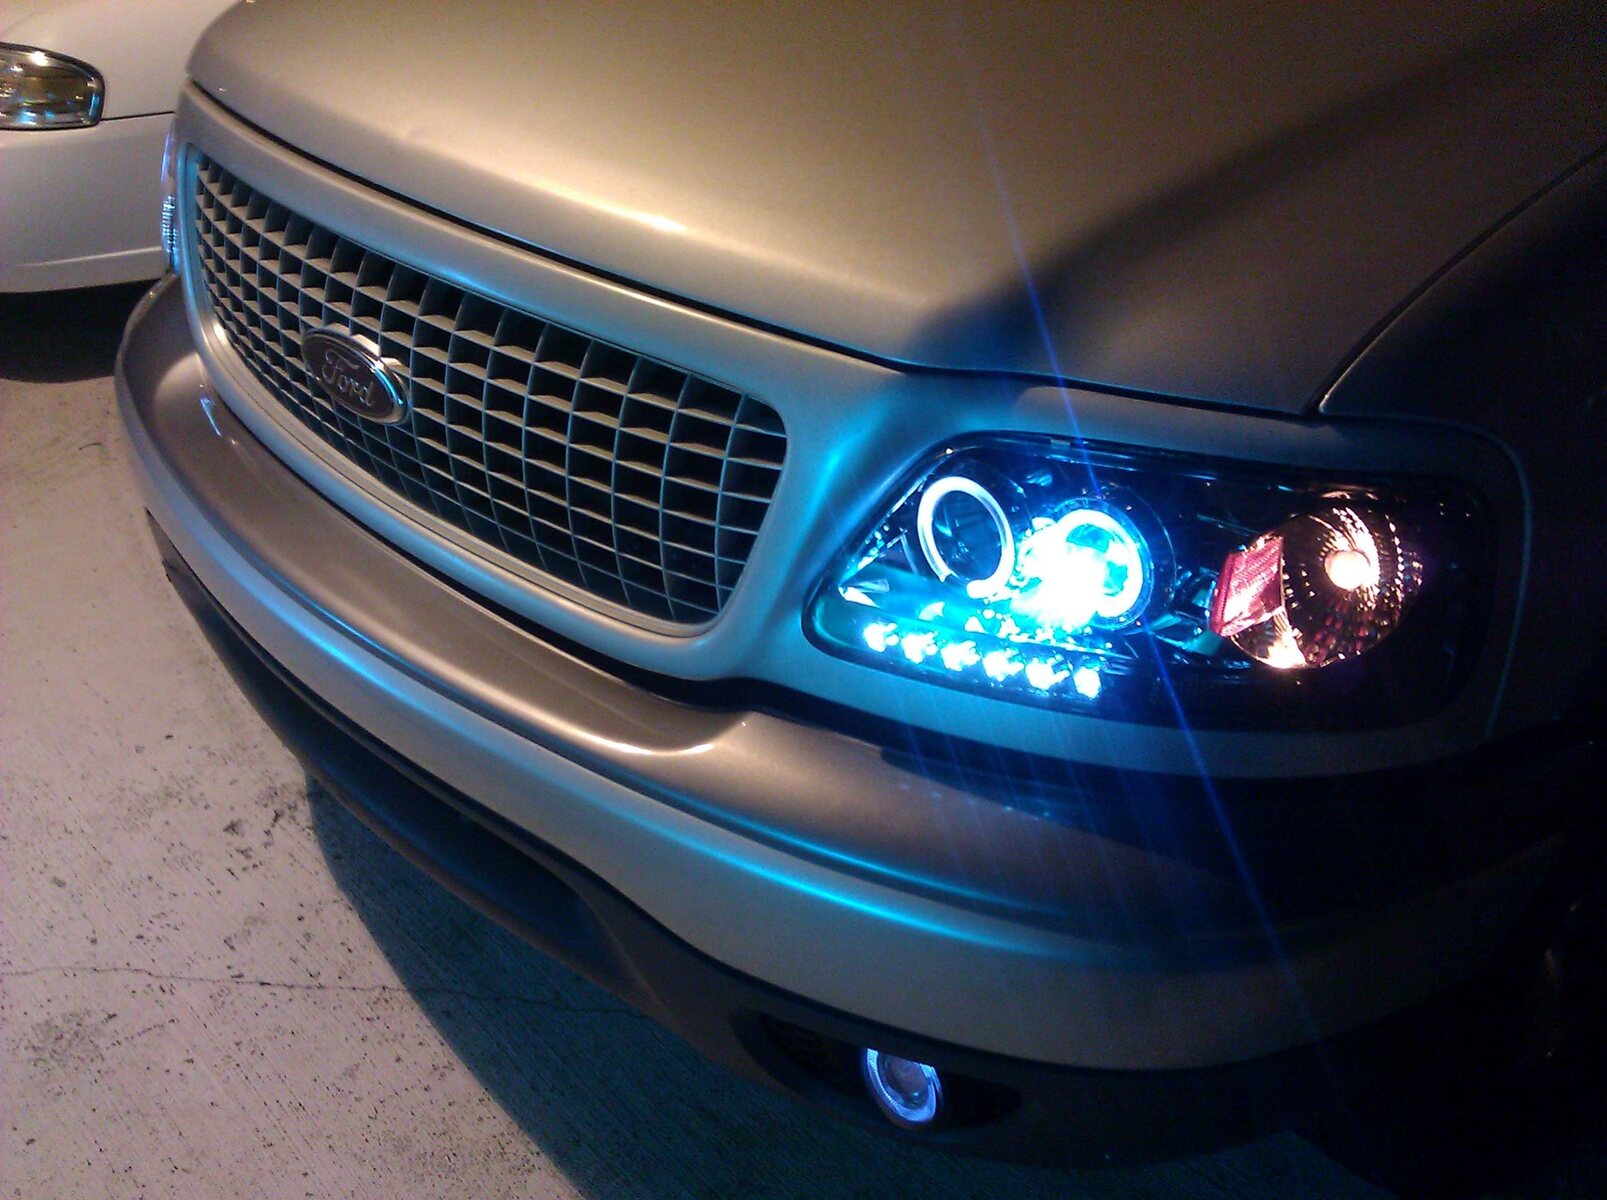
Projector headlights are a popular choice among car owners due to their superior lighting performance and stylish design. These headlights utilize a lens system that helps to focus and distribute the light in a precise and controlled manner, resulting in improved visibility on the road.
However, despite their advantages, misaligned projector headlights can be a nuisance on the road. Poorly aimed headlights can blind oncoming drivers or fail to properly illuminate the road ahead, compromising both your safety and that of others. Fortunately, adjusting projector headlights is a relatively simple process that can be done at home with a few basic tools.
In this article, we will guide you through the steps necessary to adjust projector headlights properly. Whether you’ve recently installed new headlights or noticed that your current ones are not aligned correctly, this guide will provide you with the knowledge and confidence to get the job done.
Before we dive into the specifics, it’s important to note that adjusting projector headlights may vary depending on the make and model of your vehicle. It’s always a good idea to consult your car’s manual for any specific instructions or precautions that may apply.
So, grab your tools and let’s get started on adjusting your projector headlights to ensure optimal visibility and safety on the road.
Understanding Projector Headlights
Before you begin adjusting your projector headlights, it’s essential to have a clear understanding of how they work. Unlike traditional reflector headlights, projector headlights consist of a lens system that provides a more focused and controlled beam of light.
The lens system in projector headlights helps to direct the light generated by the bulbs onto the road ahead, minimizing glare and maximizing visibility. This design ensures that the light is properly distributed, reducing the risk of blinding other drivers on the road.
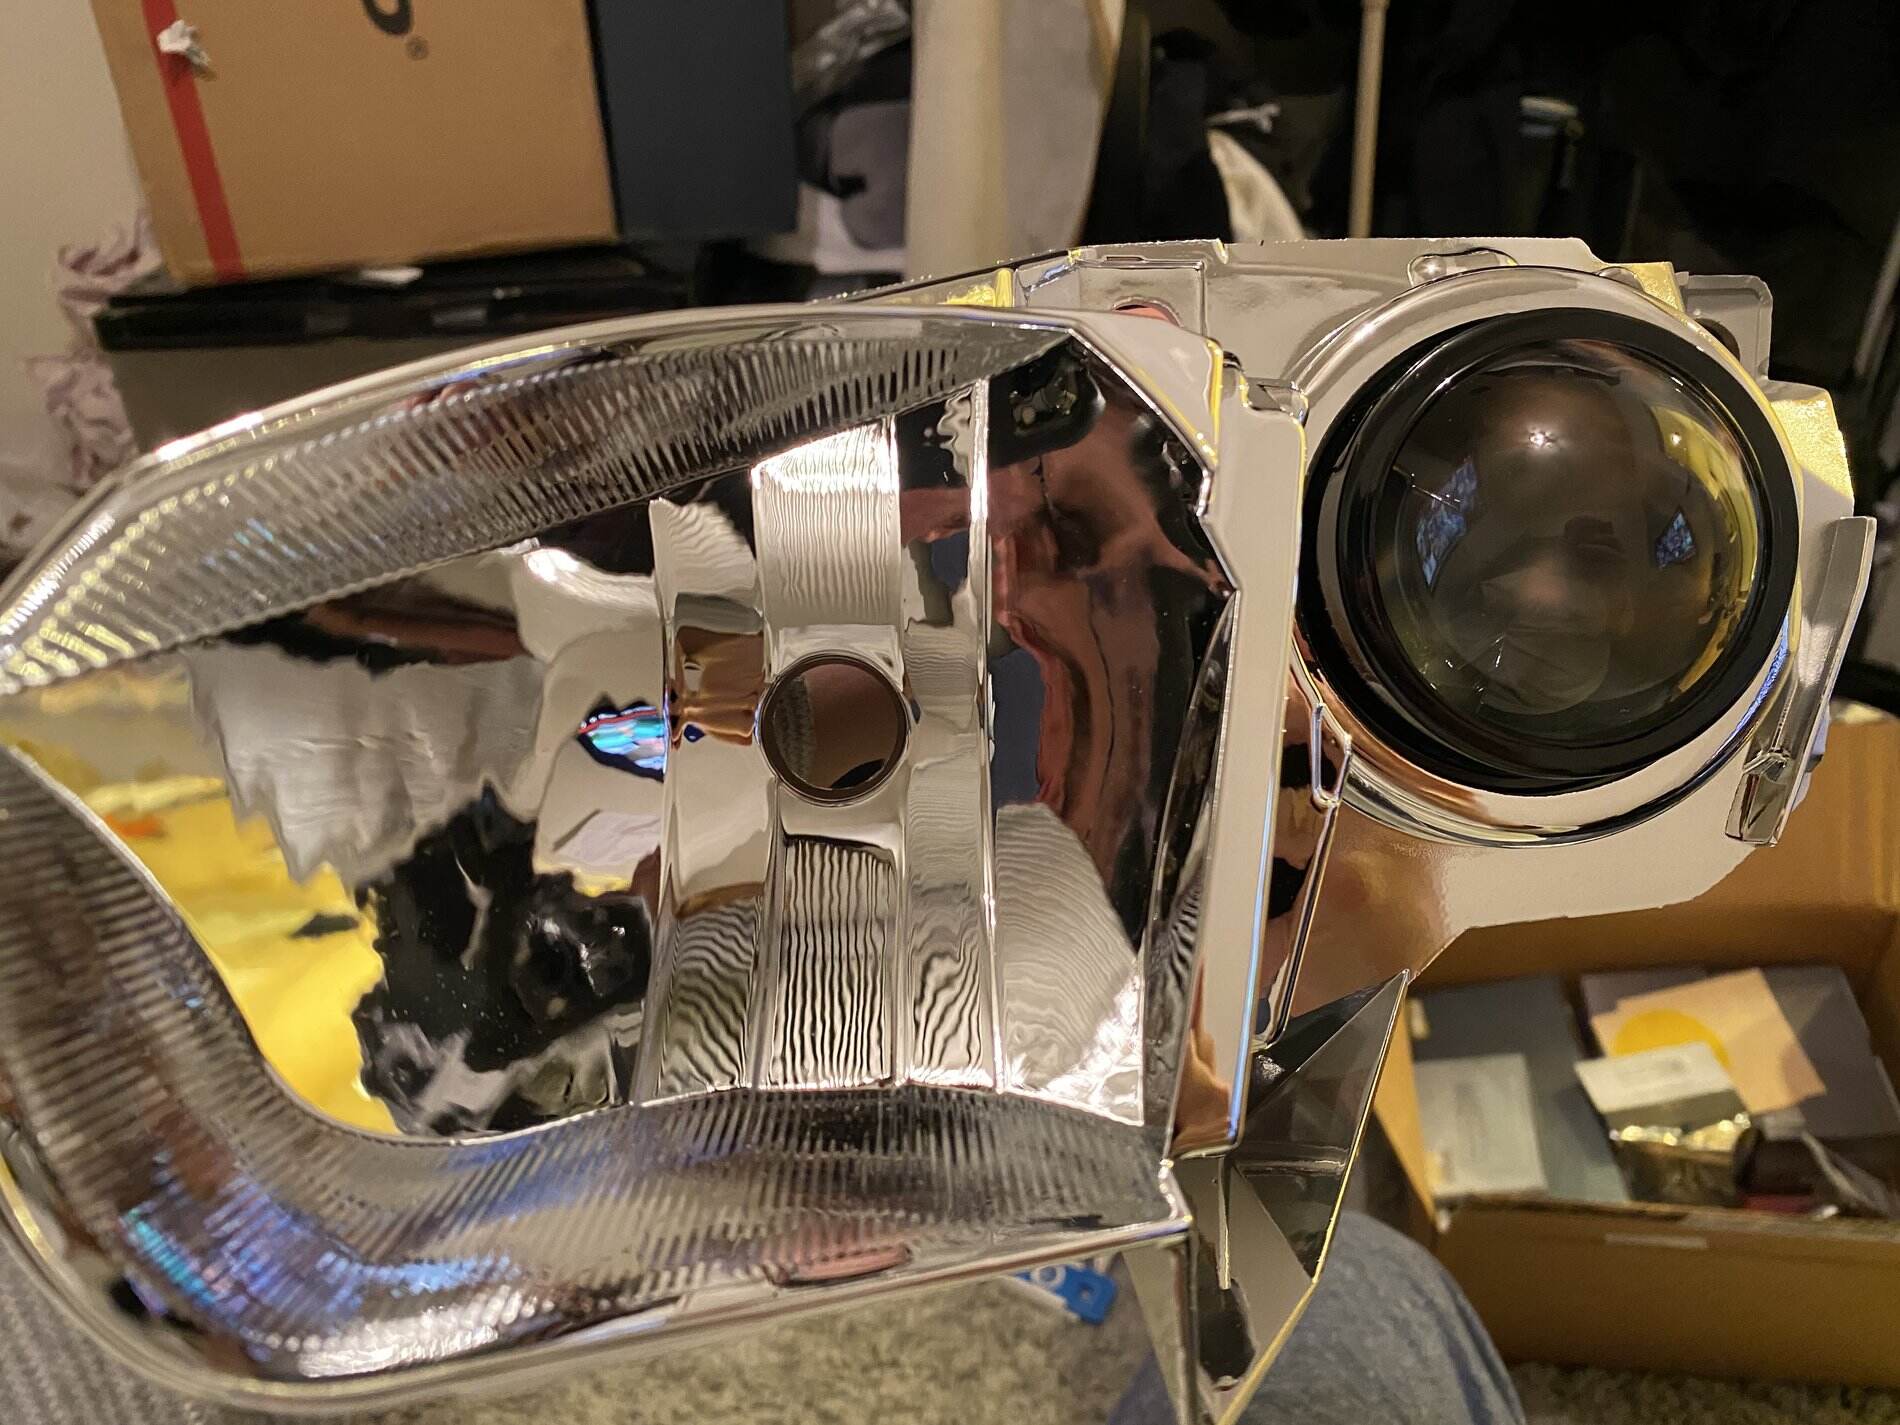
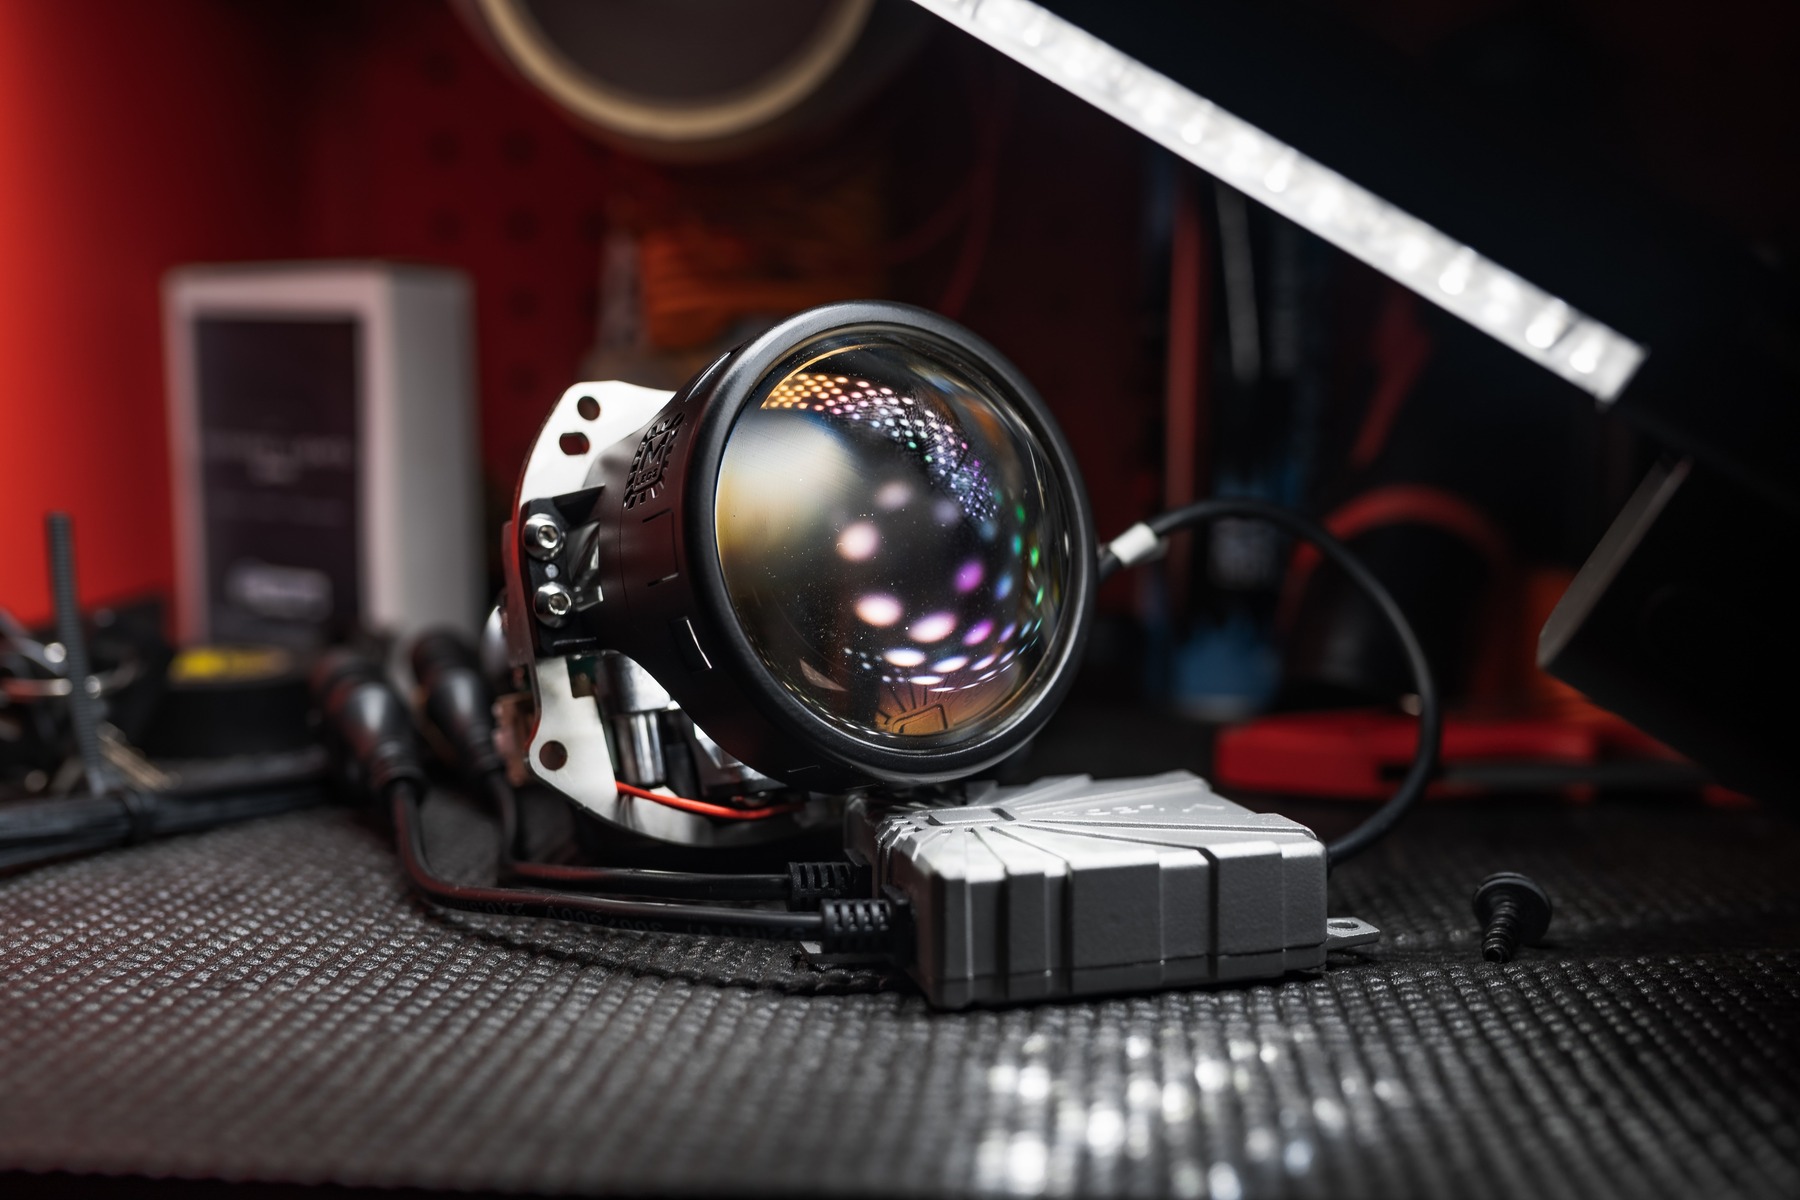
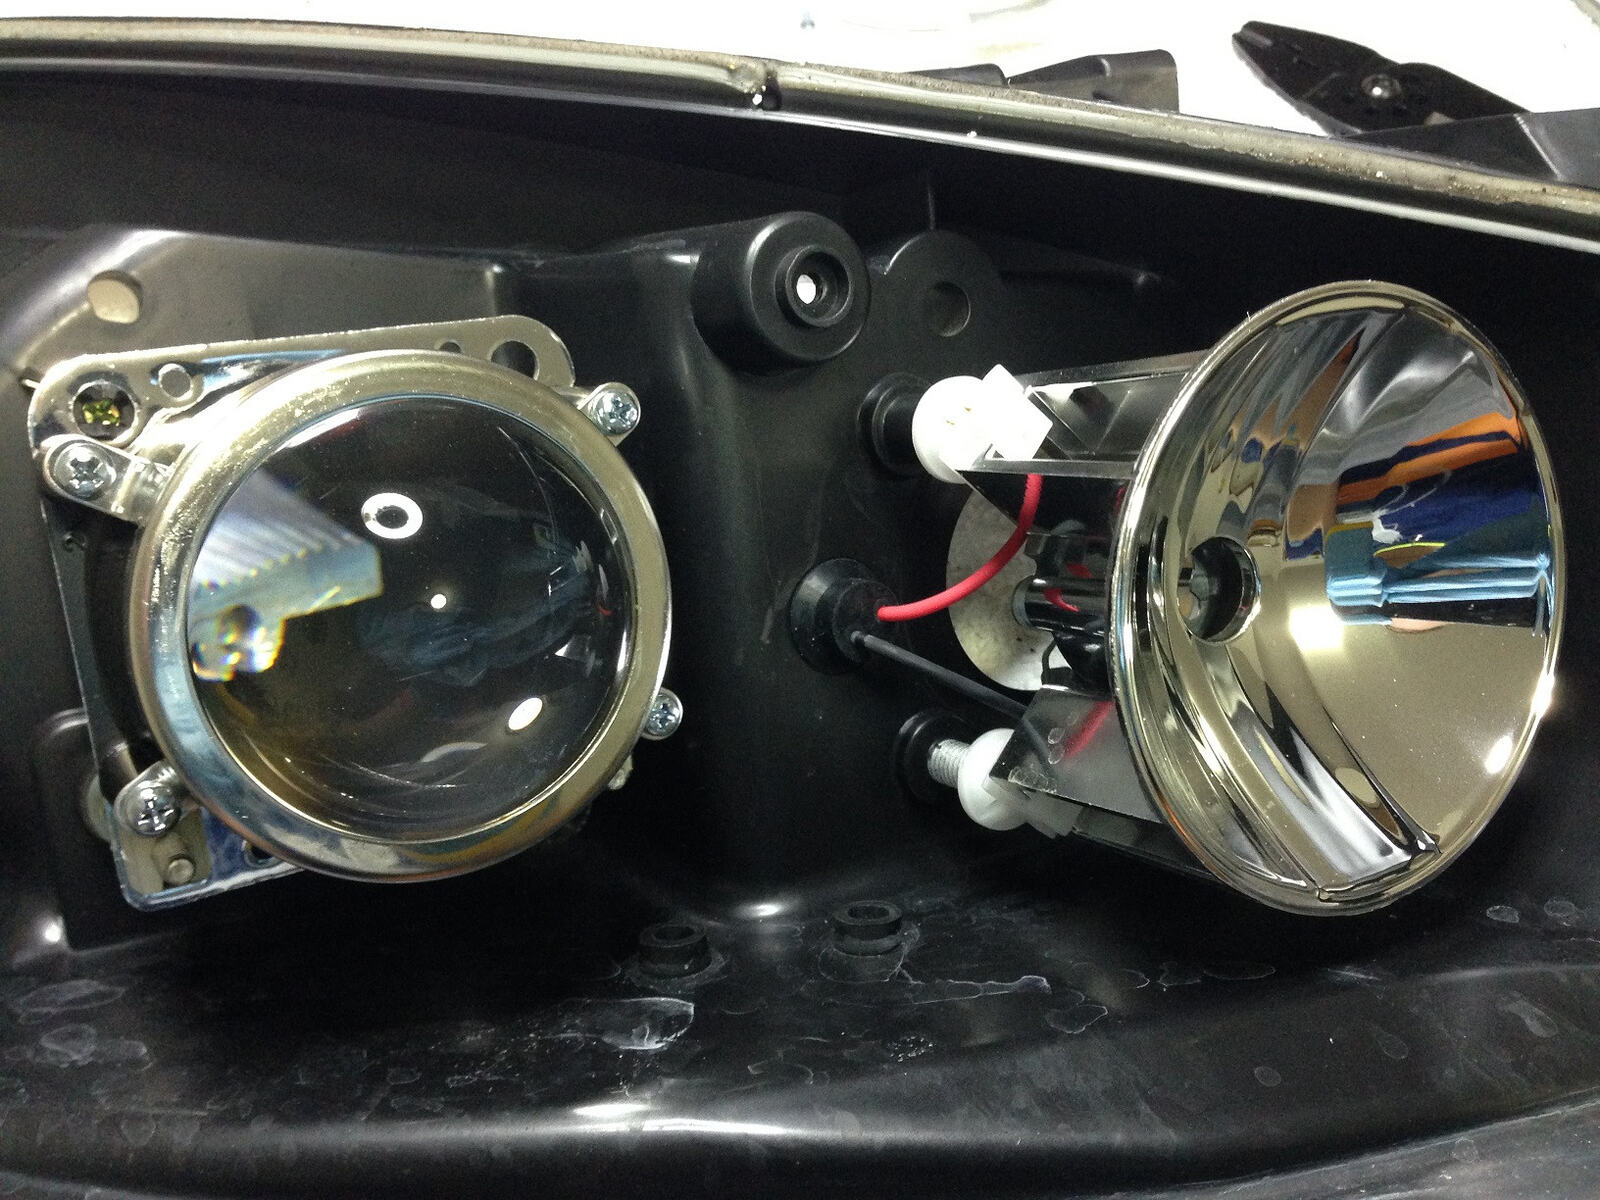
One of the main components of projector headlights is the projector housing, which contains the bulb and lens setup. The housing is responsible for keeping the components securely in place and preventing any external elements from interfering with the light output.
The adjustable feature of projector headlights allows you to modify the direction of the light beam. This adjustability is especially useful when the headlights are not properly aligned due to factors like vehicle modifications, road conditions, or even minor accidents.
To ensure optimal performance, projector headlights should be properly aligned according to the manufacturer’s specifications. Adjusting the aim of the headlights ensures that the light beam is projected at the right height and angle, providing you with clear visibility while driving.
Additionally, aligning projector headlights correctly plays a crucial role in enhancing road safety. Properly aimed headlights help you see the road ahead more clearly, enabling you to react to potential hazards in a timely manner.
Now that you have a basic understanding of projector headlights and the importance of aligning them, let’s move on to the tools you’ll need for the adjustment process.
Tools Required
Before diving into the process of adjusting your projector headlights, it’s essential to gather the necessary tools. Having the right tools on hand will ensure a smooth and successful adjustment process. Here are the tools you’ll need:
- Socket Set: A socket set will come in handy for removing any screws or bolts that hold the headlight housing in place. Make sure to choose a socket set that includes various socket sizes to accommodate different screw sizes.
- Screwdriver Set: A set of screwdrivers with different head types, including Phillips and flathead, will be necessary for removing screws and adjusting the aim of the headlights.
- Tape Measure: A tape measure will help you measure the distance between the ground and each headlight to ensure accurate vertical alignment.
- Level: A small level will assist in leveling the vehicle’s body and ensuring that the headlights are aligned horizontally.
- Masking Tape: Masking tape will be used to mark the positions of the adjusting screws during the alignment process. This will allow you to easily identify the original position if adjustments need to be reversed.
- Pen and Paper: Keeping a pen and paper handy will help you jot down any measurements or adjustments made during the process. This will ensure accuracy and provide a reference for future adjustments if needed.
- Flashlight: A flashlight can be useful in providing additional light when working on the headlights, especially in dimly lit areas.
By having these tools readily available, you’ll be well-prepared to handle the adjustment process and achieve properly aligned projector headlights. Now that you have everything you need, let’s move on to the step-by-step instructions for adjusting the vertical aim of your projector headlights.
Step 1: Park the Car
The first step in adjusting your projector headlights is to park your car on a level surface facing a flat wall or garage door. Park your car at a distance of about 25 feet from the wall, ensuring that the vehicle is perpendicular to the wall.
Parking on a level surface is crucial to ensure accurate measurements during the adjustment process. If the ground is uneven, it may affect the beam alignment and lead to inaccurate results. Therefore, find a smooth and level area to park your car.
Additionally, make sure that your headlights are turned off during the adjustment process. You want to have the headlights in the default position when making any adjustments. This will provide a baseline for proper alignment. If your headlights are already turned on, turn them off and allow them to cool down before proceeding.
Once your car is parked and the headlights are turned off, it’s time to move on to the next step: locating the adjusting screws of your projector headlights.
Step 2: Locate the Adjusting Screws
Now that your car is parked in the correct position, you need to locate the adjusting screws for your projector headlights. These screws are typically located on the back of the headlight housing and can be accessed by opening the hood of your car.
To find the adjusting screws, look for small screws or bolts that are attached to the headlight housing. They are usually labeled with symbols indicating which direction the screw will adjust the beam. Common symbols include “V” for vertical adjustment and “H” for horizontal adjustment.
In some cases, the screws may be covered by rubber caps. You’ll need to remove these caps to access the adjusting screws. Gently peel back the rubber caps, being careful not to damage them. Once removed, you should have clear access to the screws.
It’s important to note that different car models may have varying locations and types of adjusting screws. Refer to your vehicle’s manual if you’re having trouble locating them. The manual will provide specific instructions and diagrams for your particular car model.
Once you’ve located the adjusting screws, you’re ready to move on to the next step: adjusting the vertical aim of your projector headlights.
Step 3: Adjust Vertical Aim
Now that you have located the adjusting screws for your projector headlights, it’s time to adjust the vertical aim. This step will ensure that the headlights are properly aligned to provide optimal visibility without blinding other drivers on the road.
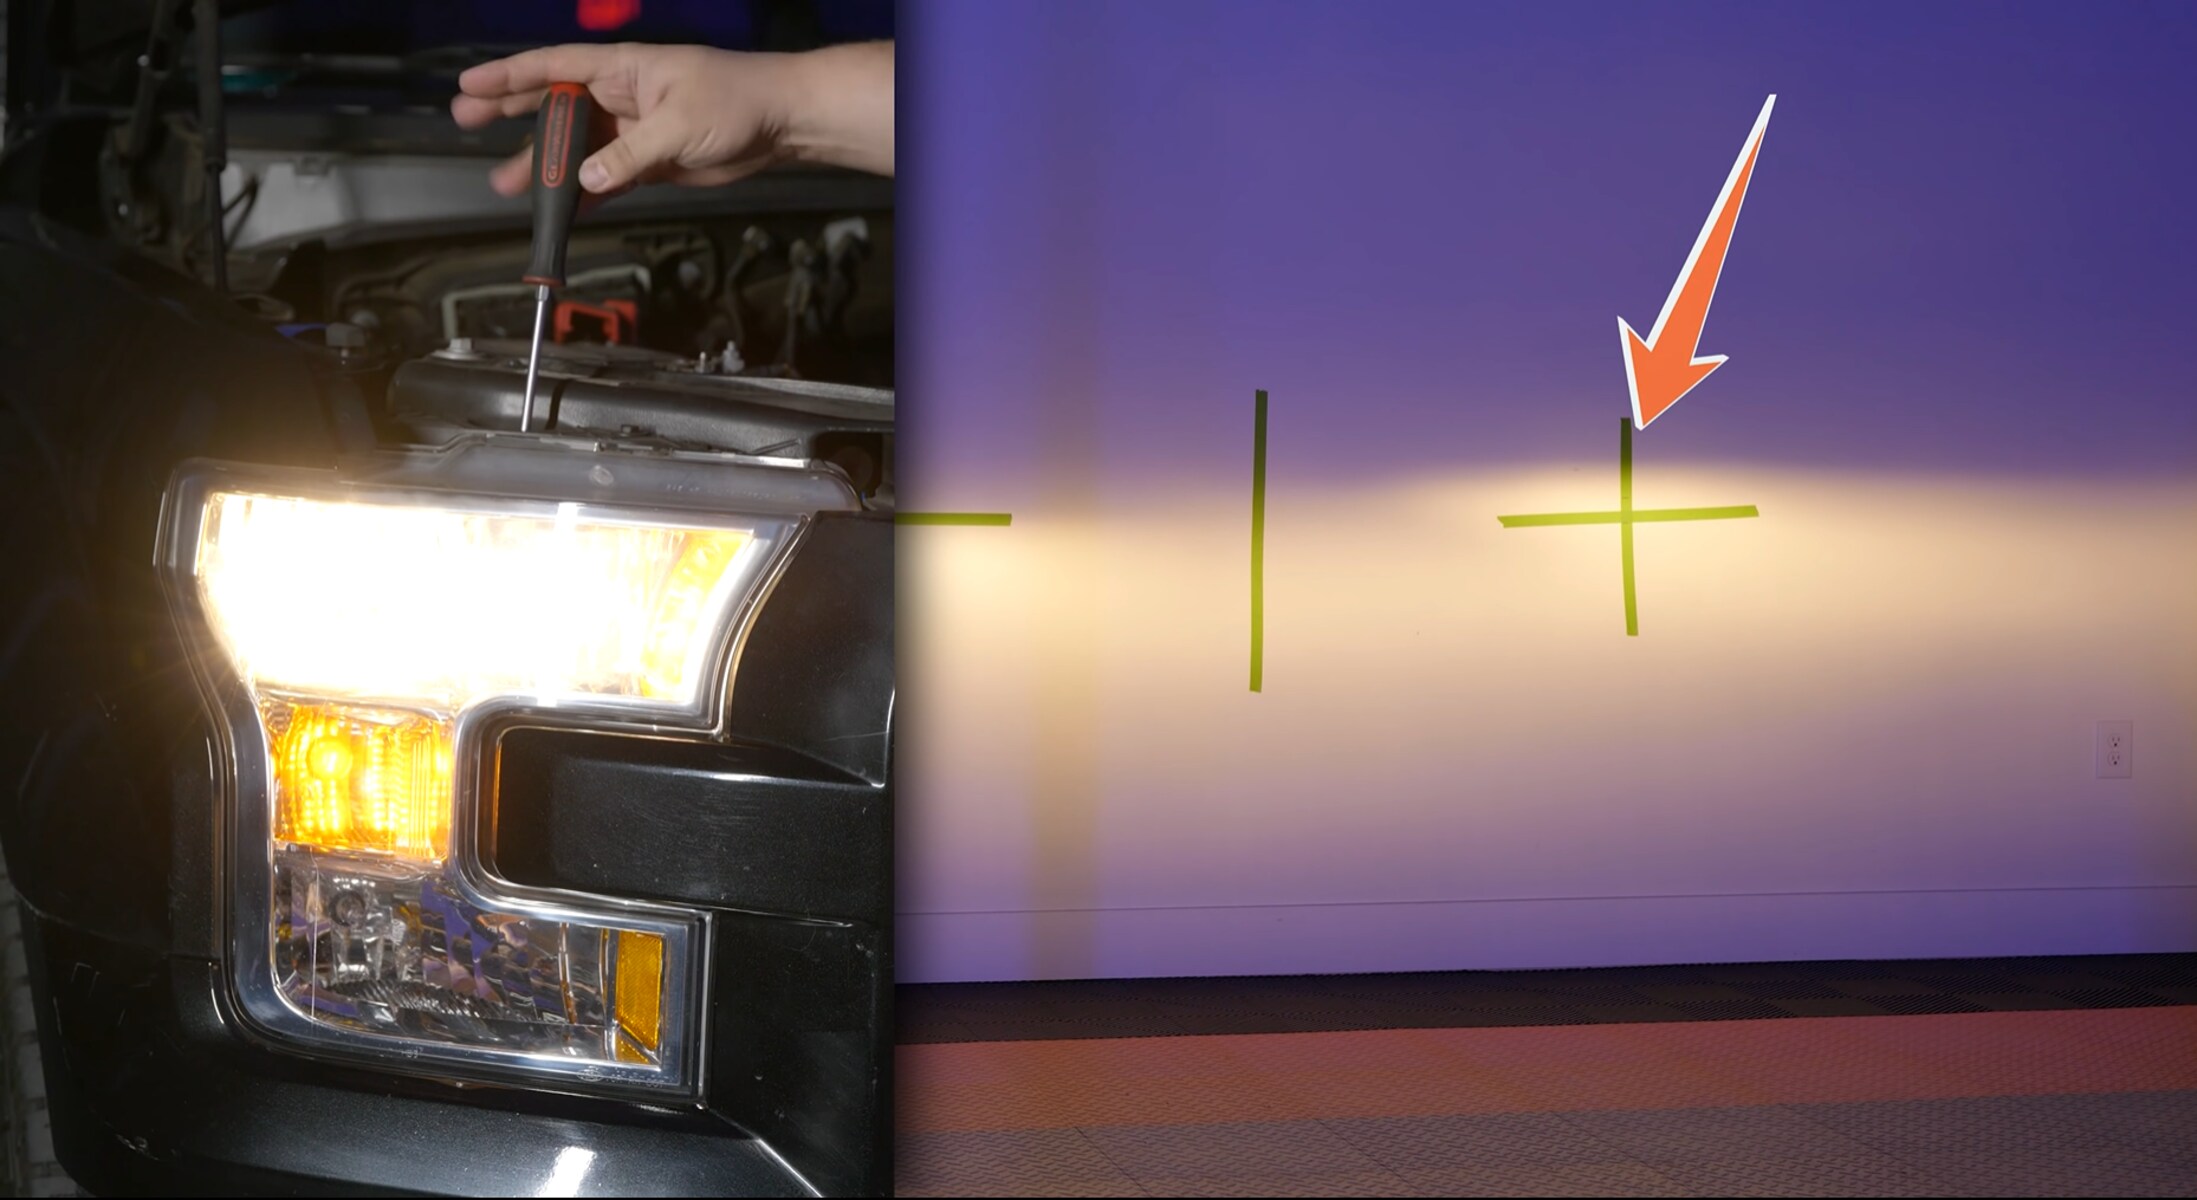
Start by using the tape measure to measure the distance between the ground and the center of each headlight. Write down these measurements as you will need them for reference during the adjustment process.
Next, use a screwdriver to turn the adjusting screw labeled with the “V” symbol to adjust the vertical aim. Turning the screw clockwise will typically lower the beam of light, while turning it counterclockwise will raise the beam.
Make small adjustments at a time and check the beam position on the wall or garage door in front of your car. The ideal beam position should be slightly below the height of your headlights, allowing for maximum visibility without blinding oncoming drivers.
Repeat the adjustment process for both headlights, ensuring that the beam height is consistent and matched between the two lights. Use masking tape to mark the original position of the adjusting screws before making any adjustments. This way, you can easily revert to the original position if needed.
After making the necessary adjustments, step back and observe the beam pattern. The light beam should be even and symmetrical. If you notice any unevenness or asymmetry, continue to make minor adjustments until the beams are aligned properly.
Once you are satisfied with the vertical aim of your projector headlights, it’s time to move on to the next step: adjusting the horizontal aim.
Step 4: Adjust Horizontal Aim
Now that you have adjusted the vertical aim of your projector headlights, it’s time to move on to adjusting the horizontal aim. This step ensures that the headlights are properly aligned from left to right, providing an even and symmetrical light beam.
Start by using a level to ensure that your vehicle is on a level surface. This will help you achieve accurate horizontal alignment. Place the level on top of the hood or another flat surface near the headlights and adjust the vehicle’s position if necessary.
Next, use the tape measure to measure the distance between the center of each headlight and mark it on the wall or garage door in front of your vehicle. This will serve as a reference point for horizontal alignment.
Locate the adjusting screw labeled with the “H” symbol, which is responsible for horizontal aim adjustment. Use a screwdriver to turn the screw clockwise to move the beam to the right or counterclockwise to move it to the left.
Make small adjustments at a time and check the beam position on the wall or garage door. Ensure that the beam is perfectly centered on the vertical reference mark you made earlier. It should be symmetrical on both sides of the mark.
Keep in mind that the horizontal adjustment may also affect the vertical aim slightly. As you make horizontal adjustments, it’s important to periodically check and adjust the vertical aim if needed to maintain balanced and properly aligned headlights.
Once you are satisfied with the horizontal aim adjustment, step back and observe the beam pattern and alignment. The light beam should be centered, even, and symmetrical. Make any final adjustments as needed to achieve the desired alignment.
Congratulations! You have successfully adjusted the horizontal aim of your projector headlights. Now, all that’s left to do is to test the headlights to ensure proper functionality and alignment.
Step 5: Test the Headlights
After adjusting the vertical and horizontal aim of your projector headlights, it’s crucial to test them to ensure that they are functioning correctly and aligned properly. Testing the headlights will verify that they provide optimal visibility without blinding oncoming drivers.
First, double-check that your vehicle is parked in a safe location with enough distance in front to test the headlights. Turn on the headlights and observe the lighting pattern on the road and surroundings.
Take your car for a short drive to ensure that the headlights are properly adjusted for both low and high beam settings. Pay attention to the illuminated area and make sure that the beams are well-defined, providing adequate visibility without excessively scattering or blinding other drivers.
Additionally, consider testing the headlights under different road conditions, such as on dark or dimly lit roads, to evaluate their performance in various scenarios. This will help you determine if any further adjustments are needed.
If you notice any issues with the lighting pattern or beam alignment during the test, you may need to revisit the adjusting screws to fine-tune the aim. Make small adjustments as necessary to achieve the desired outcome.
Remember, proper headlight alignment is crucial for your safety and the safety of others on the road, so it’s essential to ensure that your projector headlights are accurately adjusted.
Once you are satisfied with the functionality and alignment of your projector headlights, you can confidently enjoy improved visibility and a more enhanced driving experience.
With the completion of the testing phase, you have successfully adjusted your projector headlights. Safe travels!
Conclusion
Adjusting projector headlights is a straightforward process that can greatly enhance your driving experience and road safety. By correctly aligning the vertical and horizontal aim of your headlights, you can ensure optimal visibility while minimizing the risk of blinding other drivers.
Throughout this guide, we have covered the necessary steps to adjust your projector headlights. From parking your car on a level surface to locating and adjusting the screws, each step plays a crucial role in achieving proper alignment.
Remember to use the appropriate tools, such as a socket set, screwdriver set, tape measure, level, masking tape, pen, and flashlight, to assist you in the adjustment process. These tools will help you work efficiently and achieve accurate results.
By taking the time to adjust the vertical aim, followed by the horizontal aim, you can ensure that your headlights are projecting a well-aimed and symmetrical beam of light. Testing the headlights on various road conditions further ensures their functionality and alignment.
Properly aligned projector headlights enhance your visibility on the road, allowing you to have better control and reaction time when faced with obstacles or hazardous situations. Additionally, aligned headlights reduce the risk of blinding other drivers, creating a safer driving environment for everyone.
Now that you have successfully adjusted your projector headlights, it’s time to hit the road with confidence, knowing that you have taken the necessary steps to optimize your visibility and safety.
Remember to periodically check and readjust your headlights as needed, especially after any modifications to your vehicle or changes in road conditions. Properly aligned headlights are an ongoing responsibility that ensures your safety and the safety of those around you.
Enjoy your well-aligned projector headlights and happy driving!