Introduction
Connecting your laptop to a Wi-Fi network is essential for accessing the internet and staying connected wirelessly. Whether you are at home, at work, or traveling, being able to connect your laptop to Wi-Fi enables you to browse the web, check emails, stream videos, and much more. It provides flexibility and convenience, allowing you to use your laptop without being tethered to a wired connection.
If you’re new to the world of Wi-Fi or just need a refresher on how to connect your laptop to Wi-Fi, don’t worry. This guide will walk you through the process step by step, making it easy for you to establish a wireless connection and get online in no time.
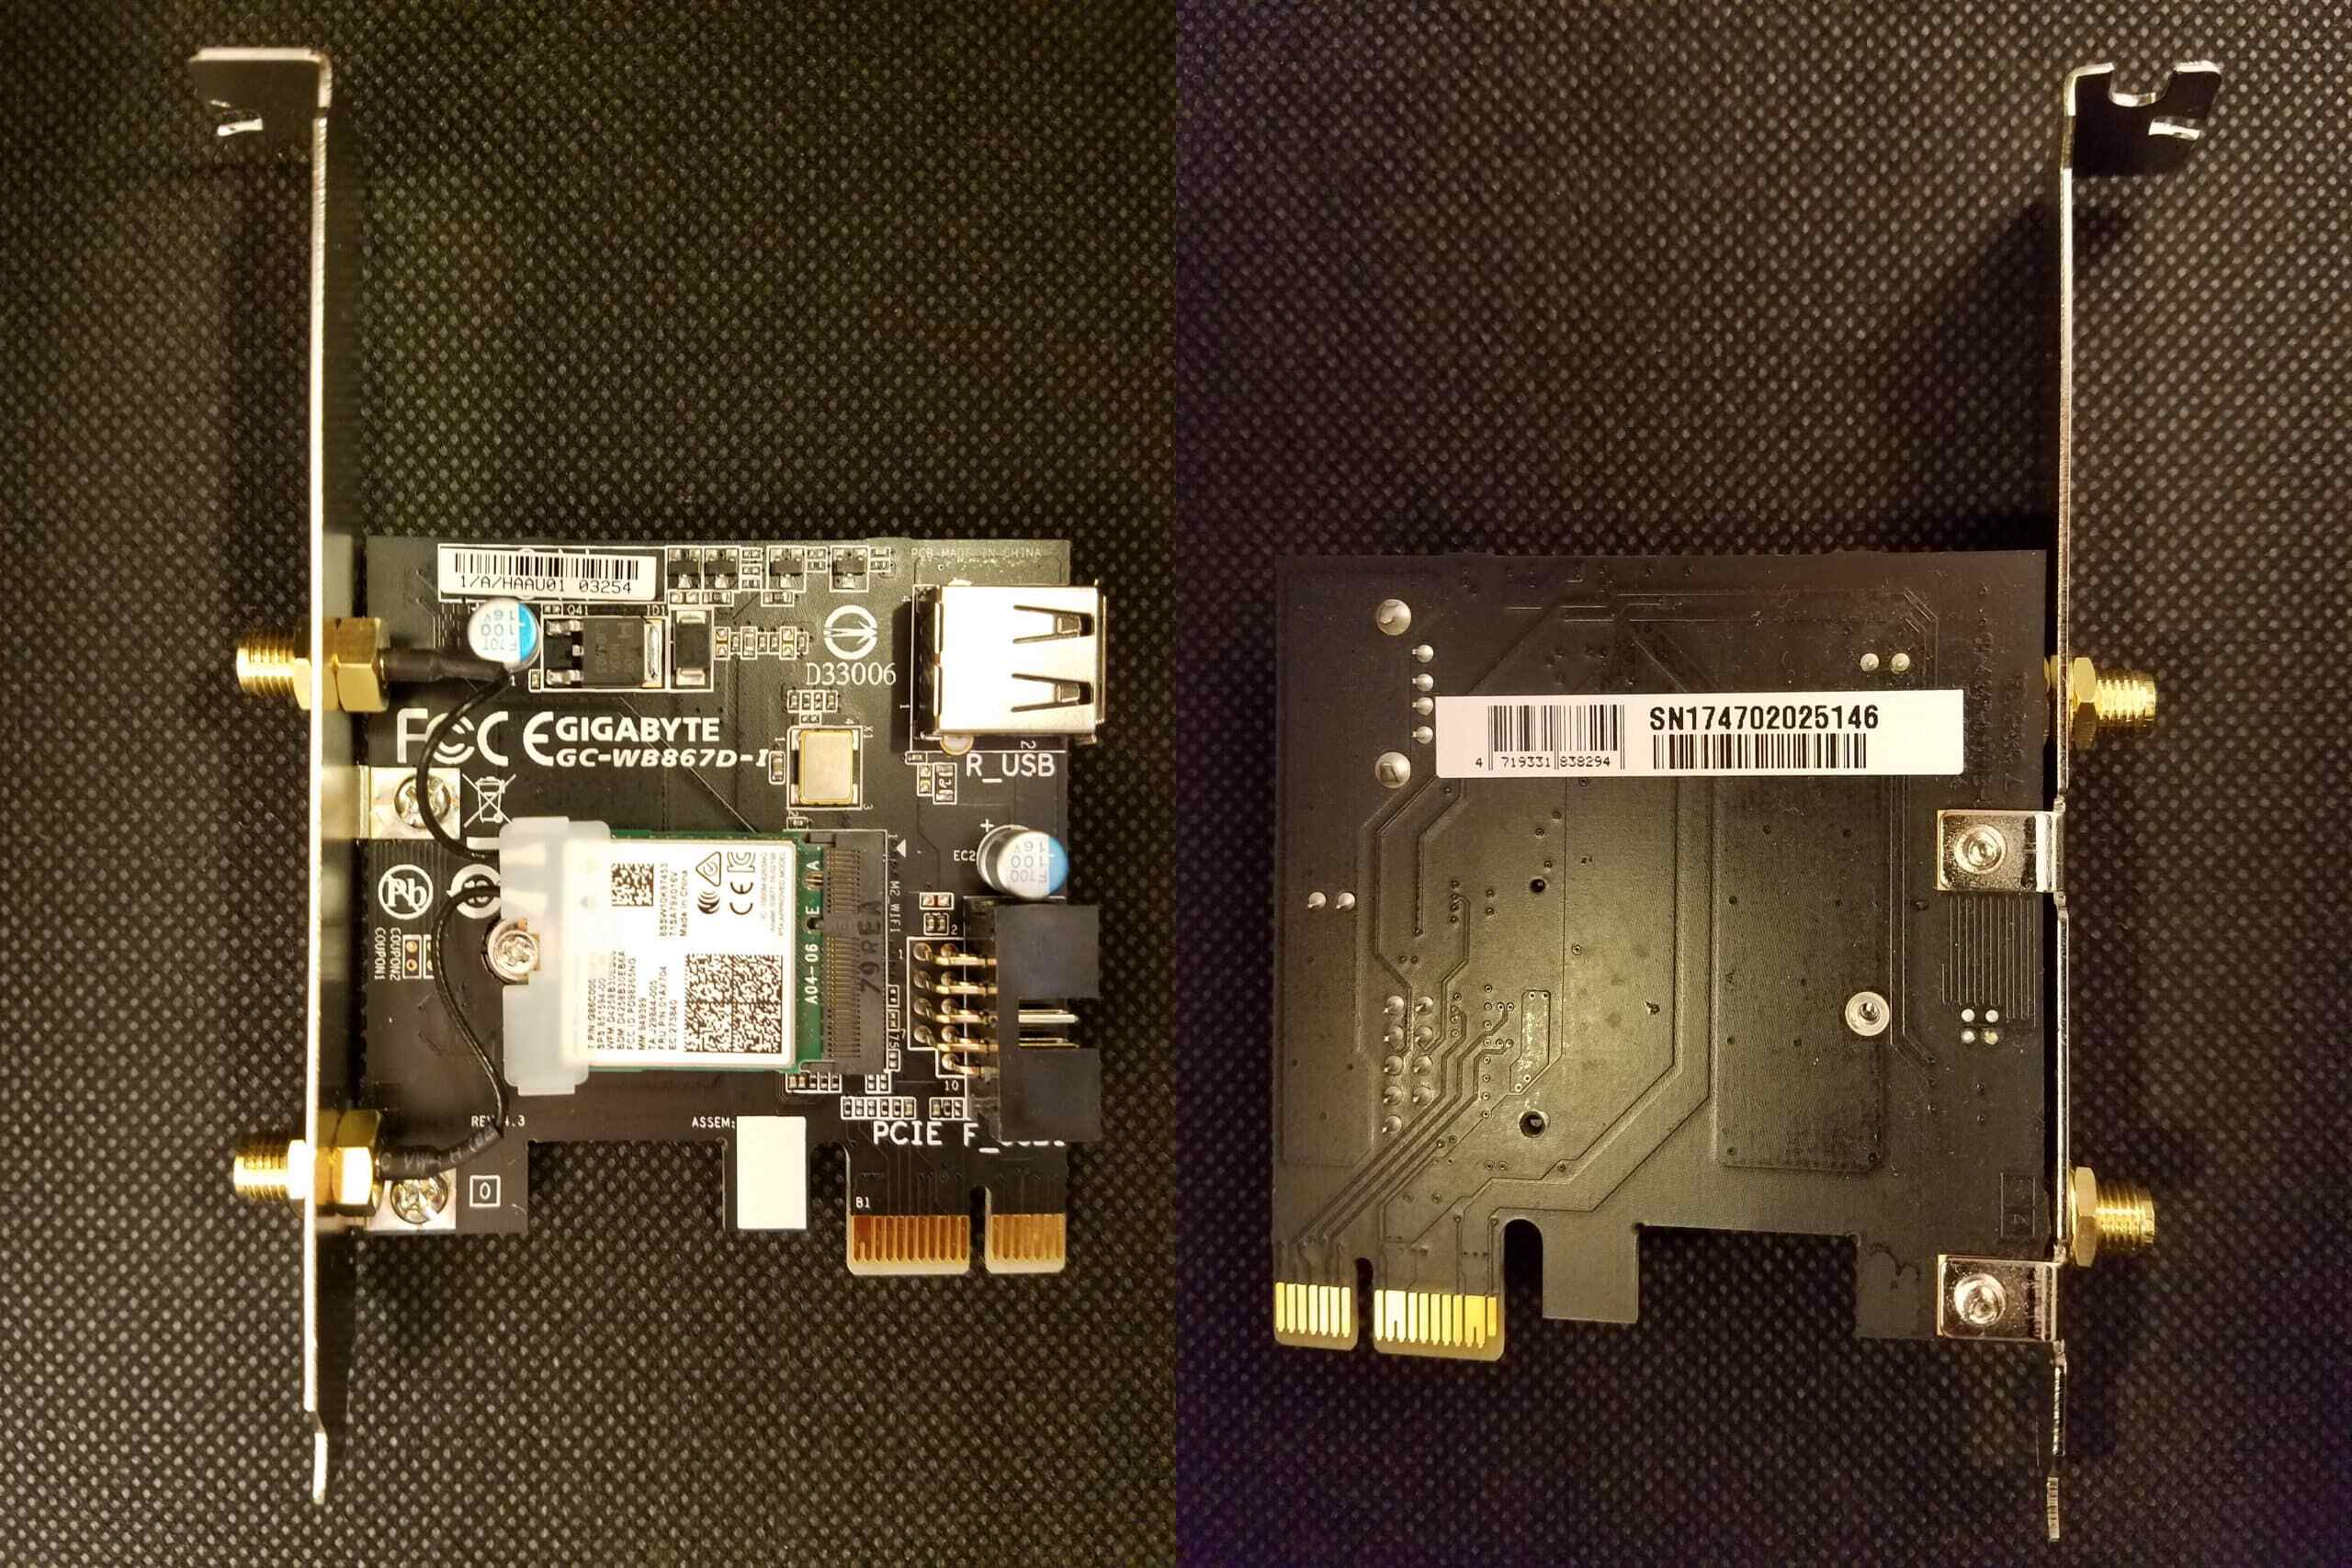
Before we dive into the steps, make sure you have a Wi-Fi router and a laptop with built-in Wi-Fi capabilities or a Wi-Fi adapter. Most modern laptops come with Wi-Fi capabilities, but if your laptop doesn’t have it, you can purchase a USB Wi-Fi adapter to enable wireless connectivity.
Now, let’s explore the steps you need to follow to connect your laptop to Wi-Fi and unleash the power of wireless internet access.
Step 1: Check Wi-Fi Connection
Before attempting to connect your laptop to a Wi-Fi network, it’s important to check if your Wi-Fi connection is working properly. This step ensures that any issues with your Wi-Fi signal or equipment are resolved before proceeding.
Start by checking if your Wi-Fi router is powered on and functioning. Ensure that all necessary cables are securely connected and that the router’s indicator lights are illuminated. If you notice any issues with the router, such as a blinking or red light, consult the router’s manual or contact your internet service provider for assistance.
Next, confirm that your laptop’s Wi-Fi capability is enabled. Look for a physical switch or key combination (usually indicated by a Wi-Fi icon) on your laptop’s keyboard or side panel. If your laptop doesn’t have a physical switch, you can usually enable Wi-Fi through the operating system’s settings or control panel.
Once you’ve verified that your Wi-Fi router is functioning correctly and Wi-Fi is enabled on your laptop, check if other devices can connect to the Wi-Fi network. If other devices are experiencing connectivity issues, this could indicate a problem with the Wi-Fi network itself. Restarting the router, updating its firmware, or contacting your internet service provider may help resolve the issue.
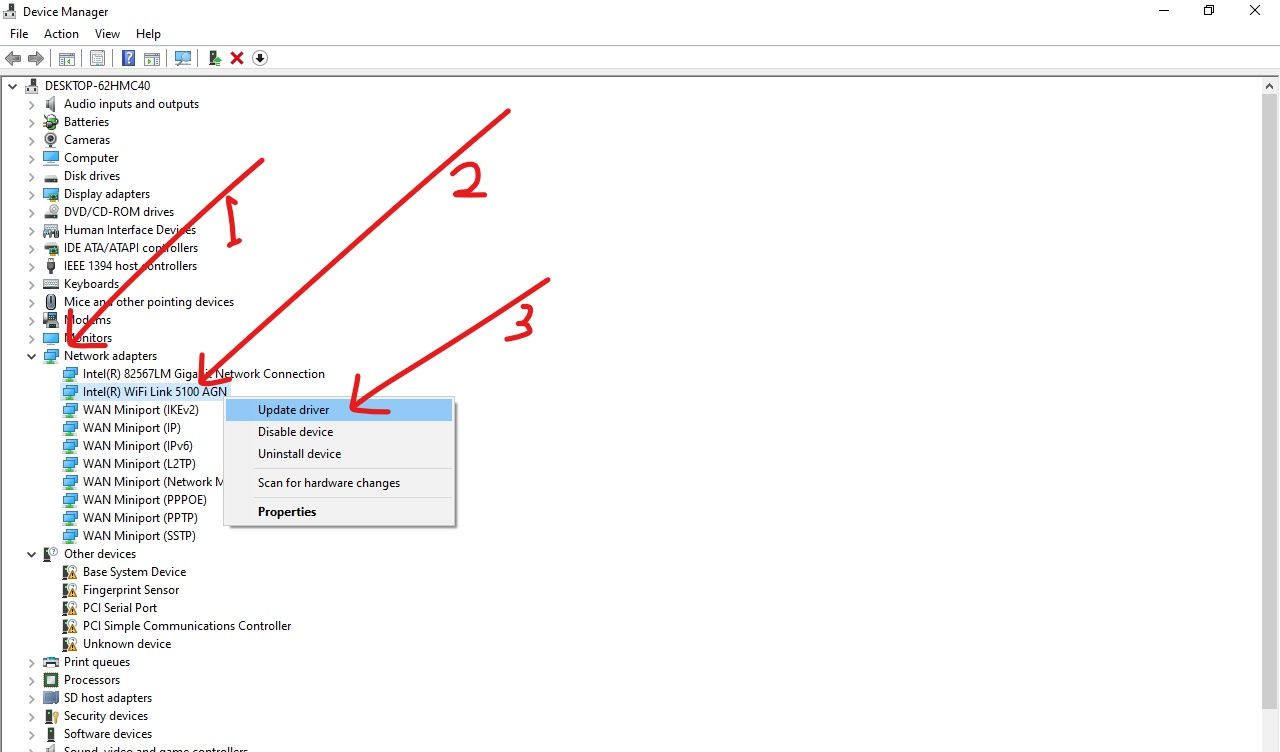
If the Wi-Fi network is functioning properly and other devices can connect, but you’re still unable to connect your laptop, there may be compatibility issues between your laptop and the Wi-Fi network. Check if your laptop supports the Wi-Fi network’s frequency band (2.4GHz or 5GHz) and security protocol (WEP, WPA, WPA2, etc.). Adjusting the Wi-Fi network settings or updating your laptop’s wireless drivers may help resolve compatibility issues.
By ensuring that your Wi-Fi connection is functional and compatible, you’ll have a solid foundation for connecting your laptop to a Wi-Fi network. With this step completed, you’re ready to move on to the next step and enable Wi-Fi on your laptop.
Step 2: Enable Wi-Fi on Your Laptop
Once you have confirmed that your Wi-Fi connection is working properly, the next step is to enable Wi-Fi on your laptop. Enabling Wi-Fi allows your laptop to search for available Wi-Fi networks in the vicinity.
To enable Wi-Fi on your laptop, look for the Wi-Fi symbol or icon on your keyboard. It is usually represented by a series of curved lines or bars. Press the corresponding key combination, such as “Fn + F2” or “Fn + Wi-Fi icon” (the specific combination may vary depending on your laptop’s make and model) to activate the Wi-Fi functionality.
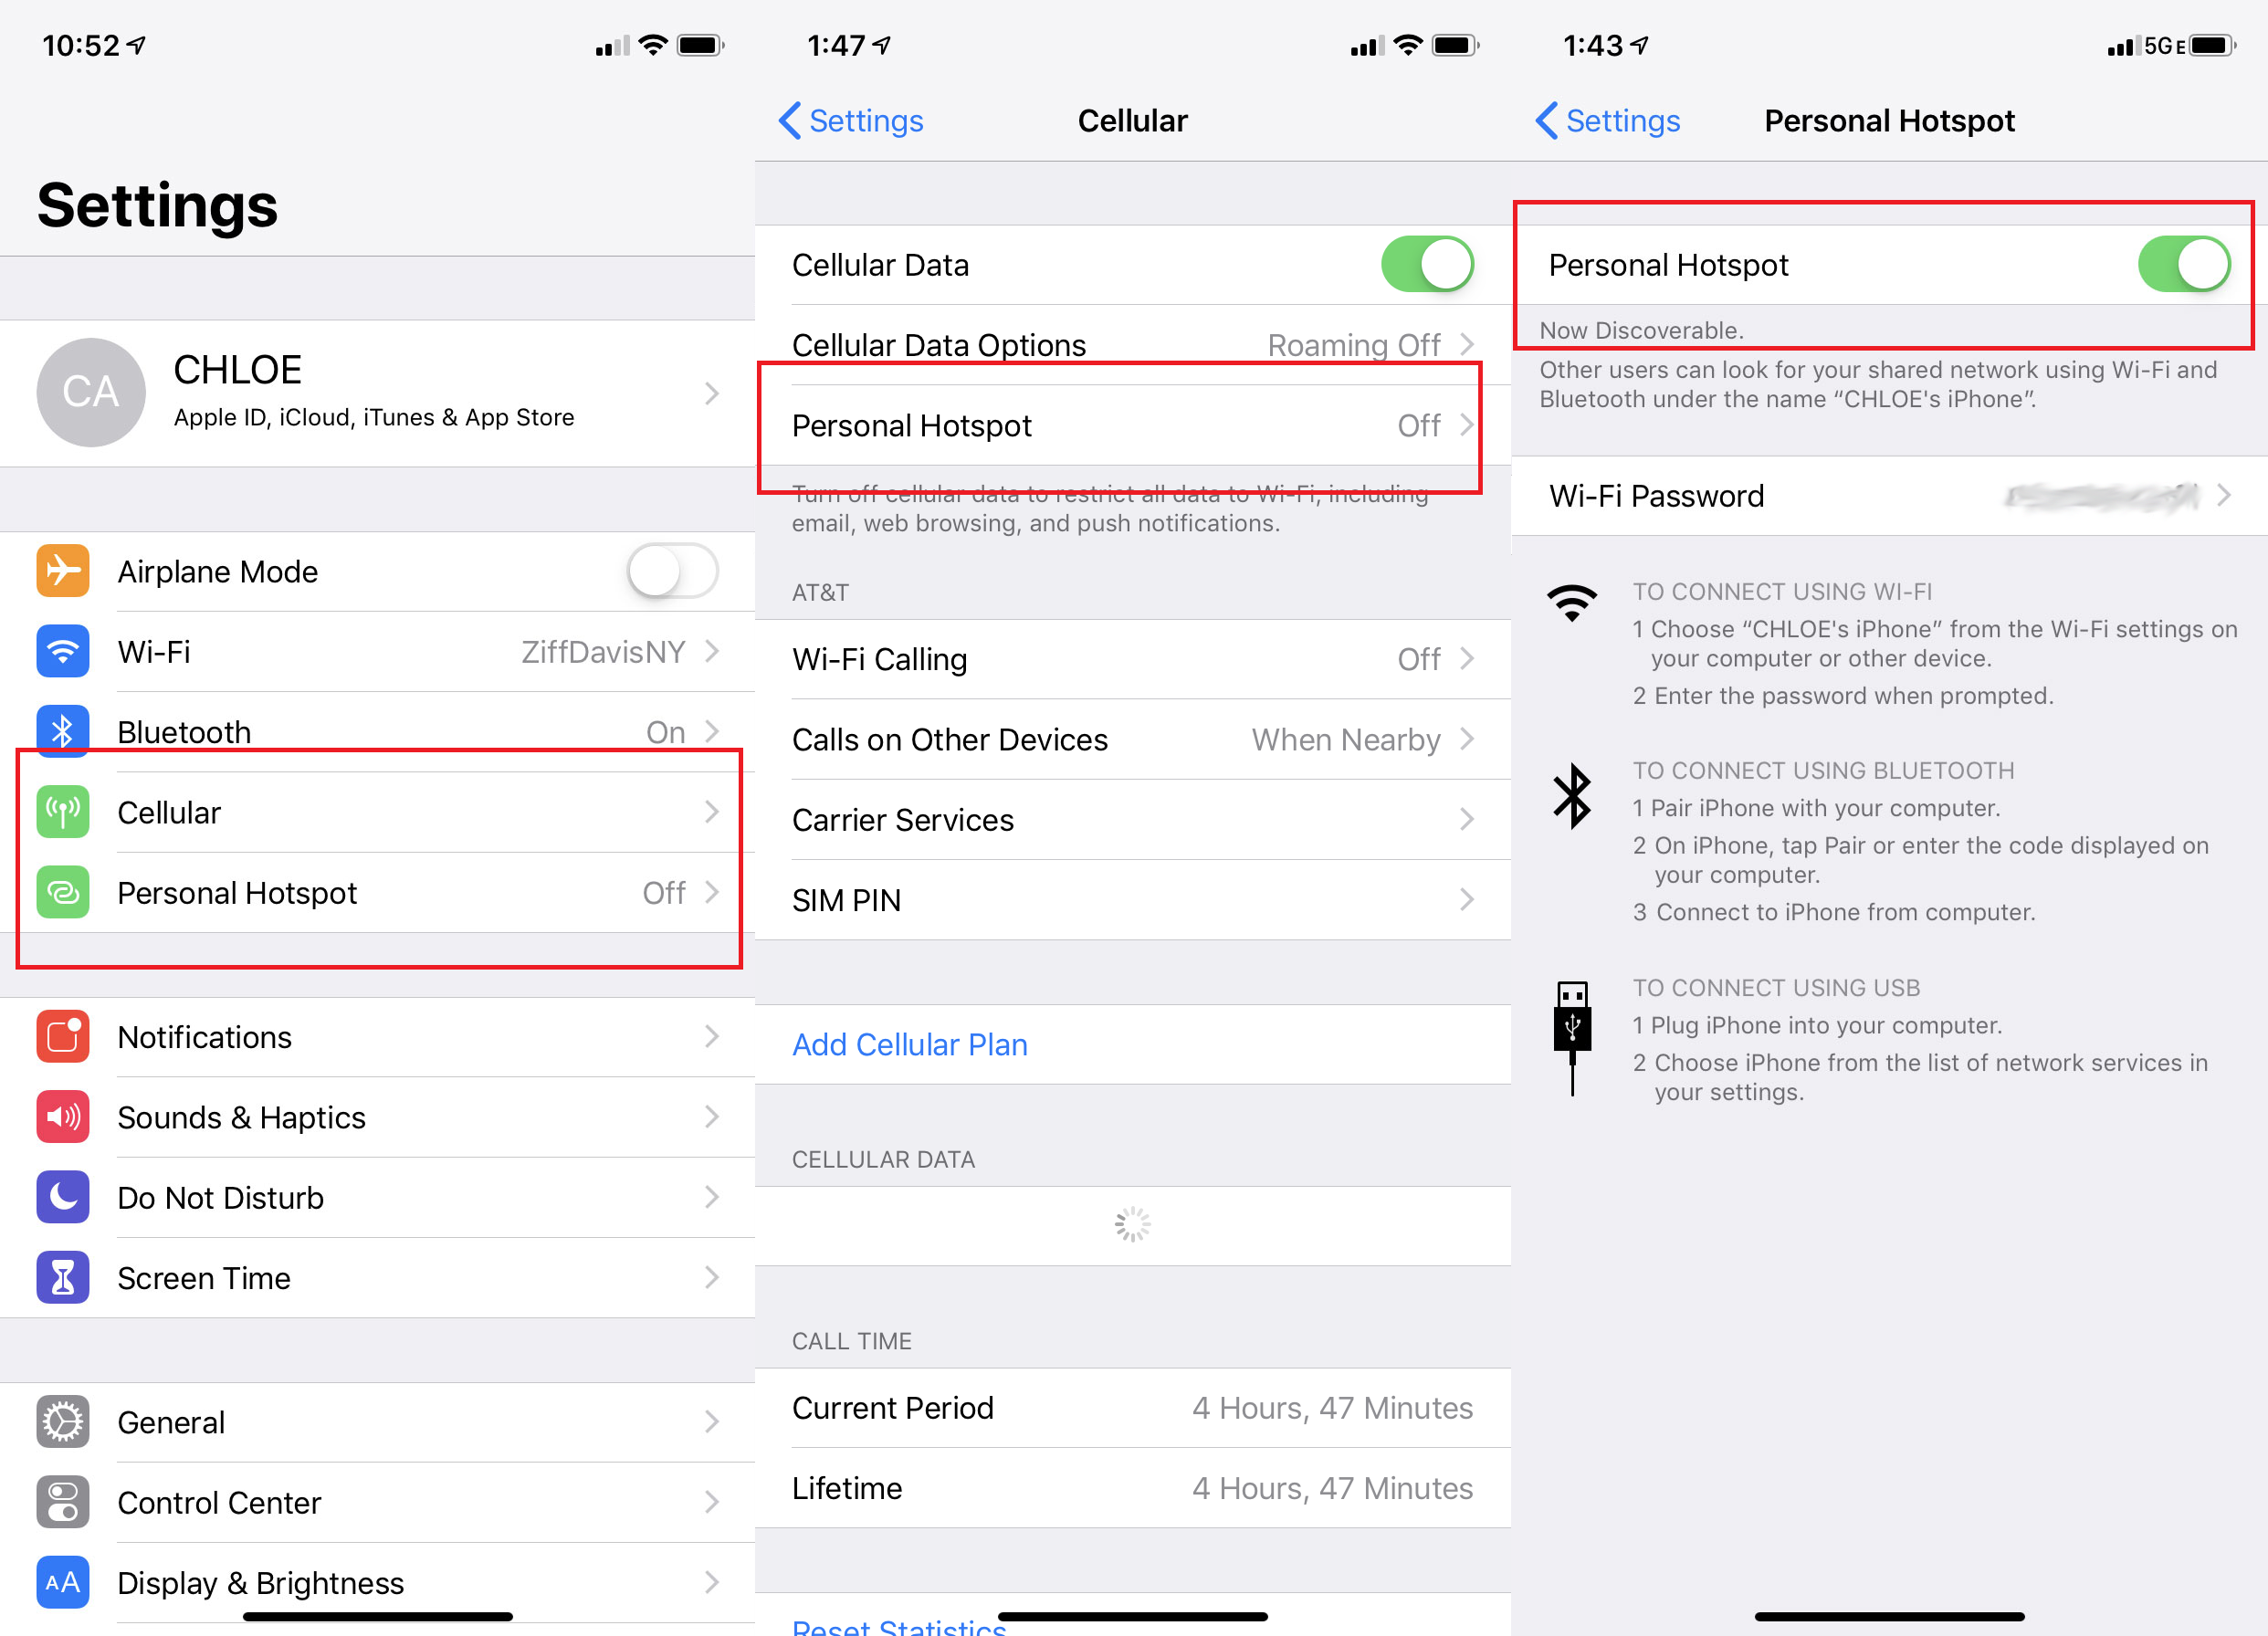
Alternatively, you can enable Wi-Fi through the operating system settings. On Windows laptops, open the “Control Panel” and navigate to the “Network and Internet” section. Click on “Wi-Fi” and toggle the switch to enable Wi-Fi. On Mac laptops, open the “System Preferences” and select “Network”. Choose “Wi-Fi” from the list on the left-hand side and click the checkbox to turn on Wi-Fi.
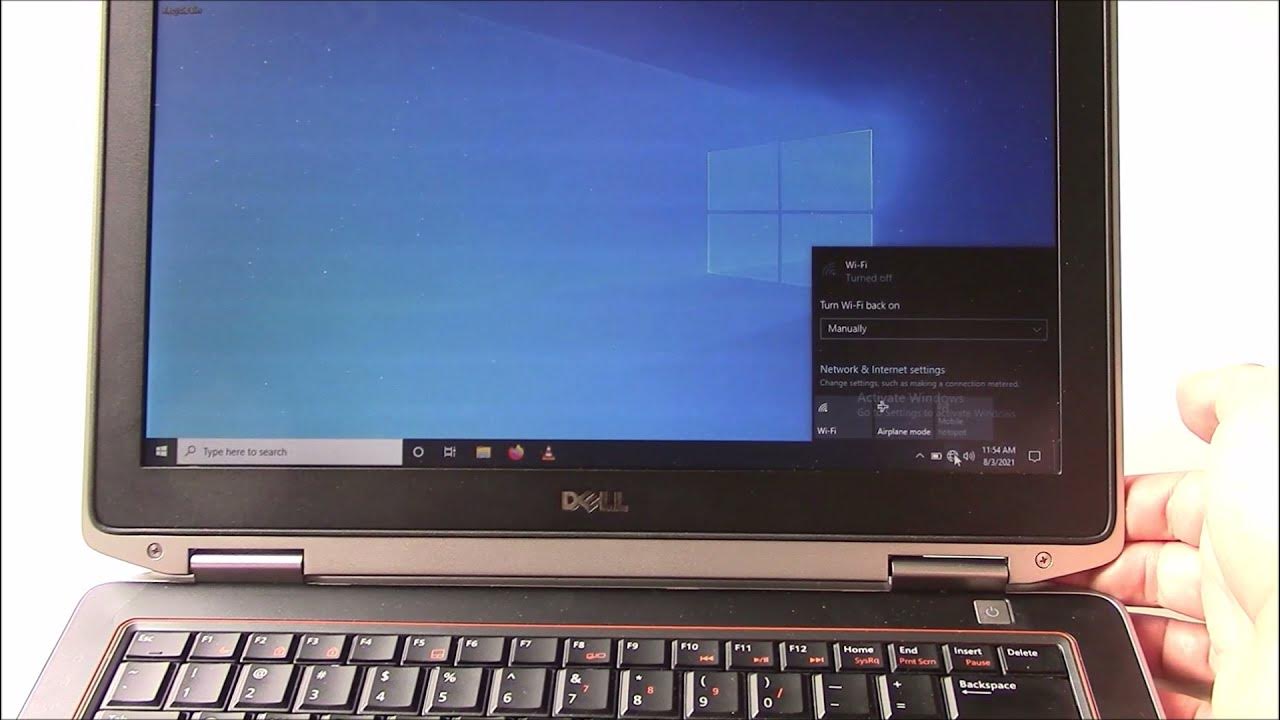
Once Wi-Fi is enabled on your laptop, you’ll see the Wi-Fi icon or symbol appear in the system tray or menu bar, indicating that your laptop is now ready to search for and connect to available Wi-Fi networks.
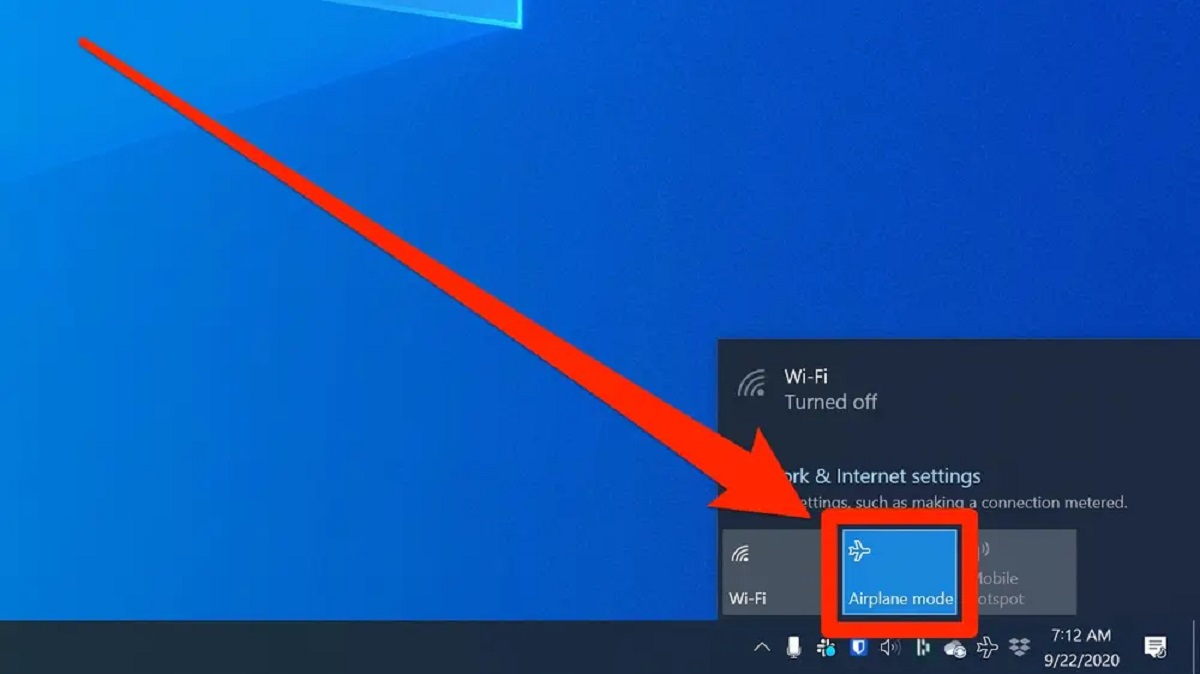
It’s worth noting that some laptops have a feature called “airplane mode” that disables all wireless connectivity, including Wi-Fi and Bluetooth. Make sure that airplane mode is turned off to enable Wi-Fi functionality. Look for the airplane icon in the system tray or menu bar and deselect it to disable airplane mode.
Enabling Wi-Fi on your laptop is a crucial step in the process of connecting to a Wi-Fi network. Once you have successfully enabled Wi-Fi, you can proceed to the next step of finding available Wi-Fi networks in your area.
Step 3: Find Available Networks
After enabling Wi-Fi on your laptop, the next step is to find the available Wi-Fi networks in your vicinity. Your laptop will scan and display a list of networks that are within range.
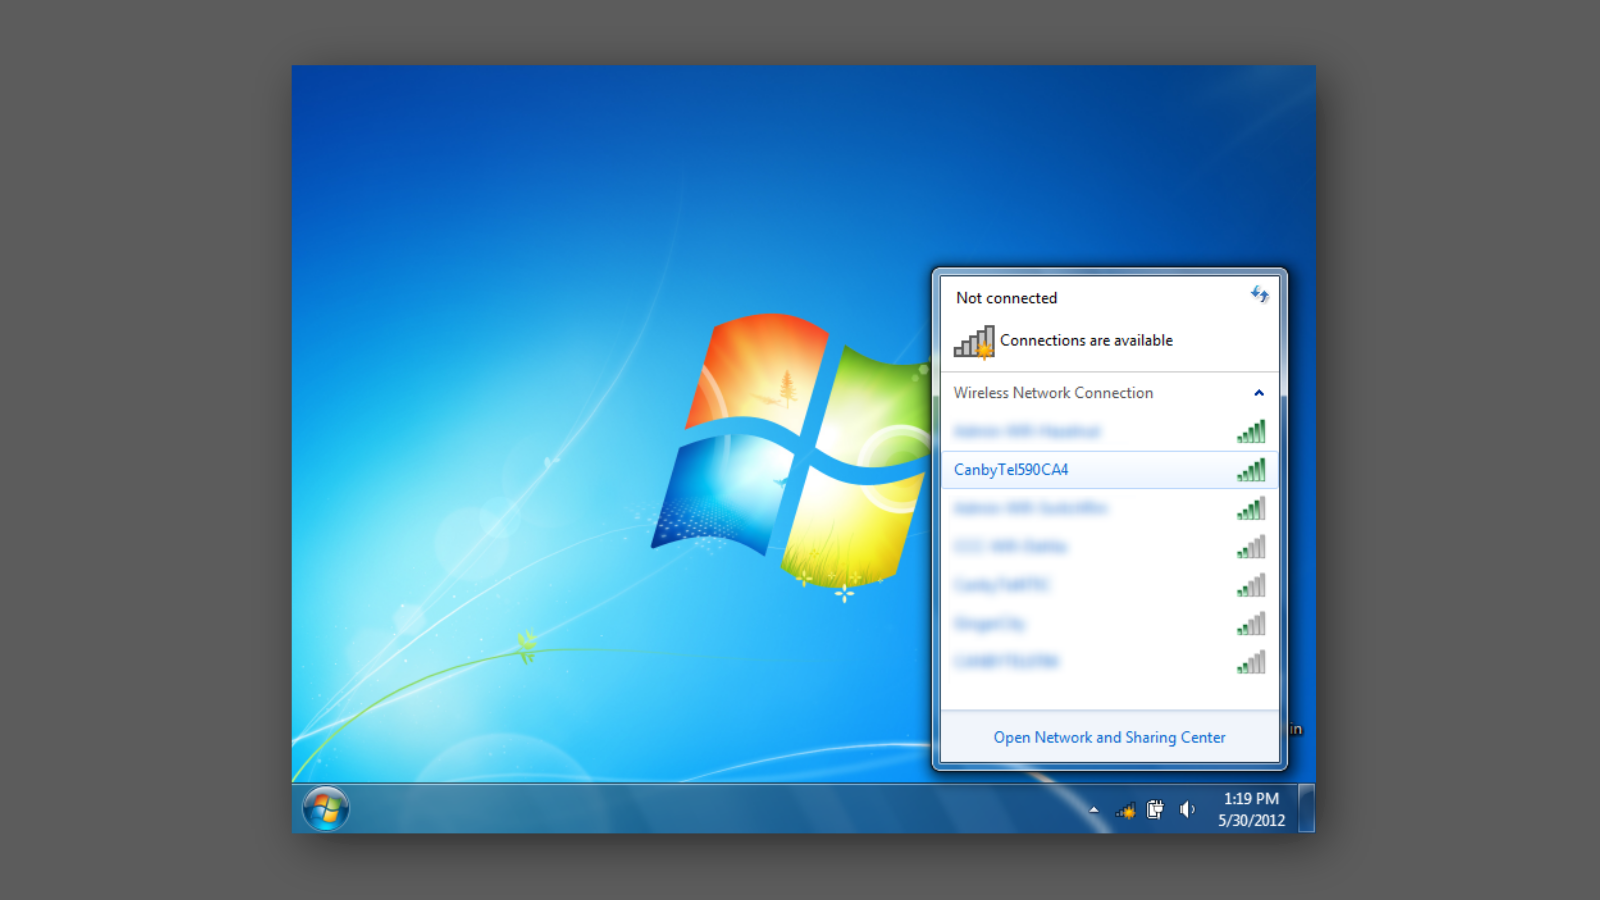
To find available networks, look for the Wi-Fi icon or symbol in the system tray or menu bar on your laptop. Clicking on the icon will open a menu or a window that shows the available Wi-Fi networks.
The list of available networks may be displayed as a dropdown menu or in a separate window. Take a moment to let the laptop complete its scan and populate the list. This process may take a few seconds to a minute, depending on your laptop’s performance and the number of Wi-Fi networks in the area.
The list of available networks will typically include the network names, also known as SSIDs (Service Set Identifiers), and sometimes signal strength indicators or icons. The SSID is the name assigned to a specific Wi-Fi network. It could be a combination of letters, numbers, or a default name provided by the router manufacturer.
Scan the list and look for the network that you want to connect to. If you are connecting to a home network, look for the name of your home Wi-Fi network. If you are in a public area or a workplace, you may see a list of various Wi-Fi networks.
In some cases, the network SSID may be hidden, making it not visible in the list of available networks. If you know the name of the hidden network, you can manually enter it in the next step.
Keep in mind that some public networks may require additional steps, such as accepting terms of service or entering a password. Look for any indicators or prompts next to the network name that might indicate if further action is needed.
Now that you have identified the Wi-Fi network you want to connect to, you can proceed to the next step to establish the connection.
Step 4: Choose Your Network
Once you have found the list of available Wi-Fi networks on your laptop, the next step is to choose the network you want to connect to. This step involves selecting the appropriate network from the list and preparing to connect to it.
Scan the list of available networks and locate the name of the network you wish to connect to. If the network is open and does not require a password, you can proceed to connect to it directly. However, if the network is secured, a password will be required to establish the connection. Look for the lock symbol or the “secured” indication next to the network name, as these indicate that a password is necessary.
If the network is open and you want to connect to it, click or select the network name from the list. Your laptop will attempt to connect automatically. Once connected, you will have internet access through the chosen network.
If the network is secured, click or select the network name, and you will be prompted to enter the password. Type in the password for the network using the keyboard. Be careful when entering the password, as it is case-sensitive. Double-check for any typos or misspellings to ensure accuracy.
If you are unable to find the Wi-Fi network you want to connect to in the list of available networks, scroll through the list to make sure you didn’t overlook it. If it still doesn’t appear, try refreshing the list by clicking on the “Refresh” or “Rescan” button.
In the case of a hidden network, manually enter the network name, also known as the SSID, in the designated field. You may also need to enter additional network information, such as the security type and password, if applicable.
Once you have chosen the network and entered the necessary information (if required), click or select “Connect” or “Join” to initiate the connection process. Your laptop will attempt to connect to the chosen network using the provided information.
After a successful connection, your laptop will display a confirmation message or a Wi-Fi symbol indicating that you are now connected to the selected network. Congratulations! You have now successfully chosen and connected to your desired Wi-Fi network.
Step 5: Enter Wi-Fi Password
When connecting to a secured Wi-Fi network, the next step is to enter the Wi-Fi password. The password ensures that only authorized users can access the network and helps protect your data and privacy.
After selecting the desired Wi-Fi network from the list, your laptop will prompt you to enter the password. This step is necessary to establish a secure connection to the network. Look for a password field or a prompt that asks for the network password.
Type in the Wi-Fi password using your keyboard. Keep in mind that passwords are case-sensitive, so ensure that you enter uppercase and lowercase letters correctly. Take your time to enter the password accurately, as any errors may lead to unsuccessful connection attempts.
If you are unsure about the password, reach out to the network administrator or the owner of the network to obtain the correct information. In some cases, the Wi-Fi router may have a label with the network name and password printed on it, so you can easily find and enter the correct password.
If you have previously connected to the same Wi-Fi network and saved the password, your laptop may automatically retrieve the password from its memory and establish the connection without prompting you to enter it again.
Remember that the Wi-Fi network password is typically set by the network owner or administrator, so it may not be the same as your laptop or other online accounts’ passwords. It’s always a good practice to use strong and unique passwords for better security.
After entering the Wi-Fi password, click or select “Connect” or “Join” to proceed. Your laptop will attempt to establish a connection with the entered password. If the password is correct, your laptop will successfully connect to the Wi-Fi network.
At this stage, you have successfully entered the Wi-Fi password and are ready to connect to the network. Hold on for a moment as your laptop establishes the connection and prepares for internet access.
Step 6: Connect to Wi-Fi
After entering the Wi-Fi password, the final step is to connect to the Wi-Fi network. This step establishes the connection between your laptop and the wireless network, allowing you to access the internet and enjoy the benefits of a wireless connection.
Once you have entered the correct Wi-Fi password, your laptop will proceed to connect to the network. It will initiate the connection process and attempt to establish a secure link with the Wi-Fi router.
Depending on your laptop and the Wi-Fi network, you may see a message indicating that your laptop is connecting to the network or that it is acquiring an IP address. This step may take a few seconds to complete.
While your laptop is attempting to connect, you may notice a loading icon or a spinning Wi-Fi symbol. This indicates that the connection process is ongoing. It’s important to be patient and allow the laptop to establish the connection without interrupting the process.
Once the connection is successfully established, your laptop will display a confirmation message or a connected status. You may also notice that the Wi-Fi icon in the system tray or menu bar changes to show a connected state.
At this point, you can open a web browser or any internet-dependent application to check if you have internet access. If successful, you should be able to browse the web, send emails, stream videos, and perform other online activities.
If you are unable to connect to the Wi-Fi network, double-check the entered password to ensure its accuracy. Additionally, check the Wi-Fi signal strength and move closer to the router if necessary. If connection issues persist, consider restarting your laptop and the Wi-Fi router or seek assistance from the network administrator or your internet service provider.
Congratulations! You have now successfully connected your laptop to the Wi-Fi network. Enjoy the freedom and convenience of wireless internet access wherever you go.
Conclusion
Connecting your laptop to a Wi-Fi network is a simple and essential process that allows you to access the internet wirelessly. By following the steps outlined in this guide, you can easily connect your laptop to any available Wi-Fi network and enjoy the benefits of wireless connectivity.
Remember to start by checking your Wi-Fi connection and ensuring that it is functioning properly. Enable Wi-Fi on your laptop and then search for available networks in your area. Choose the network you want to connect to and enter the Wi-Fi password if required. Finally, establish the connection and enjoy wireless internet access.
If you encounter any issues during the process, such as a weak signal or a forgotten password, refer back to the relevant step and troubleshoot accordingly. Restarting your laptop or router, checking for software updates, or contacting your internet service provider can help resolve most common issues.
Connecting to Wi-Fi is not only convenient, but it also allows you to stay connected and productive while on the go. Whether you’re at home, in a coffee shop, or traveling, being able to connect your laptop to Wi-Fi enables you to access online resources, communicate with others, and complete various tasks.
Now that you know how to connect your laptop to Wi-Fi, you can explore the digital world with ease. Stay connected, stay productive, and enjoy the freedom of wireless internet access wherever you go.