Introduction
Subtitles are an essential element in video production and have become increasingly popular in today’s digital landscape. They provide a textual representation of dialogue or narration, allowing viewers to understand the content of a video even if they are unable to hear or comprehend the audio. In this article, we will explore the importance of adding subtitles to videos, the different types of subtitles available, and various methods for adding subtitles to your videos.
With the rise of online video platforms and the increasing accessibility of video content, subtitles have become crucial for reaching a wider audience. They not only cater to viewers who are deaf or hard of hearing but also benefit those who prefer watching videos in a noisy environment, are learning a new language, or simply want to understand the content more clearly.
Subtitles come in different forms, including closed captions, open captions, and burned-in subtitles. Closed captions can be turned on or off by the viewer, while open captions are permanently embedded in the video. Burned-in subtitles are part of the video itself and cannot be removed. Each type has its own advantages and use cases, depending on the platform and intended audience.
Adding subtitles to your videos can be done using various methods. Video editing software such as Adobe Premiere Pro and Final Cut Pro allow you to import subtitle files and sync them with your video. Online subtitle generators offer a convenient solution for adding subtitles without the need for editing software. Additionally, some video players have built-in subtitle features that allow you to add subtitles directly while watching the video.
When adding subtitles to your videos, it is important to follow best practices to ensure a seamless viewing experience. This includes using clear and readable fonts, proper timing and synchronization of subtitles, and accurate transcription of dialogue or narration. By adhering to these practices, you can enhance the accessibility and inclusiveness of your video content, reaching a wider audience and ultimately improving the overall user experience.
Why add subtitles to a video?
Subtitles play a crucial role in improving the accessibility, engagement, and overall impact of your video content. Here are some compelling reasons why you should consider adding subtitles to your videos:
- Enhanced accessibility: By adding subtitles, you make your videos accessible to a wider audience, including those who are deaf or hard of hearing. Subtitles provide a textual representation of the audio, allowing viewers with hearing impairments to understand and enjoy your content.
- Improved comprehension: Subtitles can greatly enhance the comprehension of your video, especially when dealing with complex or technical information. Even viewers who can hear the audio may find it easier to follow along and retain information when reading subtitles.
- Language barriers: Subtitles are invaluable for reaching international audiences. They enable viewers who are not fluent in the video’s original language to understand the content. This is particularly important in today’s globalized world, where language barriers are increasingly common.
- Noisy environments: Subtitles allow viewers to enjoy video content even in noisy environments where audio may be difficult to hear. Whether it’s a crowded café or a noisy public transportation, subtitles ensure that your message is still conveyed effectively.
- SEO benefits: Adding subtitles to your videos can improve their search engine optimization (SEO). Search engines can crawl through the text in subtitles, enabling your videos to be discovered and indexed more easily. This can lead to increased visibility and organic traffic to your video content.
- Engagement and retention: Subtitles can significantly improve viewer engagement and retention. Studies have shown that videos with subtitles receive higher watch times and viewer engagement. Subtitles help to keep viewers hooked, as they can follow the content more closely and focus on the visuals.
In summary, adding subtitles to your videos has numerous benefits. It not only enhances accessibility but also improves comprehension, widens your audience reach, overcomes language barriers, caters to viewers in noisy environments, boosts SEO, and increases viewer engagement. By incorporating subtitles into your video content, you create a more inclusive and impactful viewing experience for all audiences.
Types of subtitles
When it comes to adding subtitles to your videos, there are different types to choose from. Each type serves a specific purpose and caters to different viewing preferences. Here are the three main types of subtitles:
- Closed captions: Closed captions are subtitles that can be toggled on or off by the viewer. They provide a textual representation of the audio, including dialogue, sound effects, and other relevant audio cues. Closed captions are typically used to make videos accessible to viewers who are deaf or hard of hearing. They can also be beneficial for viewers who prefer to read along with the dialogue or need assistance understanding accents or unfamiliar terminology.
- Open captions: Open captions, also known as “burned-in” or “hardcoded” subtitles, are permanently embedded in the video and cannot be turned off. Unlike closed captions, open captions are always visible to all viewers. Open captions are useful when you want to ensure that the subtitles are seen by everyone, without relying on viewer settings or external subtitle files. They are commonly used for videos shared on social media platforms or when the subtitles are an integral part of the video’s content.
- Burned-in subtitles: Burned-in subtitles are similar to open captions, as they are permanently displayed on the video. However, burned-in subtitles are actually part of the video file itself and cannot be removed or manipulated by the viewer. They are commonly used when exporting videos for platforms that do not support external subtitle files or when you want to ensure that the subtitles are visible regardless of the playback method.
Choosing the right type of subtitles depends on various factors, such as the platform where your videos will be shared, the target audience, and your specific goals for the video. Closed captions are ideal for providing accessibility and flexibility, open captions are great for videos shared on social media, and burned-in subtitles are necessary when the subtitles need to be permanently included in the video itself.
It’s worth noting that different video editing software and online subtitle generators may have specific features or support only certain types of subtitles. It’s important to choose a method that aligns with your desired subtitle type and the capabilities of your chosen tool.
In summary, the types of subtitles available include closed captions, open captions, and burned-in subtitles. Each type has its own benefits and use cases, from enhancing accessibility to ensuring subtitle visibility in various scenarios. By understanding the different types of subtitles and their applications, you can choose the most suitable option for your video content.
How to add subtitles using video editing software
If you have access to video editing software like Adobe Premiere Pro or Final Cut Pro, adding subtitles to your videos can be done seamlessly within the editing process. Here’s a step-by-step guide on how to add subtitles using video editing software:
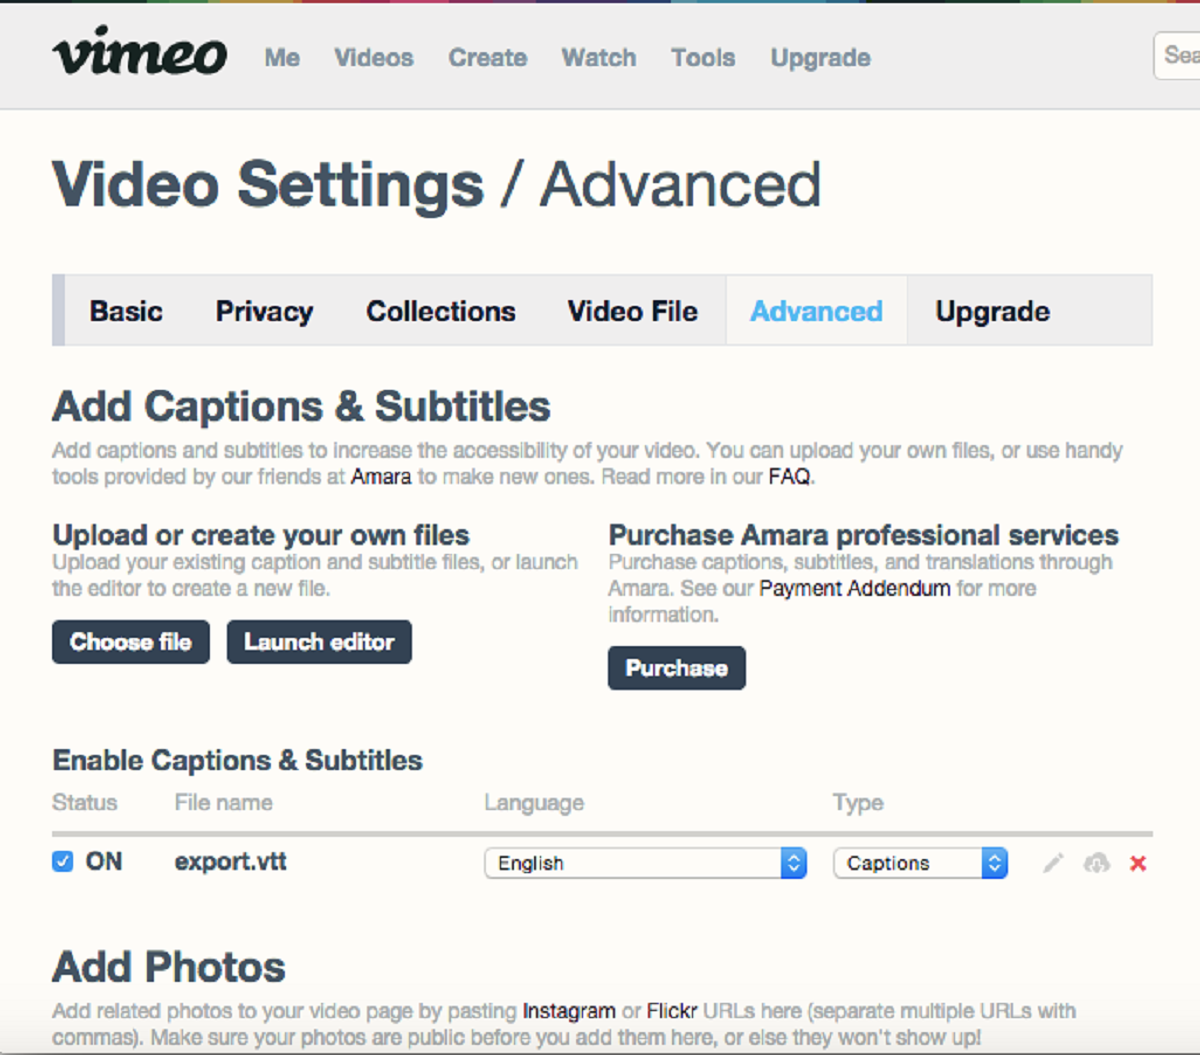
- Prepare your subtitle file: Start by creating or obtaining a subtitle file in a compatible format, such as SubRip (.srt) or WebVTT (.vtt). The subtitle file should contain the text, timing, and formatting for each subtitle entry.
- Import your video and subtitle file: Launch your video editing software and import your video clip into the timeline. Then, import the subtitle file into the software. Most video editing software allows you to drag and drop the subtitle file directly into the timeline or use the import command.
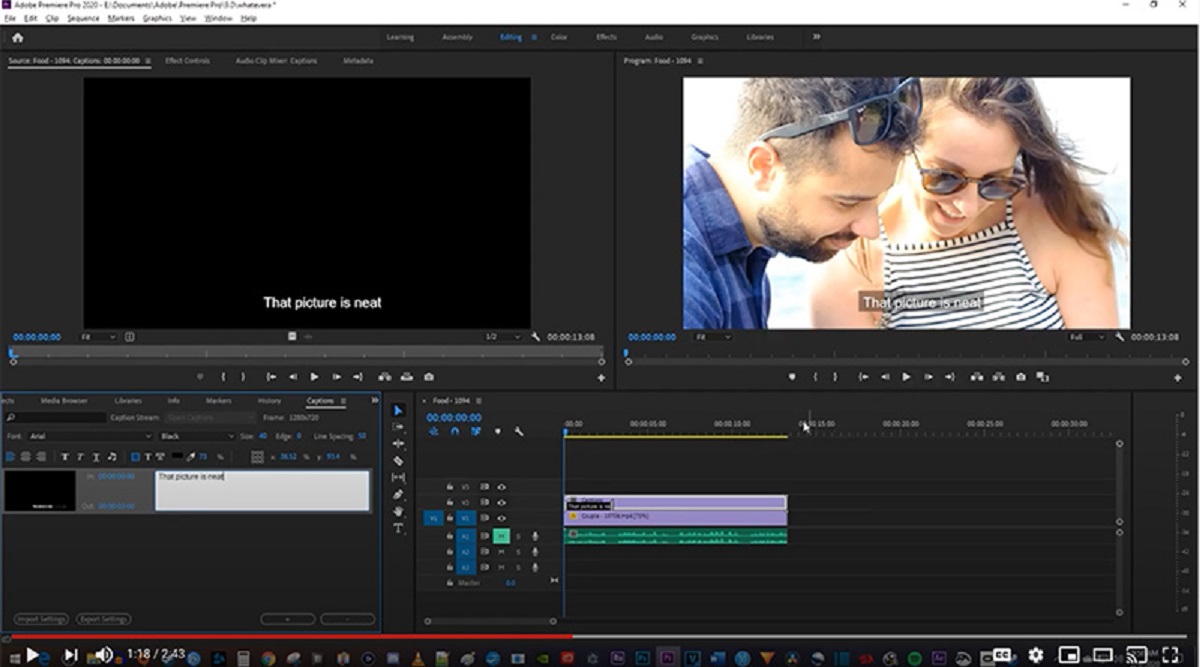
- Synchronize the subtitles: Once the subtitle file is imported, you need to sync the subtitles with the video’s timeline. This involves adjusting the timing of each subtitle entry to match the corresponding dialogue or narration in the video. Use the editing software’s timeline or markers to precisely sync the subtitles with the audio.
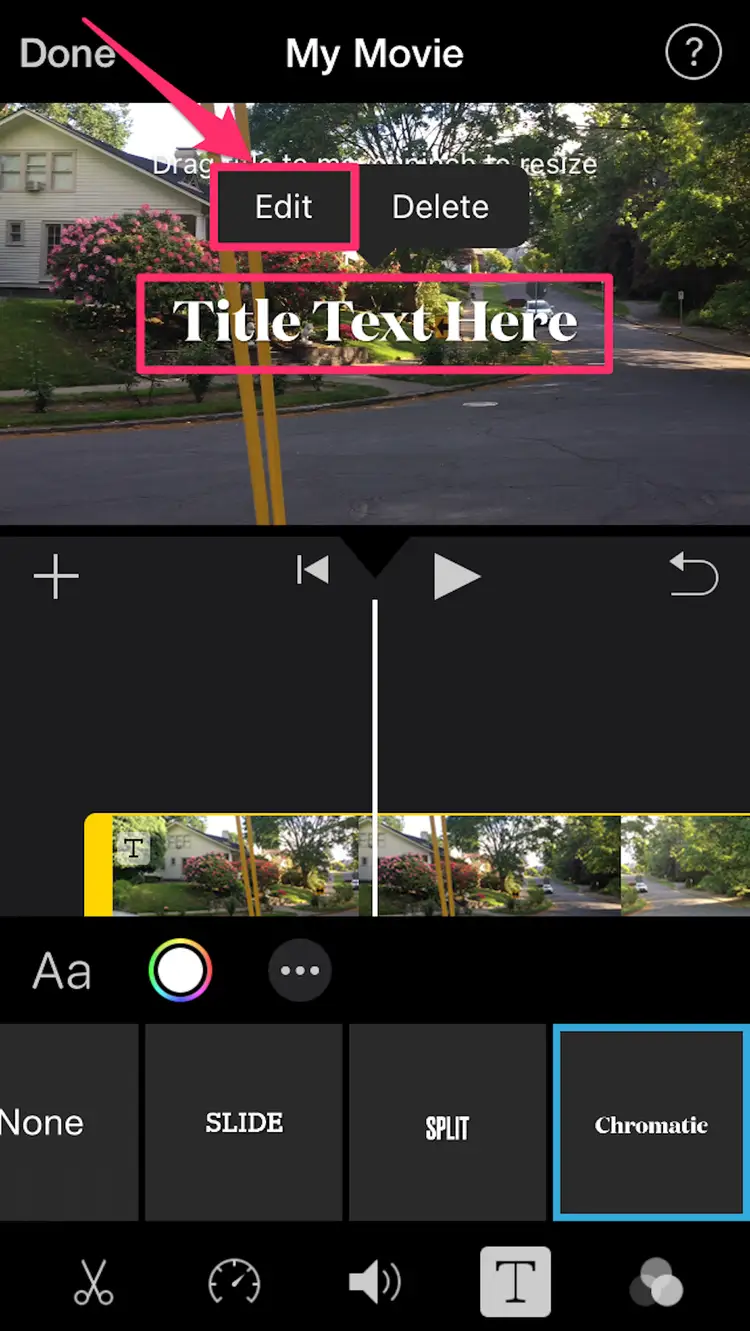
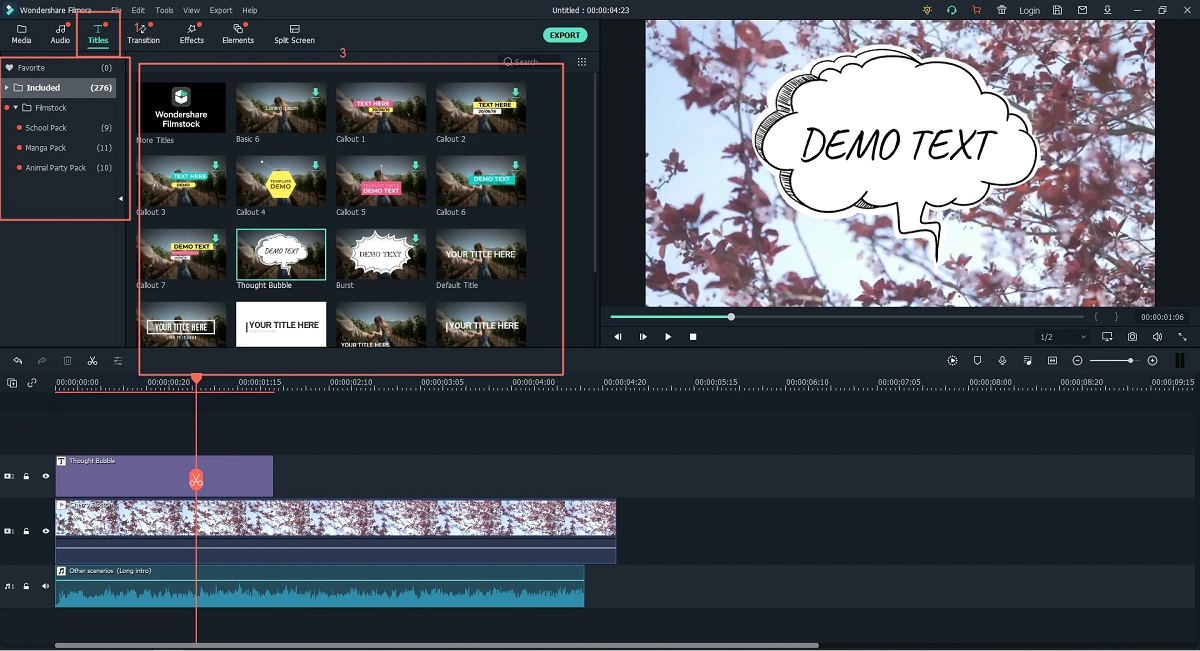
- Style and format the subtitles: Customize the appearance of the subtitles to align with your video’s branding or style. Most video editing software provides options to modify the font type, size, color, background, and positioning of the subtitles. Make sure the subtitles are easily readable and visually pleasing.
- Preview and fine-tune: Play through the video to ensure that the subtitles are correctly placed and synchronized. Make any necessary adjustments to the timing, positioning, or formatting of the subtitles to ensure they enhance the viewing experience.
- Export the video: Once you are satisfied with the subtitles, proceed to export the video with the embedded subtitles. Select the desired export settings, including resolution, format, and compression options. Then, initiate the export process and wait for the software to generate the final video file.
Adding subtitles using video editing software provides a high level of control and customization over the appearance and synchronization of the subtitles. It allows you to fine-tune the subtitles to match the timing and tone of the video, ensuring a cohesive viewing experience.
Remember to save a backup of your original video and subtitle files before making any modifications. This way, you can always revert back to the original files if needed. Additionally, make sure to test your final exported video on different devices and platforms to ensure that the subtitles are visible and properly displayed to your intended audience.
In summary, adding subtitles using video editing software involves importing your video and subtitle files, synchronizing the subtitles with the video’s timeline, customizing their appearance, previewing and fine-tuning, then exporting the final video with embedded subtitles. This method provides control over the subtitle placement, timing, and formatting, allowing you to create a professional and polished video with accurate and aesthetically pleasing subtitles.
How to add subtitles using online subtitle generators
If you don’t have access to video editing software or prefer a more streamlined approach, online subtitle generators offer a convenient solution for adding subtitles to your videos. Here’s a step-by-step guide on how to add subtitles using online subtitle generators:
- Choose a reliable subtitle generator: Start by selecting a reputable online subtitle generator that suits your needs. There are several options available, such as Kapwing, SubtitleBee, and Amara, each offering different features and user interfaces. Do some research to find the generator that best fits your requirements.
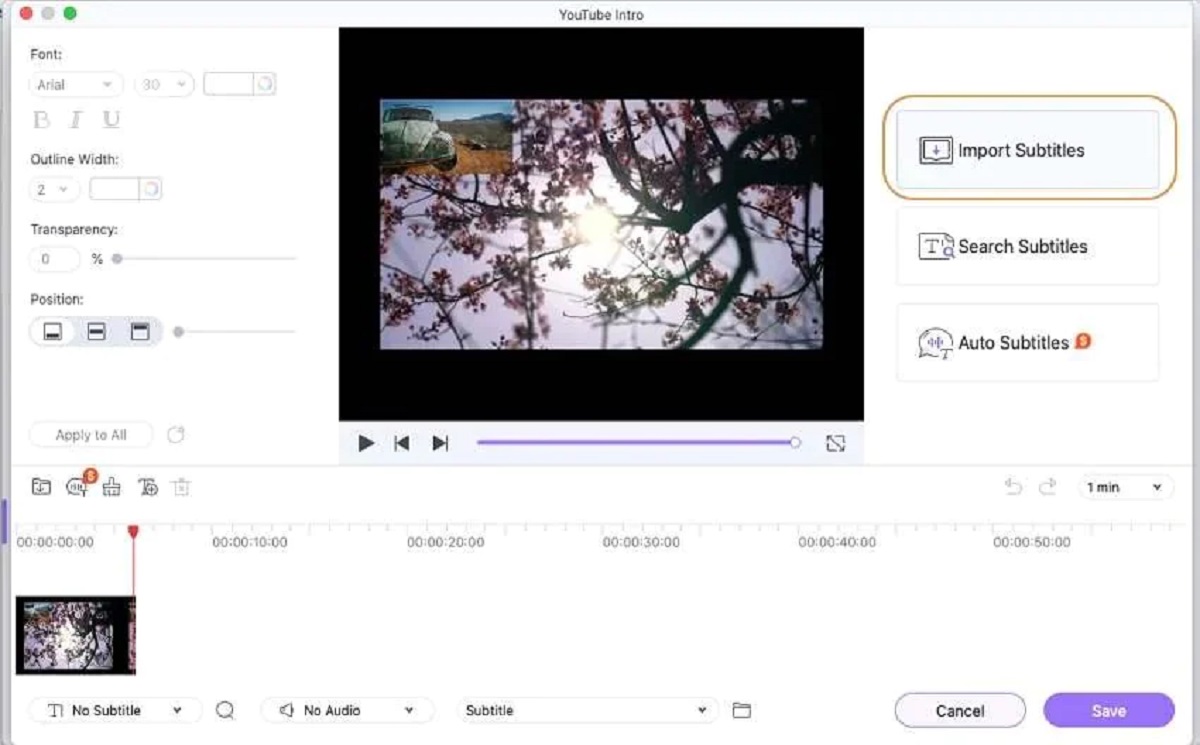
- Upload your video: Once you have chosen an online subtitle generator, upload your video file to the platform. Some generators may require you to create an account or sign in before you can start the process.
- Transcribe the dialogue or narration: Begin transcribing the dialogue or narration of your video. Most subtitle generators provide a text editor where you can type out the spoken words in the video. Alternatively, you may have the option to upload a separate transcript file if you already have one available.
- Synchronize the subtitles: After transcribing the dialogue, you will need to synchronize the subtitles with the video’s timeline. Many online subtitle generators allow you to adjust the timing of each subtitle entry by simply dragging and dropping them to the desired positions on the timeline.
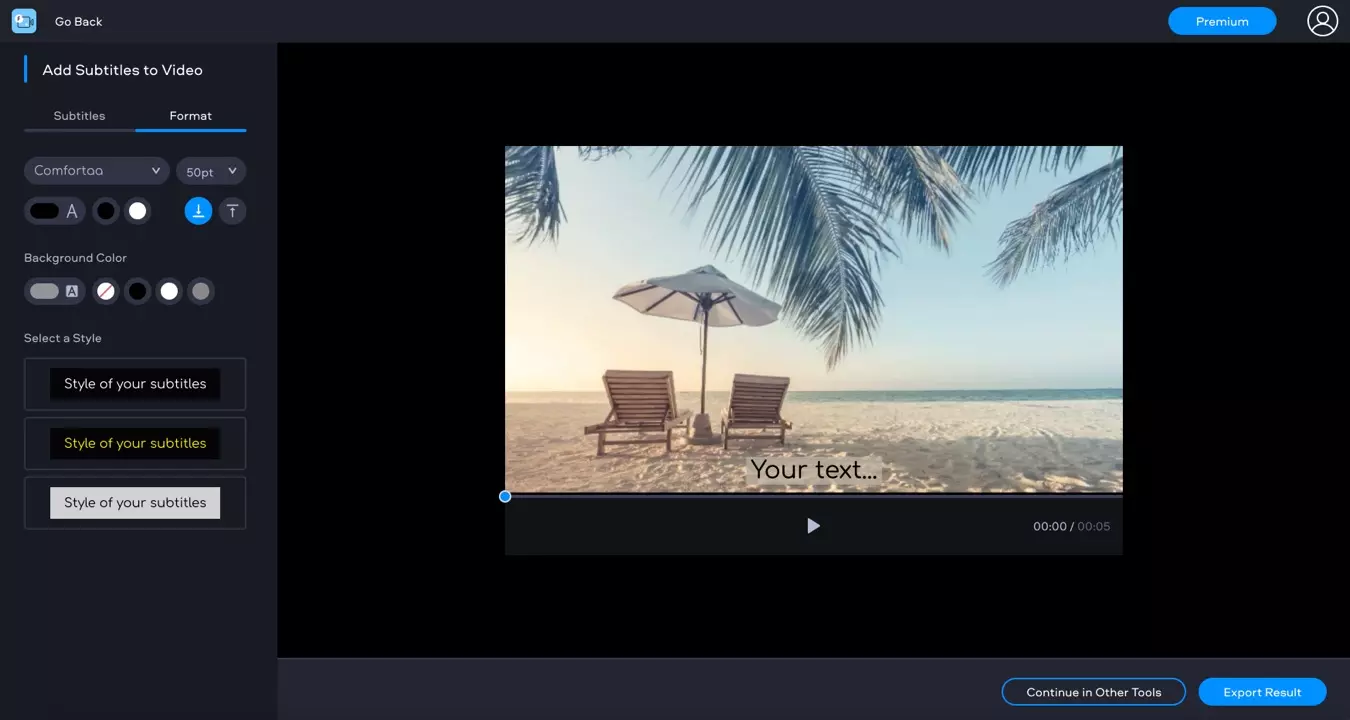
- Customize the subtitle appearance: Depending on the subtitle generator you are using, you may have options to customize the visual appearance of the subtitles. This could include selecting different fonts, colors, sizes, and positioning. Explore the available customization settings and make adjustments as desired.
- Preview and download the subtitle file: Once you have finished synchronizing and customizing the subtitles, preview the video with the subtitles to ensure accuracy and proper placement. If everything looks satisfactory, you can proceed to download the subtitle file in a compatible format, such as SubRip (.srt) or WebVTT (.vtt).
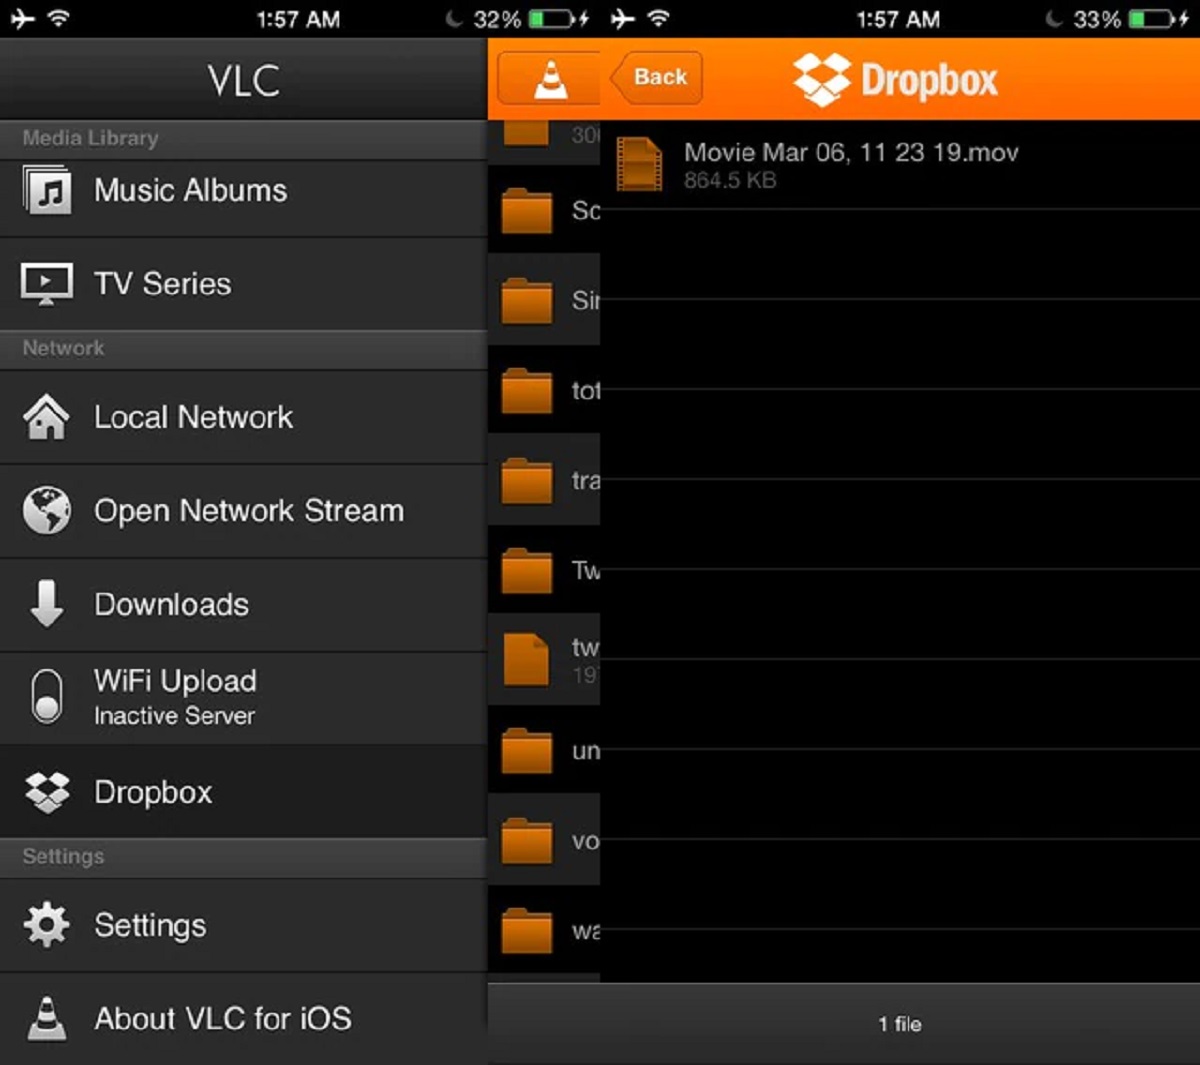
- Select a video player: Choose a video player that supports subtitle functionality. Popular video players like VLC Media Player, Windows Media Player, and QuickTime Player offer options for adding and displaying subtitles.
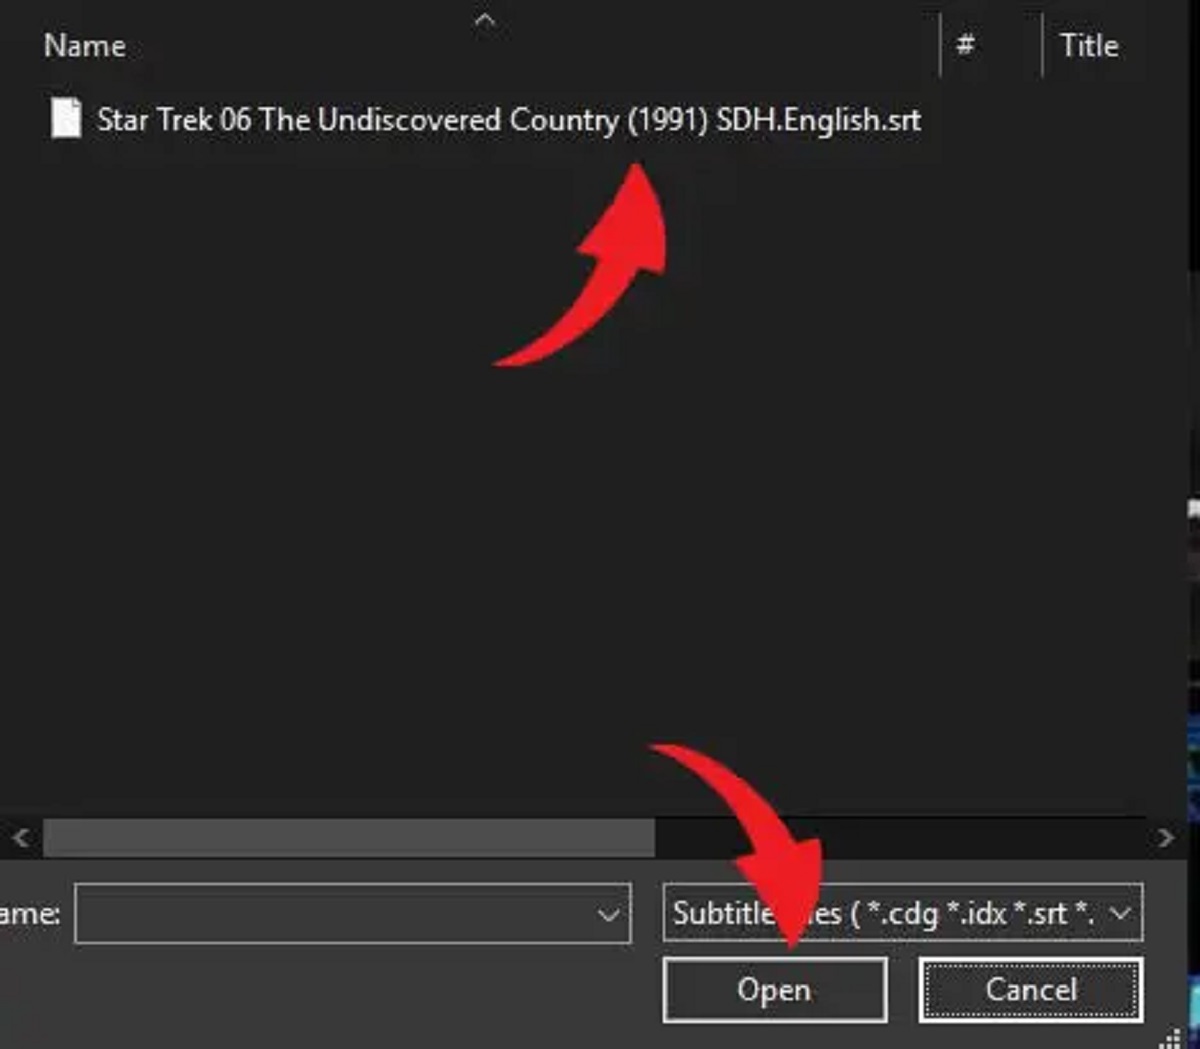
- Obtain the subtitle file: Start by obtaining a subtitle file in a compatible format, such as SubRip (.srt) or WebVTT (.vtt). You can either create the subtitle file yourself or download one from reliable sources online.
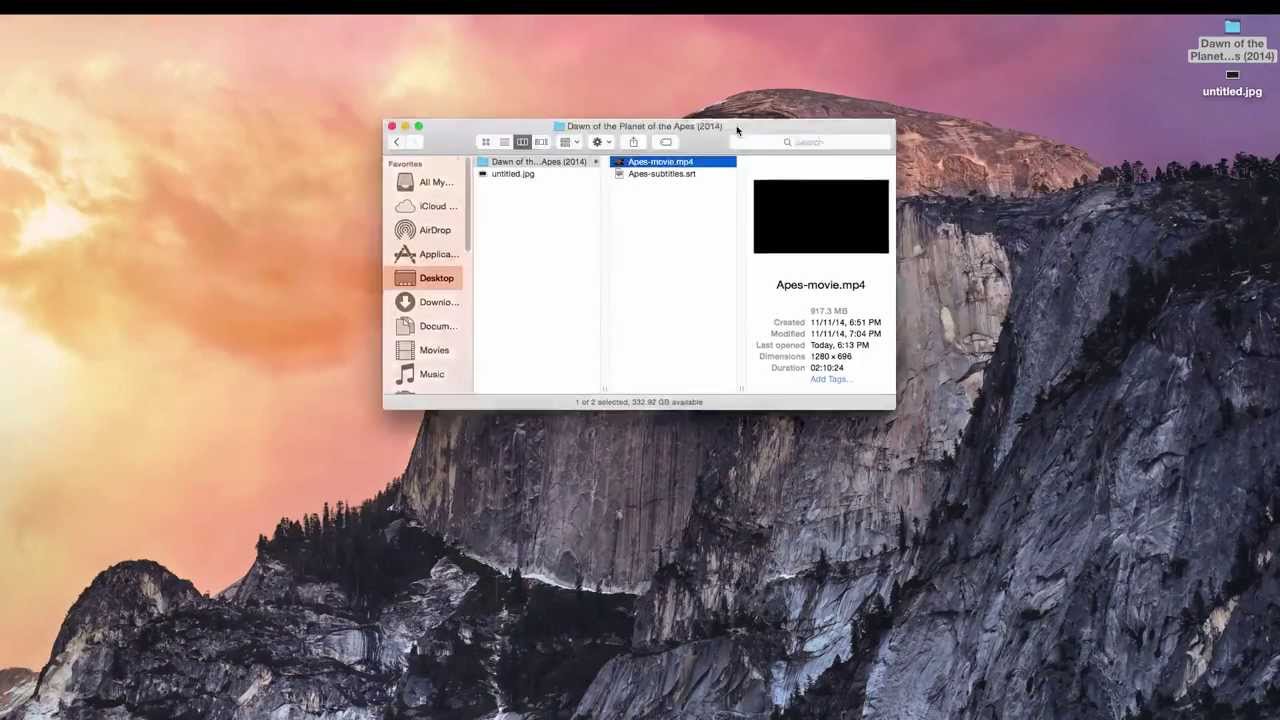
- Ensure the video and subtitle file have matching names: To enable automatic subtitle playback, make sure the video file and subtitle file have the same name (excluding the file extension). For example, if your video file is named “myvideo.mp4,” the corresponding subtitle file should be named “myvideo.srt” or “myvideo.vtt”.
- Place the video and subtitle file in the same location/folder: Move both the video file and subtitle file to the same folder or directory on your computer. This allows the video player to easily detect and associate the subtitle file with the video.
- Open the video with the video player: Launch the video player of your choice and open the video file. The player should automatically detect the presence of the matching subtitle file in the same location. If not, you may need to manually link the subtitle file to the video within the player’s settings or preferences.
- Adjust subtitle settings: Once the video is playing, you can adjust the subtitle settings within the video player. This includes options such as changing the font style, size, color, and positioning of the subtitles. The exact location of these settings will vary depending on the video player you are using.
- Synchronize subtitles (if necessary): If the subtitles are not in sync with the video’s audio, most video players allow you to manually adjust the timing of the subtitles. This ensures that the subtitles are accurately aligned with the dialogue or narration in the video.
- Enjoy the video with subtitles: Sit back and enjoy watching the video with the added subtitles. The video player will display the subtitles in real-time, providing a seamless viewing experience.
- Choose clear and easily readable fonts: Select fonts that are clear, legible, and easy to read, even at smaller sizes. Use sans-serif fonts like Arial or Helvetica, as they have better readability on screens.
- Ensure proper timing and synchronization: Sync the subtitles accurately with the audio, making sure each subtitle appears and disappears at the appropriate time. Adjust the timing to match the natural flow of speech, allowing viewers to follow along without feeling rushed or overwhelmed.
- Keep subtitles concise: Aim for concise subtitles that convey the essence of the dialogue or narration. Avoid long sentences or paragraphs, as they can be difficult to read and may distract from the visual elements of the video.
- Use proper punctuation: Proper punctuation in subtitles helps viewers understand the meaning and context of the dialogue. Use commas, periods, and appropriate punctuation marks to ensure clarity and natural breaks in the text.
- Be mindful of subtitle placement: Position subtitles in a way that does not obstruct important visual elements or text within the video. Typically, subtitles are placed at the bottom center or bottom corners of the screen, allowing viewers to read comfortably without any distractions.
- Proofread and edit: Review the subtitles for any spelling, grammar, or formatting errors. Ensure that the subtitles accurately reflect the dialogue or narration in the video. Make necessary edits to improve the overall quality of the subtitles.
- Consider localization: If your video targets an international audience, consider providing subtitles in multiple languages. Translate the dialogue or narration accurately to ensure effective communication with viewers from different linguistic backgrounds.
- Provide context and non-verbal cues: In addition to text, consider including non-verbal cues in the subtitles to provide additional context or information. This can include indicating laughter, sound effects, or describing relevant visual elements not covered in the dialogue.
- Test subtitles on different devices: Play your video with subtitles on various devices and platforms to ensure compatibility and proper display. Check for any issues, such as formatting errors, timing discrepancies, or readability problems, and make adjustments accordingly.
How to add subtitles using video players
If you prefer a more convenient and user-friendly method for adding subtitles to your videos, many video players offer built-in subtitle features. Here’s a step-by-step guide on how to add subtitles using video players:
Adding subtitles using video players offers a convenient method for watching videos with subtitles on various devices and platforms. It eliminates the need for separate subtitle files and allows for easy customization of subtitle settings to suit your preferences.
Remember to test the playback of your video with subtitles on different devices and video players to ensure compatibility and proper subtitle display. Additionally, it’s important to provide the video file and matching subtitle file together when sharing your video with others to ensure they can also enjoy it with subtitles.
Best practices for adding subtitles
When adding subtitles to your videos, it’s important to follow best practices to ensure readability, accuracy, and an overall positive viewing experience for your audience. Here are some key best practices to consider:
Following these best practices will help ensure that your subtitles are accurate, readable, and provide an enhanced viewing experience for your audience. Remember to continuously assess and fine-tune your subtitle implementation to meet the specific needs and preferences of your viewers.
Conclusion
Adding subtitles to your videos is a valuable practice that enhances accessibility, comprehension, and overall engagement for your audience. Whether you use video editing software, online subtitle generators, or video players, there are various methods available to easily incorporate subtitles into your videos.
Subtitles not only benefit viewers who are deaf, hard-of-hearing, or non-native speakers, but they also improve the overall viewing experience for everyone. By adding subtitles, you expand your reach to a wider audience and make your content more inclusive and accessible to individuals with different needs and preferences.
When adding subtitles, it’s important to adhere to best practices such as choosing readable fonts, ensuring accurate timing and synchronization, keeping subtitles concise, and testing for proper display on different devices and platforms. These practices ensure that your subtitles are clear, accurate, and seamlessly integrated into your videos.
Whether your goal is to provide accessibility, improve comprehension, overcome language barriers, or boost search engine visibility, subtitles play a crucial role in achieving these objectives. By incorporating subtitles into your video production process, you create a more engaging and inclusive experience for your viewers.
So, the next time you create videos, consider adding subtitles to maximize their impact and ensure that your message reaches a wide and diverse audience. With the multitude of tools and techniques available, you can easily add subtitles and make a positive impact on your video content.