Introduction
Adding subtitles to a video on your Android device can greatly enhance the viewing experience, making it easier for viewers to understand the dialogue, especially in cases where the audio quality may be poor or the language is unfamiliar. Subtitles also come in handy when you want to watch a video without disturbing others or in a noisy environment.
Fortunately, with the availability of subtitle apps for Android, adding subtitles to your videos has become a simple and convenient process. In this guide, we will walk you through the steps to add subtitles to a video on your Android device, allowing you to enjoy your favorite videos with accurate and synchronized captions.
Before we begin, it is important to note that there are several subtitle apps available in the Google Play Store, each with its own features and functionality. We will provide a general overview of the process, but the specific steps may vary slightly depending on the app you choose to use.
Now, let’s dive into the world of subtitles and learn how to add them to your videos on Android!
Step 1: Choosing a Subtitle App
The first step in adding subtitles to a video on your Android device is to choose a reliable subtitle app. There are various subtitle apps available in the Google Play Store, each offering different features and capabilities. Here are some factors to consider when selecting a subtitle app:
- User Reviews and Ratings: Check the reviews and ratings of different subtitle apps to gauge their reliability and functionality. Look for apps with positive reviews and high ratings, indicating that users have had a good experience with them.
- Supported Video Formats: Ensure that the subtitle app you choose supports the video formats you commonly use. It would be frustrating to find out that the app doesn’t support the video files you want to add subtitles to.
- Subtitle Format Compatibility: Different subtitle apps may support different subtitle file formats. Make sure the app you choose can handle the subtitle format you plan to use, such as .srt, .sub, or .ass.
- Ease of Use: Look for an app that has a user-friendly interface and intuitive controls. You don’t want to spend too much time trying to figure out how to use the app.
- Additional Features: Some subtitle apps offer additional features, such as the ability to customize subtitle appearance, sync subtitles with audio, or search and download subtitles directly from the app. Consider whether these features are important to you.
Once you have considered these factors, browse through the subtitle apps in the Google Play Store and read their descriptions to get a better idea of their functionalities. Take your time to choose an app that suits your needs and preferences.
Finally, it’s worth mentioning that one popular subtitle app for Android is “Subtitle Viewer.” This app allows you to add subtitles to your videos easily and supports a wide range of subtitle formats. However, feel free to explore other options if you prefer.
Step 2: Downloading and Installing the App
Once you have chosen a subtitle app that meets your requirements, it’s time to download and install it on your Android device. Follow these steps to get started:
- Open the Google Play Store: On your Android device, locate the Google Play Store app and tap on it to open it.
- Search for the Subtitle App: In the search bar, enter the name of the subtitle app you have chosen or use keywords related to subtitle apps to find relevant options.
- Select the App: From the search results, find the subtitle app you want to download and tap on it to access its app page.
- Download and Install: On the app page, tap the “Install” or “Download” button to initiate the downloading and installation process. Wait for the app to be downloaded and installed on your device.
- Open the App: Once the installation is complete, tap the “Open” button to launch the subtitle app. Alternatively, you can find the app icon on your home screen or app drawer and tap on it to open it.
It’s essential to ensure that you download the app from the official Google Play Store to minimize the risk of downloading any malicious or counterfeit apps.
Note that the steps mentioned above may vary slightly depending on your Android device’s version and the specific layout of your Google Play Store app. However, the general concept of searching for the app, downloading it, and installing it remains the same.
Now that you have successfully downloaded and installed the subtitle app, you are ready to proceed to the next step: opening the app and starting the process of adding subtitles to your video.
Step 3: Opening the App
With the subtitle app installed on your Android device, it’s time to open the app and begin the process of adding subtitles to your video. Follow these steps to open the app:
- Locate the App Icon: Depending on your device’s configuration, the app icon may be on the home screen, app drawer, or a designated folder. Look for the app icon with the name or logo of the subtitle app you have downloaded.
- Tap on the App Icon: Once you have located the app icon, tap on it to open the subtitle app. It may take a moment to load, depending on your device and the app’s size.
- Grant Necessary Permissions: Some subtitle apps may request certain permissions to access your media files or other device features. Read the permission prompt carefully and grant the necessary permissions for the app to function correctly.
- Explore the App Interface: Once the app is opened, you will be greeted by its user interface. Take a moment to familiarize yourself with the different options and features available. Most subtitle apps have a straightforward and intuitive interface, making it easy to navigate and use.
Upon opening the app, you should be ready to start the process of adding subtitles to your video. However, keep in mind that the specific steps may differ slightly based on the subtitle app you have chosen. Some apps may have additional introductory screens, tutorials, or settings that you can customize before proceeding to load your video and add subtitles.
Now that you have successfully opened the subtitle app, you can move on to the next step: loading your video into the app to begin the subtitle addition process.
Step 4: Loading Your Video
After opening the subtitle app on your Android device, the next step is to load the video you want to add subtitles to. Follow these steps to load your video into the subtitle app:
- Tap on the “+” or “Add” Button: Look for the option to add a video file within the subtitle app’s interface. It is usually denoted by a “+” or “Add” button. Tap on this button to initiate the process of selecting your video.
- Select Your Video File: The subtitle app will display a file browser or file picker interface, allowing you to navigate through your device’s storage and select the video file you want to add subtitles to. Locate the video file in the appropriate location and tap on it to select it.
- Wait for the Video to Load: Once you have selected the video file, the subtitle app will begin to load the video into its interface. The loading time may vary depending on the size and format of the video file. Be patient and wait for the app to complete the loading process.
- Confirm Video Loading: Once the video is successfully loaded into the subtitle app, you will be presented with a confirmation message or a preview of the video. Ensure that the correct video is loaded and ready for subtitle editing.
It’s important to note that not all subtitle apps support all video formats. If your selected subtitle app cannot open your video file, consider converting the video into a compatible format using a separate video conversion app or software before proceeding with the subtitle addition process.
Once your video is loaded into the subtitle app, you are ready to move on to the next step: adding subtitles to your video.
Step 5: Adding Subtitles
Now that you have successfully loaded your video into the subtitle app, it’s time to add subtitles to your video. Follow these steps to add subtitles:
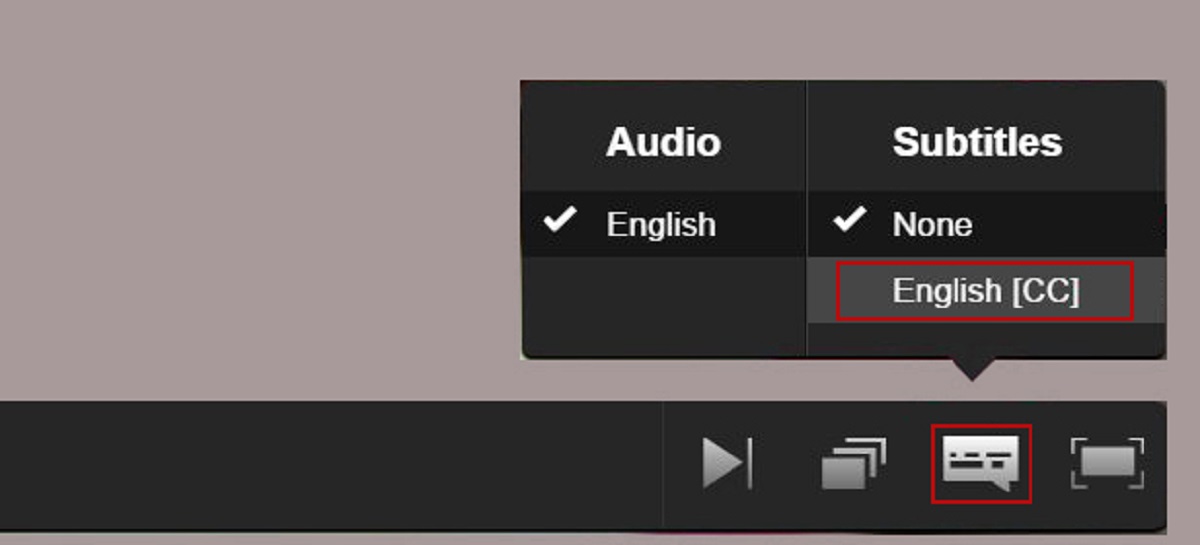
- Select the Subtitle Tab or Option: Within the subtitle app’s interface, locate the tab or option specifically designed for adding or editing subtitles. This may be denoted by a “Subtitles” or “Subtitle Editor” tab.
- List of Existing Subtitles: In the subtitle editor section, you may see a list of existing subtitles if any have been added to the video previously. If this is a new subtitle file, the list may be empty.
- Add New Subtitle: Tap on the option to add a new subtitle line or entry. This will allow you to start creating subtitles for your video.
- Enter Subtitle Text: In the subtitle entry section, input the text that you want to display as subtitles at the specific timestamp in your video. Type the subtitle text accurately, ensuring correct spelling and grammar.
- Set Subtitle Timing: After entering the subtitle text, set the timing for the subtitle to appear on the screen. This is done in hours, minutes, seconds, and milliseconds format (HH:MM:SS:MS or MM:SS:MS). The subtitle app may provide options to set timing manually or by pausing the video at the desired point and automatically capturing the timestamp.
- Save the Subtitle: Once you have entered the subtitle text and set the timing, save the subtitle entry. The app may provide a “Save” button or an “Add” button to finalize the subtitle and add it to the list of existing subtitles.
- Repeat for Additional Subtitles: If your video requires multiple subtitles, repeat the above steps to add additional subtitles at different timestamps. Ensure proper synchronization between the subtitle text and the corresponding video dialogue or action.
Continue adding subtitles for the entire duration of your video, creating as many subtitle entries as necessary. Take your time to ensure accurate timing and proper placement of subtitles to provide a seamless viewing experience.
Now that you have successfully added subtitles to your video, you are ready to move on to the next step: adjusting the subtitle timing if necessary.
Step 6: Adjusting Subtitle Timing
After adding subtitles to your video, it’s important to ensure that the timing of the subtitles is synchronized with the corresponding dialogue or action on the screen. To adjust the subtitle timing, follow these steps:
- Select the Subtitle Entry: Within the subtitle app’s interface, locate the subtitle entry that needs timing adjustment. This is usually in the list of existing subtitles.
- Access the Timing Editor: Tap on the selected subtitle entry to access the timing editor or timing adjustment options. This may be denoted by an “Edit” or “Timing” button.
- Modify the Timing: Within the timing editor, adjust the start time and end time of the subtitle. This can be done by manually entering the desired timestamps or by dragging the subtitle’s start and end markers along the video timeline.
- Preview the Timing: After adjusting the subtitle timing, preview the video and observe how the subtitles align with the dialogue or action. Make any necessary tweaks to ensure the timing is accurate.
- Save the Timing Adjustment: Once you are satisfied with the modified subtitle timing, save the changes. The app may provide a “Save” or “Apply” button to confirm the updated timing.
Repeat these steps for each subtitle entry that requires timing adjustment. Make sure to carefully review and test the timing of each subtitle to maintain synchronization throughout the video.
It’s important to note that some subtitle apps may provide additional features for timing adjustment, such as the ability to align subtitles to specific audio cues or perform automated syncing based on speech recognition. Explore the features available in your chosen subtitle app to optimize the subtitle timing adjustment process.
With the subtitle timing adjusted, you are now ready to move on to the next step: customizing the appearance of your subtitles.
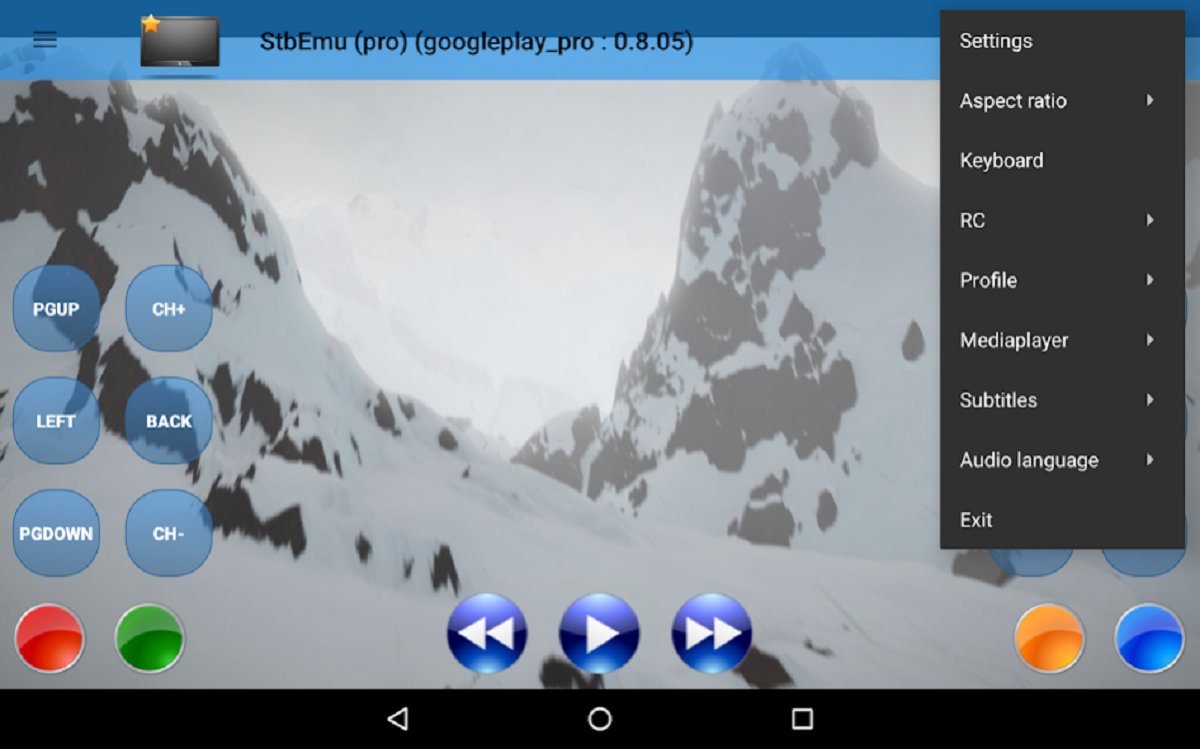
Step 7: Customizing Subtitle Appearance
Customizing the appearance of subtitles can greatly enhance the visual experience of your video. Depending on the subtitle app you are using, you may have options to personalize the font style, size, color, position, and more. Follow these steps to customize the subtitle appearance:
- Access the Subtitle Customization Options: Within the subtitle app’s interface, look for a menu, settings, or customization option that specifically relates to the appearance of subtitles. This may be labeled as “Subtitle Styles” or “Subtitle Settings.”
- Explore the Available Customization Features: Once you have accessed the subtitle customization options, explore the various features that are available. This may include options to select different fonts, adjust the font size, change the color, specify the position on the screen, and even add background or outline effects to the subtitles.
- Make Desired Changes: Customize the subtitle appearance to your preferences. Experiment with different font styles, sizes, and colors to find a combination that is easy to read and matches the overall visual aesthetic of your video.
- Preview the Subtitle Appearance: It’s recommended to preview the subtitle appearance within the app to see how it will look when added to the video. Some subtitle apps offer a preview feature that allows you to view a snippet of your video with the customized subtitle style applied.
- Save the Customization: Once you are satisfied with the customized subtitle appearance, save the changes. The app may provide a “Save” or “Apply” button to confirm the new subtitle style.
Remember that the customization options may vary depending on the subtitle app you are using. Some apps may offer advanced features like transparency settings, animation effects, or even the ability to import custom subtitle styles. Take advantage of these features to create subtitles that complement the visual theme and mood of your video.
With the subtitle appearance customized to your liking, you’re almost there! The next step is to save your subtitles and finalize the process.
Step 8: Saving Your Subtitles
At this stage, you have successfully added and customized subtitles for your video on your Android device. The final step is to save your subtitles so that they can be permanently embedded into the video. Follow these steps to save your subtitles:
- Locate the Subtitle Saving Option: Within the subtitle app’s interface, look for an option that allows you to save or export your subtitles. This may be labeled as “Save,” “Export Subtitles,” or similar.
- Select the Save Format: When saving your subtitles, the app may offer different formats to choose from, such as .srt, .sub, or .ass. Select the format that is compatible with your video playback needs.
- Choose a Destination: Specify the location on your device where you want to save the subtitle file. You may have the option to save it in the same folder as the video, in a specific subfolder, or in any desired storage location.
- Save the Subtitles: Once you have selected the save format and destination, tap the “Save” or “Export” button to initiate the saving process. The app will then generate the subtitle file and save it to the specified location.
After saving your subtitles, you can verify that they have been saved successfully by navigating to the specified location on your Android device and locating the subtitle file. The subtitle file will have the same name as your video file, but with a different subtitle file extension (.srt, .sub, or .ass).
It’s important to note that some subtitle apps may offer additional features at this stage, such as the ability to directly share the subtitle file via email or cloud storage services. Take advantage of these options if you need to share the subtitle file with others or use it on different devices.
With your subtitles saved, you have completed the process of adding, customizing, and saving subtitles for your video on your Android device. Congratulations! You can now enjoy your video with accurate and synchronized subtitles.
Conclusion
Adding subtitles to a video on your Android device enables you to enhance the accessibility and overall viewing experience. By following the steps outlined in this guide, you can easily add subtitles to your videos and customize their appearance to suit your preferences. Let’s recap the process:
- Choosing a Subtitle App: Consider factors such as user reviews, supported video formats, and subtitle format compatibility when selecting a subtitle app for your Android device.
- Downloading and Installing the App: Visit the Google Play Store, search for your chosen subtitle app, and download and install it on your device.
- Opening the App: Locate the app icon on your device and tap on it to open the subtitle app.
- Loading Your Video: Use the app to load the video file you want to add subtitles to.
- Adding Subtitles: Enter the subtitle text and set the appropriate timing for each subtitle.
- Adjusting Subtitle Timing: Review and modify the subtitle timing to ensure synchronization with the video dialogue or action.
- Customizing Subtitle Appearance: Explore the subtitle customization options and personalize the font style, size, color, and position to match your video’s visual aesthetic.
- Saving Your Subtitles: Save the subtitles in a compatible format and specify the destination on your device.
By following these steps, you have successfully added subtitles to your video on your Android device. Now, you can enjoy watching your videos with clear and synchronized captions, making it easier for viewers to understand the content.
Remember to choose a reliable subtitle app and experiment with different customization features to find the best subtitles for your videos. With the ability to add accurate and visually appealing subtitles to your videos, you can engage a broader audience and enhance their viewing experience.
So why wait? Start adding subtitles to your videos on your Android device today and enjoy the benefits of clear, accessible, and visually appealing content.