Introduction
Safari is a popular web browser known for its sleek interface and seamless user experience. As you browse the web, Safari diligently keeps track of your search history, allowing you to revisit previously viewed websites with ease. However, there are times when you may want to clear this history for privacy reasons or to declutter your browsing experience. Whether you're using Safari on your Mac, iPhone, or iPad, the process of deleting your search history is straightforward and can be accomplished in just a few simple steps.
In this article, we will guide you through the process of deleting your search history on Safari, empowering you to take control of your browsing data. You'll learn how to clear individual items from your history, wipe out your entire browsing history, and manage your history settings to suit your preferences. By the end of this guide, you'll have a clear understanding of how to maintain your privacy and keep your browsing experience organized while using Safari.
Let's dive into the step-by-step process of deleting your search history on Safari, so you can browse the web with confidence and peace of mind.
Step 1: Open Safari and go to the History tab
To begin the process of deleting your search history on Safari, you'll first need to open the Safari browser on your device. Whether you're using a Mac, iPhone, or iPad, the steps to access your browsing history remain consistent across different platforms.
On Mac:
- Launch Safari by clicking on the Safari icon in your dock or by searching for Safari in your Applications folder and opening it.
- Once Safari is open, navigate to the top menu bar and locate the "History" tab. Click on "History" to reveal a dropdown menu containing various options related to your browsing history.
On iPhone or iPad:
- Unlock your device and locate the Safari icon on your home screen. Tap on the Safari icon to launch the browser.
- With Safari open, tap and hold the "Bookmarks" icon located at the bottom of the screen. This action will reveal a menu with several options, including "History."
Upon accessing the History tab, you will be presented with a list of your recently visited websites, organized by date and time. This is where you can view and manage your browsing history, including the option to delete individual items or clear your entire browsing history.
By successfully navigating to the History tab, you have completed the first step towards managing your search history on Safari. With this foundational step accomplished, you are now ready to proceed to the next phase of the process, which involves clearing individual items from your history.
Now that you've accessed the History tab, let's move on to the next step and explore how to clear individual items from your browsing history in Safari.
Step 2: Clear individual items from your history
Once you've accessed the History tab in Safari, you gain the ability to selectively remove specific items from your browsing history. This feature is particularly useful when you want to eliminate certain websites from your history while retaining others. Whether you stumbled upon a website by accident, visited a page with sensitive information, or simply wish to declutter your history, Safari provides a straightforward method for managing individual items in your browsing history.
To clear individual items from your history in Safari, follow these steps:
On Mac:
- Open Safari and navigate to the History tab as previously described.
- Scroll through the list of websites in your browsing history and identify the specific item you wish to remove.
- Once you've located the item, right-click on it to reveal a dropdown menu of options.
- From the dropdown menu, select "Delete" to remove the individual item from your browsing history.
On iPhone or iPad:
- Launch Safari and access the History tab by following the earlier instructions.
- Scroll through the list of websites in your browsing history and find the item you want to delete.
- Swipe from right to left on the item to reveal the "Delete" option.
- Tap on "Delete" to remove the selected item from your browsing history.
By following these steps, you can efficiently manage your browsing history by removing specific items that you no longer wish to retain. This level of control allows you to curate your browsing history according to your preferences, ensuring that your history remains organized and reflective of your browsing habits.
Clearing individual items from your history in Safari empowers you to maintain a tidy and relevant browsing history, free from any unwanted or outdated entries. With this capability at your fingertips, you can confidently manage your browsing history to align with your privacy and organizational preferences.
Now that you've learned how to clear individual items from your history, let's proceed to the next step, which involves clearing your entire browsing history in Safari.
Step 3: Clear your entire history
Clearing your entire browsing history in Safari is a comprehensive way to declutter your browsing experience and maintain privacy. Whether you want to start afresh with a clean slate or ensure that no trace of your browsing activity is left behind, Safari offers a simple method to wipe out your entire history with just a few clicks or taps.
To clear your entire browsing history in Safari, follow these steps:
On Mac:
- Open Safari and navigate to the top menu bar.
- Click on the "History" tab to reveal a dropdown menu.
- From the dropdown menu, select "Clear History" to initiate the process of clearing your entire browsing history.
- A dialog box will appear, allowing you to choose the time range for which you want to clear your history. You can select options such as "the last hour," "today," "today and yesterday," or "all history." Choose "all history" to remove your entire browsing history from Safari.
- Once you've selected "all history," click "Clear History" to confirm and complete the process.
On iPhone or iPad:
- Launch Safari and tap the "Bookmarks" icon at the bottom of the screen.
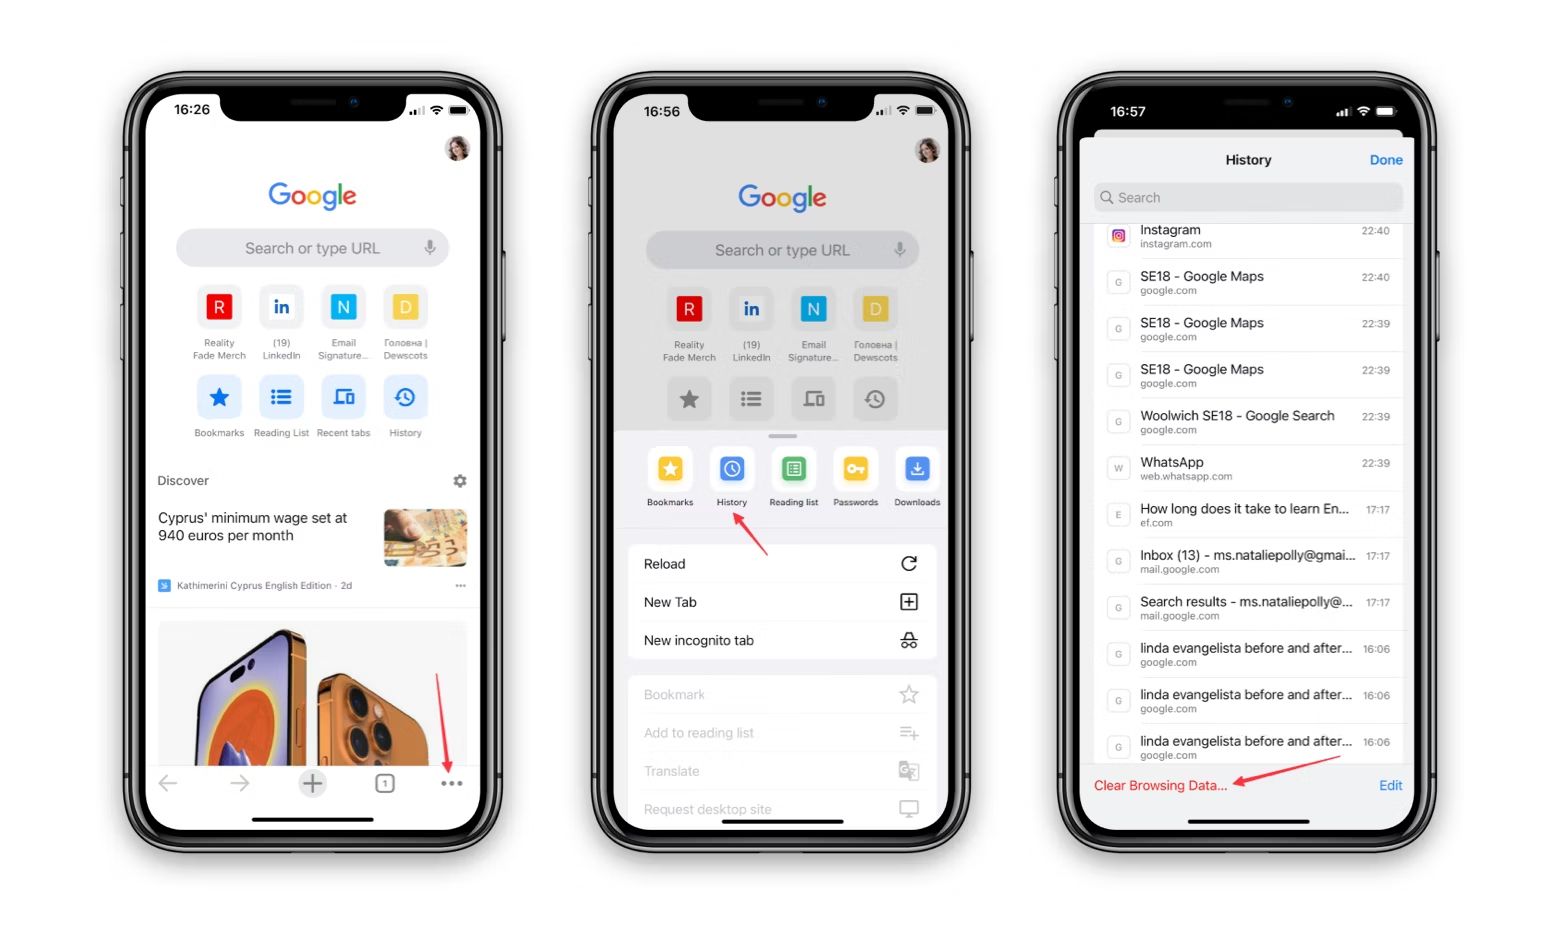
- In the menu that appears, tap on "History" to access your browsing history.
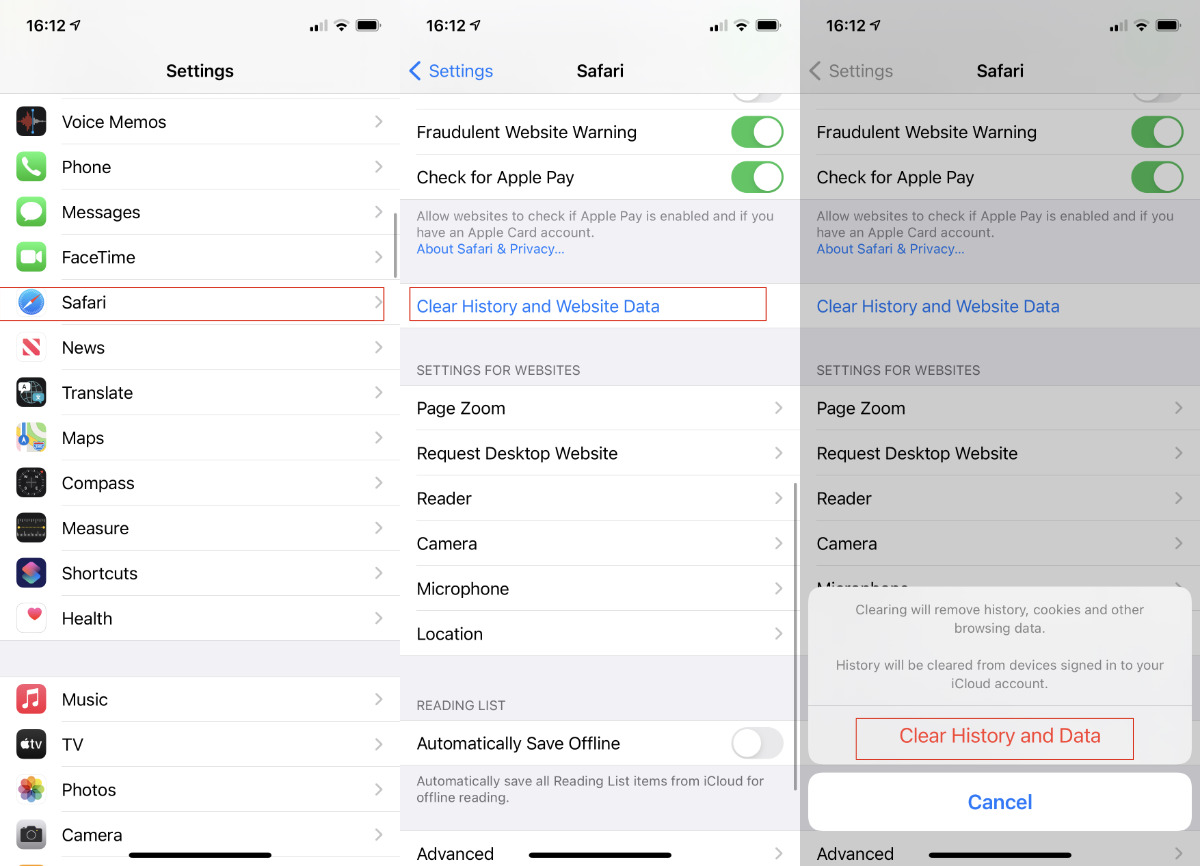
- Tap on "Clear" at the bottom of the screen.
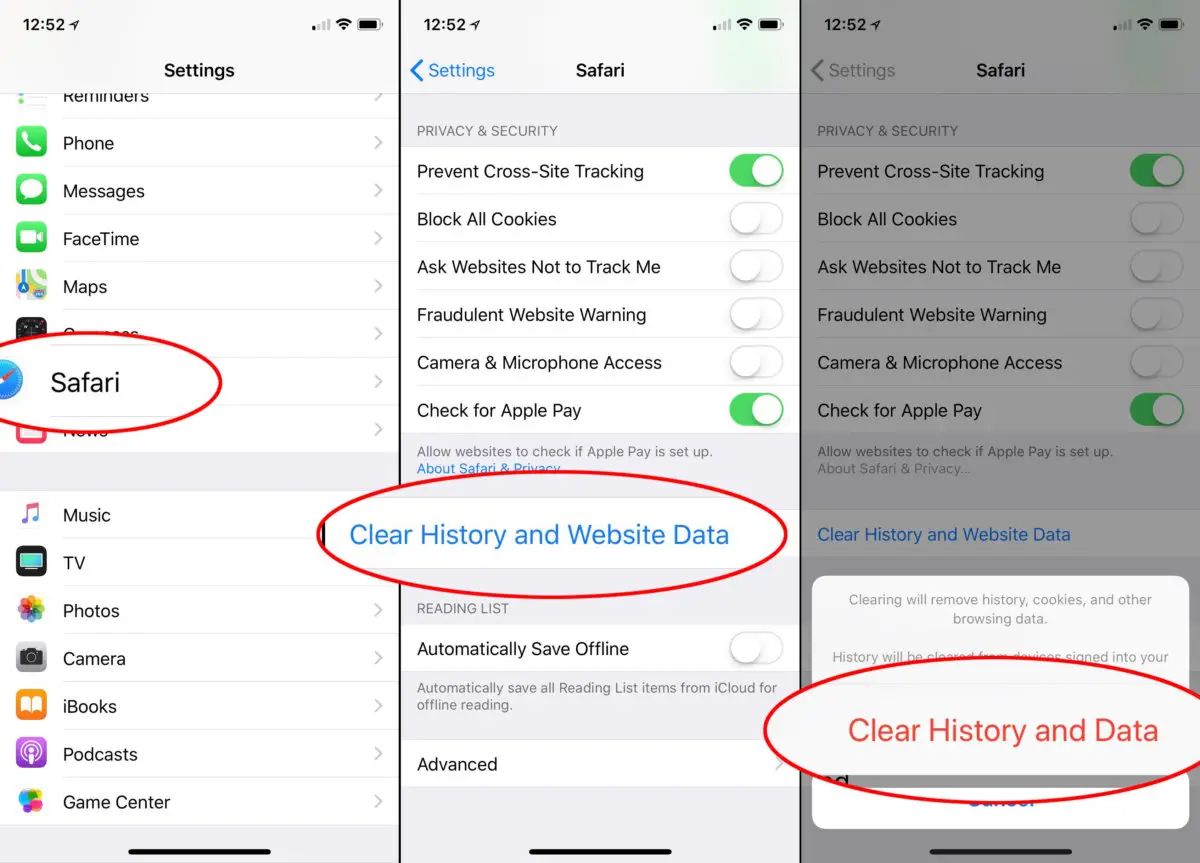
- A prompt will appear, asking if you want to clear your history. Tap "Clear History and Website Data" to confirm and proceed with clearing your entire browsing history.
By following these steps, you can effectively remove all traces of your browsing history from Safari, ensuring that your privacy is maintained and your browsing experience is streamlined. Clearing your entire history is a proactive measure to safeguard your privacy and maintain a clutter-free browsing environment.
Once you've cleared your entire browsing history, you can browse the web with confidence, knowing that your past browsing activity has been securely removed. This process allows you to start anew or simply maintain a clean slate in terms of your browsing history within Safari.
With your entire history cleared, you have successfully taken control of your browsing data and ensured that your privacy remains intact. Now that you've learned how to clear your entire history, let's explore the next step, which involves managing your history settings to further customize your browsing experience in Safari.
Step 4: Manage your history settings
In addition to clearing your browsing history, Safari provides customizable settings that allow you to manage how your browsing history is stored and utilized. By accessing the history settings, you can tailor the behavior of Safari to align with your privacy preferences and browsing habits. This level of control empowers you to fine-tune your browsing experience, ensuring that your history is managed in a manner that suits your individual needs.
To manage your history settings in Safari, follow these steps:
On Mac:
- Open Safari and navigate to the top menu bar.
- Click on the "Safari" tab to reveal a dropdown menu.
- Select "Preferences" from the dropdown menu to access the Safari preferences window.
- Within the preferences window, click on the "Privacy" tab, which contains various options related to your browsing data and history settings.
- In the "Privacy" tab, you can customize settings such as website tracking, cookie management, and the management of website data. These settings allow you to control how Safari handles your browsing history and related data.
On iPhone or iPad:
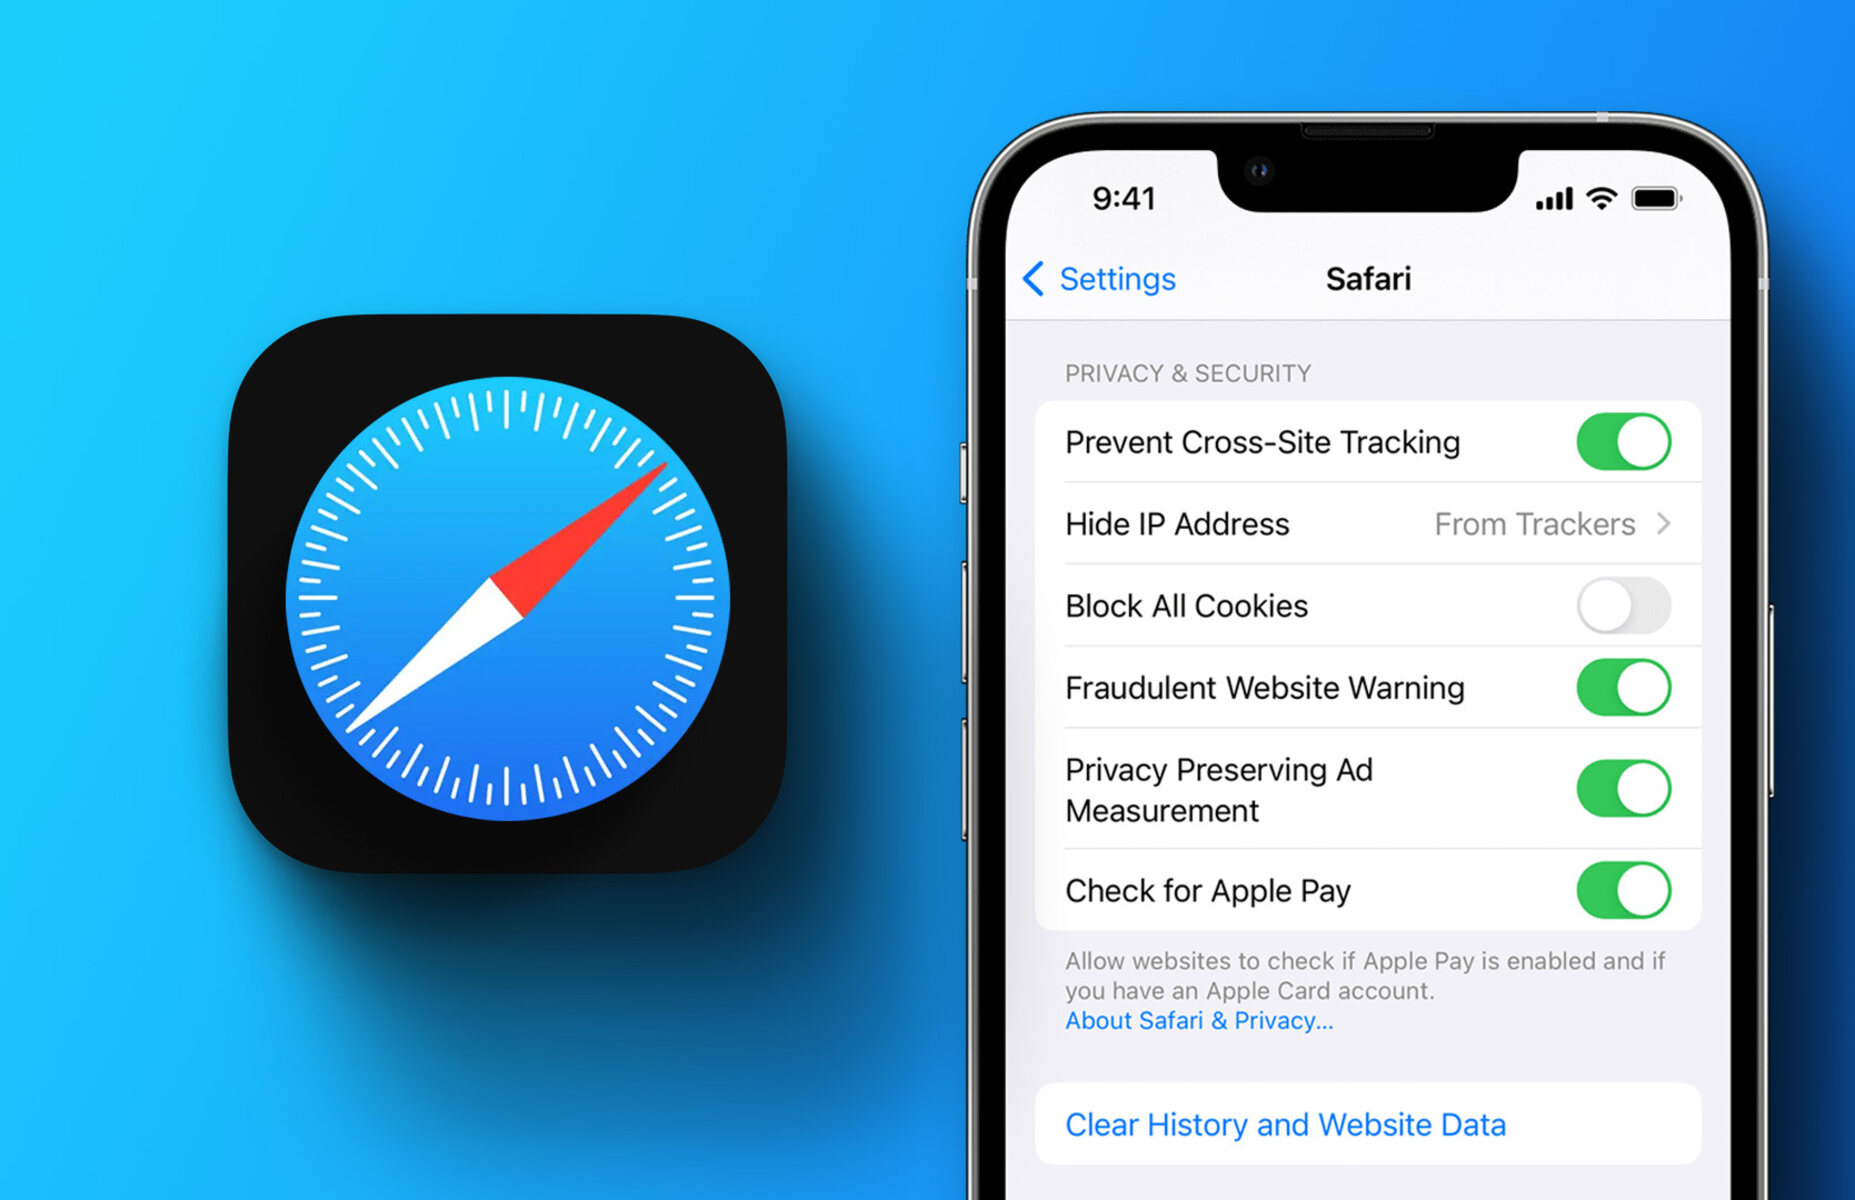
- Open the "Settings" app on your device.
- Scroll down and tap on "Safari" to access the Safari settings.
- Within the Safari settings, you can find options to manage your privacy and security settings, including those related to your browsing history.
- Customize settings such as "Prevent Cross-Site Tracking," "Block All Cookies," and "Clear History and Website Data" to tailor Safari's behavior according to your preferences.
By managing your history settings, you can dictate how Safari handles your browsing history, cookies, and website data. These settings offer a nuanced approach to maintaining your privacy and controlling the storage of your browsing information. Whether you prefer to limit website tracking, enhance your privacy protections, or fine-tune data management, Safari's history settings provide the flexibility to align the browser with your specific preferences.
With your history settings managed to your liking, you can navigate the web with confidence, knowing that Safari operates in a manner that respects your privacy and browsing preferences. By customizing these settings, you can optimize your browsing experience while maintaining control over your browsing history and related data.
By following these steps, you can effectively manage your history settings in Safari, ensuring that the browser operates in a manner that aligns with your privacy and browsing preferences. With these customizable options at your disposal, you can tailor Safari to suit your individual needs, providing a personalized and secure browsing experience.
Conclusion
In conclusion, managing your search history on Safari is an essential aspect of maintaining privacy, decluttering your browsing experience, and customizing the browser to align with your preferences. By following the step-by-step guide outlined in this article, you have gained valuable insights into the process of deleting your search history on Safari, empowering you to take control of your browsing data.
From accessing the History tab to clearing individual items and wiping out your entire history, you have learned how to navigate Safari's interface with ease and confidence. The ability to selectively remove specific items from your history provides a tailored approach to managing your browsing data, ensuring that your history remains relevant and organized.
Clearing your entire browsing history serves as a proactive measure to safeguard your privacy and maintain a clutter-free browsing environment. This comprehensive action allows you to start anew or simply maintain a clean slate in terms of your browsing history within Safari, providing peace of mind as you explore the web.
Furthermore, the ability to manage your history settings empowers you to fine-tune Safari's behavior to suit your individual needs. By customizing settings related to privacy, website tracking, and data management, you can optimize your browsing experience while maintaining control over your browsing history and related data.
As you continue to utilize Safari for your web browsing needs, the knowledge and skills acquired from this guide will serve you well in maintaining a streamlined and privacy-conscious browsing experience. Whether you're using Safari on your Mac, iPhone, or iPad, the principles of managing your search history remain consistent, allowing you to apply these techniques across different devices seamlessly.
By taking proactive steps to manage your search history on Safari, you can browse the web with confidence, knowing that your privacy is respected, and your browsing experience is tailored to your preferences. With the tools and knowledge at your disposal, you are well-equipped to maintain a tidy and relevant browsing history while enjoying the seamless functionality of Safari.
In essence, by mastering the art of managing your search history on Safari, you have unlocked the potential to browse the web with confidence, privacy, and personalized control. Embrace these newfound capabilities as you navigate the digital landscape, knowing that you hold the key to a tailored and secure browsing experience on Safari.


