Introduction
Safari, Apple's native web browser, is a powerful tool for accessing the internet on Mac, iPhone, and iPad devices. As you navigate through various websites, Safari diligently keeps track of your browsing history, creating a record of the sites you've visited. While this feature can be incredibly useful for revisiting previously viewed pages, there are times when you may want to clear this history for privacy or performance reasons.
Whether you're looking to remove traces of a surprise gift purchase from a shared device or simply aiming to declutter your browsing experience, knowing how to delete your Safari history is a valuable skill. By taking a few simple steps, you can ensure that your browsing activities remain private and your browser functions optimally.
In this guide, we'll walk you through the process of deleting your Safari history, providing clear and easy-to-follow instructions for both Mac and iOS devices. By the end of this tutorial, you'll have the knowledge and confidence to manage your browsing history effectively, allowing you to maintain a clean and secure digital footprint. Let's dive in and take control of your Safari browsing history!
Step 1: Open Safari and Access History
To begin the process of deleting your Safari browsing history, you'll first need to open the Safari web browser on your Mac or iOS device. Once Safari is launched, accessing your browsing history is a straightforward task, allowing you to review and manage the list of websites you've visited.
On Mac:
-
Launch Safari: Click on the Safari icon in your Mac's dock or navigate to the Applications folder and open Safari from there.
-
Access History: Once Safari is open, you can access your browsing history by clicking on the "History" tab located in the top menu bar. A dropdown menu will appear, displaying various options including "Show All History." Click on "Show All History" to reveal a comprehensive list of websites you've visited, organized by date.
-
Review and Navigate: Upon accessing your browsing history, you can scroll through the list to review the websites you've visited. Safari conveniently categorizes the history by date, making it easy to locate specific entries based on when they were accessed.
On iOS:
-
Open Safari App: Tap on the Safari app icon on your iOS device's home screen to launch the browser.
-
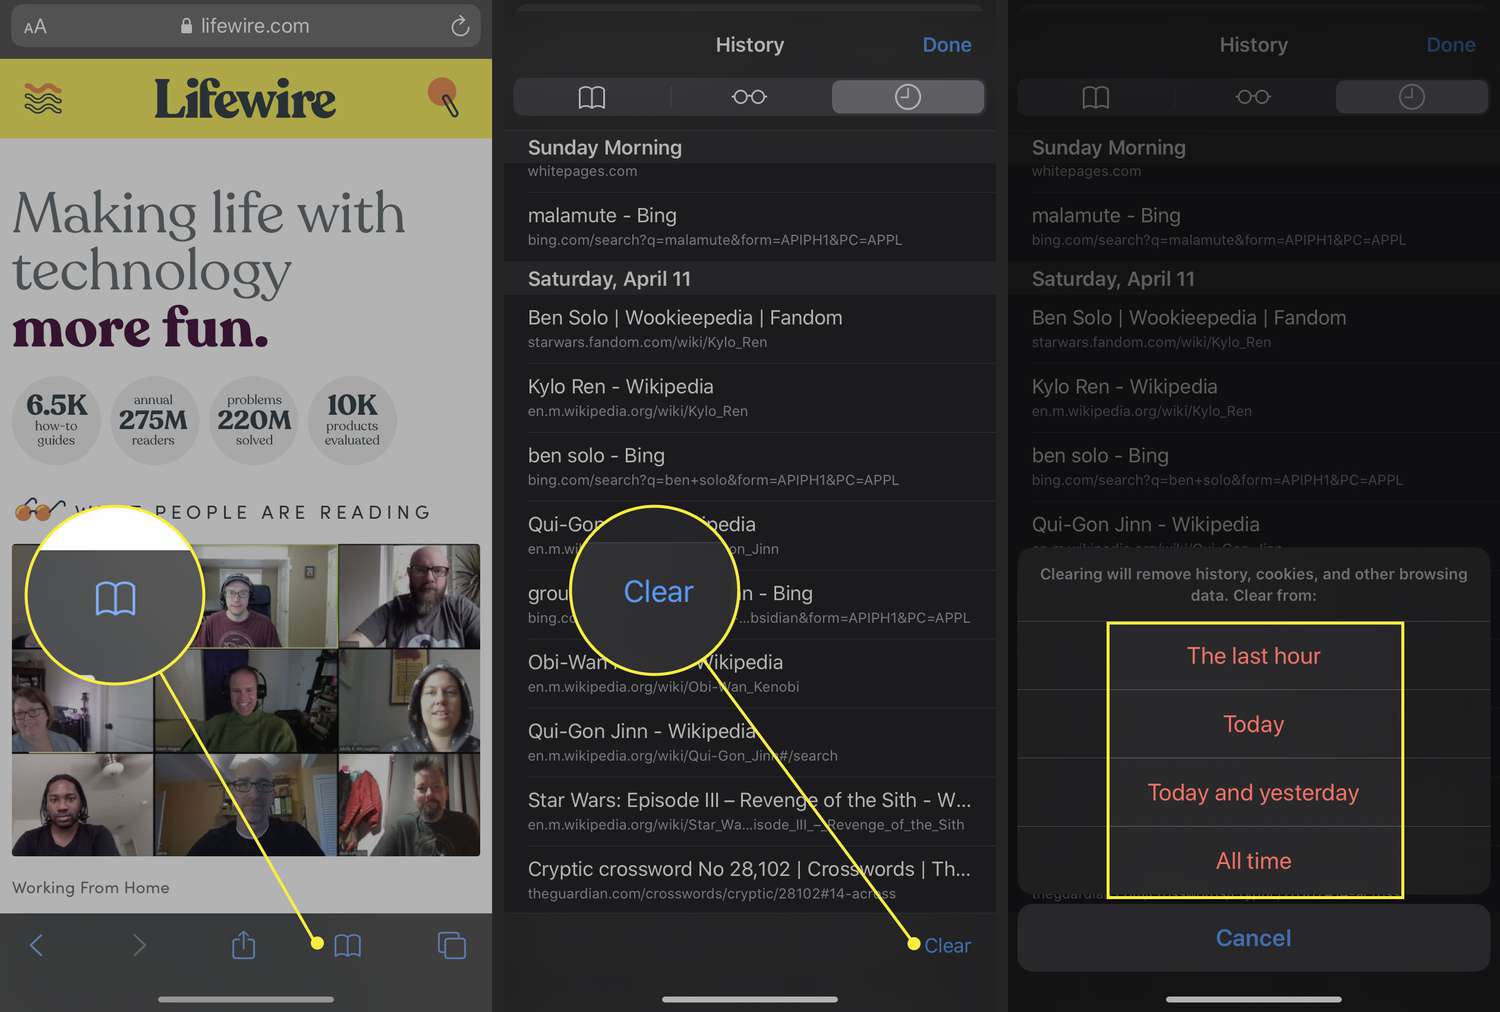
Access History: Once Safari is open, tap and hold the back arrow icon located in the bottom toolbar. This action will reveal your browsing history, allowing you to view the websites you've visited.
-
Navigate History: You can now scroll through the list of visited websites, organized by date, and tap on any entry to revisit the respective site.
By following these simple steps, you can effortlessly access your browsing history on both Mac and iOS devices, setting the stage for the next phase of clearing your Safari history. Now that you've successfully accessed your browsing history, let's move on to the next step and learn how to clear this data from your Safari browser.
Step 2: Clear Browsing History
Now that you've accessed your browsing history on Safari, it's time to take control of this data by clearing the records of your online activities. Whether you're looking to maintain privacy, free up storage space, or optimize your browser's performance, clearing your browsing history is a simple yet impactful task. Below, you'll find detailed instructions for clearing your Safari history on both Mac and iOS devices.
On Mac:
-
Navigate to History: After accessing your browsing history as outlined in Step 1, click on the "History" tab in the top menu bar. From the dropdown menu, select "Clear History" to proceed.
-
Choose Time Range: A dialog box will appear, offering options to clear your browsing history from the last hour, today, today and yesterday, or all history. Select the desired time range based on the data you wish to remove.
-
Confirm Clearing: Once you've chosen the time range, click on the "Clear History" button to initiate the deletion process. Safari will promptly remove the selected browsing history from your Mac, ensuring that your past online activities are no longer accessible.
On iOS:
-
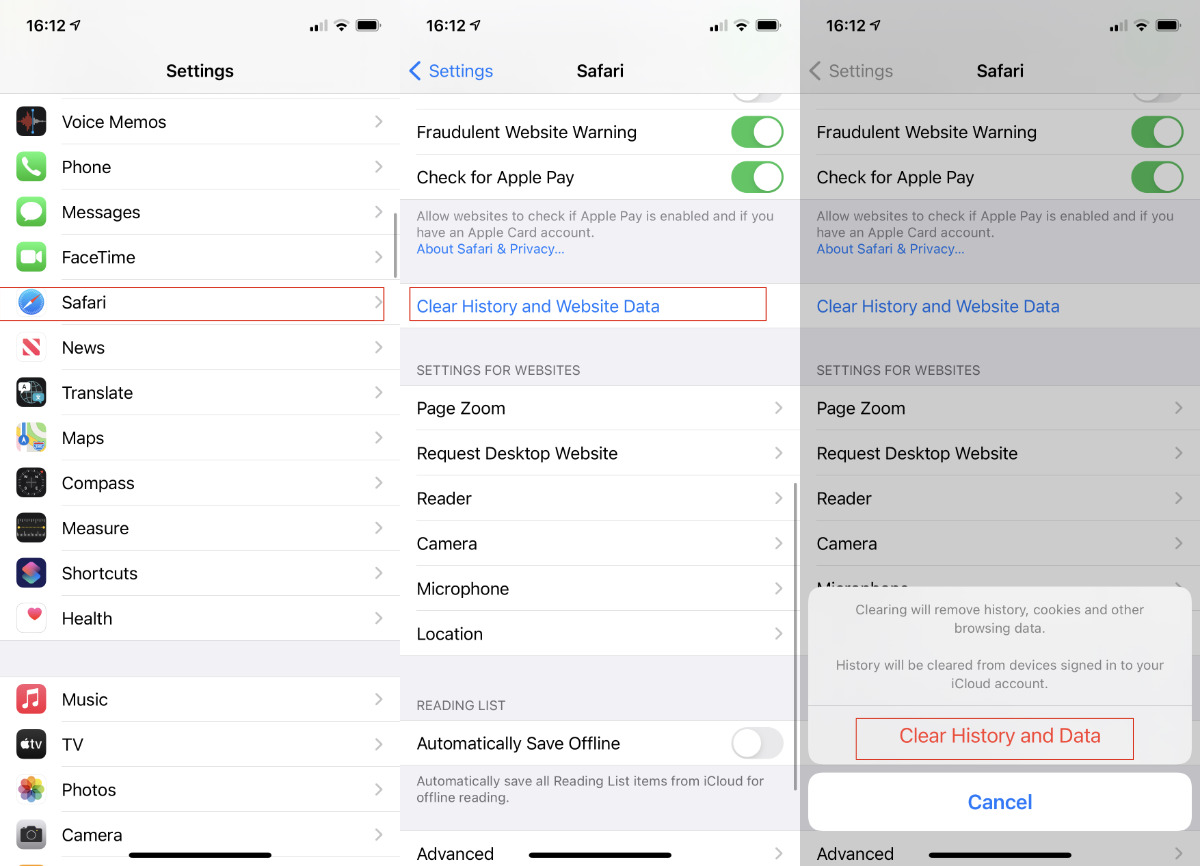
Access Settings: Open the "Settings" app on your iOS device and scroll down to find "Safari" in the list of installed apps.
-
Clear History and Website Data: Within the Safari settings, tap on "Clear History and Website Data." A confirmation prompt will appear, asking if you want to clear your browsing history and cookies. Tap "Clear History and Data" to proceed.
By following these straightforward steps, you can effectively clear your Safari browsing history, safeguarding your privacy and optimizing your browsing experience. With your browsing history successfully cleared, let's move on to the final step to ensure that the deletion process is confirmed and your Safari browser is ready for continued use.
Step 3: Confirm Deletion
After clearing your Safari browsing history on Mac or iOS, it's essential to confirm that the deletion process was successful. Verifying that your browsing history has been effectively removed provides peace of mind and ensures that your privacy is upheld. Additionally, confirming the deletion allows you to proceed with your browsing activities on Safari with a clean slate, free from the remnants of past visits.
On Mac:
-
Verify History Removal: To confirm that your browsing history has been deleted on Safari for Mac, simply revisit the "Show All History" option under the "History" tab. Upon accessing your browsing history, you should notice that the previously listed websites are no longer present, indicating that the deletion process was successful.
-
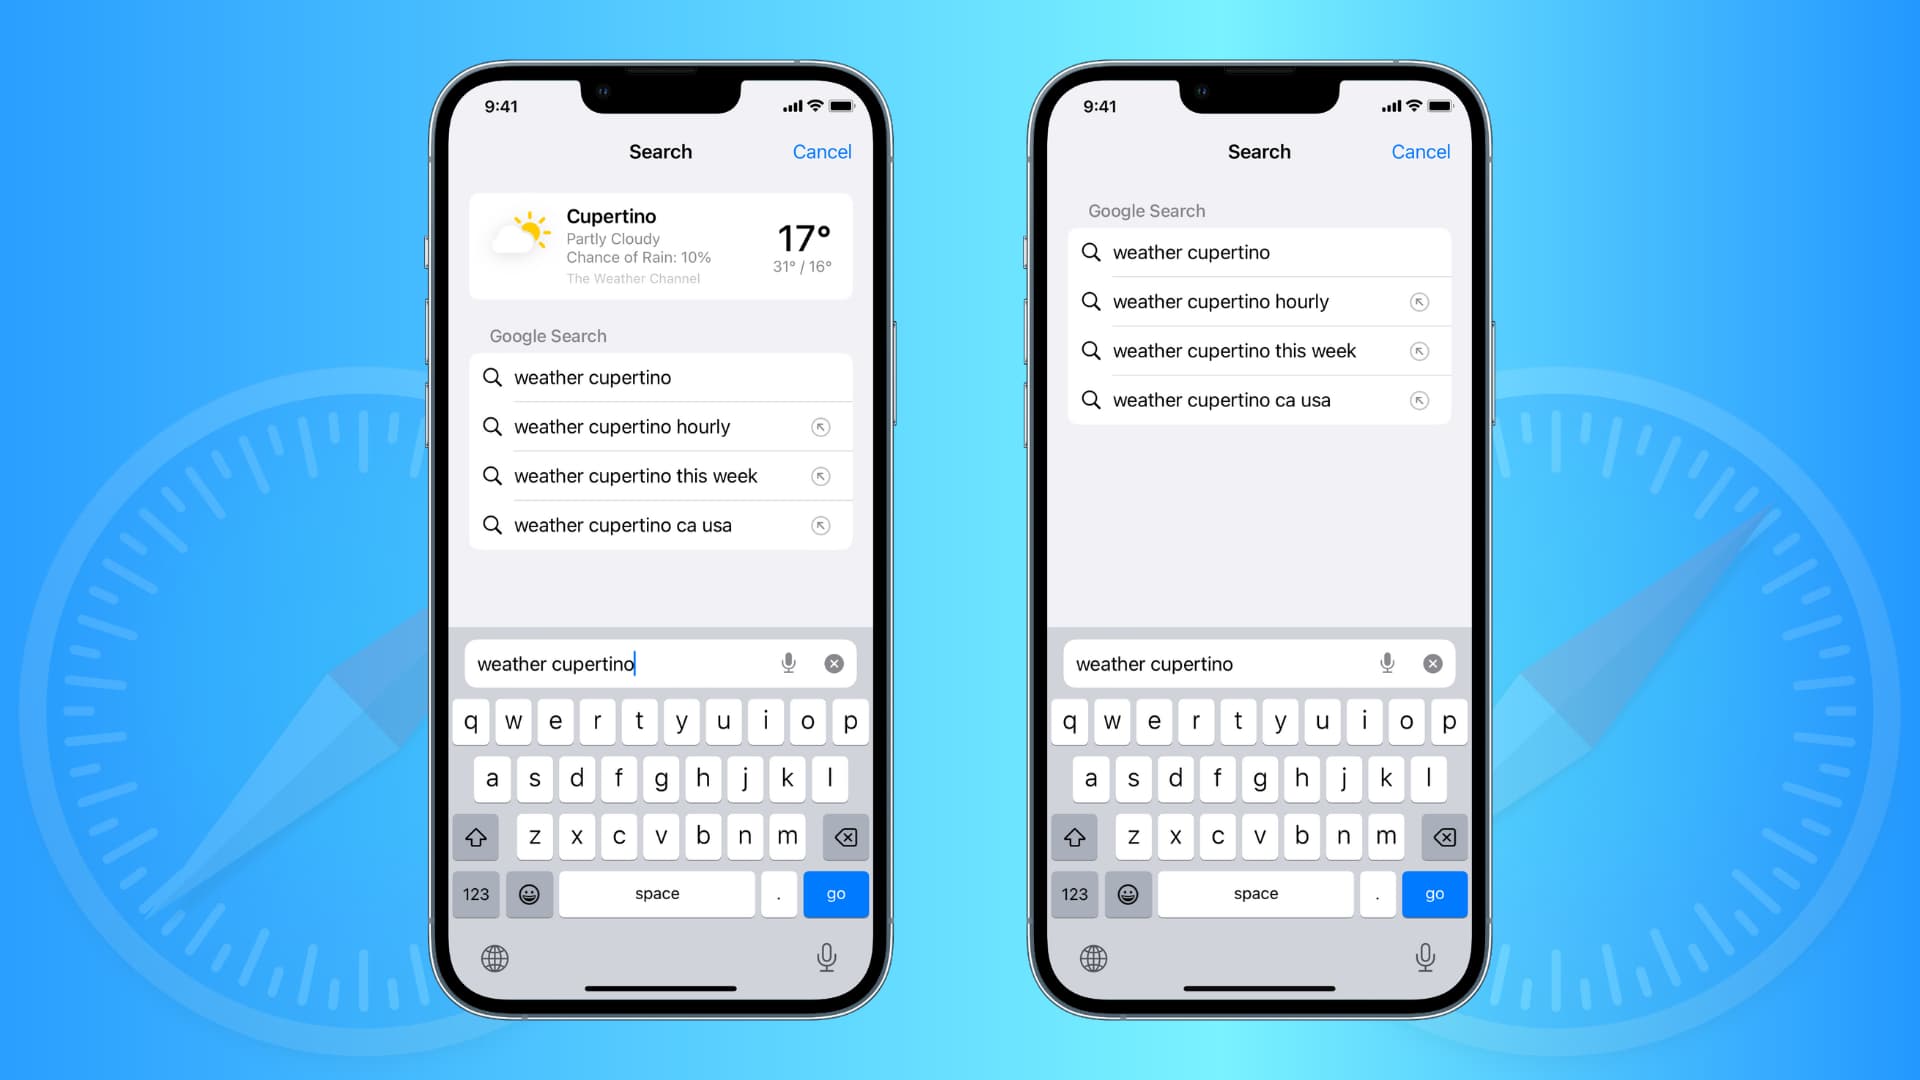
Check Recent Searches: Another way to confirm the deletion of your browsing history is to utilize the search bar within Safari. By typing in keywords or URLs that were previously visited, you can verify that the browser no longer auto-suggests or displays these entries, reaffirming that your browsing history has been effectively cleared.
On iOS:
-
Revisit Browsing History: After clearing your browsing history and website data in Safari settings on your iOS device, you can confirm the deletion by tapping and holding the back arrow icon within the Safari app. Upon reviewing your browsing history, you should observe that the previously visited websites are no longer listed, indicating the successful removal of your browsing history.
-
Test Auto-Suggestions: To further confirm the deletion, you can test Safari's auto-suggestion feature by typing in keywords or URLs that were previously part of your browsing history. If the browser no longer auto-suggests or displays these entries, it serves as additional confirmation that your browsing history has been effectively cleared.
By following these confirmation steps, you can ensure that your Safari browsing history has been successfully deleted, allowing you to proceed with your online activities with confidence and privacy. With your browsing history effectively cleared and the deletion confirmed, you are now equipped to enjoy a fresh and secure browsing experience on Safari.