Introduction
When browsing the internet, our web browsers diligently record our digital footprints, creating a history of websites visited, searches made, and downloads initiated. While this feature can be convenient for revisiting previously viewed pages, it also poses potential privacy risks. Whether you're concerned about safeguarding your personal information or simply wish to maintain a clutter-free browsing experience, knowing how to effectively erase your browser history is essential.
In this comprehensive guide, we will explore the step-by-step process of completely erasing your browsing history across various popular web browsers. From Google Chrome and Mozilla Firefox to Safari, Microsoft Edge, and Opera, we'll delve into the specific methods for clearing your digital trail on each platform. Additionally, we'll uncover the role of browser extensions in achieving a more thorough and efficient erasure of browsing history.
By following the instructions outlined in this guide, you'll gain the knowledge and tools necessary to maintain your online privacy and ensure that your browsing history remains confidential. Whether you're using a shared device, seeking to prevent targeted advertising, or simply aiming to keep your browsing habits discreet, the ability to clear your browser history effectively is a valuable skill in today's digital landscape.
So, without further ado, let's embark on this journey to discover the techniques and tools that will empower you to take control of your browsing history and protect your online privacy.
Step 1: Clearing Browser History on Google Chrome
Google Chrome, one of the most widely used web browsers, offers a straightforward process for clearing browsing history. Follow these simple steps to ensure that your digital trail is completely erased:
-
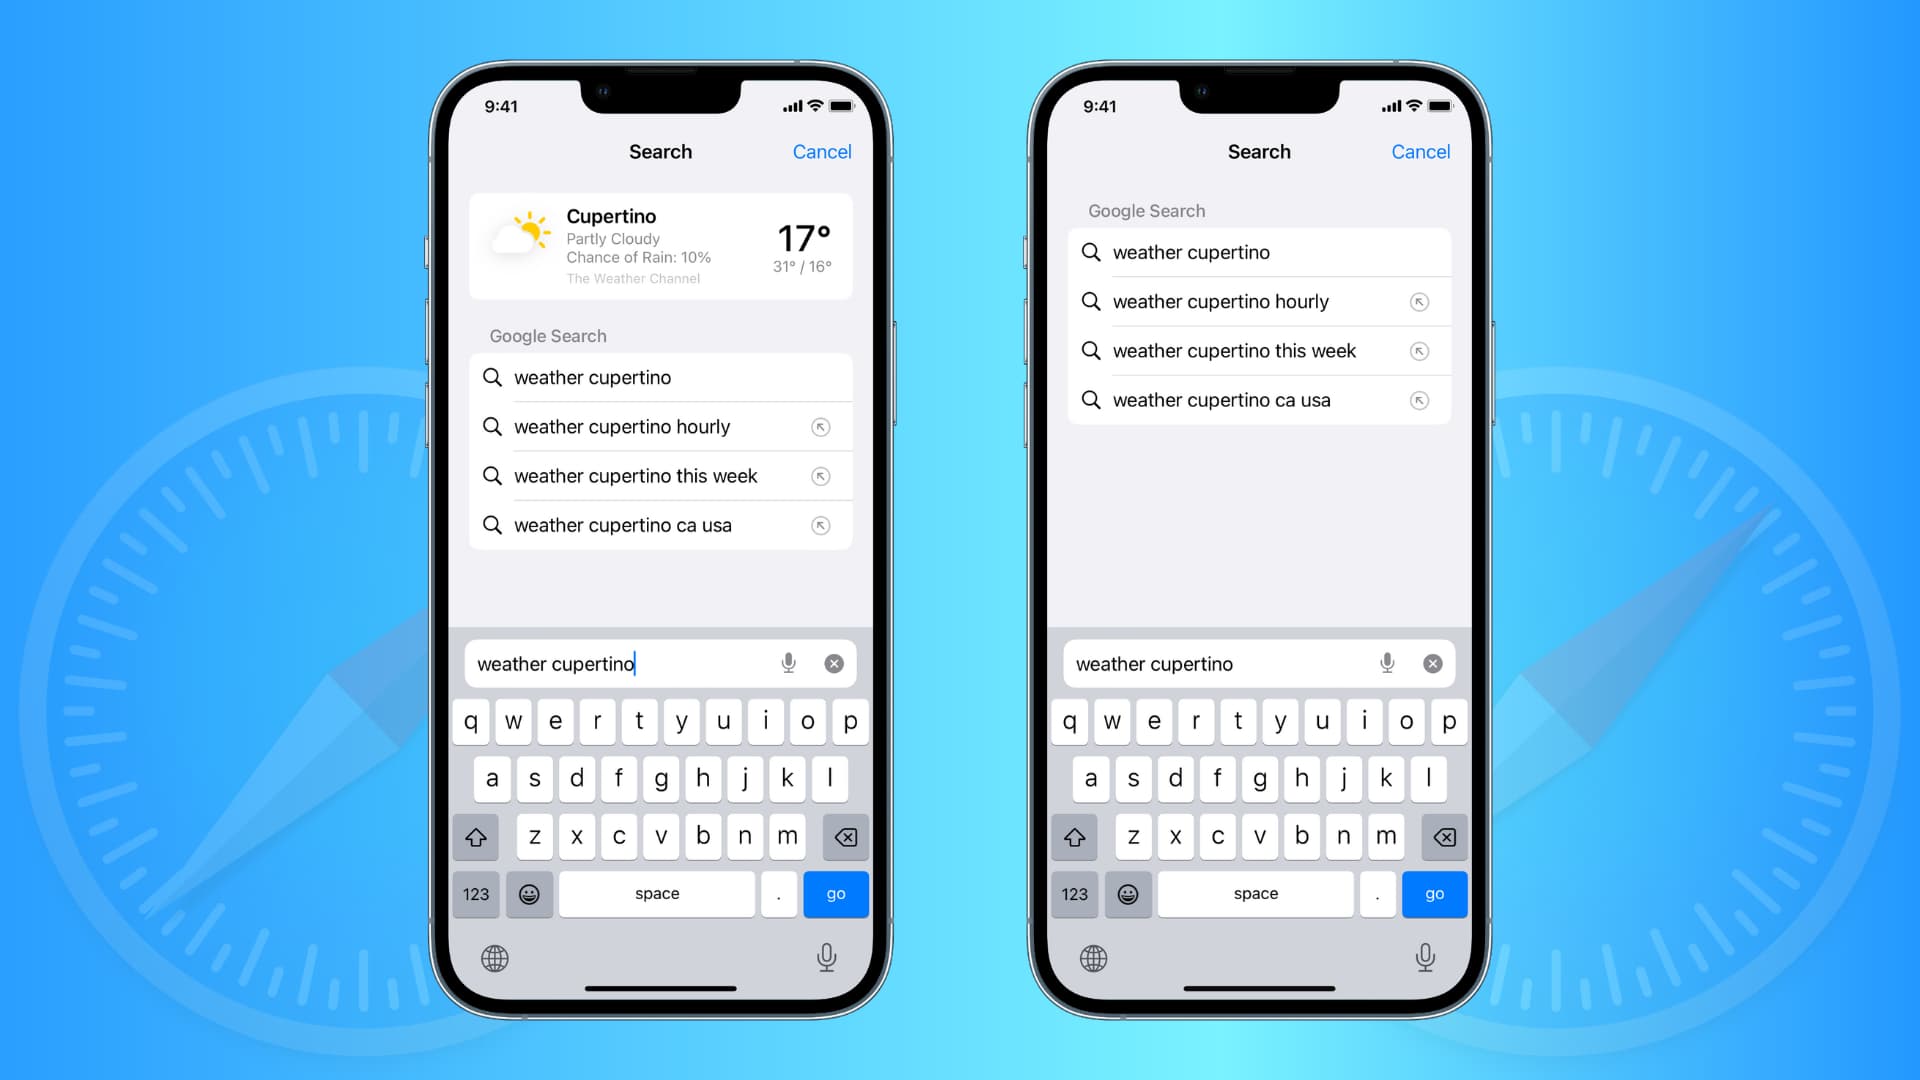
Open Chrome Settings: Launch Google Chrome on your computer or mobile device and click on the three-dot menu icon located in the top-right corner of the browser window. From the dropdown menu, select "History" to access your browsing history.
-
Access History Settings: Within the History tab, you will find an option labeled "History" again. Click on it to proceed to the next step.
-
Choose Browsing Data to Clear: Once you're in the History section, you will see a list of your browsing history organized by date. On the left-hand side, you'll find a menu with options such as "Clear browsing data." Click on this option to continue.
-
Select Data to Clear: A new window will appear, allowing you to choose the browsing data you wish to clear. You can select the time range for which you want to clear data and choose the types of information to erase, such as browsing history, cookies, cached images and files, and more.
-
Clear Browsing Data: After customizing your preferences, click on the "Clear data" button to initiate the erasure process. Chrome will promptly remove the selected browsing data from your history, ensuring that your digital footprint is effectively erased.
By following these steps, you can confidently clear your browsing history on Google Chrome, maintaining your privacy and ensuring that your online activities remain confidential. Whether you're using a shared device, seeking to prevent targeted advertising, or simply aiming to keep your browsing habits discreet, regularly clearing your browsing history is a proactive measure to safeguard your digital privacy.
Now that you've mastered the art of clearing browsing history on Google Chrome, let's explore the next steps to ensure a comprehensive erasure of your digital footprint across other popular web browsers.
Step 2: Deleting Browser History on Mozilla Firefox
Mozilla Firefox, known for its user-friendly interface and customizable features, provides a seamless process for deleting browsing history. Follow these steps to ensure that your digital trail is completely erased:
-
Access Firefox History: Launch Mozilla Firefox on your computer or mobile device. In the top-right corner of the browser window, click on the three horizontal lines to open the menu. From the dropdown menu, select "Library" and then click on "History" to access your browsing history.
-
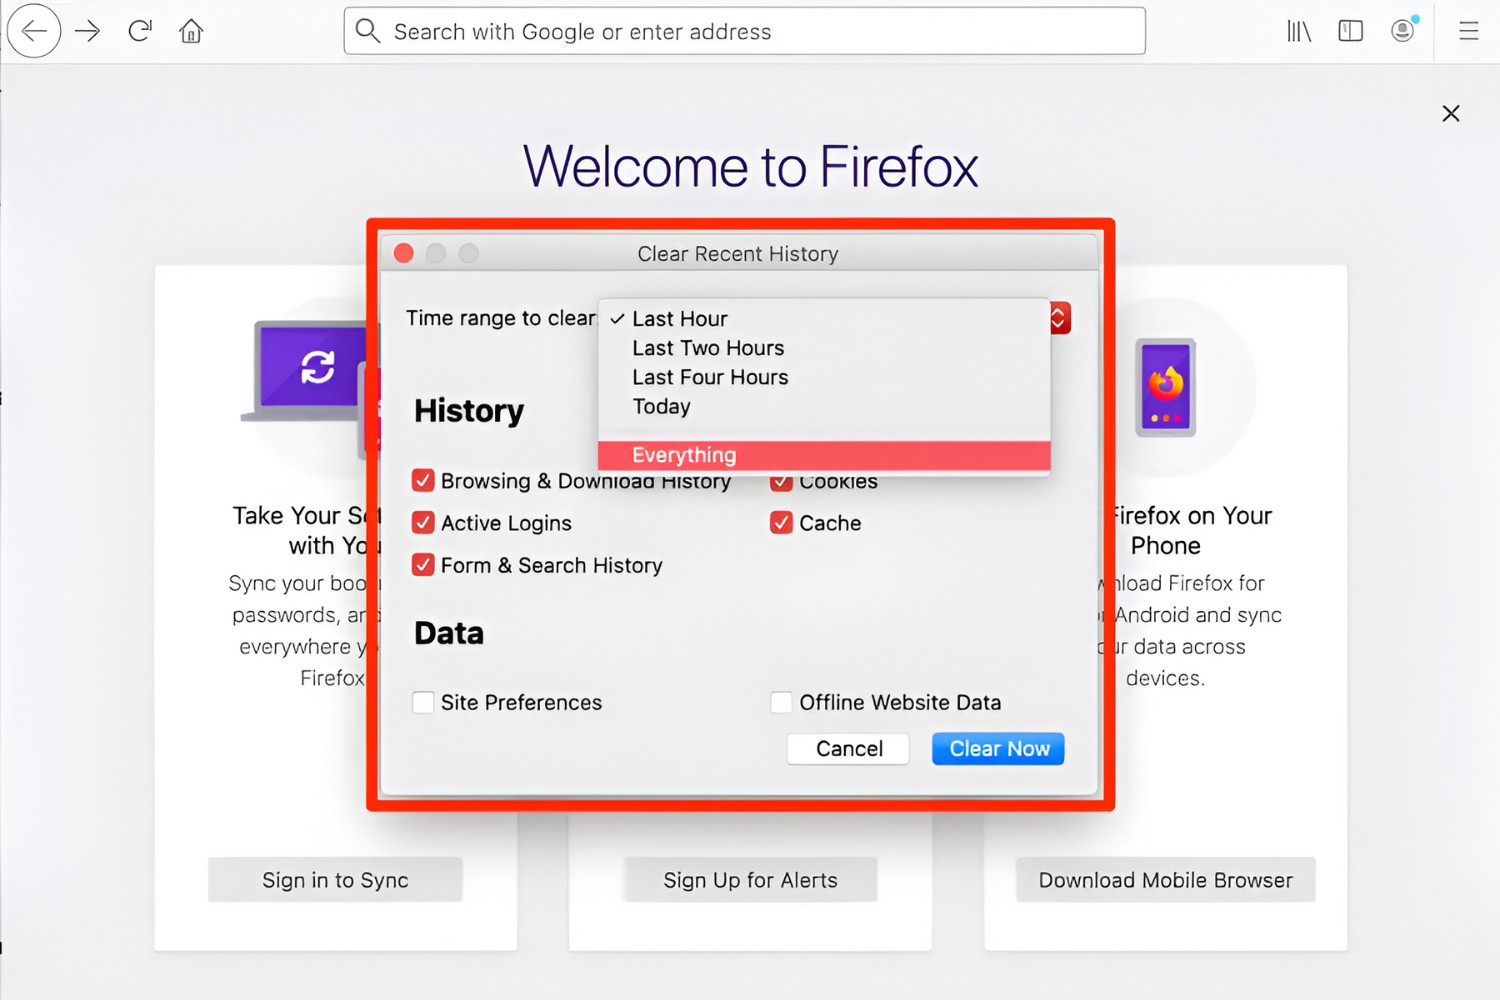
Choose Browsing History to Clear: Within the History tab, you will find a list of your browsing history organized by date. On the left-hand side, you'll find a menu with options such as "Clear Recent History." Click on this option to proceed to the next step.
-
Select Time Range and Data to Clear: A new window will appear, allowing you to choose the time range for which you want to clear data. You can select options such as "Last hour," "Last two hours," "Today," or "Everything." Additionally, you can choose the types of information to erase, including browsing and download history, form and search history, cookies, and cache.
-
Clear Browsing History: After customizing your preferences, click on the "Clear Now" button to initiate the erasure process. Firefox will promptly remove the selected browsing data from your history, ensuring that your digital footprint is effectively erased.
By following these steps, you can confidently clear your browsing history on Mozilla Firefox, maintaining your privacy and ensuring that your online activities remain confidential. Whether you're using a shared device, seeking to prevent targeted advertising, or simply aiming to keep your browsing habits discreet, regularly clearing your browsing history is a proactive measure to safeguard your digital privacy.
Now that you've mastered the art of deleting browsing history on Mozilla Firefox, let's explore the next steps to ensure a comprehensive erasure of your digital footprint across other popular web browsers.
Step 3: Erasing Browser History on Safari
Safari, Apple's sleek and efficient web browser, offers a seamless process for erasing browsing history. Whether you're using Safari on a Mac, iPhone, or iPad, the steps to clear your digital trail remain consistent. Follow these simple instructions to ensure that your browsing history is completely erased, safeguarding your privacy and maintaining confidentiality.
On Mac:
-
Open Safari Preferences: Launch Safari on your Mac and click on "Safari" in the top menu bar. From the dropdown menu, select "Preferences" to access the browser settings.
-
Access History Settings: Within the Preferences window, navigate to the "Privacy" tab. Here, you will find the option to "Remove All Website Data." Click on this option to proceed to the next step.
-
Confirm Data Removal: A confirmation dialog will appear, asking if you are sure you want to remove all website data. Click "Remove Now" to initiate the erasure process. Safari will promptly clear your browsing history, cookies, and other website data, ensuring a comprehensive erasure of your digital footprint.
On iPhone or iPad:
-
Open Safari Settings: On your iPhone or iPad, launch the Settings app and scroll down to find "Safari" in the list of installed apps. Tap on "Safari" to access the browser settings.
-
Clear History and Website Data: Within the Safari settings, scroll down and tap on "Clear History and Website Data." A confirmation prompt will appear, asking if you want to clear history and data. Tap "Clear History and Data" to confirm and initiate the erasure process.
By following these steps, you can confidently clear your browsing history on Safari, ensuring that your online activities remain private and secure. Whether you're using a Mac, iPhone, or iPad, regularly erasing your browsing history is a proactive measure to safeguard your digital privacy and maintain confidentiality.
Now that you've mastered the art of erasing browsing history on Safari, let's explore the next steps to ensure a comprehensive erasure of your digital footprint across other popular web browsers.
Step 4: Removing Browser History on Microsoft Edge
Microsoft Edge, the modern and efficient web browser developed by Microsoft, provides a streamlined process for removing browsing history. Whether you're using Edge on a Windows computer, Mac, iPhone, or Android device, the steps to clear your digital trail remain consistent. Follow these detailed instructions to ensure that your browsing history is completely erased, safeguarding your privacy and maintaining confidentiality.
On Windows Computer:
-
Open Edge Settings: Launch Microsoft Edge on your Windows computer and click on the three-dot menu icon in the top-right corner of the browser window. From the dropdown menu, select "History" to access your browsing history.
-
Choose Browsing History to Clear: Within the History tab, you will find a list of your browsing history organized by date. On the left-hand side, click on "Clear browsing data" to proceed.
-
Select Data to Clear: A new window will appear, allowing you to choose the browsing data you wish to clear. You can select the time range for which you want to clear data and choose the types of information to erase, such as browsing history, cookies, cached images and files, and more.
-
Clear Browsing Data: After customizing your preferences, click on the "Clear now" button to initiate the erasure process. Microsoft Edge will promptly remove the selected browsing data from your history, ensuring that your digital footprint is effectively erased.
On Mac, iPhone, or Android Device:
-
Open Edge Settings: Launch Microsoft Edge on your device and tap on the three-dot menu icon (or the "Settings and more" option) to access the browser settings.
-
Access History Settings: Depending on your device, navigate to the "History" or "Privacy, search, and services" section within the settings.
-
Choose Browsing Data to Clear: Select the types of browsing data you want to clear, such as browsing history, cookies, cached data, and more.
-
Clear Browsing Data: After customizing your preferences, tap on the "Clear browsing data" or "Clear data" option to initiate the erasure process. Microsoft Edge will promptly remove the selected browsing data from your history, ensuring a comprehensive erasure of your digital footprint.
By following these steps, you can confidently clear your browsing history on Microsoft Edge, ensuring that your online activities remain private and secure. Whether you're using a Windows computer, Mac, iPhone, or Android device, regularly removing your browsing history is a proactive measure to safeguard your digital privacy and maintain confidentiality.
Step 5: Clearing Browser History on Opera
Opera, known for its speed, security, and innovative features, offers a seamless process for clearing browsing history. Whether you're using Opera on a desktop or mobile device, the steps to clear your digital trail remain consistent. Follow these detailed instructions to ensure that your browsing history is completely erased, safeguarding your privacy and maintaining confidentiality.
On Desktop:
-
Access Opera History: Launch Opera on your computer and click on the Opera menu button located in the top-left corner of the browser window. From the dropdown menu, hover over "History" to access your browsing history.
-
Choose Browsing History to Clear: Within the History tab, you will find a list of your browsing history organized by date. Click on "Clear browsing data" to proceed.
-
Select Data to Clear: A new window will appear, allowing you to choose the browsing data you wish to clear. You can select the time range for which you want to clear data and choose the types of information to erase, such as browsing history, cookies, cached images and files, and more.
-
Clear Browsing Data: After customizing your preferences, click on the "Clear data" button to initiate the erasure process. Opera will promptly remove the selected browsing data from your history, ensuring that your digital footprint is effectively erased.
On Mobile:
-
Open Opera Settings: Launch the Opera browser on your mobile device and tap on the Opera menu button (usually located at the bottom of the screen) to access the browser settings.
-
Access History Settings: Depending on your device, navigate to the "History" or "Privacy" section within the settings.
-
Choose Browsing Data to Clear: Select the types of browsing data you want to clear, such as browsing history, cookies, cached data, and more.
-
Clear Browsing Data: After customizing your preferences, tap on the "Clear browsing data" or "Clear data" option to initiate the erasure process. Opera will promptly remove the selected browsing data from your history, ensuring a comprehensive erasure of your digital footprint.
By following these steps, you can confidently clear your browsing history on Opera, ensuring that your online activities remain private and secure. Whether you're using a desktop or mobile device, regularly clearing your browsing history is a proactive measure to safeguard your digital privacy and maintain confidentiality.
Step 6: Using Browser Extensions for Complete Erasure
In addition to the built-in tools provided by web browsers, utilizing browser extensions can significantly enhance the thoroughness and efficiency of erasing browsing history. These extensions offer advanced features and customization options, allowing users to exert greater control over their digital footprint. By integrating these extensions into your browser, you can achieve a more comprehensive erasure of your browsing history and associated data.
Browser extensions such as "Click&Clean" and "History Eraser" are designed to provide users with a wide array of options for clearing browsing history, cookies, cache, download history, and other forms of stored data. These extensions often offer customizable settings, allowing users to specify the types of data they want to erase and the time range for which the erasure should apply. Additionally, some extensions provide secure deletion methods to ensure that the erased data cannot be recovered.
Furthermore, privacy-focused extensions like "Privacy Badger" and "Ghostery" not only facilitate the removal of browsing history but also offer robust tracking protection. These extensions identify and block trackers, cookies, and other elements used by websites to track user activity, thereby enhancing overall privacy and security while browsing the web.
For users who prioritize anonymity and seek to prevent targeted advertising, extensions such as "uBlock Origin" and "AdBlock Plus" not only remove browsing history but also effectively block intrusive ads and tracking scripts, contributing to a more private and streamlined browsing experience.
It's important to note that while browser extensions can enhance the erasure of browsing history, users should exercise caution and select extensions from reputable sources to ensure the security and reliability of the tools they integrate into their browsers. Regularly updating and reviewing installed extensions is also advisable to mitigate potential security risks.
By incorporating these browser extensions into your web browsing experience, you can elevate the level of control you have over your digital privacy and ensure a more thorough erasure of your browsing history across various web browsers. Whether you're focused on privacy, security, or simply maintaining a clutter-free browsing environment, leveraging browser extensions can be a valuable asset in your quest for complete erasure of browsing history.
Conclusion
In today's digital age, where online privacy and data security are of paramount importance, the ability to effectively erase browsing history is a fundamental aspect of maintaining personal privacy and confidentiality. Throughout this comprehensive guide, we've explored the step-by-step processes for clearing browsing history on popular web browsers such as Google Chrome, Mozilla Firefox, Safari, Microsoft Edge, and Opera. By following these detailed instructions, users can confidently manage their digital footprints and ensure that their online activities remain private and secure.
It's crucial to recognize that the erasure of browsing history extends beyond mere privacy concerns. Clearing browsing history also contributes to a clutter-free and optimized browsing experience, allowing users to maintain a streamlined digital environment. Whether it's preventing targeted advertising, safeguarding personal information on shared devices, or simply maintaining a discreet online presence, the knowledge and tools provided in this guide empower users to take control of their browsing history.
Furthermore, we've delved into the role of browser extensions in achieving a more comprehensive erasure of browsing history. By integrating privacy-focused extensions and tools designed to enhance tracking protection and ad blocking, users can elevate their online privacy and security while enjoying a more seamless browsing experience. However, it's essential for users to exercise caution and select extensions from reputable sources to ensure the reliability and security of the tools they integrate into their browsers.
In conclusion, the ability to completely erase browsing history is a proactive and empowering practice in today's digital landscape. By implementing the techniques and tools outlined in this guide, users can navigate the online world with confidence, knowing that their digital footprints remain under their control. Whether it's through the native features of web browsers or the integration of advanced browser extensions, the pursuit of online privacy and data security is within reach for all users who seek to maintain confidentiality and control over their digital presence.