Introduction
Clearing your browsing history on an iPad 2 can be a simple yet essential task to maintain your privacy and keep your device running smoothly. Whether you want to remove traces of your online activity or free up storage space, knowing how to clear your browser history is a valuable skill for any iPad user. By following a few straightforward steps, you can ensure that your browsing data is securely erased, giving you peace of mind and a clean slate for your future online adventures.
In this guide, we will walk you through the process of clearing your browser history on an iPad 2. You will learn how to navigate the settings and efficiently remove your browsing history and website data. By the end of this tutorial, you will have the knowledge and confidence to manage your browsing history effectively, empowering you to maintain your privacy and optimize your device's performance.
Now, let's dive into the step-by-step instructions to clear your browser history on your iPad 2. Whether you're a tech-savvy individual or a casual user, this guide will equip you with the necessary skills to manage your browsing history with ease. Let's get started!
Step 1: Open the Settings app
To begin the process of clearing your browser history on your iPad 2, you'll need to open the Settings app. The Settings app serves as the control center for various configurations and preferences on your device, making it the starting point for managing your browsing history.
First, locate the Settings app icon on your iPad 2's home screen. The icon resembles a set of gears and is typically found among your other app icons. Once you've identified the Settings app, tap on the icon to launch the application.
Upon opening the Settings app, you will be greeted by a series of options and preferences that allow you to customize your iPad 2 experience. The layout of the Settings app is designed to provide easy access to various features, including those related to privacy, security, and general device settings.
As you navigate through the Settings app, you may notice different sections and categories, each serving a specific purpose in managing your iPad 2's functionality. These sections are organized to help you locate and adjust settings related to connectivity, display, sound, and other aspects of your device.
Once you have successfully opened the Settings app, you are now ready to proceed to the next step in clearing your browser history on your iPad 2. By familiarizing yourself with the Settings app and its layout, you are taking the first step toward effectively managing your device's browsing history and maintaining your privacy.
With the Settings app now open, you are one step closer to clearing your browser history and website data, ensuring that your online activities remain private and your device operates at its best. Let's move on to the next step and continue the process of managing your browsing history on your iPad 2.
Step 2: Scroll down and tap on Safari
After successfully opening the Settings app on your iPad 2, the next step in clearing your browser history involves locating and selecting the "Safari" option within the settings. Safari is the default web browser on iOS devices, including the iPad 2, and accessing its settings allows you to manage various aspects of your browsing experience.
To proceed, you will need to scroll down the list of options within the Settings app. As you scroll, you may notice a diverse range of settings and preferences, each contributing to the overall functionality and customization of your iPad 2. The scrolling action enables you to navigate through the available settings and locate the specific option related to the Safari browser.
As you continue scrolling, keep an eye out for the "Safari" option, which is typically represented by an icon featuring a compass. Once you have identified the Safari option, tap on it to access the browser's settings.
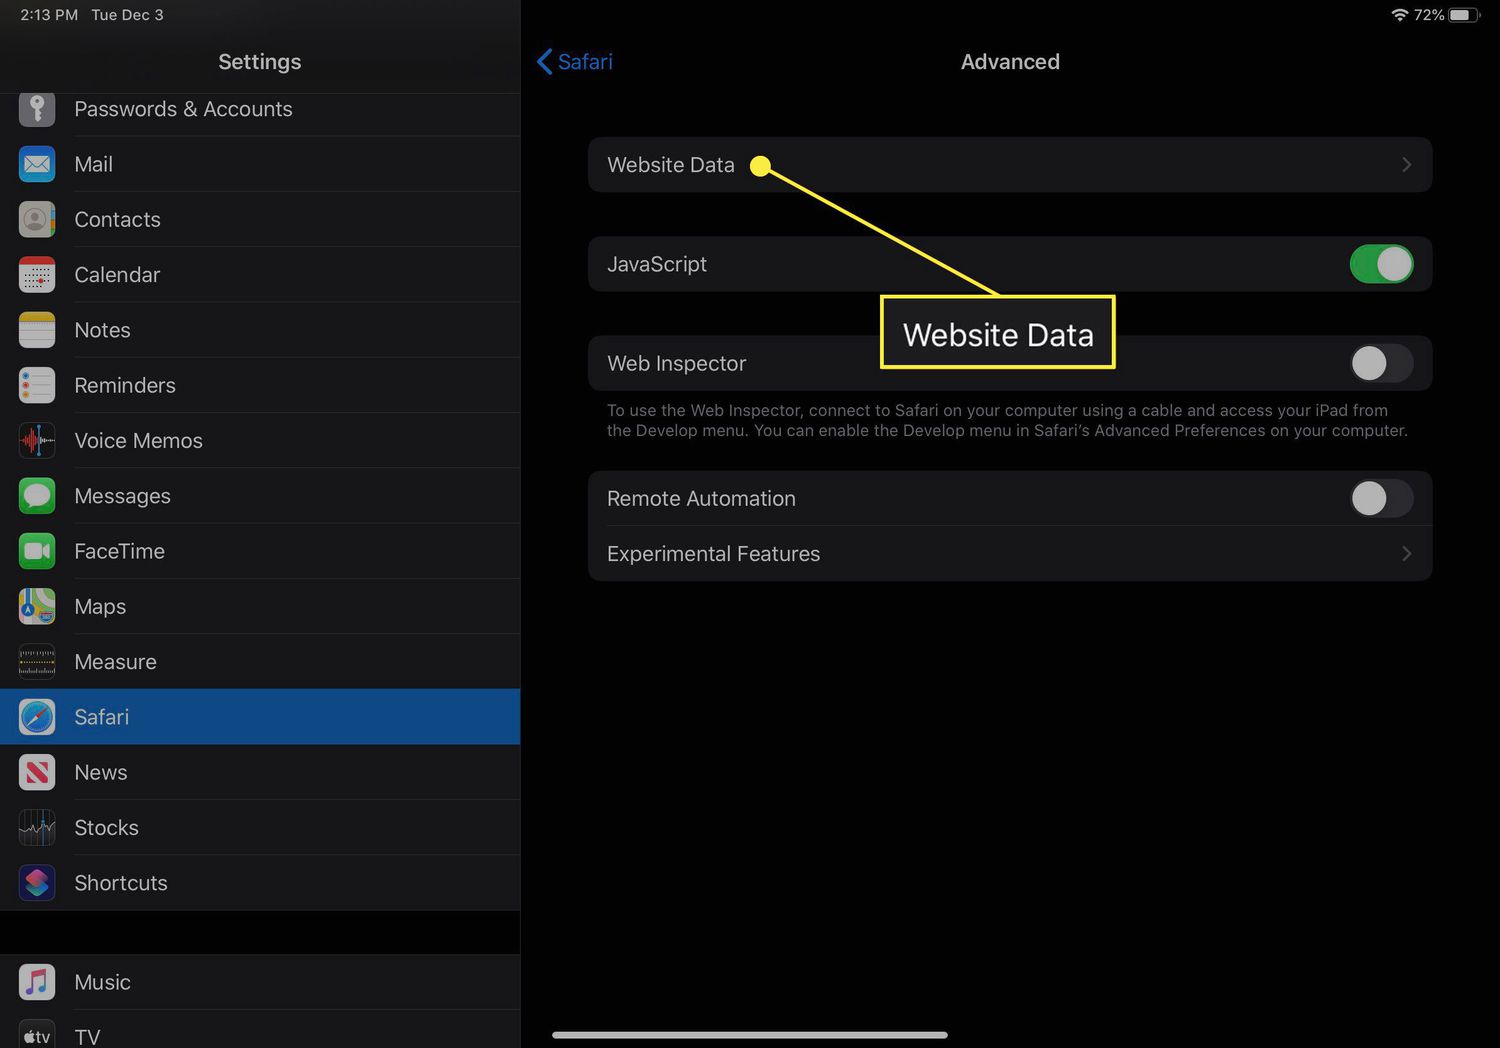
Upon tapping on the Safari option, you will be presented with a range of configuration settings and preferences specific to the Safari browser. These settings allow you to customize your browsing experience, manage privacy and security features, and control various aspects of how Safari interacts with websites and web content.
By selecting the Safari option within the Settings app, you are taking a crucial step toward managing your browsing history and website data. This action positions you to access the necessary controls to clear your browsing history, ensuring that your online activities remain private and your device operates efficiently.
With the Safari settings now accessible, you are poised to proceed to the next step in the process of clearing your browser history on your iPad 2. By navigating through the settings and accessing the Safari preferences, you are actively engaging in the management of your browsing history, empowering yourself to maintain your privacy and optimize your device's performance.
Now that you have successfully located and tapped on the Safari option within the Settings app, you are ready to move on to the subsequent steps in the process of clearing your browser history on your iPad 2. Let's continue the journey toward effectively managing your browsing history and website data on your device.
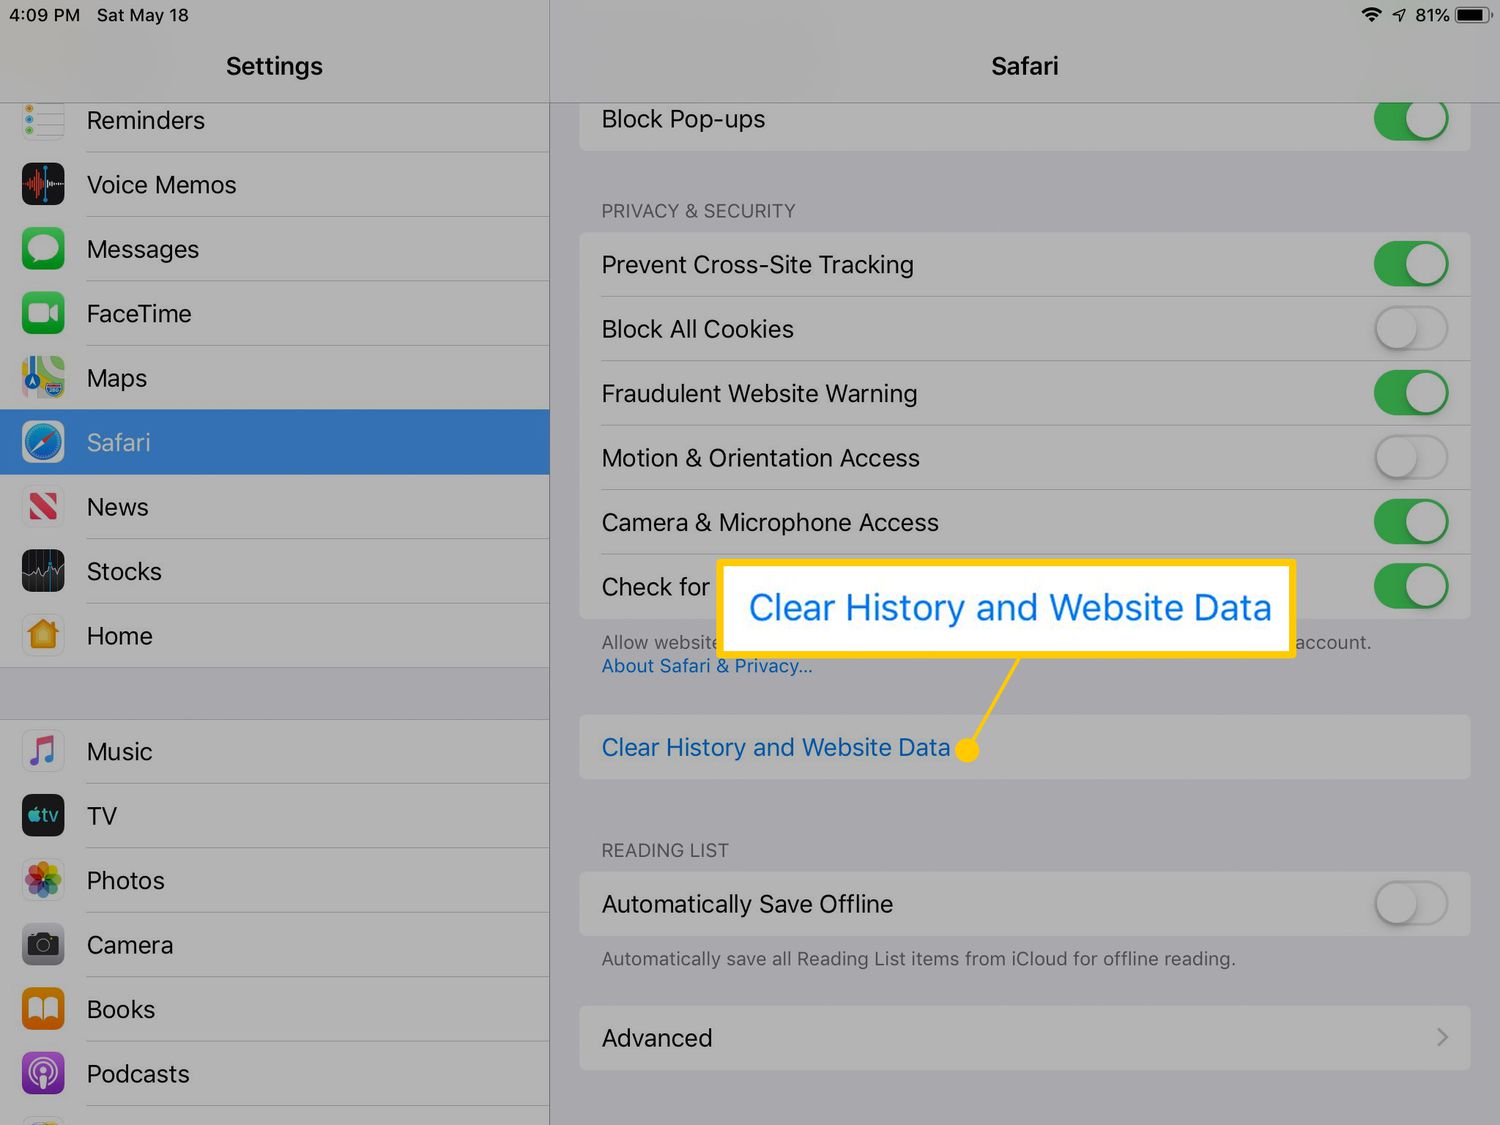
Step 3: Tap on Clear History and Website Data
After accessing the Safari settings within the Settings app on your iPad 2, the next crucial step in clearing your browser history involves tapping on the "Clear History and Website Data" option. This action initiates the process of removing your browsing history and associated website data from your device, ensuring that your online activities are securely erased.
Upon entering the Safari settings, you will encounter various configuration options related to the browser's functionality and privacy features. Among these options, you will find the "Clear History and Website Data" button, which serves as the gateway to managing your browsing history on your iPad 2.
To proceed, locate the "Clear History and Website Data" option within the Safari settings. This action may require scrolling through the available settings to find the specific control for clearing your browsing history and website data. Once you have identified the "Clear History and Website Data" button, tap on it to initiate the clearing process.
Tapping on the "Clear History and Website Data" option triggers the removal of your browsing history and associated website data from your iPad 2. This action is essential for maintaining your privacy and ensuring that your device operates efficiently by freeing up storage space previously occupied by browsing history and related data.
By tapping on the "Clear History and Website Data" button, you are actively taking control of your browsing history management, demonstrating a proactive approach to safeguarding your privacy and optimizing your device's performance. This action empowers you to maintain a clean and secure browsing environment on your iPad 2, allowing you to enjoy a seamless and private online experience.
With the "Clear History and Website Data" option now activated, your device is in the process of erasing your browsing history and associated website data, effectively clearing the digital footprint of your online activities. This proactive step ensures that your privacy is upheld, and your device remains optimized for future browsing endeavors.
Having tapped on the "Clear History and Website Data" option, you have successfully initiated the process of clearing your browser history on your iPad 2, demonstrating a commitment to managing your online activities and maintaining your privacy. This proactive approach equips you with the necessary skills to effectively manage your browsing history and website data, empowering you to take control of your digital footprint on your device.
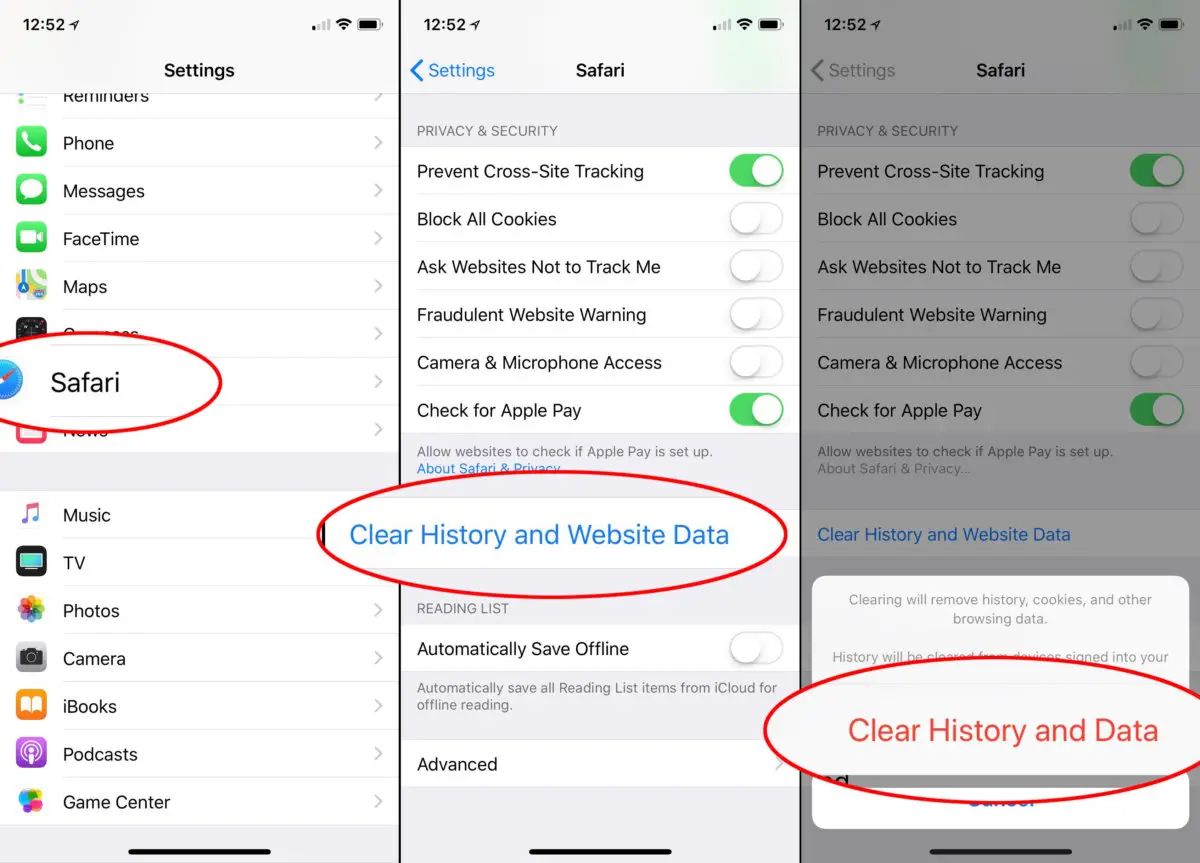
Step 4: Confirm the action
After tapping on the "Clear History and Website Data" option within the Safari settings on your iPad 2, the final step in clearing your browser history involves confirming the action. This confirmation ensures that the process of erasing your browsing history and associated website data is initiated, providing you with a clean slate for your future online activities.
Upon tapping on the "Clear History and Website Data" option, you will be prompted to confirm your decision to proceed with clearing your browsing history and website data. This confirmation dialog serves as a safeguard, preventing accidental or unintended actions while empowering you to take deliberate control of your browsing history management.
To confirm the action, you will encounter a pop-up dialog on your iPad 2 screen, presenting you with the option to proceed with clearing your browsing history and website data. This dialog serves as a final checkpoint, allowing you to review and affirm your decision before the clearing process is executed.
Once the confirmation dialog appears, carefully review the details presented, ensuring that you are indeed prepared to clear your browsing history and associated website data. This moment provides an opportunity to validate your intent and commitment to managing your online privacy and optimizing your device's performance.
Upon confirming the action, you will proceed with the process of clearing your browsing history and website data on your iPad 2. This affirmative step signifies your proactive approach to maintaining a clean and secure browsing environment, free from the digital traces of your previous online activities.
By confirming the action to clear your browsing history and website data, you are actively taking control of your digital footprint, ensuring that your online activities remain private and your device operates efficiently. This deliberate confirmation empowers you to manage your browsing history with confidence, knowing that your privacy is upheld and your device is optimized for future online endeavors.
With the action confirmed, your iPad 2 will proceed to execute the process of clearing your browsing history and associated website data, providing you with a fresh start for your future online experiences. This affirmative step marks the completion of the process, demonstrating your commitment to proactive browsing history management and privacy maintenance.
Conclusion
Congratulations! By following the step-by-step instructions outlined in this guide, you have successfully cleared your browser history and website data on your iPad 2. This proactive action not only safeguards your privacy but also optimizes your device's performance by freeing up storage space previously occupied by browsing history and associated data.
Managing your browsing history is a crucial aspect of maintaining your online privacy and ensuring that your digital footprint remains secure. By regularly clearing your browser history and website data, you take proactive steps to protect your personal information and maintain a clean and private browsing environment on your iPad 2.
As technology continues to evolve, the need for privacy and security in the digital realm becomes increasingly important. By familiarizing yourself with the process of clearing your browser history on your iPad 2, you demonstrate a proactive approach to managing your online activities and safeguarding your personal data.
Moving forward, it's beneficial to incorporate the habit of periodically clearing your browser history and website data, ensuring that your online activities remain private and your device operates at its best. By integrating this practice into your digital routine, you empower yourself to maintain a secure and efficient browsing environment, free from the remnants of previous online activities.
In addition to privacy benefits, clearing your browser history can also contribute to optimizing your device's performance. By removing unnecessary browsing data, you free up storage space and potentially enhance the speed and responsiveness of your iPad 2, creating a smoother and more efficient user experience.
By taking control of your browsing history management, you actively contribute to a secure and private digital environment for yourself. This proactive approach empowers you to navigate the online landscape with confidence, knowing that your privacy is upheld and your device is optimized for future online endeavors.
As you continue to explore the capabilities of your iPad 2 and engage in various online activities, remember that managing your browsing history is a fundamental aspect of maintaining your digital privacy and device performance. By staying informed and proactive in managing your online activities, you equip yourself with the skills and knowledge to navigate the digital realm securely and confidently.
With your browser history now cleared and your device optimized, you are ready to embark on your next online adventure, knowing that your privacy is protected and your iPad 2 is operating at its best. Keep exploring, stay informed, and continue to prioritize your digital privacy and security in all your online endeavors.