Introduction
Clearing the cache in Safari on your Mac can help improve the browser's performance and resolve issues related to website loading, login errors, or outdated content display. The cache is a temporary storage location for files such as images, scripts, and other elements of web pages. While it serves the purpose of speeding up website loading by storing frequently accessed data, an overloaded or outdated cache can lead to browsing problems. Therefore, knowing how to clear the cache in Safari is a valuable skill for Mac users.
In this guide, you will learn the step-by-step process to clear the cache in Safari on your Mac. Whether you are experiencing slow browsing speeds, encountering website display issues, or simply want to ensure a clean browsing experience, clearing the cache can often provide a quick and effective solution. By following the instructions provided, you can easily navigate through the browser settings and clear the cache, allowing Safari to function optimally and provide a seamless browsing experience.
Now, let's delve into the specific steps to clear the cache in Safari on your Mac, empowering you to take control of your browsing environment and ensure a smooth and efficient web experience.
Step 1: Open Safari Preferences
To begin the process of clearing the cache in Safari on your Mac, you first need to access the browser's preferences. This step is essential as it allows you to navigate to the specific settings where you can manage the cache and other browsing data. Follow the simple instructions below to open Safari Preferences:
-
Launch Safari: Locate the Safari icon on your Mac's dock or in the Applications folder, and click to open the browser.
-
Access Preferences: Once Safari is open, navigate to the top-left corner of your screen and click on "Safari" in the menu bar. A drop-down menu will appear, and you should select "Preferences" from the options listed. Alternatively, you can use the keyboard shortcut "Command + ," to directly access the Preferences window.
-
Explore Preferences: Upon selecting Preferences, a new window will open, displaying various tabs such as "General," "Tabs," "Search," "Security," "Privacy," "Websites," and "Advanced." These tabs contain a wide range of settings that allow you to customize your browsing experience. For the purpose of clearing the cache, you will need to proceed to the "Advanced" tab.
By following these steps, you will successfully open the Safari Preferences window, positioning yourself to proceed with the next steps to clear the cache and optimize your browsing experience. Opening the Preferences window is the initial and crucial step in the process, enabling you to access the necessary settings to manage the cache and other browsing data effectively.
Now that you have accessed the Safari Preferences, you are ready to move on to the next step and proceed with clearing the cache to ensure a smooth and efficient browsing experience on your Mac.
Step 2: Clear Cache
After successfully accessing the Safari Preferences, you are now ready to proceed with the crucial step of clearing the cache. The cache stores temporary files from websites you visit, and over time, it can accumulate a significant amount of data. Clearing the cache not only frees up storage space but also ensures that you are accessing the most up-to-date versions of websites. Follow the detailed instructions below to clear the cache in Safari on your Mac:
-
Navigate to the "Advanced" Tab: In the Safari Preferences window, click on the "Advanced" tab located at the far right. This tab contains advanced settings that allow you to customize various aspects of the browser's functionality.
-
Enable the Develop Menu: Within the "Advanced" tab, locate the option that says "Show Develop menu in menu bar" and ensure that it is checked. Enabling this option will add the Develop menu to the top menu bar of Safari, providing access to additional browsing tools and features.
-
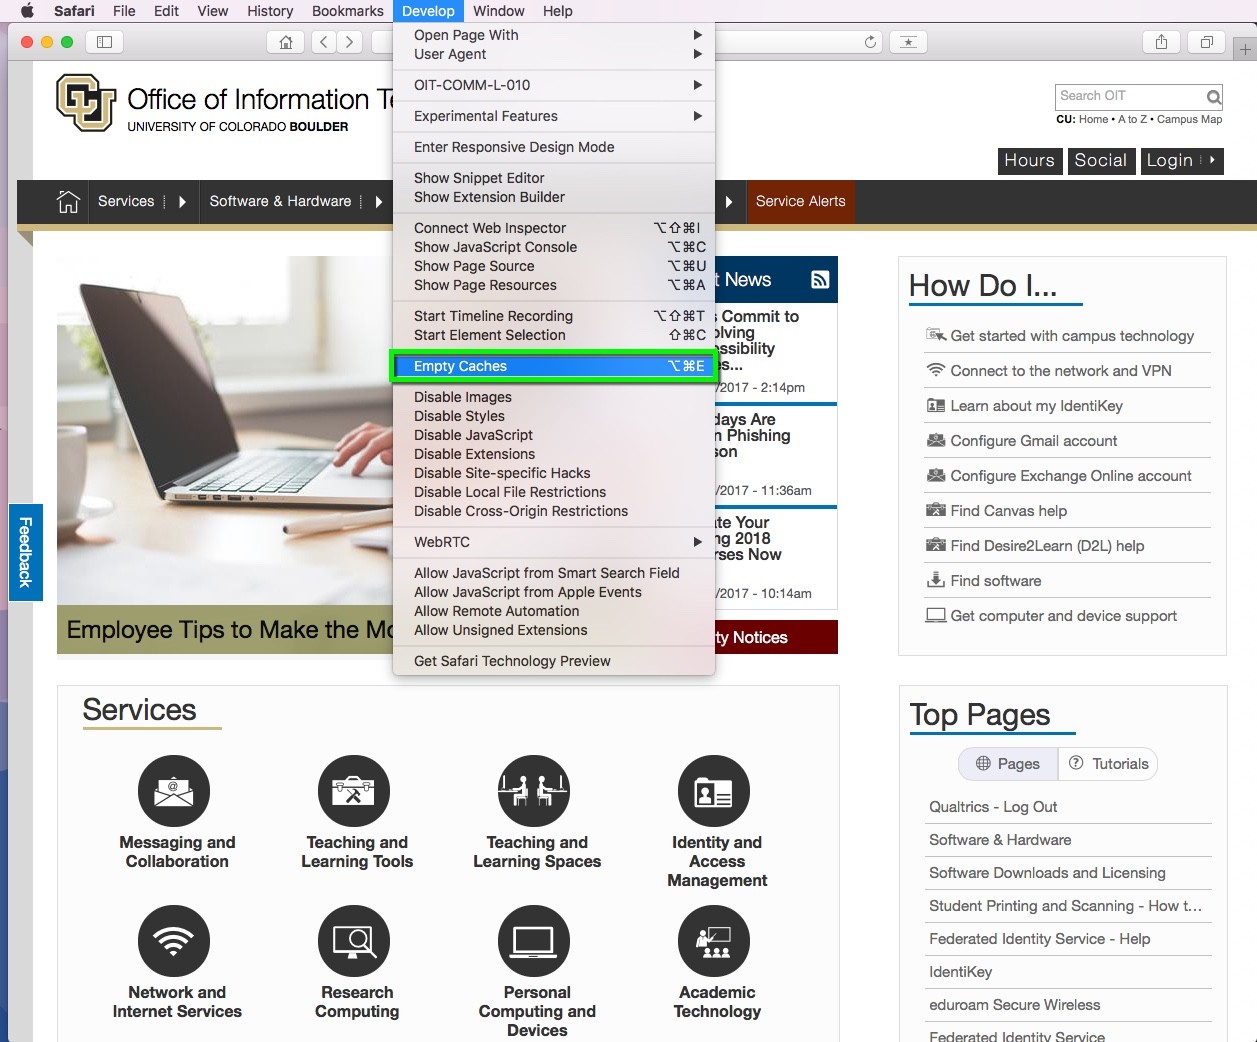
Access the Develop Menu: Once the Develop menu is enabled, navigate to the top menu bar of Safari, where you will now see the "Develop" option. Click on "Develop" to reveal a drop-down menu containing various developer-oriented tools and options.
-
Select "Empty Caches": Within the "Develop" menu, locate and click on the "Empty Caches" option. This action will prompt Safari to clear the cache, removing all temporary files stored within the browser.
By following these steps, you will effectively clear the cache in Safari on your Mac, ensuring that your browsing experience is optimized and free from any potential issues related to outdated or excessive cache data. Once the cache is cleared, Safari will begin to rebuild the cache as you visit websites, ensuring that you have access to the most current versions of web content.
With the cache now cleared, you have taken a proactive step to maintain the performance and efficiency of Safari on your Mac. By regularly clearing the cache, you can prevent potential browsing issues and ensure that your browser operates smoothly, providing a seamless and enjoyable web experience.
Now that you have successfully cleared the cache in Safari on your Mac, you are ready to move on to the final step to confirm the clearing of the cache, ensuring that the process has been completed successfully.
Step 3: Confirm Clearing Cache
After clearing the cache in Safari on your Mac, it's essential to confirm that the process has been completed successfully. Verifying the clearing of the cache ensures that you can proceed with confidence, knowing that your browsing data is up to date and that any potential issues related to outdated cache files have been addressed. Follow the steps below to confirm the clearing of the cache in Safari on your Mac:
-
Check for Confirmation Message: Upon clearing the cache by selecting "Empty Caches" from the Develop menu, Safari may display a confirmation message indicating that the cache has been successfully cleared. This message serves as a direct confirmation that the cache-clearing process has been executed.
-
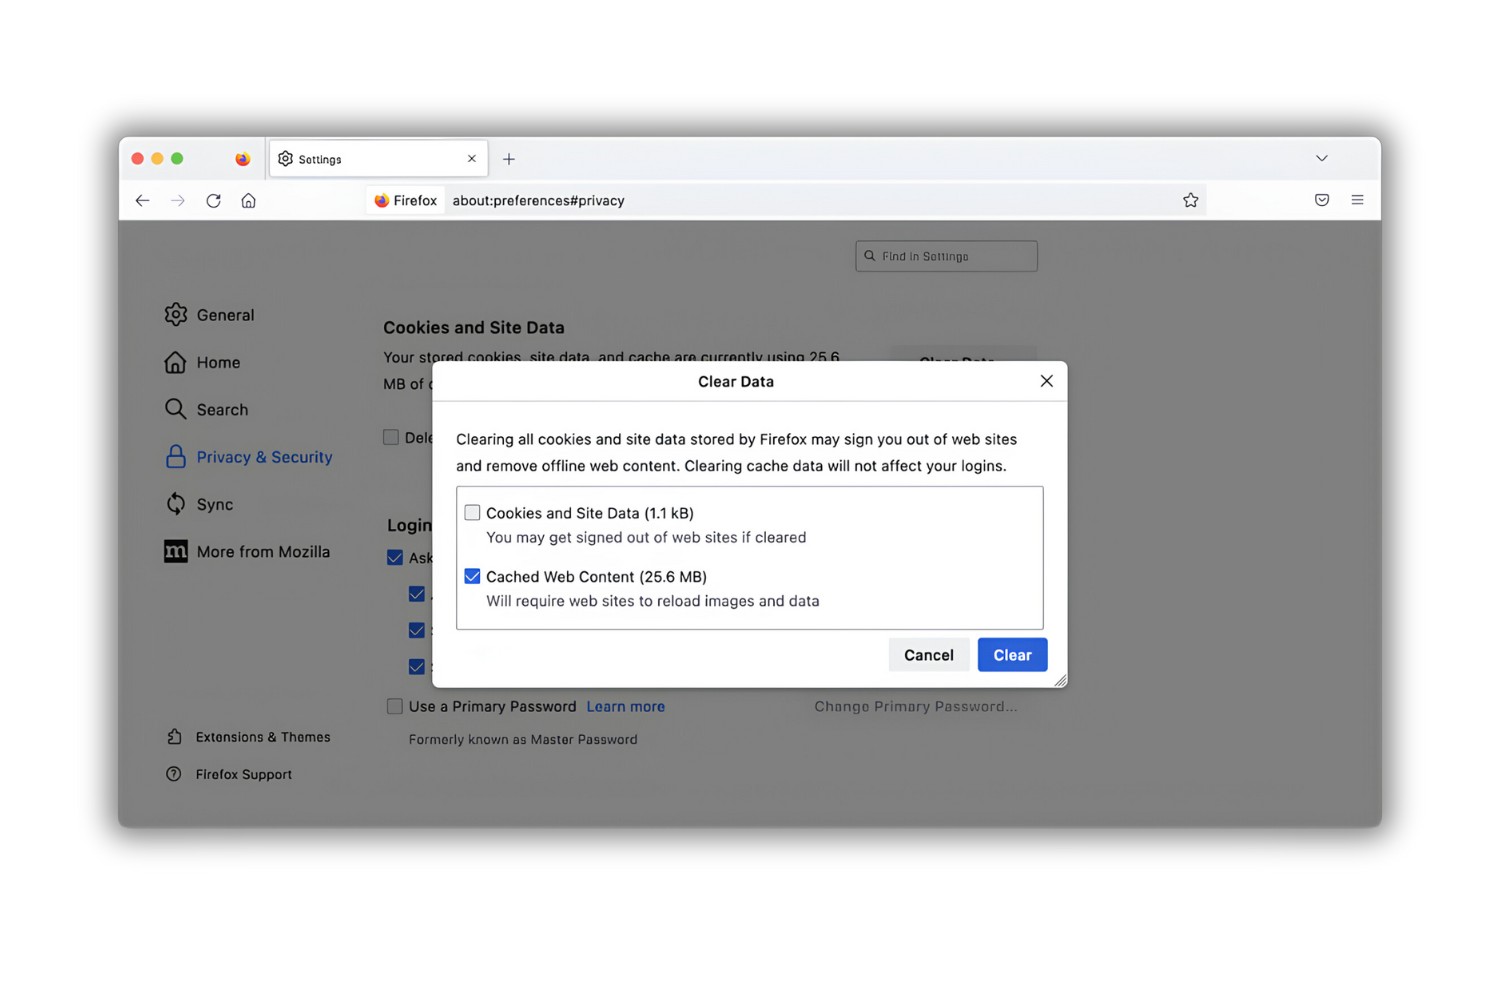
Verify Browsing Data: To further confirm the clearing of the cache, you can verify the browsing data within Safari. Navigate to the Safari menu and select "Preferences." Within the Preferences window, click on the "Privacy" tab. Here, you will find the option to "Manage Website Data." By clicking on this option, you can view the list of websites and their associated data stored in the cache. If the cache has been successfully cleared, this list should reflect the removal of stored website data.
-
Observe Browsing Performance: After clearing the cache, observe the browsing performance in Safari. Access various websites that you frequently visit and note any improvements in loading times or the display of content. A noticeable enhancement in browsing speed and the absence of any display issues can serve as indirect confirmation that the cache has been successfully cleared.
By following these steps to confirm the clearing of the cache in Safari on your Mac, you can ensure that the browser's cache has been effectively cleared, providing you with a clean and optimized browsing environment. Regularly confirming the clearing of the cache allows you to maintain the performance of Safari and mitigate potential issues related to outdated or excessive cache data.
With the cache successfully cleared and confirmed, you have taken proactive measures to optimize the browsing experience on your Mac. By incorporating the practice of regularly clearing and confirming the cache, you can ensure that Safari operates smoothly, providing you with a seamless and efficient web browsing experience.
Conclusion
In conclusion, mastering the process of clearing the cache in Safari on your Mac empowers you to take control of your browsing environment and ensure a seamless web experience. By following the step-by-step guide outlined in this article, you have gained valuable insights into managing the cache and optimizing the performance of Safari.
Clearing the cache in Safari serves as a proactive measure to address potential browsing issues related to outdated or excessive cache data. By regularly clearing the cache, you can prevent issues such as slow loading times, display errors, and outdated content, ensuring that you have access to the most current versions of websites.
Furthermore, the ability to confirm the clearing of the cache provides an additional layer of assurance, allowing you to verify that the cache-clearing process has been executed successfully. This practice enables you to maintain a clean and efficient browsing environment, promoting enhanced performance and a seamless user experience.
As you continue to navigate the digital landscape on your Mac, incorporating the practice of clearing the cache in Safari can significantly contribute to a smoother and more efficient browsing experience. Whether you are a casual user or rely on Safari for professional purposes, the benefits of clearing the cache extend to improved performance, enhanced security, and the assurance of accessing up-to-date web content.
In essence, by understanding and implementing the process of clearing the cache in Safari on your Mac, you are actively contributing to the optimization of your browsing environment. This proactive approach allows you to stay ahead of potential issues and ensures that Safari operates at its best, providing you with a reliable and enjoyable platform for accessing the web.
By embracing the knowledge and skills acquired through this guide, you are well-equipped to maintain the performance and efficiency of Safari, ultimately enhancing your overall browsing experience on your Mac. Clearing the cache in Safari is not just a technical task; it is a proactive step towards ensuring a smooth and seamless web experience, reflecting your commitment to optimizing your digital interactions.