Introduction
Uninstalling Safari from your Mac may seem like a daunting task, especially for those who are accustomed to the convenience of this default web browser. However, there are various reasons why you might want to remove Safari from your Mac. Perhaps you prefer using a different browser, or maybe you're experiencing issues with Safari and want to perform a clean reinstall. Whatever the reason, this guide will walk you through the process of uninstalling Safari from your Mac, ensuring that you can seamlessly transition to an alternative browser of your choice.
Safari, Apple's native web browser, is deeply integrated into the macOS ecosystem, making its removal a bit more involved than simply dragging the application to the Trash. While it's not possible to completely remove Safari without potentially causing system instability, you can effectively disable and hide it from your system, freeing up space and resources for the browser of your preference.
In the following steps, we will delve into the process of uninstalling Safari from your Mac, providing clear and concise instructions to ensure a smooth transition. Whether you're looking to switch to a different browser or troubleshoot Safari-related issues, this guide will equip you with the knowledge to confidently navigate through the uninstallation process. So, let's dive in and explore the steps to bid farewell to Safari on your Mac.
Step 1: Close Safari and any related processes
Before initiating the uninstallation process, it's crucial to ensure that Safari and its associated processes are completely closed. This step is essential to prevent any potential conflicts or interruptions during the removal procedure. Here's how to effectively close Safari and its related processes on your Mac:
-
Quit Safari: Begin by closing the Safari browser. If Safari is unresponsive or frozen, you can force quit the application by pressing Command + Option + Esc, selecting Safari from the list of applications, and clicking "Force Quit."
-
Check Activity Monitor: Open the Activity Monitor by navigating to Applications > Utilities > Activity Monitor. Here, you can check for any lingering Safari processes or extensions that might still be running in the background. Look for processes related to Safari, such as Safari Web Content, Safari Networking, or any Safari extensions. If you find any, select the process and click the "X" button in the top-left corner to force quit it.
-
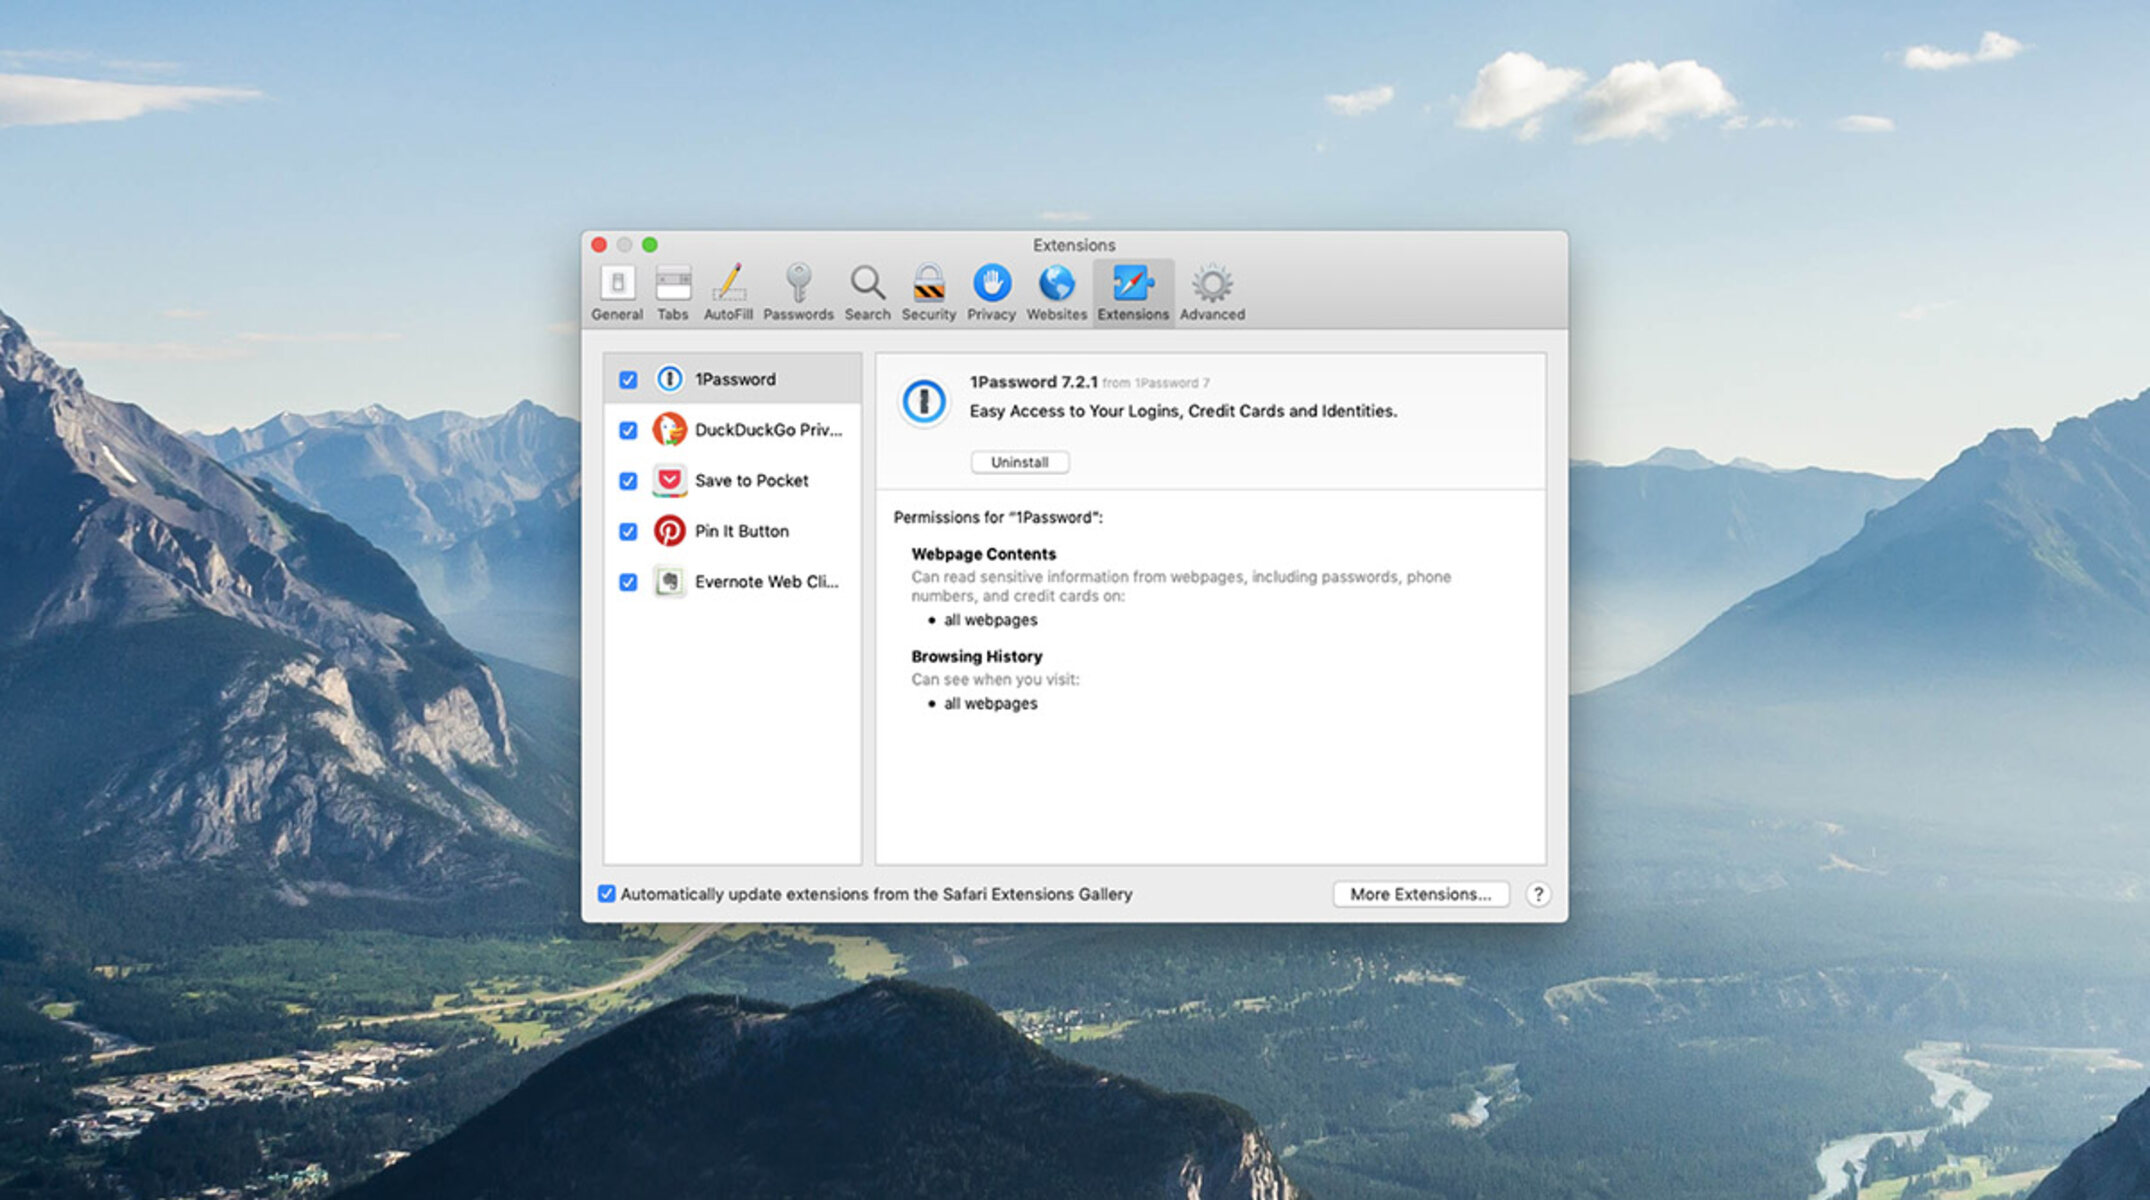
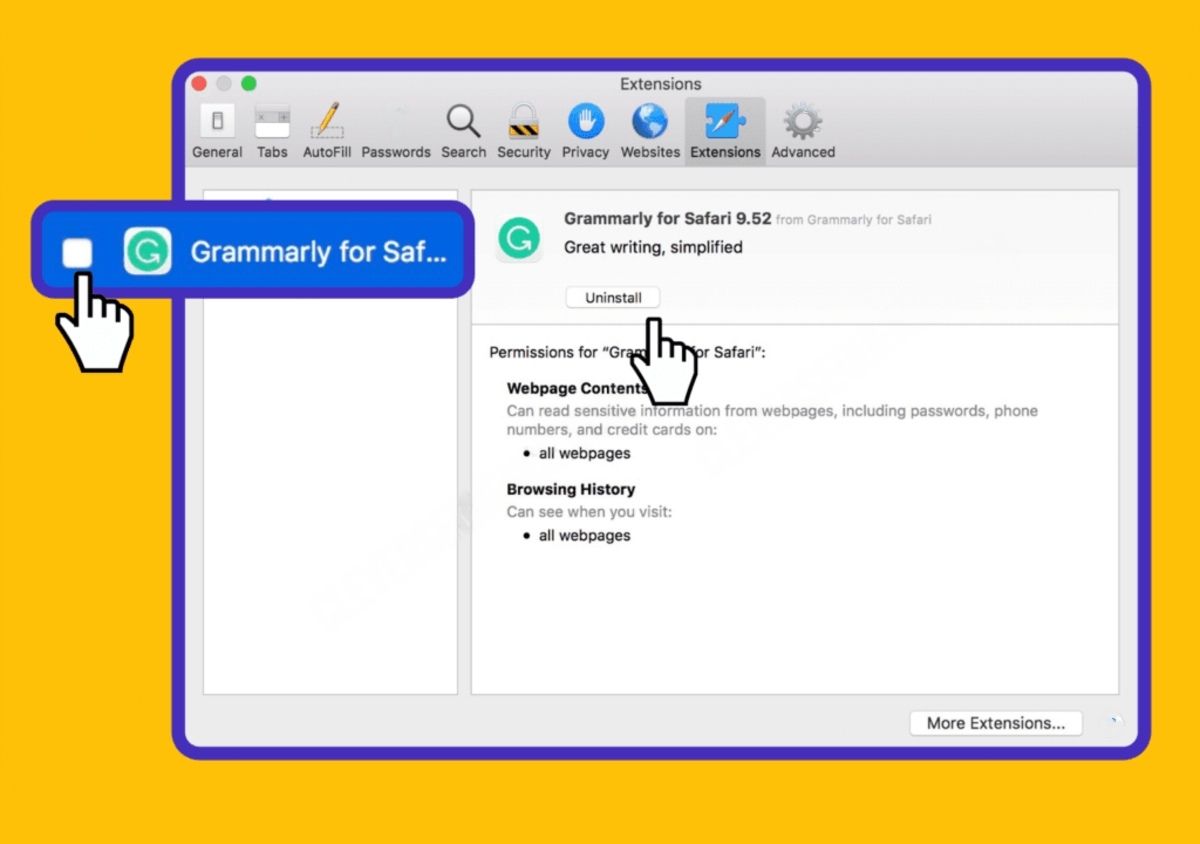
Disable Safari Extensions: If you have installed any extensions in Safari, it's advisable to disable them before proceeding with the uninstallation. Open Safari, go to Safari > Preferences > Extensions, and disable or uninstall any active extensions.
-
Clear Safari Cache: While not directly related to closing processes, clearing the Safari cache can help ensure that no residual data interferes with the uninstallation process. In Safari, navigate to Safari > Preferences > Privacy, and click "Manage Website Data." Here, you can remove all website data stored in Safari.
By following these steps, you can effectively close Safari and its associated processes, preparing the groundwork for the subsequent stages of the uninstallation process. Ensuring that Safari is completely shut down and any related processes are terminated will help streamline the removal procedure and minimize the likelihood of encountering complications during the uninstallation process.
Step 2: Drag Safari to the Trash
Once you have ensured that Safari and its associated processes are closed, you can proceed with the next step of uninstalling Safari from your Mac. This step involves removing the Safari application by dragging it to the Trash. Here's a detailed guide on how to effectively carry out this process:
-
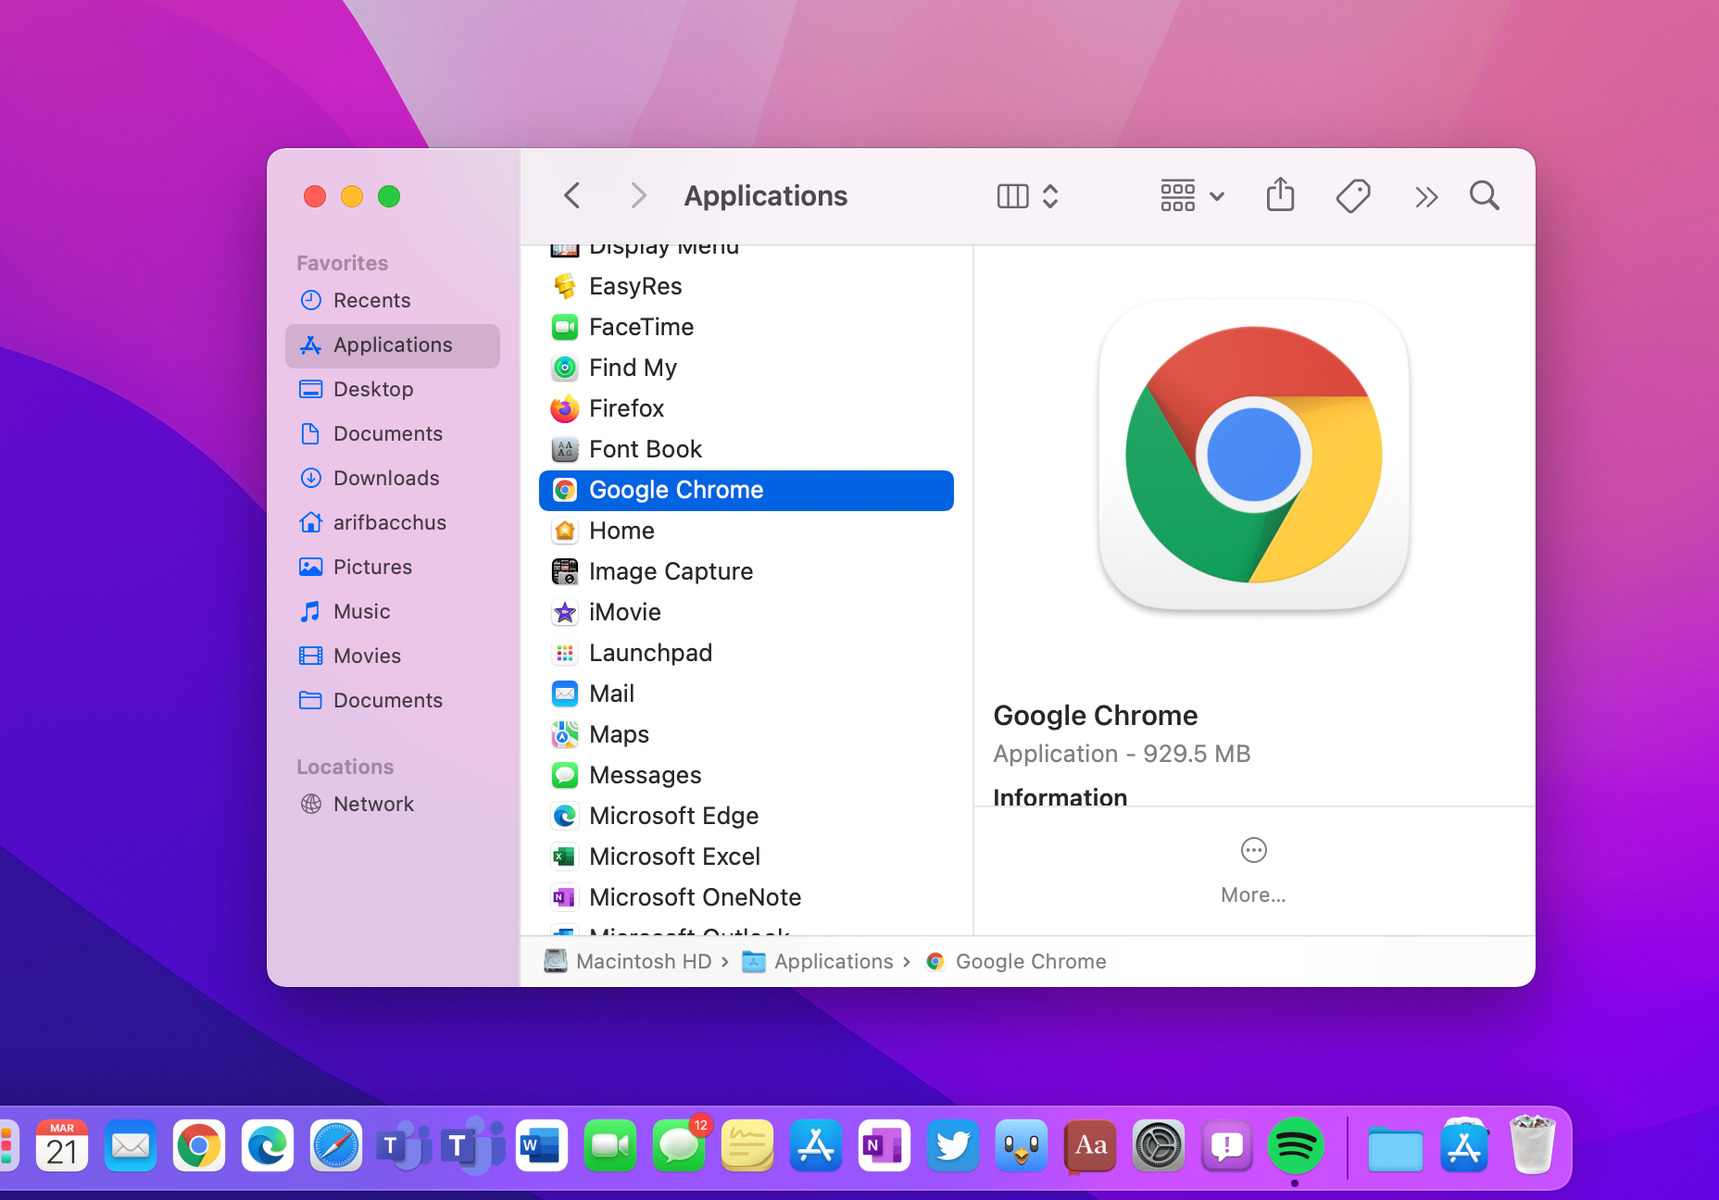
Locate Safari: Begin by navigating to the Applications folder on your Mac. You can access this folder by clicking on the Finder icon in the Dock, selecting "Applications" from the sidebar, and then locating the Safari application icon.
-
Drag Safari to the Trash: To uninstall Safari, simply click and drag the Safari application icon from the Applications folder to the Trash icon in the Dock. Alternatively, you can right-click on the Safari icon and select "Move to Trash" from the contextual menu.
-
Enter Administrator Password: In some cases, you may be prompted to enter your administrator password to authorize the removal of Safari. This is a security measure to prevent unauthorized changes to your system. Enter your password when prompted to proceed with moving Safari to the Trash.
-
Empty the Trash: After dragging Safari to the Trash, it's important to empty the Trash to complete the uninstallation process. Right-click on the Trash icon in the Dock and select "Empty Trash" from the contextual menu. Alternatively, you can open the Trash, click "Empty" in the upper-right corner, and confirm the action when prompted.
By following these steps, you can effectively remove the Safari application from your Mac. However, it's important to note that simply dragging Safari to the Trash does not completely uninstall all associated files and preferences. To ensure a more thorough removal, it's essential to proceed with the next step, which involves removing Safari preferences and cache files from your system.
With Safari successfully moved to the Trash, you're now ready to proceed to the next stage of the uninstallation process. The following step will guide you through the process of removing Safari preferences and cache files, further optimizing the uninstallation process and ensuring a clean transition away from Safari on your Mac.
Step 3: Remove Safari preferences and cache files
After dragging the Safari application to the Trash, it's essential to delve deeper into the uninstallation process by removing Safari preferences and cache files from your Mac. While dragging the application to the Trash removes the core Safari program, various associated files and preferences may still linger on your system. To ensure a more thorough uninstallation and prevent any potential conflicts or remnants, it's crucial to address these residual components. Here's a comprehensive guide on how to effectively remove Safari preferences and cache files from your Mac:
-
Access Library Folder: Begin by accessing the Library folder on your Mac. The Library folder contains numerous system and application-specific files, including Safari preferences and cache data. To access the Library folder, open Finder and click on the "Go" menu in the top menu bar. While holding down the Option key, you'll notice that the Library option appears in the dropdown menu. Click on Library to access the folder.
-
Remove Safari Preferences: Within the Library folder, navigate to the "Preferences" subfolder. Here, you'll find various preference files associated with installed applications, including Safari. Look for files prefixed with "com.apple.Safari" or similar identifiers. Select these files and move them to the Trash. Removing these preference files ensures that any customized settings or configurations specific to Safari are effectively eliminated from your system.
-
Clear Safari Cache: Continuing within the Library folder, locate the "Caches" subfolder. Here, you'll find cache data generated by installed applications, including Safari. Look for folders or files related to Safari, such as "com.apple.Safari" or "SafariCache." Select these items and move them to the Trash. Clearing the Safari cache helps eliminate temporary data and stored website information, further optimizing the uninstallation process.
-
Empty the Trash: After removing Safari preferences and cache files, it's crucial to empty the Trash to complete the uninstallation process. Right-click on the Trash icon in the Dock and select "Empty Trash" from the contextual menu. Alternatively, you can open the Trash, click "Empty" in the upper-right corner, and confirm the action when prompted.
By meticulously removing Safari preferences and cache files, you can ensure a more comprehensive uninstallation, minimizing the presence of residual data associated with the Safari browser on your Mac. This step contributes to a cleaner and more streamlined transition away from Safari, allowing you to seamlessly embrace an alternative web browsing experience on your Mac.
Step 4: Empty the Trash
Emptying the Trash is the final crucial step in the process of uninstalling Safari from your Mac. Once you have dragged the Safari application to the Trash and removed its associated preferences and cache files, emptying the Trash ensures the permanent deletion of all discarded items, including Safari and its related components. This action is essential to fully free up the disk space occupied by the removed files and to prevent any potential restoration of Safari or its remnants. Here's a detailed guide on how to effectively empty the Trash and complete the uninstallation process:
-
Empty the Trash: After removing Safari preferences and cache files, it's time to empty the Trash to finalize the uninstallation process. To do this, simply right-click on the Trash icon located in the Dock and select "Empty Trash" from the contextual menu. Alternatively, you can open the Trash by clicking on its icon, then click "Empty" in the upper-right corner of the window, and confirm the action when prompted. This action permanently deletes all the items in the Trash, including the Safari application and its associated files.
-
Confirm Deletion: When you choose to empty the Trash, a confirmation dialog may appear, asking if you are sure you want to permanently delete the items. This serves as a safety measure to prevent accidental deletions. Confirm the action by clicking "Empty Trash" or "OK" in the dialog box. Once confirmed, the items are irreversibly removed from your system, freeing up the disk space previously occupied by Safari and its related components.
By emptying the Trash, you effectively complete the uninstallation of Safari from your Mac, ensuring that all discarded items, including the Safari application and its associated files, are permanently erased from your system. This final step marks the culmination of the uninstallation process, allowing you to transition seamlessly to an alternative web browsing experience on your Mac.
With the Trash now emptied, you have successfully uninstalled Safari from your Mac, paving the way for a fresh start with the web browser of your choice. Whether you opt for a popular alternative such as Google Chrome or Mozilla Firefox, or explore niche browsers tailored to specific preferences, you can now embark on a new browsing journey with confidence, knowing that Safari has been effectively removed from your Mac.
Conclusion
Congratulations! You have successfully navigated through the process of uninstalling Safari from your Mac, paving the way for a seamless transition to an alternative web browsing experience. By following the comprehensive steps outlined in this guide, you have effectively removed Safari and its associated components, freeing up valuable disk space and resources on your Mac. Whether you sought to switch to a different browser, troubleshoot Safari-related issues, or simply streamline your system, this uninstallation process empowers you to embrace a new chapter in your digital exploration.
As you bid farewell to Safari, it's important to reflect on the versatility and freedom that comes with choosing a web browser that aligns with your preferences and browsing habits. Whether you opt for the speed and customization options of Google Chrome, the privacy-centric features of Mozilla Firefox, or the seamless integration with the Apple ecosystem offered by Safari, the world of web browsers is brimming with options to cater to your unique needs.
Moreover, the uninstallation process serves as a reminder of the adaptability and customization inherent in the macOS environment. While Safari remains an integral part of the macOS ecosystem, the ability to tailor your digital experience by choosing your preferred web browser exemplifies the flexibility and personalization that define the Mac user experience.
As you embark on your journey with a new web browser, take the opportunity to explore its features, extensions, and customization options. Whether it's enhancing productivity with tab management tools, fortifying privacy with ad-blocking extensions, or immersing yourself in a vibrant library of themes and add-ons, your new browser awaits with a wealth of possibilities to enrich your online interactions.
In essence, the process of uninstalling Safari from your Mac transcends a mere technical procedure; it symbolizes the freedom to curate your digital environment according to your preferences and needs. Embrace this newfound freedom with enthusiasm, and may your chosen web browser become a trusted companion in your digital endeavors.
With Safari gracefully bid adieu, you are now equipped to embark on a fresh browsing journey, empowered by the freedom to choose, customize, and explore the vast expanse of the internet with a renewed sense of control and personalization. Here's to a seamless transition and an enriching browsing experience on your Mac!