Introduction
Adding sites to the trusted sites list in Chrome is a crucial step in ensuring a secure and seamless browsing experience. By designating specific websites as trusted, you can mitigate potential security risks and streamline access to trusted content. This feature is particularly valuable for users who frequent certain websites and wish to bypass security prompts or restrictions for those sites.
Trusted sites are granted additional privileges, such as the ability to run certain scripts and access specific functionalities that may be restricted for general websites. This can enhance the overall browsing experience by allowing seamless interaction with trusted web applications and services.
In this guide, we will explore the step-by-step process of adding sites to the trusted sites list in Chrome. Whether you need to grant special permissions to a banking website, a work-related platform, or any other trusted site, this tutorial will equip you with the knowledge to navigate Chrome's settings and customize your trusted sites list effectively.
By following the instructions outlined in this guide, you will gain a deeper understanding of Chrome's security settings and be empowered to tailor your browsing environment to suit your specific needs. Let's delve into the details and learn how to add sites to the trusted sites list in Chrome.
Step 1: Open Chrome Settings
To begin the process of adding sites to the trusted sites list in Chrome, the first step is to access the browser's settings. Chrome provides a user-friendly interface for managing various configurations, including security settings and site permissions. Here's how you can open Chrome settings:
-
Launch Google Chrome: Start by opening the Google Chrome browser on your computer or mobile device. Look for the Chrome icon in your applications folder or on your desktop, and double-click to launch the browser.
-
Access the Menu: Once Chrome is open, you will see the menu icon, typically represented by three vertical dots located in the upper-right corner of the browser window. Click on this icon to reveal a dropdown menu of options.
-
Select "Settings": Within the dropdown menu, locate and click on the "Settings" option. This action will redirect you to the Chrome settings interface, where you can customize various aspects of the browser's functionality.
-
Explore Settings Categories: Upon entering the settings page, you will encounter a range of categories on the left-hand side, covering areas such as Privacy and security, Autofill, Appearance, and more. These categories allow you to navigate through different settings and make adjustments as needed.
By following these steps, you will successfully open the Chrome settings, setting the stage for the subsequent actions required to add sites to the trusted sites list. With the settings interface readily accessible, you can proceed to the next steps in the process, ultimately enhancing your browsing experience by designating trusted sites within Chrome.
Opening Chrome settings is the foundational step that paves the way for configuring security preferences and managing site permissions. This initial action sets the stage for a seamless and secure browsing experience, empowering users to customize their trusted sites list and optimize their interaction with specific websites.
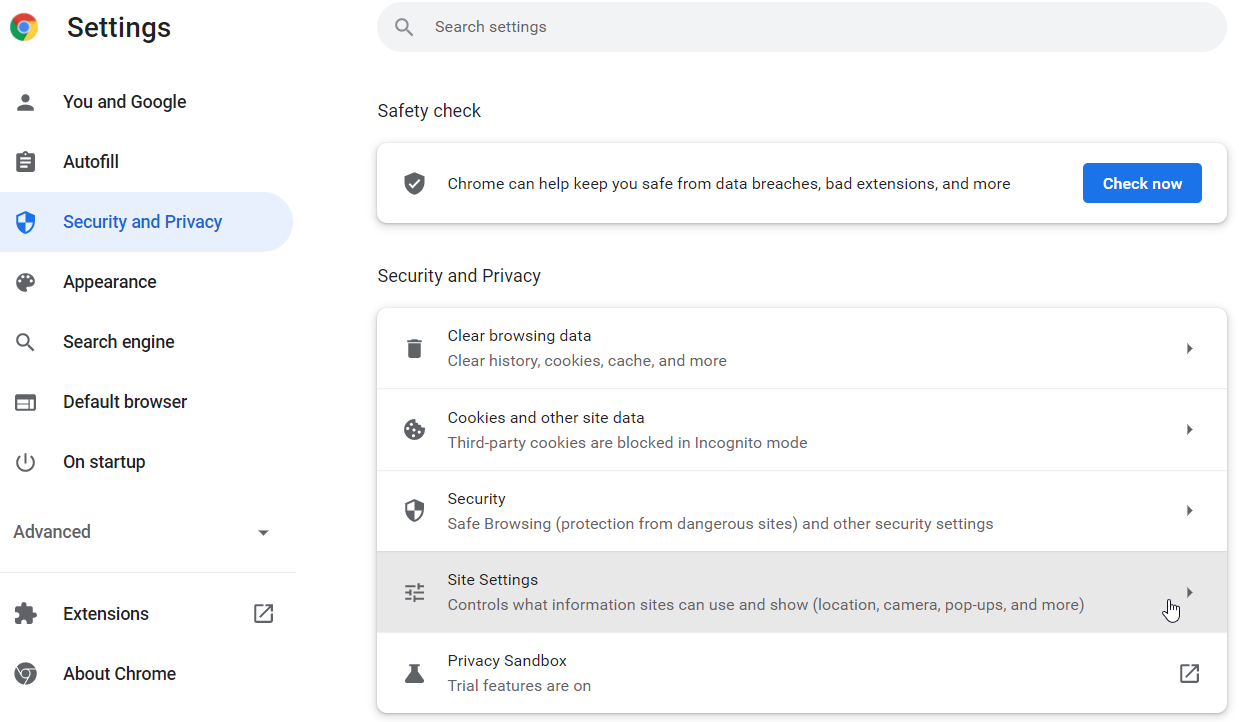
Step 2: Navigate to Security Settings
Once you have accessed the Chrome settings, the next crucial step in adding sites to the trusted sites list involves navigating to the security settings. Chrome's security settings encompass a range of configurations that enable users to manage site permissions, control access to sensitive data, and enhance browsing security. By navigating to the security settings, you can gain access to the specific controls that govern trusted sites and customize your browsing environment according to your preferences.
To navigate to the security settings in Chrome, follow these steps:
-
Locate the "Security" Category: Within the Chrome settings interface, scan the list of categories on the left-hand side. Look for the "Security" category, which is typically positioned among other key settings sections such as Privacy and security, Site settings, and Advanced.
-
Click on "Security": Once you have identified the "Security" category, click on it to access the corresponding security settings. This action will direct you to a new window or tab within the settings interface, where you can delve into the intricacies of Chrome's security configurations.
-
Explore Security Options: Upon entering the security settings, take a moment to familiarize yourself with the available options. Chrome's security settings encompass a diverse array of controls, including those related to site permissions, SSL/TLS certificates, and safe browsing features. By exploring these options, you can gain insights into the various security measures implemented by Chrome to safeguard your browsing activities.
Navigating to the security settings in Chrome is a pivotal stage in the process of adding sites to the trusted sites list. By accessing the security settings, users can delve into the intricacies of Chrome's security features and gain a deeper understanding of the mechanisms that underpin secure browsing. This step sets the stage for the subsequent actions that will enable you to designate specific sites as trusted, thereby customizing your browsing environment to align with your preferences and security requirements.
As you proceed to the next steps in the process, the insights gleaned from navigating to the security settings will inform your decisions and empower you to make informed choices regarding trusted sites and enhanced browsing security. By leveraging the security settings within Chrome, users can fortify their browsing experience and tailor their interactions with websites to align with their individual preferences and security standards.
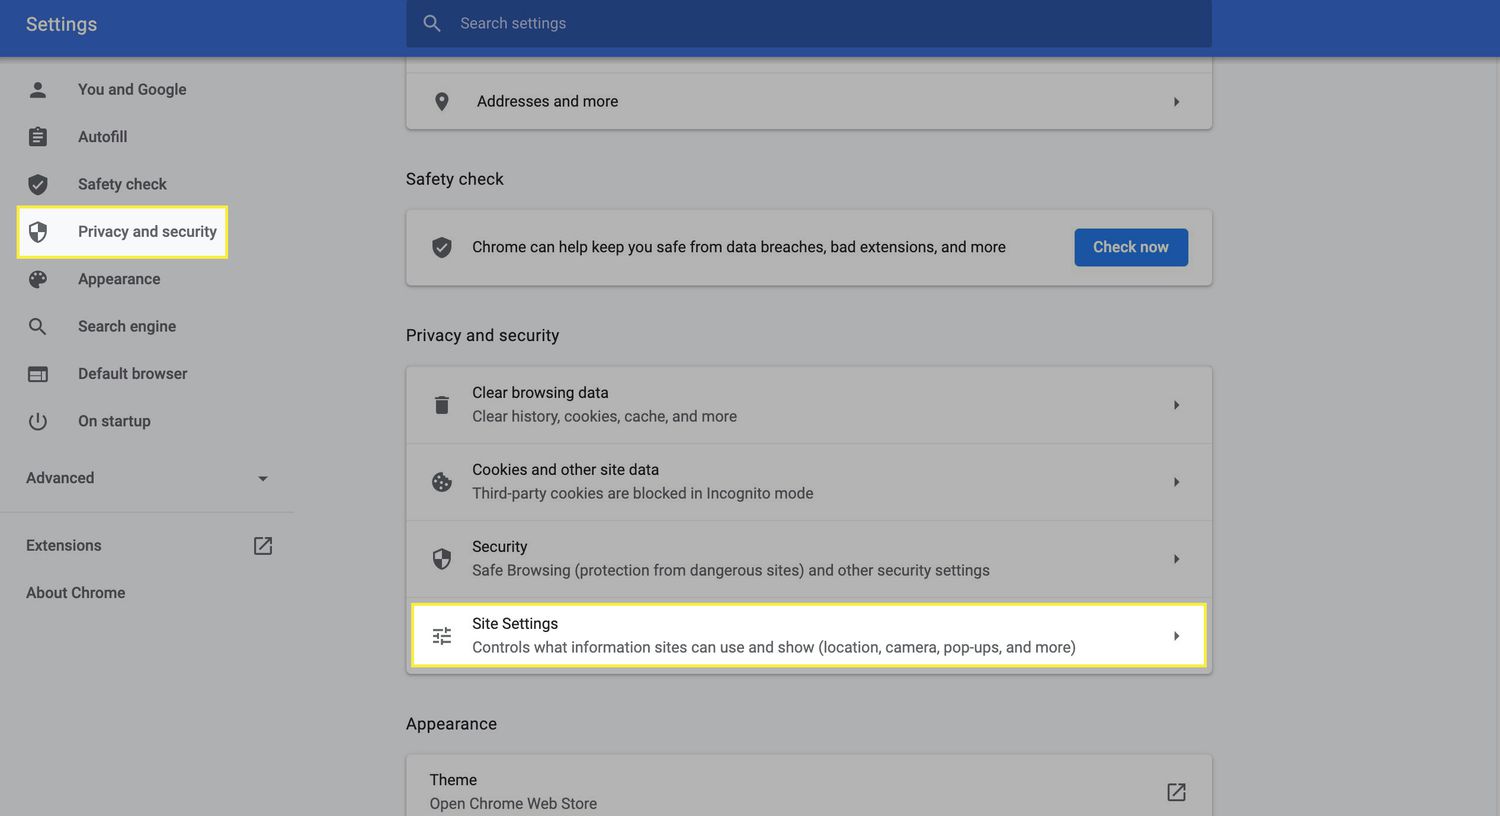
Step 3: Add Site to Trusted Sites
Adding a site to the trusted sites list in Chrome involves a deliberate and strategic process aimed at enhancing browsing convenience and security. By designating specific websites as trusted, users can streamline their interactions with these sites, bypass certain security restrictions, and enjoy a more seamless browsing experience. The ability to add sites to the trusted sites list empowers users to customize their browsing environment, granting special privileges to trusted websites while upholding stringent security measures for untrusted domains.
To add a site to the trusted sites list in Chrome, follow these steps:
-
Access Site Settings: Upon navigating to the security settings in Chrome, locate the "Site settings" section, which encompasses a range of controls related to site permissions and behavior. Within the site settings, look for the "Permissions" subsection, where you can manage various site-specific permissions and configurations.
-
Manage Permissions: Within the site settings, click on "Permissions" to access a comprehensive overview of site-specific permissions. Here, you can manage settings such as location access, camera access, microphone access, and more. Look for the "Additional permissions" or "Trusted sites" option, which may be located within the advanced permissions settings.
-
Add Site to Trusted Sites: Upon finding the "Trusted sites" or similar option, proceed to add the desired site to the trusted sites list. This typically involves entering the URL of the site and confirming its addition to the trusted list. Chrome will recognize the designated site as trusted, granting it additional privileges and adjusting its security settings accordingly.
-
Verify Site Status: After adding the site to the trusted sites list, it's essential to verify its status to ensure that the changes have been successfully applied. You can revisit the site settings or security settings to confirm that the designated site is now recognized as trusted within Chrome.
By following these steps, users can effectively add sites to the trusted sites list in Chrome, thereby customizing their browsing environment and optimizing their interactions with specific websites. This process empowers users to tailor their browsing experience, granting special privileges to trusted sites while upholding robust security measures for untrusted domains.
The ability to add sites to the trusted sites list underscores Chrome's commitment to user-centric security and personalized browsing experiences. By providing users with the flexibility to designate trusted sites, Chrome empowers individuals to navigate the web with confidence, knowing that their interactions with trusted websites are streamlined and secure.
Step 4: Confirm Changes
After adding a site to the trusted sites list in Chrome, it is essential to confirm that the changes have been successfully applied. Verifying the status of the designated site ensures that it is recognized as a trusted entity within Chrome, granting it additional privileges and adjusting its security settings accordingly. This step is crucial in ensuring that the desired sites are seamlessly integrated into the trusted sites list, thereby enhancing the browsing experience and streamlining interactions with specific websites.
To confirm the changes made to the trusted sites list in Chrome, follow these steps:
-
Revisit Site Settings: Return to the site settings or security settings within Chrome to review the status of the designated site. By revisiting the relevant settings sections, you can verify whether the site has been successfully added to the trusted sites list.
-
Check Permissions: Within the site settings, navigate to the permissions or trusted sites section to confirm the inclusion of the designated site. Ensure that the site is listed among the trusted entities, indicating that it has been granted special privileges within Chrome.
-
Test Site Functionality: Access the designated site and test its functionality to ascertain whether the changes have been applied effectively. By interacting with the site and observing its behavior, you can validate that it is operating within the parameters of a trusted site, benefiting from the additional privileges granted by Chrome.
-
Review Security Indicators: While visiting the designated site, pay attention to any security indicators or notifications provided by Chrome. These indicators may include visual cues or messages that confirm the trusted status of the site, reinforcing the successful addition of the site to the trusted sites list.
By confirming the changes made to the trusted sites list in Chrome, users can ensure that their designated sites are accorded the appropriate privileges and security settings, fostering a seamless and secure browsing experience. This verification process underscores the importance of meticulous site management within Chrome, empowering users to tailor their browsing environment and interact with trusted websites with confidence and convenience.
Conclusion
In conclusion, the ability to add sites to the trusted sites list in Chrome represents a pivotal aspect of personalized browsing experiences and robust security management. By following the step-by-step process outlined in this guide, users can navigate Chrome's settings, access security configurations, and designate specific websites as trusted entities within the browser.
The process of adding sites to the trusted sites list empowers users to streamline their interactions with trusted websites, granting them special privileges while upholding stringent security measures for untrusted domains. This customization capability aligns with Chrome's commitment to user-centric security and personalized browsing experiences, allowing individuals to navigate the web with confidence and convenience.
By leveraging the trusted sites feature, users can mitigate potential security risks and enjoy a more seamless browsing experience on their preferred websites. Whether it's granting special permissions to a banking platform, a work-related portal, or any other trusted site, the ability to add sites to the trusted sites list enhances the overall browsing experience and fosters a sense of control and security for users.
Furthermore, the process of confirming the changes made to the trusted sites list underscores the importance of meticulous site management within Chrome. Verifying the status of designated sites ensures that they are seamlessly integrated into the trusted sites list, benefiting from the additional privileges granted by Chrome and operating within a secure browsing environment.
In essence, the feature of trusted sites in Chrome embodies the fusion of security and convenience, allowing users to tailor their browsing environment to suit their specific needs while upholding robust security standards. By adding sites to the trusted sites list and confirming the changes, users can navigate the web with confidence, knowing that their interactions with trusted websites are streamlined, secure, and optimized for a seamless browsing experience.