Introduction
Pop-up blockers have become a common feature in web browsers, including Chromebook’s built-in Chrome browser. While these blockers are intended to enhance the browsing experience by preventing intrusive pop-up advertisements, they can sometimes hinder the functionality of certain websites or prevent important notifications from appearing. Therefore, knowing how to disable the pop-up blocker on your Chromebook can be essential for accessing certain web content or completing specific tasks.
In this guide, we will explore various methods to disable the pop-up blocker on Chromebook, allowing you to customize your browsing experience and regain control over which pop-ups you wish to see or block. Whether you need to access a website that relies on pop-up windows to display content, receive important notifications, or simply prefer having more control over pop-up behavior, we’ve got you covered.
Before we dive into the methods, it’s important to note that disabling the pop-up blocker should be done cautiously. Pop-ups can be intrusive and potentially harmful, so it’s crucial to ensure you’re disabling the pop-up blocker for trusted websites only. Be mindful of potential security risks and only disable the blocker when you’re confident in the source of the pop-ups you’re allowing.
Without further ado, let’s explore the methods to disable the pop-up blocker on your Chromebook and regain control over pop-up behavior.
Why do you need to disable the pop-up blocker on Chromebook?
The pop-up blocker on Chromebook can be highly effective in preventing intrusive and unwanted pop-up advertisements. However, there are several scenarios where disabling the pop-up blocker becomes necessary:
- Accessing specific website features: Some websites, especially those related to online banking, e-commerce, or government services, use pop-up windows to display important information or perform specific functions. By disabling the pop-up blocker, you can ensure that you have full access to these features and avoid any disruptions in your browsing experience.
- Enabling notifications: Certain websites or web applications utilize pop-up windows to deliver important notifications or alerts. Disabling the pop-up blocker allows these notifications to appear, ensuring that you receive timely updates and stay informed about any essential information or events.
- Troubleshooting website issues: In some instances, a malfunctioning or poorly optimized website may not load properly due to conflicts with the pop-up blocker. By temporarily disabling the blocker, you can troubleshoot website issues and identify whether the pop-up blocker is causing any conflicts or obstructing the website’s functionality.
- Configuring website preferences: Some websites require specific pop-up permissions to function correctly. By disabling the pop-up blocker, you can configure website preferences and allow pop-ups to appear when necessary, granting you more control over the browsing experience.
- Experiencing interactive content: Certain interactive websites, such as online quizzes, surveys, or multimedia platforms, rely on pop-up windows to display content or gather user input. Disabling the pop-up blocker can enhance your interaction with these websites, allowing you to fully engage with the content and participate in the intended user experience.
While the pop-up blocker is a valuable feature to protect against unwanted pop-up advertisements, there are valid reasons to disable it temporarily or on selected websites. By understanding the situations where disabling the pop-up blocker is beneficial, you can make informed decisions and customize your browsing experience to suit your needs.
How to Disable the Pop-up Blocker on Chromebook
There are several methods you can use to disable the pop-up blocker on your Chromebook. Follow the steps below to regain control over pop-up behavior:
Method 1: Using Chrome Browser Settings
- Open the Chrome browser on your Chromebook.
- Click on the three-dot menu icon in the top-right corner of the browser window.
- In the dropdown menu, select “Settings.”
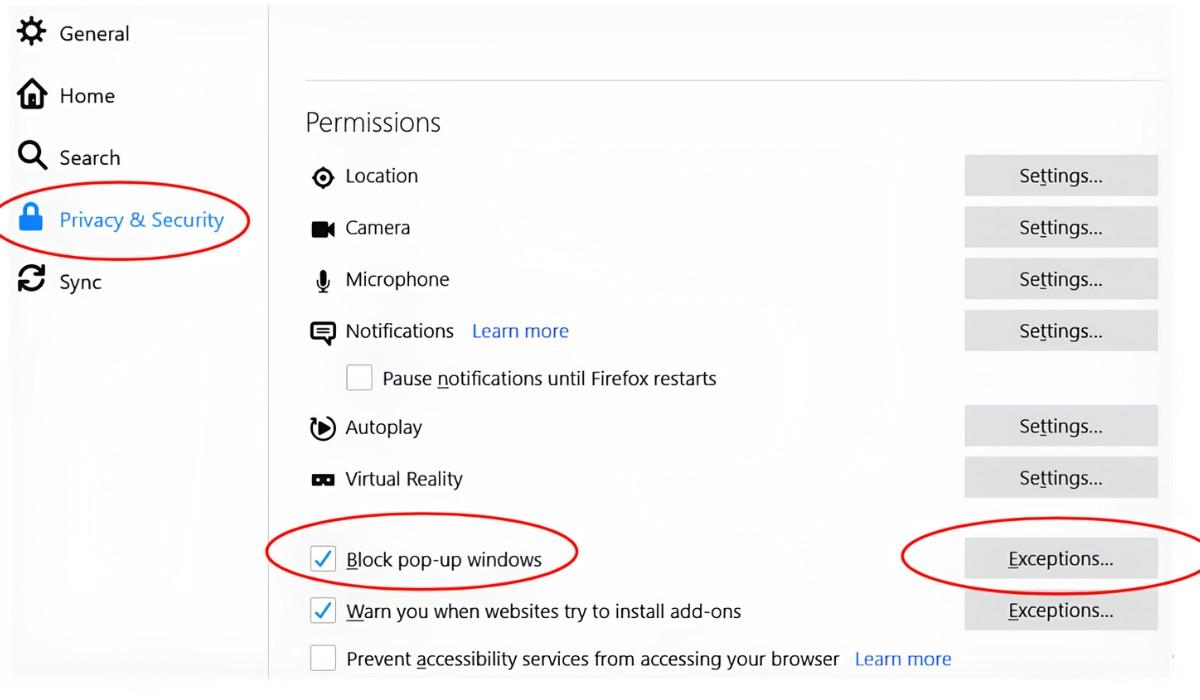
- Scroll down and click on “Privacy and security” in the left sidebar.
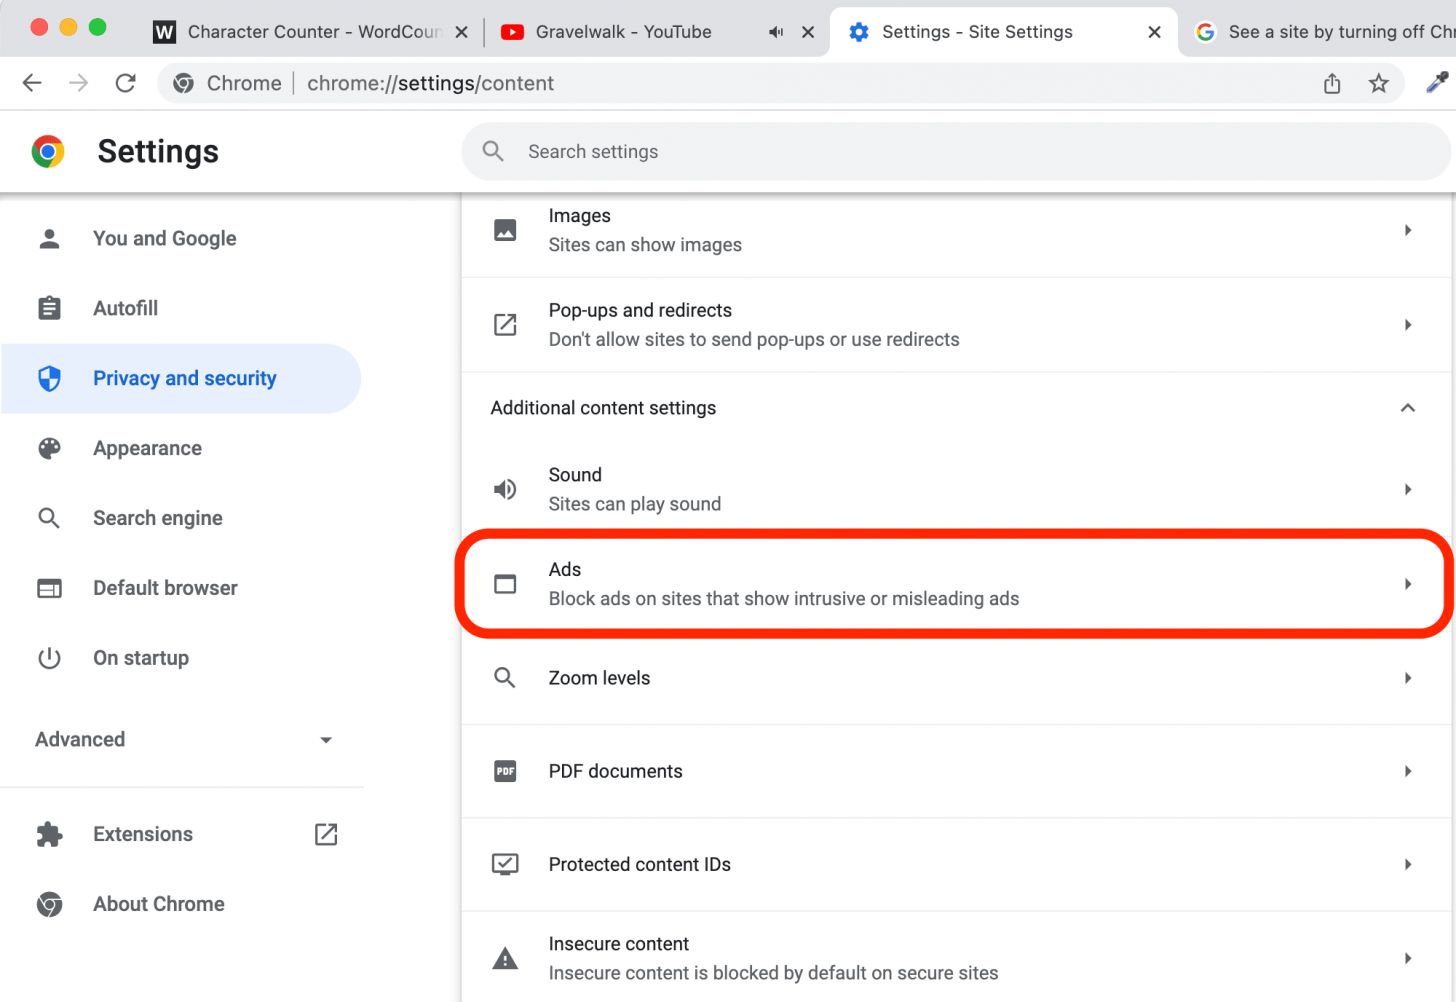
- Under the “Privacy and security” section, click on “Site Settings.”
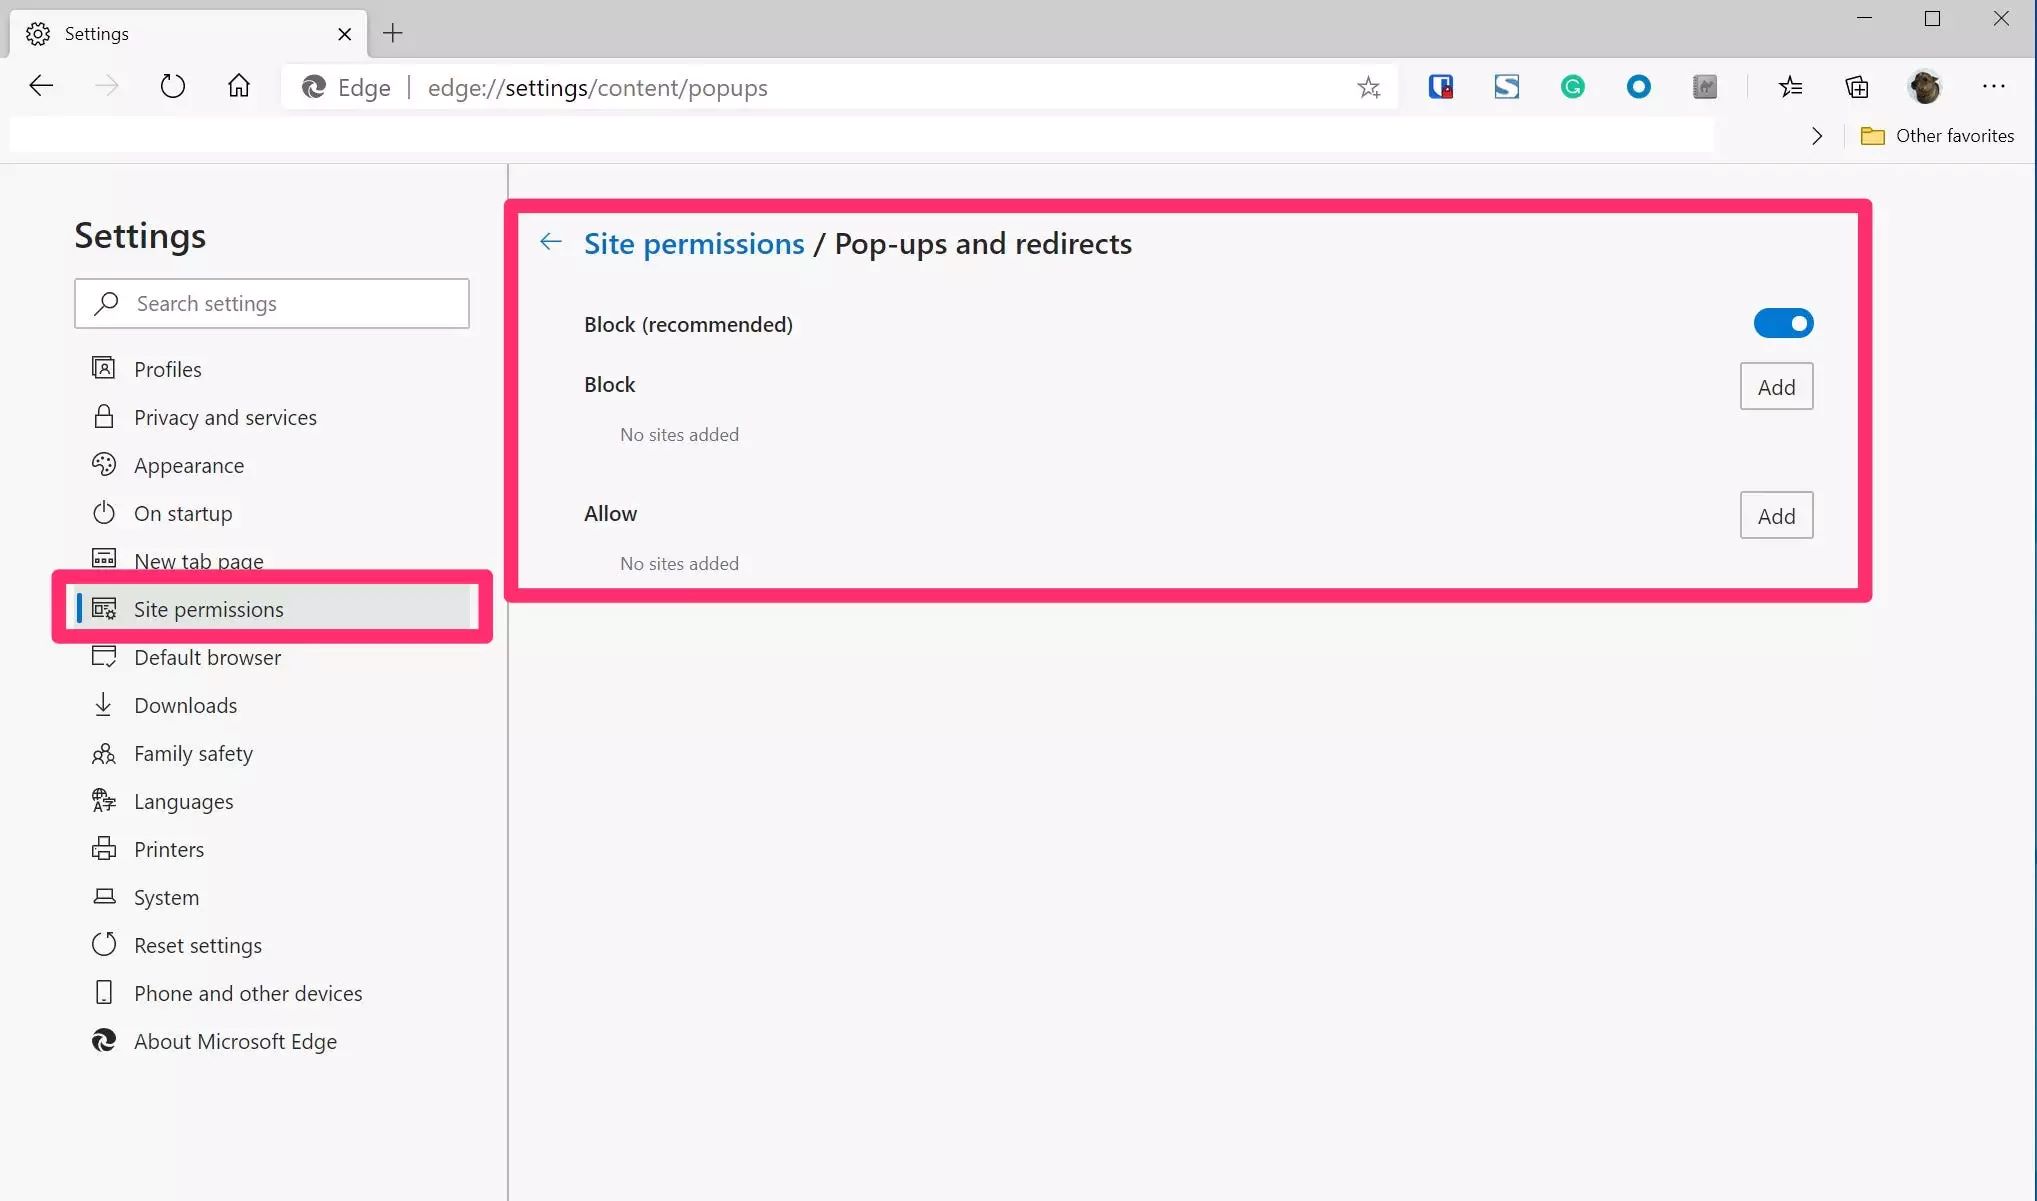
- Scroll down and locate the “Pop-ups and redirects” option.
- Toggle the switch next to “Allowed” to disable the pop-up blocker. The switch will turn gray.
Method 2: Using the Site Settings
- Visit the website for which you wish to disable the pop-up blocker.
- Click on the lock icon located to the left of the website URL in the address bar.
- In the dropdown menu, click on “Site settings.”
- Scroll down to find the “Pop-ups and redirects” section.
- Toggle the switch next to “Blocked” to enable pop-ups for that specific website.
Method 3: Using the Quick Settings Menu
- While on a webpage, click on the clock icon located in the bottom-right corner of the screen.
- In the quick settings menu that appears, find the “Pop-ups blocked” option.
- Click on “Pop-ups blocked” to disable the pop-up blocker temporarily for that website.
Method 4: Using a Chrome Extension
- Open the Chrome Web Store on your Chromebook.
- Search for a pop-up blocker extension of your choice.
- Click on the extension you want to install, and then click on the “Add to Chrome” button.
- Follow the on-screen instructions to install and configure the extension.
- Once installed, the extension will automatically block or allow pop-ups based on its settings.
By following these methods, you can easily disable the pop-up blocker on your Chromebook, either temporarily or permanently, depending on your browsing needs. It’s important to remember that being cautious and allowing pop-ups only from trusted websites is essential to maintain a secure browsing experience.
Method 1: Using Chrome Browser Settings
If you want to disable the pop-up blocker on your Chromebook entirely, you can do so by accessing the Chrome browser settings. Follow the steps below:
- Open the Chrome browser on your Chromebook.
- Click on the three-dot menu icon in the top-right corner of the browser window. This will open a dropdown menu.
- In the dropdown menu, select “Settings.” The Chrome browser settings page will open in a new tab.
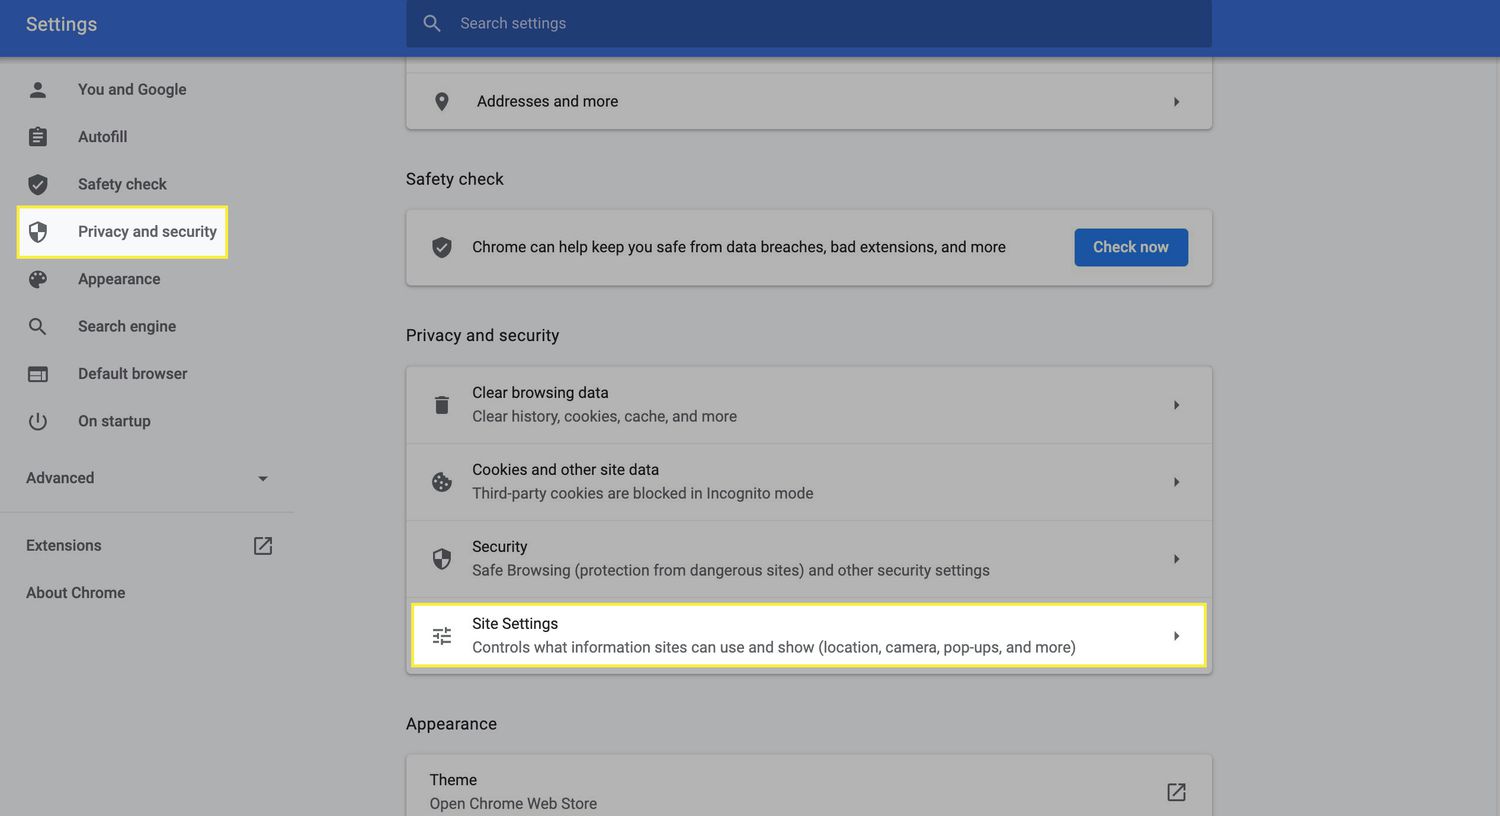
- Scroll down to find and click on “Privacy and security” in the left sidebar. This will expand a list of options.
- Under the “Privacy and security” section, click on “Site Settings.”
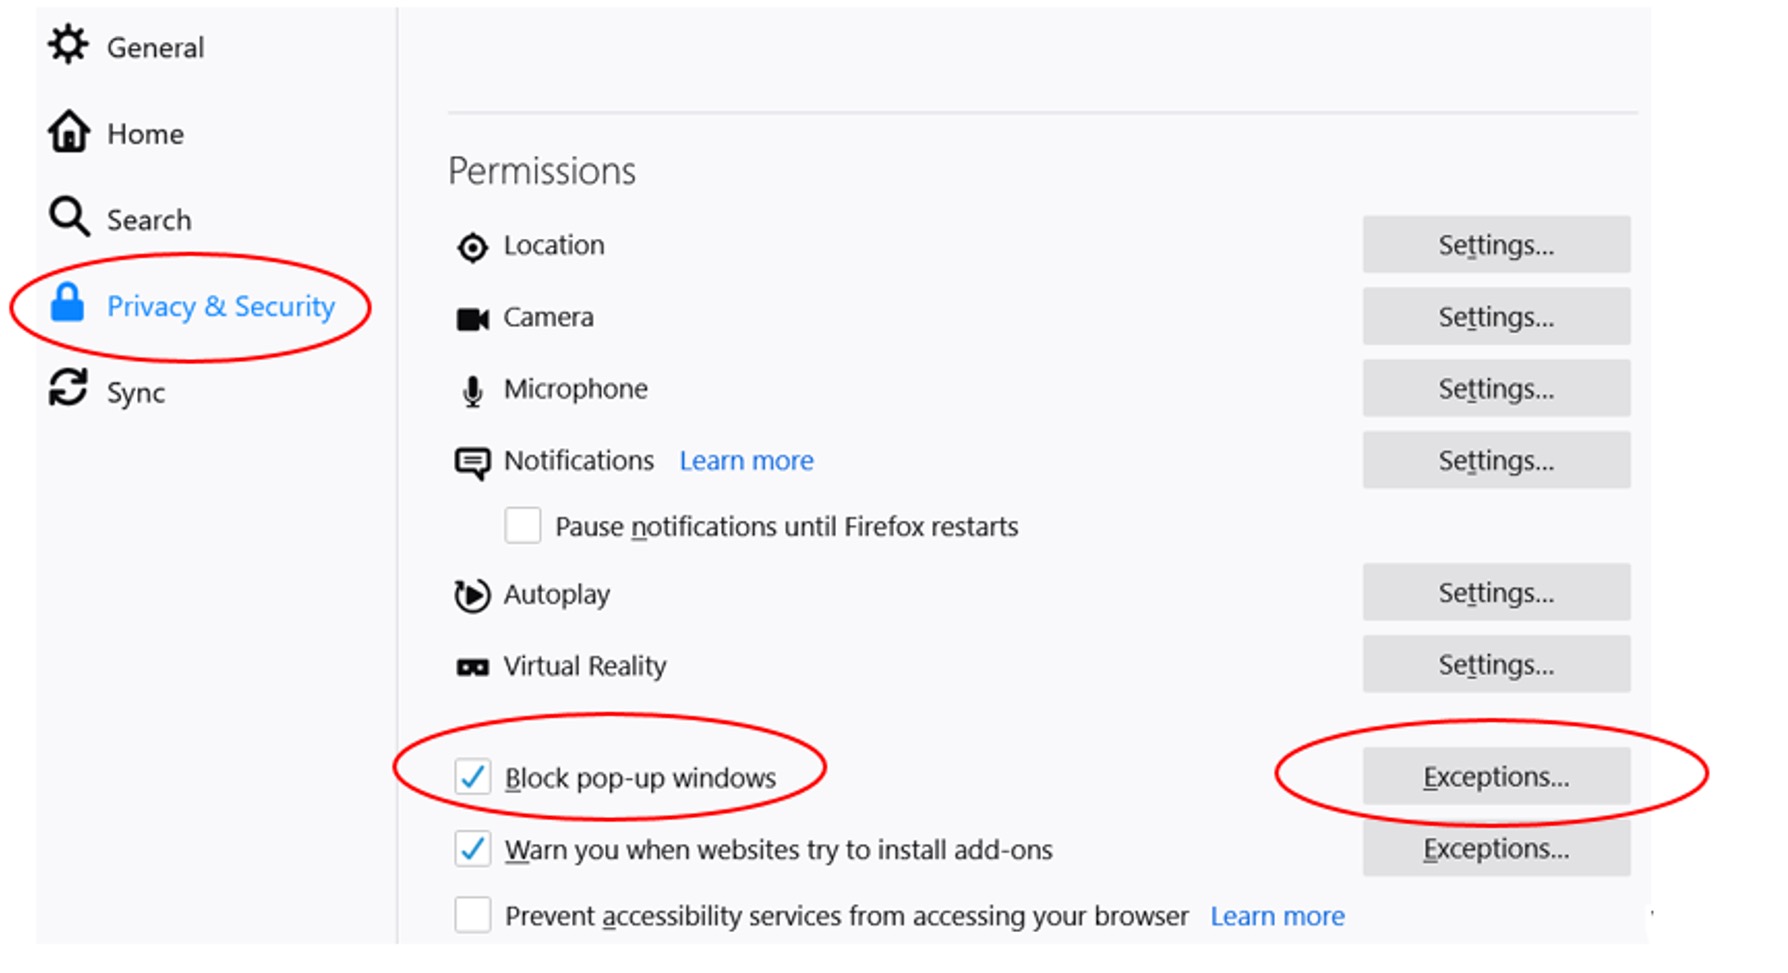
- Scroll down the list of site settings and locate the “Pop-ups and redirects” option.
- By default, the pop-up blocker is set to “Allowed.” To disable the pop-up blocker, simply toggle the switch next to “Allowed.” The switch will turn gray, indicating that the pop-up blocker is now disabled.
By following these steps, you have successfully disabled the pop-up blocker on your Chromebook using the Chrome browser settings. It’s important to remember that disabling the pop-up blocker may result in unwanted pop-up ads or potentially malicious pop-ups. Therefore, it’s crucial to exercise caution and only disable the pop-up blocker for trusted websites to ensure a safe browsing experience.
Method 2: Using the Site Settings
If you want to disable the pop-up blocker for a specific website on your Chromebook, you can do so using the site settings. Follow the steps below:
- Visit the website for which you want to disable the pop-up blocker on your Chromebook.
- Look for the lock icon located to the left of the website URL in the address bar. Click on it to open a dropdown menu.
- In the dropdown menu, click on “Site settings.” You will be directed to the site settings page for the specific website.
- Scroll down the list of site settings until you find the “Pop-ups and redirects” section.
- By default, the pop-up blocker is set to “Blocked” for all websites. To enable pop-ups for the selected website, simply toggle the switch next to “Block” to “Allowed”.
By following these steps, you have successfully disabled the pop-up blocker for the specific website you are currently visiting. This allows the website to display pop-up windows or perform specific functions that may be necessary for your browsing experience.
It’s important to note that enabling pop-ups for a specific website should be done with caution. Make sure you trust the website and understand the potential risks associated with allowing pop-ups. Some websites may misuse pop-ups or display annoying ads, so exercise discretion when adjusting site-specific pop-up settings.
Method 3: Using the Quick Settings Menu
If you want to quickly disable the pop-up blocker for a website while browsing on your Chromebook, you can do so using the quick settings menu. Follow the steps below:
- While on the webpage for which you want to disable the pop-up blocker, locate the clock icon in the bottom-right corner of the screen. This icon represents the quick settings menu.
- Click on the clock icon to open the quick settings menu. A small menu will appear displaying various options.
- In the quick settings menu, look for the “Pop-ups blocked” option. This indicates the current status of the pop-up blocker for the website you are on.
- If the pop-up blocker is currently enabled, the “Pop-ups blocked” text will be displayed. Click on it to temporarily disable the pop-up blocker for the website.
By following these steps, you can quickly disable the pop-up blocker for the website you are currently browsing. This provides you with the flexibility to allow pop-up windows on a case-by-case basis and ensures a seamless browsing experience for websites that require or utilize pop-up functionality.
It’s important to note that the pop-up blocker will remain disabled only for the current browsing session. When you close the browser or navigate to a different website, the pop-up blocker will revert to its original settings. This allows you to maintain control over pop-up behavior while temporarily disabling the blocker for specific websites as needed.
Method 4: Using a Chrome Extension
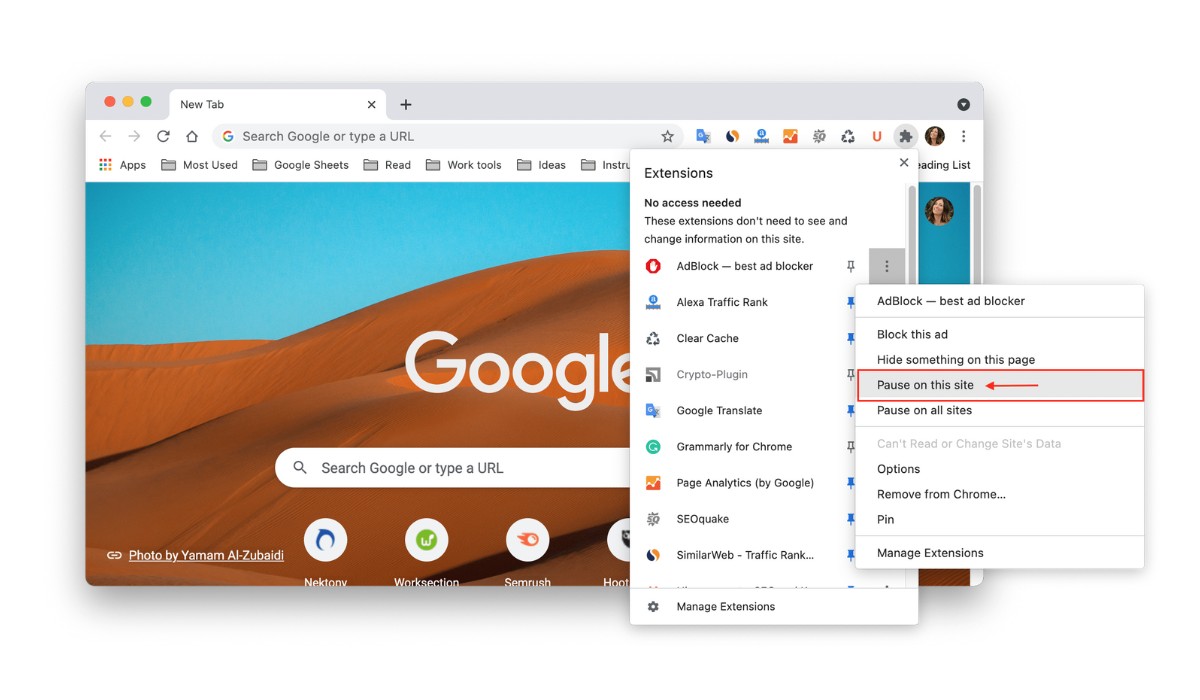
If you want more control over your pop-up settings on Chromebook, you can utilize a Chrome extension specifically designed for managing pop-ups. Follow the steps below to install and use a pop-up blocker extension:
- Open the Chrome Web Store on your Chromebook.
- In the search bar, type in “pop-up blocker” or a relevant keyword to find pop-up blocker extensions available.
- Review the list of extensions and choose the one that suits your needs. It’s recommended to read reviews and check the ratings to ensure you select a reputable and effective extension.
- Click on the extension you want to install. This will open the extension details page.
- On the extension details page, click on the “Add to Chrome” button. A confirmation prompt will appear.
- Review and confirm any permissions required by the extension. If you are comfortable with the permissions, click on “Add extension” to proceed with the installation.
- Once the extension is installed, you can access its settings and customize the pop-up behavior according to your preferences.
By following these steps, you can install and configure a pop-up blocker extension on your Chromebook. These extensions provide additional features and settings beyond the built-in pop-up blocker, allowing you to fine-tune your pop-up preferences and ensure a smoother browsing experience.
It’s important to note that the effectiveness and functionality of different pop-up blocker extensions may vary. Therefore, it’s recommended to research and choose a reputable extension with positive user reviews to ensure optimal performance and security.
Conclusion
Disabling the pop-up blocker on your Chromebook can give you more control over your browsing experience and allow you to access specific website features and notifications. By following the methods outlined in this guide, you can easily disable the pop-up blocker and customize your pop-up settings according to your preferences.
- Method 1: You can disable the pop-up blocker using the Chrome browser settings. By toggling the switch next to “Allowed” in the “Pop-ups and redirects” section, you can disable the pop-up blocker entirely.
- Method 2: You can use the site settings to disable the pop-up blocker for a specific website. By toggling the switch next to “Block” to “Allowed” in the “Pop-ups and redirects” section of the site settings, you can enable pop-ups for that particular website.
- Method 3: The quick settings menu allows you to temporarily disable the pop-up blocker for the current browsing session. By clicking on the “Pop-ups blocked” option in the quick settings menu, you can disable the pop-up blocker for the website you are currently on.
- Method 4: If you want more control over your pop-up settings, you can install a pop-up blocker extension from the Chrome Web Store. These extensions provide additional features and settings to customize your pop-up behavior according to your preferences.
Remember to exercise caution when disabling the pop-up blocker and only allow pop-ups from trusted websites. This will help ensure a safe and secure browsing experience. Additionally, it’s always a good practice to re-enable the pop-up blocker when you are done accessing specific websites or completing tasks that required its temporary disablement.
By understanding how to disable the pop-up blocker on your Chromebook, you can enhance your browsing experience and have greater control over which pop-ups you allow or block. Experiment with these methods and find the best approach that suits your needs while maintaining a secure browsing environment.