Introduction
Turning your laptop into a hotspot on Windows 10 can be incredibly useful in various scenarios. Whether you're traveling, working from a remote location, or simply need to share your internet connection with other devices, setting up a hotspot on your laptop can provide a convenient solution.
By configuring your laptop as a hotspot, you can share your internet connection with other devices, such as smartphones, tablets, and other laptops, without the need for a separate physical hotspot device. This can be particularly handy when you're in a location with limited Wi-Fi access or when you want to avoid the hassle of setting up a complex network.
In this guide, we'll walk through the step-by-step process of turning your Windows 10 laptop into a hotspot. You'll learn how to check your network adapter to ensure compatibility, configure the hotspot settings to your preferences, start the hotspot, and seamlessly connect other devices to it. By the end of this tutorial, you'll have a clear understanding of how to transform your laptop into a convenient and reliable hotspot, enhancing your connectivity options and providing flexibility in various situations.
Let's dive into the details and get started with the first step: checking your network adapter.
Step 1: Check your network adapter
Before setting up a hotspot on your Windows 10 laptop, it's essential to ensure that your network adapter supports the necessary features for creating a hotspot. The network adapter, also known as a wireless network interface controller or wireless card, is responsible for enabling wireless connectivity on your device.
To check if your network adapter supports hotspot functionality, follow these steps:
-
Open Device Manager: Right-click on the Start button and select "Device Manager" from the context menu. Alternatively, you can press the Windows key + X and choose "Device Manager" from the power user menu.
-
Navigate to Network Adapters: In the Device Manager window, expand the "Network adapters" category to view the list of network adapters installed on your laptop.
-
Check for Wireless Adapter: Look for an entry that includes the term "Wireless" or "Wi-Fi" in its name. This indicates the presence of a wireless network adapter.
-
Verify Hotspot Support: Double-click on the wireless network adapter to open its properties window. Navigate to the "Advanced" tab and look for an option related to hotspot, such as "Hosted Network" or "Hotspot." If such an option is present, it indicates that your network adapter supports the creation of a hotspot.
If you find the hotspot-related option in the properties of your wireless network adapter, it means that your adapter is capable of functioning as a hotspot. However, if you don't see this option, it's possible that your network adapter does not support hotspot functionality.
In the event that your network adapter does not support hotspot features, you may consider using an external USB wireless adapter that offers hotspot capabilities. These adapters can be easily plugged into your laptop's USB port and provide the necessary functionality to create a hotspot.
By verifying the compatibility of your network adapter, you can ensure that your laptop is equipped to serve as a hotspot, allowing you to proceed with the configuration steps with confidence. Once you've confirmed hotspot support, you can move on to the next step of configuring the hotspot settings on your Windows 10 laptop.
With the compatibility check completed, you are ready to move on to the next step of configuring the hotspot settings on your Windows 10 laptop.
Step 2: Configure the hotspot settings
Configuring the hotspot settings on your Windows 10 laptop is a crucial step in creating a seamless and secure wireless hotspot. By customizing the hotspot settings, you can define the network name, security type, password, and other essential parameters to ensure a reliable and protected connection for devices that will connect to the hotspot.
To configure the hotspot settings, follow these steps:
-
Access the Network & Internet Settings: Begin by accessing the Network & Internet settings on your Windows 10 laptop. You can do this by clicking on the network icon in the system tray and selecting "Network & Internet settings."
-
Navigate to Mobile Hotspot Settings: In the Network & Internet settings window, navigate to the "Mobile hotspot" section. Here, you'll find the options to configure the hotspot settings according to your preferences.
-
Choose a Network Name (SSID): The network name, also known as the Service Set Identifier (SSID), is the name that will be displayed when other devices search for available Wi-Fi networks. Enter a descriptive and recognizable name for your hotspot to make it easy for other users to identify and connect to it.
-
Select a Security Type: Windows 10 offers the flexibility to choose the security type for your hotspot. You can opt for either WPA2-Personal or WPA3-Personal, both of which provide strong encryption to secure the wireless connection. Select the security type that aligns with your security preferences.
-
Set a Password: A strong and unique password is essential to prevent unauthorized access to your hotspot. Create a password that combines uppercase and lowercase letters, numbers, and special characters to enhance security. This password will be required for devices to connect to the hotspot.
-
Save the Settings: Once you've configured the network name, security type, and password, save the settings to apply the changes. Your hotspot is now configured with the specified settings and is ready to be activated.
By customizing the hotspot settings with a unique network name, robust security type, and a strong password, you can establish a reliable and secure wireless hotspot on your Windows 10 laptop. These settings contribute to the overall integrity and accessibility of the hotspot, ensuring that connected devices can enjoy a stable and protected wireless connection.
With the hotspot settings configured, you're prepared to proceed to the next step of starting the hotspot and making it available for other devices to connect.
This step is crucial in ensuring that your hotspot is tailored to your preferences and security standards, providing a personalized and secure wireless environment for connected devices.
Step 3: Start the hotspot
After configuring the hotspot settings on your Windows 10 laptop, the next step is to initiate the hotspot and make it available for other devices to connect. Starting the hotspot enables your laptop to broadcast a wireless signal, allowing nearby devices to discover and connect to the network you've created.
To start the hotspot on your Windows 10 laptop, follow these steps:
-
Access the Mobile Hotspot Settings: Return to the Network & Internet settings on your laptop. Navigate to the "Mobile hotspot" section, where you previously configured the hotspot settings.
-
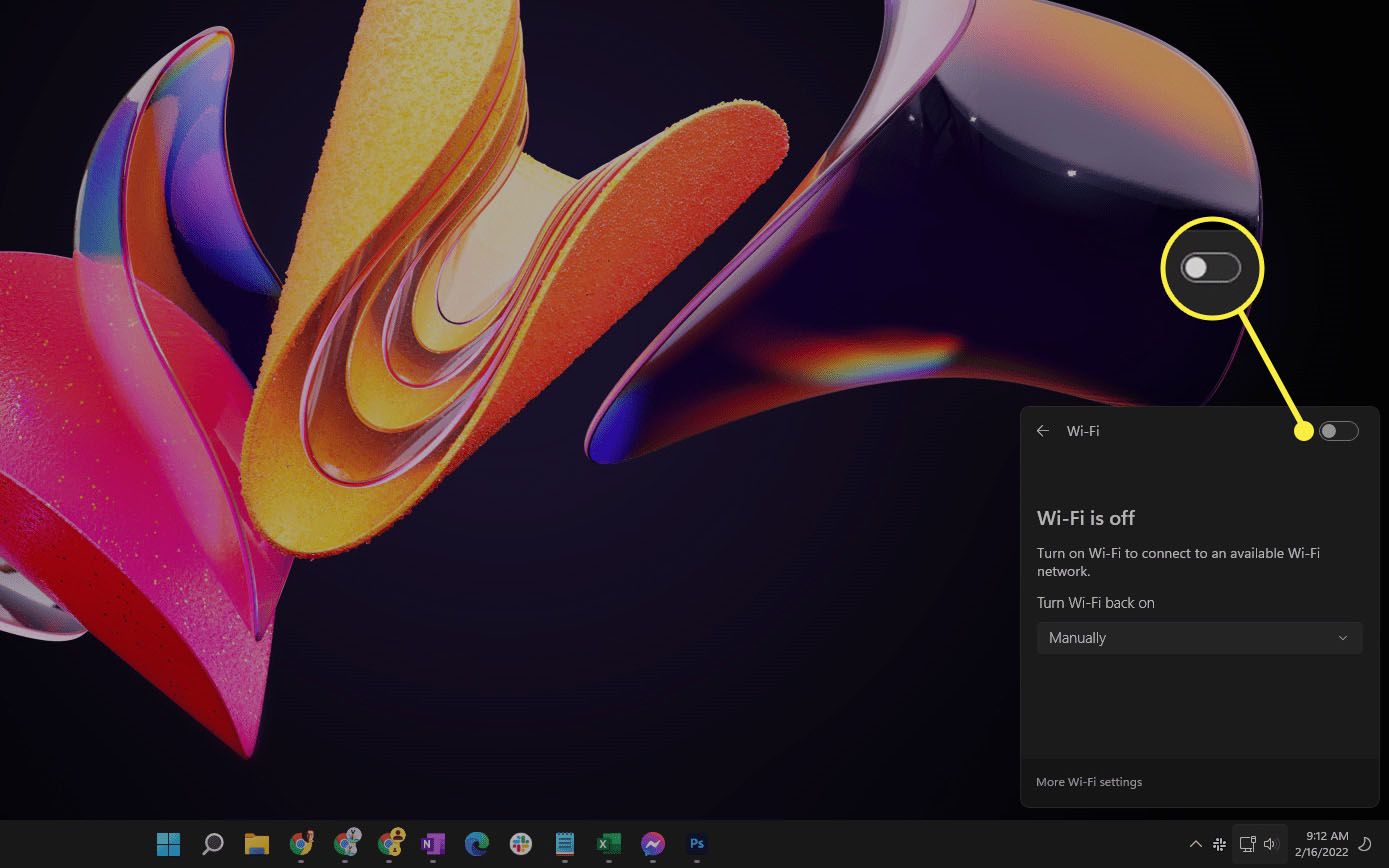
Activate the Hotspot: Within the Mobile hotspot settings, locate the "Share my Internet connection with other devices" option. Toggle the switch to turn on the hotspot. As soon as the hotspot is activated, your laptop begins broadcasting the wireless network using the network name (SSID) and security settings you defined earlier.
-
Verify Hotspot Availability: Once the hotspot is activated, nearby devices can search for available Wi-Fi networks and should be able to discover the network name you specified for your hotspot. The security type and password you set up are essential for connecting to the hotspot, ensuring that only authorized users can access the network.
-
Monitor Hotspot Status: You can verify the status of your hotspot, including the number of connected devices and the overall usage, directly from the Mobile hotspot settings. This allows you to keep track of the devices connected to your hotspot and manage the network effectively.
By following these steps, you can successfully start the hotspot on your Windows 10 laptop, allowing other devices to connect and utilize your internet connection. The seamless activation of the hotspot enhances the accessibility of your wireless network, providing a convenient and reliable connectivity option for a variety of devices.
As the hotspot becomes active, devices within range can connect to the network using the specified network name and password, enabling them to access the internet through your laptop's connection. This capability is particularly valuable in situations where traditional Wi-Fi access is limited, or when you need to share your internet connection with other devices without relying on additional hardware or complex network setups.
With the hotspot successfully started, you've completed a critical phase in transforming your Windows 10 laptop into a versatile and accessible wireless hotspot. The next step involves connecting devices to your hotspot, allowing them to benefit from the internet connectivity provided by your laptop.
Step 4: Connect to the hotspot
Connecting to the hotspot created by your Windows 10 laptop is a straightforward process that enables other devices to access the internet through your laptop's internet connection. Once the hotspot is active, devices within range can seamlessly connect and benefit from the wireless network you've established.
To connect to the hotspot on your Windows 10 laptop, follow these steps:
-
Discover the Hotspot: On the device you wish to connect, navigate to the Wi-Fi settings and initiate a search for available networks. The network name (SSID) you specified for your hotspot should appear in the list of discoverable Wi-Fi networks. Select the network name to proceed with the connection process.
-
Enter the Password: When prompted, enter the password you set up for the hotspot during the configuration step. The password serves as a security measure to ensure that only authorized users can connect to the network. Upon entering the correct password, proceed to establish the connection.
-
Establish the Connection: Once the correct password is entered, the device will attempt to establish a connection to the hotspot. Your Windows 10 laptop will authenticate the connection request, and upon successful validation, the device will be connected to the hotspot.
-
Verify Connection Status: After the connection is established, the device will be able to access the internet through your laptop's internet connection. You can verify the successful connection from the device's Wi-Fi settings, where the connected status should be displayed alongside the network name (SSID) of your hotspot.
By following these steps, you can effectively connect devices to the hotspot created by your Windows 10 laptop, providing them with access to the internet and enabling them to leverage your laptop's internet connection. This seamless connectivity option is particularly valuable in situations where traditional Wi-Fi access is limited or when you need to share your internet connection with other devices without relying on additional hardware or complex network setups.
As devices connect to the hotspot, they can benefit from the stable and secure wireless connection provided by your laptop, enhancing their connectivity options and enabling them to stay connected while on the go. This capability adds a layer of flexibility to your network setup, allowing you to extend your internet connection to a variety of devices without the need for a physical hotspot device.
With devices successfully connected to the hotspot, you've completed the process of transforming your Windows 10 laptop into a versatile and accessible wireless hotspot. This capability enhances the overall connectivity options available to you and other users, providing a convenient and reliable solution for sharing internet access across multiple devices.
Conclusion
Transforming your Windows 10 laptop into a hotspot offers a myriad of benefits, ranging from enhanced connectivity options to the convenience of sharing your internet connection with other devices. By following the comprehensive steps outlined in this guide, you've gained the knowledge and proficiency to configure and activate a wireless hotspot, elevating the versatility of your laptop and expanding its utility beyond traditional computing tasks.
Through the process of checking your network adapter for hotspot compatibility, configuring the hotspot settings to align with your preferences, initiating the hotspot, and connecting devices to it, you've harnessed the power of your laptop to create a reliable and secure wireless network. This capability is particularly valuable in diverse scenarios, including travel, remote work, and situations where traditional Wi-Fi access is limited or unavailable.
By customizing the hotspot settings with a unique network name, robust security type, and a strong password, you've established a personalized and secure wireless environment for connected devices. This attention to detail ensures that your hotspot offers a stable and protected connection, safeguarding your internet access while accommodating the connectivity needs of other devices.
The seamless activation of the hotspot enhances the accessibility of your wireless network, providing a convenient and reliable connectivity option for a variety of devices. Whether you're sharing your internet connection with colleagues during a meeting, enabling family members to connect their devices while traveling, or simply expanding your connectivity options at home, the hotspot functionality of your Windows 10 laptop empowers you to stay connected in diverse environments.
As devices connect to the hotspot and leverage your laptop's internet connection, you've unlocked a new level of flexibility and convenience in managing your network setup. This capability allows you to extend your internet connection to a variety of devices without the need for a physical hotspot device, simplifying the process of sharing internet access and enhancing the overall connectivity options available to you and other users.
In conclusion, the ability to turn your Windows 10 laptop into a hotspot represents a valuable feature that enhances your connectivity options, fosters collaboration, and provides a seamless solution for sharing internet access across multiple devices. By mastering the steps outlined in this guide, you've unlocked the potential of your laptop to serve as a versatile and accessible wireless hotspot, enriching your digital experience and empowering you to stay connected wherever you go.