Checking the Wi-Fi Signal Strength
One of the first steps in troubleshooting laptop connection issues to a hotspot is to check the Wi-Fi signal strength. A weak signal can lead to intermittent or slow connections, making it essential to assess the strength of the wireless signal. Here's how to do it:
-
Physical Proximity: Ensure that the laptop is within a reasonable range of the hotspot. Physical obstructions such as walls and large objects can weaken the Wi-Fi signal. Moving closer to the hotspot can help improve the signal strength.
-
Signal Bars: Look at the Wi-Fi icon on the taskbar. If the signal bars are low or fluctuating, it indicates a weak signal. In such cases, consider repositioning the laptop to optimize the signal reception.
-
Using a Wi-Fi Analyzer: Install a Wi-Fi analyzer app on your smartphone or use a similar tool on another device to measure the signal strength. This can provide a visual representation of the Wi-Fi signals in the area, helping you identify potential sources of interference or areas with stronger signals.
-
Built-in Laptop Tools: Some laptops have built-in tools to check Wi-Fi signal strength. You can access these tools through the network settings or the system tray icon for Wi-Fi.
-
Signal Strength Metrics: If available, use the laptop's network settings to view specific metrics related to the Wi-Fi signal strength. Look for parameters such as signal-to-noise ratio (SNR) and received signal strength indicator (RSSI) to gauge the quality of the connection.
By assessing the Wi-Fi signal strength using these methods, you can gain valuable insights into the quality of the wireless connection between the laptop and the hotspot. This information forms the basis for further troubleshooting steps to address any connectivity issues.
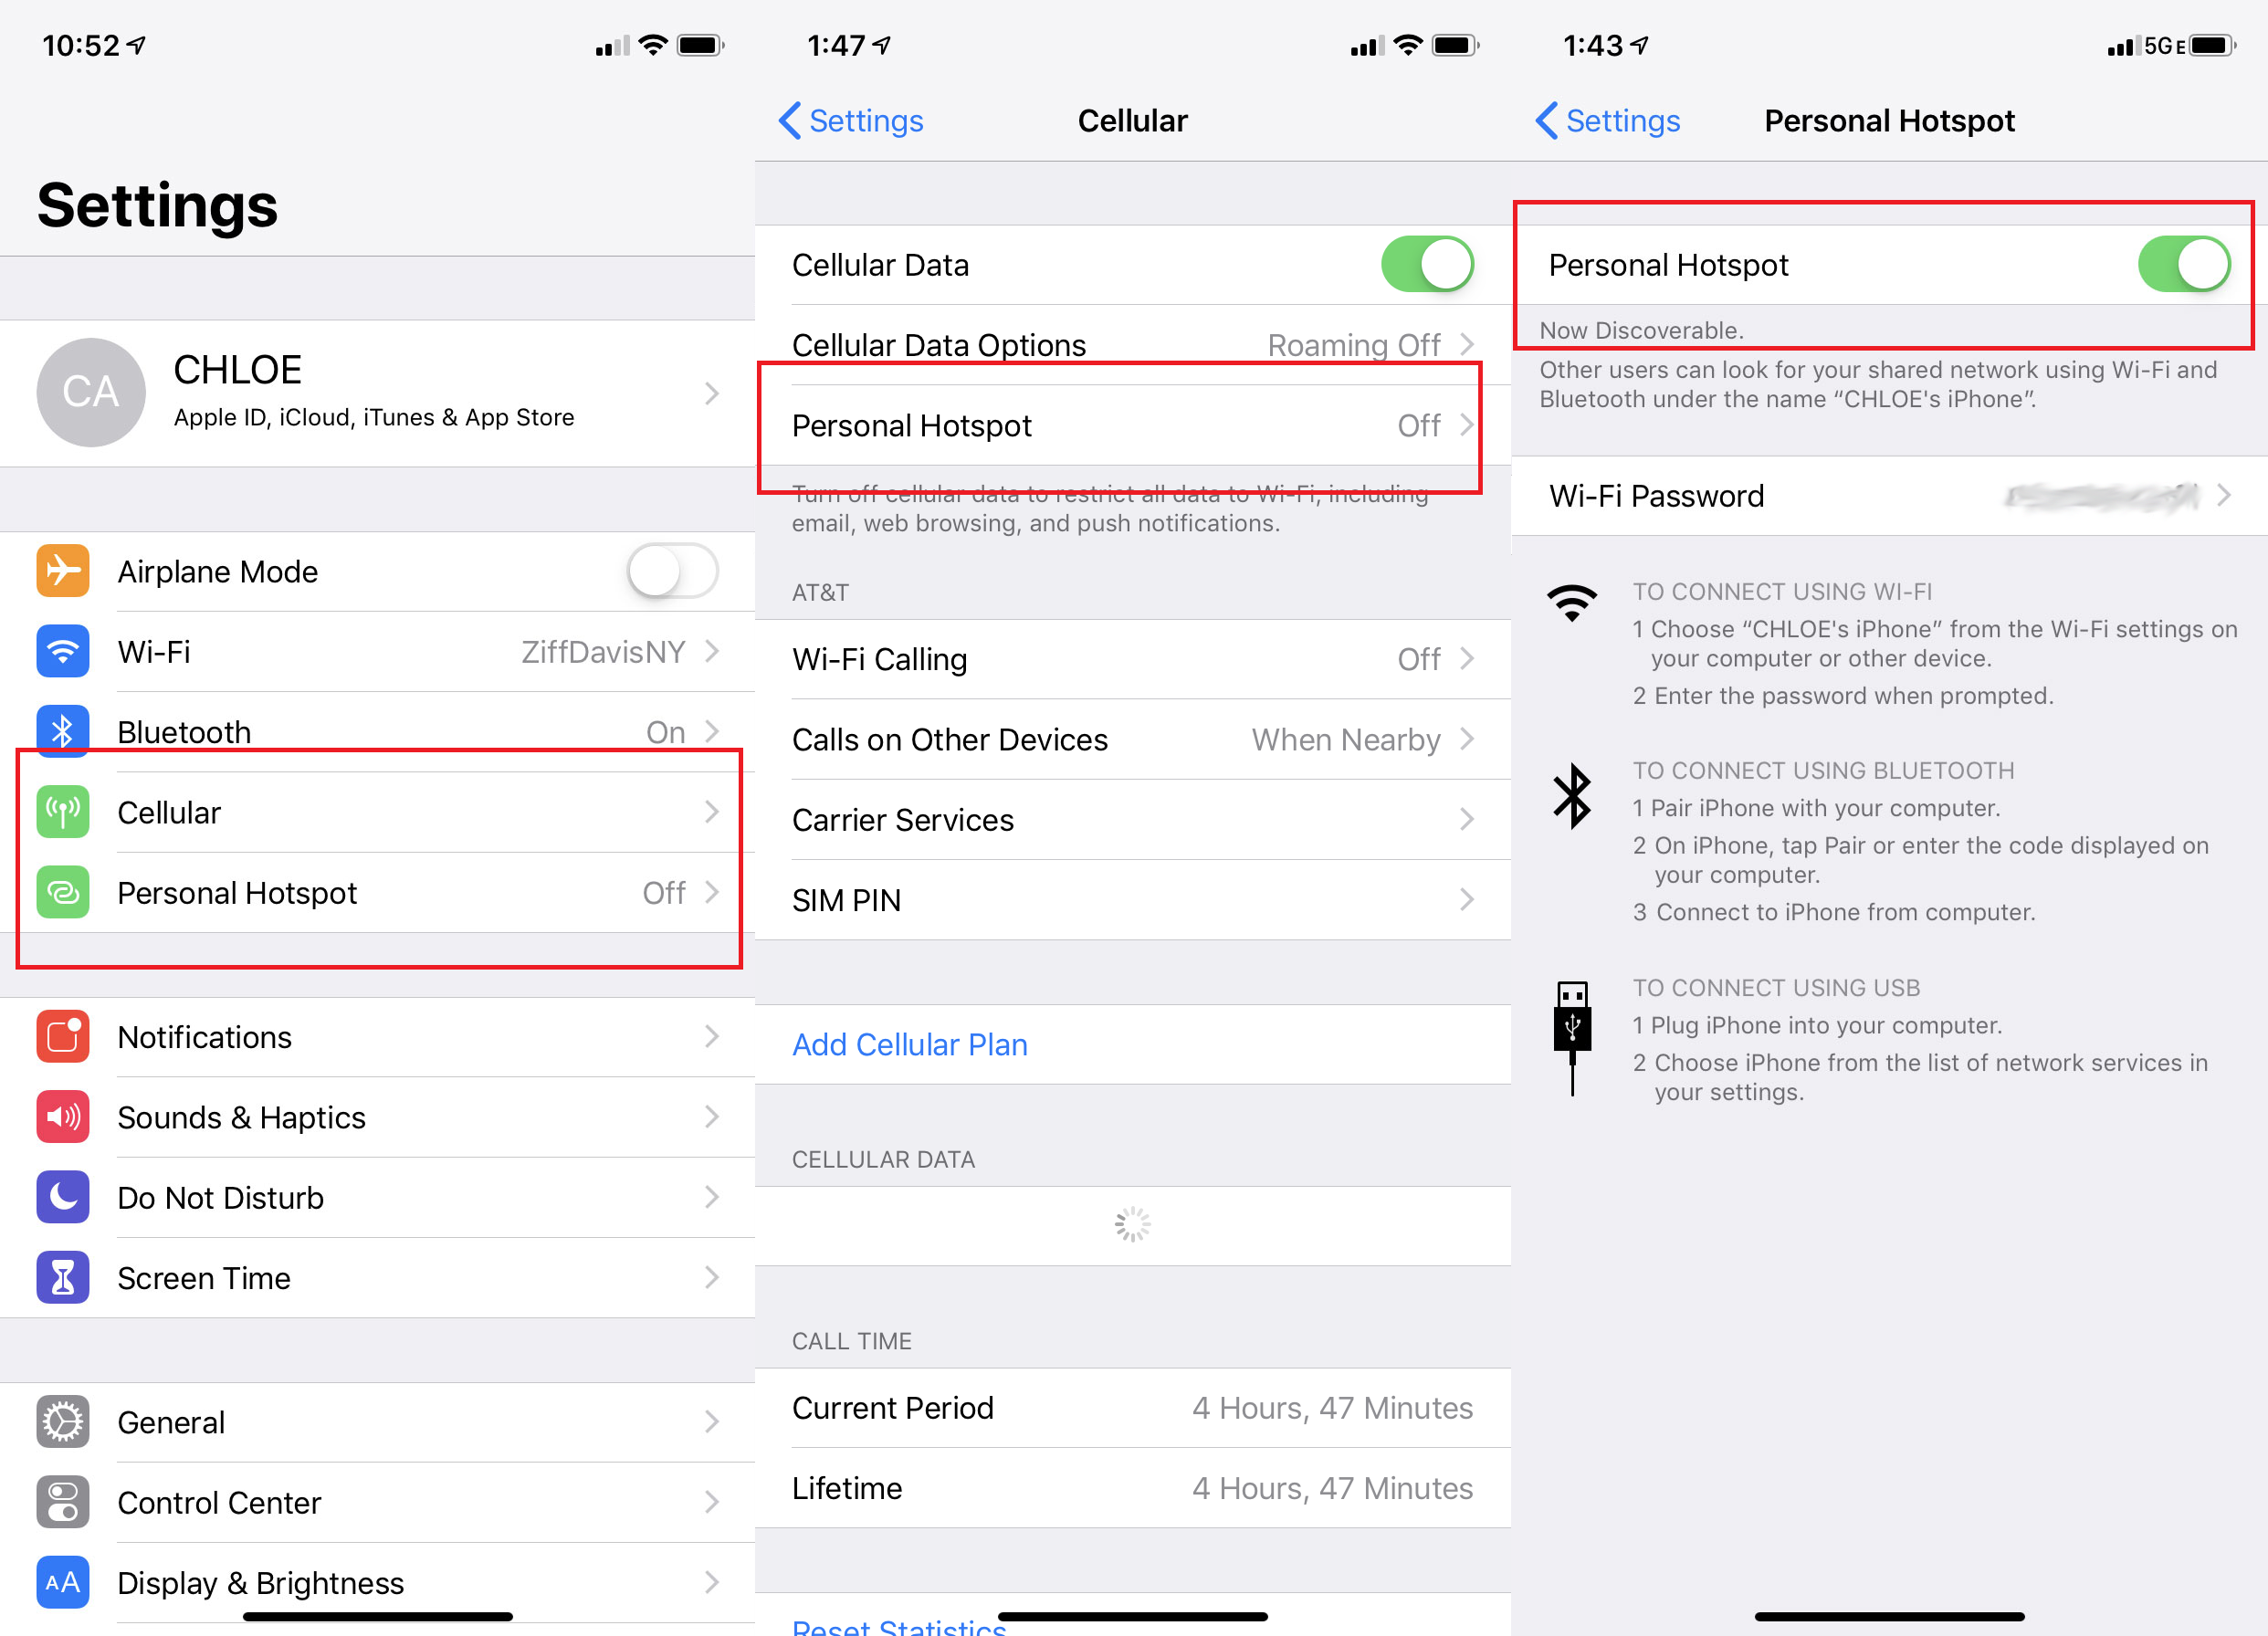
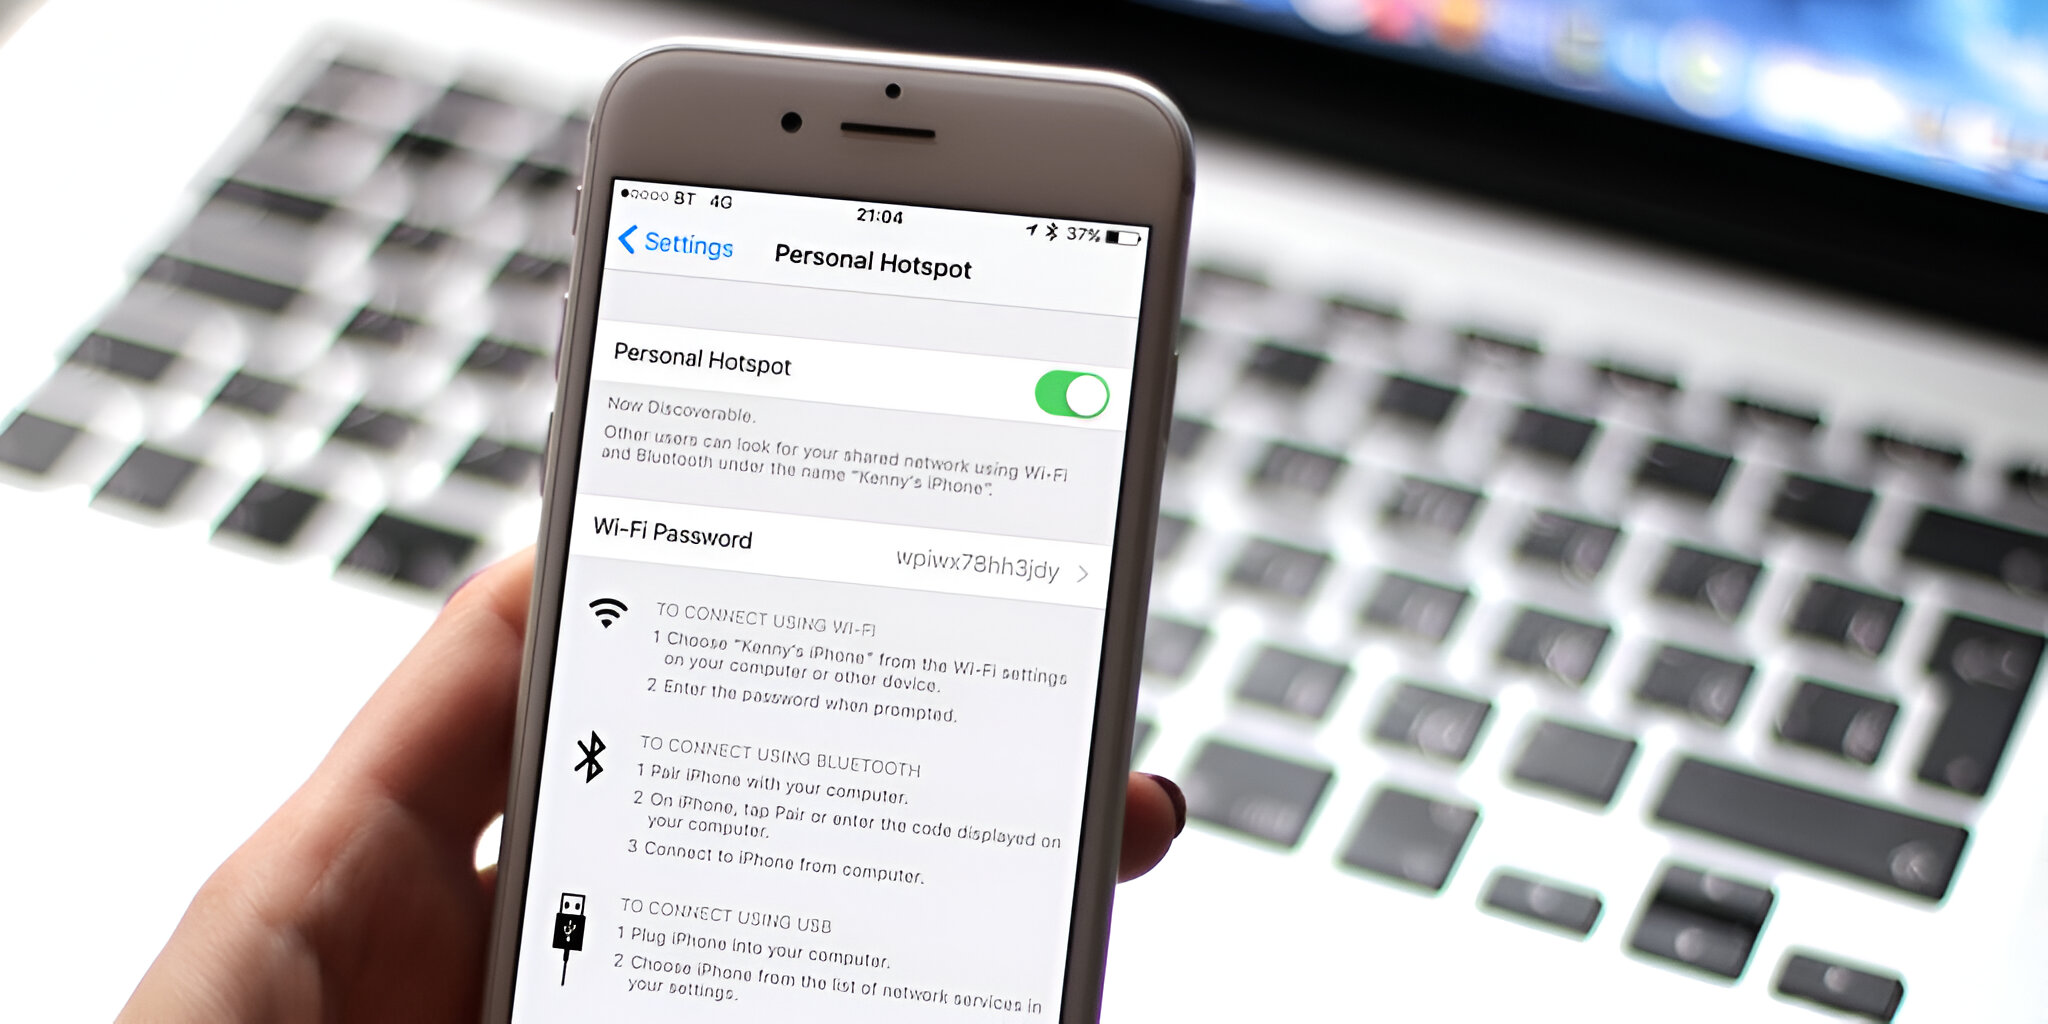
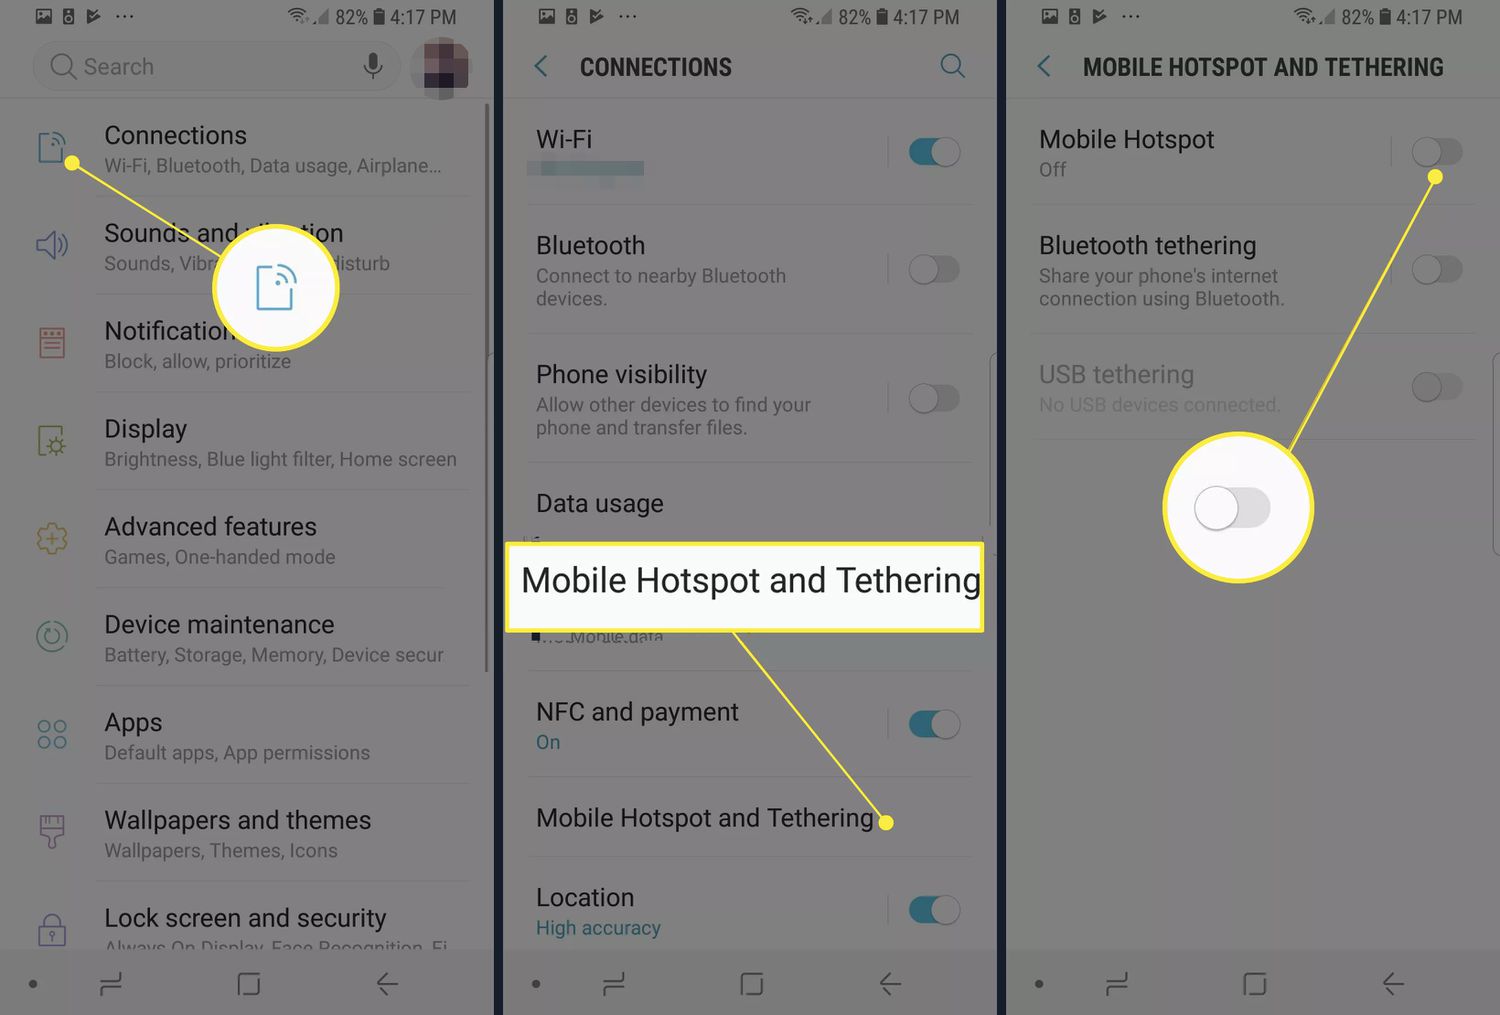
Verifying the Hotspot Settings
Verifying the hotspot settings is a crucial step in troubleshooting laptop connection issues. It involves ensuring that the hotspot is configured correctly and is capable of providing a stable and secure connection. Here's a detailed look at the essential aspects of verifying the hotspot settings:
-
Network Name (SSID): The Service Set Identifier (SSID) is the name of the hotspot network. It's important to confirm that the SSID of the hotspot matches the network name that the laptop is attempting to connect to. In some cases, multiple nearby hotspots may have similar names, leading to connection confusion. Verifying the SSID helps prevent connectivity issues arising from mistaken network selection.
-
Security Protocol: Hotspots typically employ security protocols such as WPA2-PSK (Wi-Fi Protected Access 2 – Pre-Shared Key) to encrypt data transmissions and prevent unauthorized access. Verifying that the correct security protocol is in use ensures that the laptop's connection settings align with the security measures implemented by the hotspot.
-
Password Authentication: If the hotspot network is secured with a password, it's essential to verify that the correct password is entered on the laptop. A small typo in the password can prevent successful authentication and lead to connection failures. Double-checking the password entry can often resolve authentication issues.
-
Channel and Bandwidth: Hotspots operate on specific Wi-Fi channels within designated frequency bands. Interference from neighboring networks or devices can impact the performance of the hotspot. Verifying the channel and bandwidth settings of the hotspot can help identify potential sources of interference and enable adjustments for optimal connectivity.
-
MAC Filtering: Some hotspots implement MAC (Media Access Control) address filtering as an additional layer of security. Verifying that the MAC address of the laptop is allowed on the hotspot network can prevent connectivity issues caused by MAC filtering restrictions.
-
DHCP and IP Address Allocation: Dynamic Host Configuration Protocol (DHCP) settings on the hotspot determine the allocation of IP addresses to connected devices. Verifying that the laptop obtains a valid IP address from the hotspot's DHCP server is essential for establishing proper network communication.
By meticulously verifying these hotspot settings, users can address potential misconfigurations or compatibility issues that may hinder the laptop's connection to the hotspot. This proactive approach lays the foundation for a more efficient and effective troubleshooting process, ultimately leading to improved connectivity and seamless network access.
Updating the Laptop's Network Drivers
Ensuring that the laptop's network drivers are up to date is a critical aspect of troubleshooting connection issues to a hotspot. Network drivers serve as the communication interface between the laptop's operating system and its network hardware, facilitating the transmission of data over Wi-Fi connections. Outdated or incompatible network drivers can lead to connectivity problems, including slow or unstable connections and intermittent signal loss. Here's a comprehensive look at the process of updating the laptop's network drivers to address potential network-related issues:
-
Identifying the Network Adapter: The first step involves identifying the specific network adapter installed on the laptop. This information can typically be found in the Device Manager, accessible through the Control Panel or by right-clicking on the Start menu and selecting "Device Manager." Under the "Network adapters" section, the name and model of the network adapter can be identified.
-
Checking the Current Driver Version: Once the network adapter is identified, it's essential to check the current driver version installed on the laptop. This can be done by right-clicking on the network adapter in the Device Manager, selecting "Properties," and navigating to the "Driver" tab. Note down the driver version and the date of the last update, if available.
-
Visiting the Manufacturer's Website: To obtain the latest network drivers, visit the official website of the laptop's manufacturer or the website of the network adapter's manufacturer. Navigate to the support or downloads section and locate the drivers for the specific network adapter model and the operating system version installed on the laptop.
-
Downloading and Installing the Latest Drivers: Download the most recent network driver that is compatible with the laptop's operating system. It's important to ensure that the driver is specifically designed for the exact model of the network adapter installed in the laptop. Once downloaded, run the driver installation package and follow the on-screen instructions to update the network drivers.
-
Restarting the Laptop: After the driver installation is complete, restart the laptop to allow the changes to take effect. This step is crucial as it ensures that the updated network drivers are fully integrated into the system.
-
Testing the Connection: Once the laptop has restarted, test the Wi-Fi connection to the hotspot to determine if the driver update has resolved the connectivity issues. Check for improvements in signal strength, connection stability, and overall network performance.
By meticulously following these steps to update the laptop's network drivers, users can address potential driver-related issues that may be impacting the laptop's ability to connect to the hotspot. Keeping the network drivers up to date is an effective strategy for maintaining optimal network functionality and addressing connectivity challenges.
Rebooting the Laptop and Hotspot
Rebooting the laptop and hotspot is a simple yet effective troubleshooting technique that can help resolve a wide range of connectivity issues. This process involves restarting both the laptop and the hotspot device to clear temporary system glitches, refresh network configurations, and establish a clean connection. Here's a detailed look at the steps involved in rebooting the laptop and hotspot to address connectivity challenges:
Laptop Reboot:
- Save and Close Applications: Before initiating the reboot, ensure that all open applications and documents are saved and closed to prevent data loss or disruption.
- Shut Down the Laptop: Proceed to shut down the laptop through the operating system's shutdown option. Allow the laptop to power off completely before proceeding to the next step.
- Wait for a Few Minutes: After the laptop has powered down, wait for a few minutes to ensure that all residual power is discharged from the system components.
- Power On the Laptop: Turn on the laptop by pressing the power button. Allow the operating system to boot up fully, and log in to the user account once the system is ready.
Hotspot Reboot:
- Locate the Power Source: If the hotspot is battery-powered, ensure that it is sufficiently charged or connected to a power source to prevent interruptions during the reboot process.
- Power Off the Hotspot: Use the power button or the designated switch to turn off the hotspot device. Wait for the device to power down completely.
- Wait for a Few Minutes: Similar to the laptop reboot process, allow a few minutes for the hotspot device to discharge any residual power and reset internal components.
- Power On the Hotspot: Turn on the hotspot device and wait for it to initialize. Depending on the device, indicator lights or display screens may provide status updates during the startup process.
Testing the Connection:
After rebooting both the laptop and the hotspot, attempt to establish a connection between the two devices. Check the Wi-Fi network list on the laptop to ensure that the hotspot is detected, and attempt to connect to the network. Assess the stability of the connection, signal strength, and overall network performance to determine if the reboot has resolved the connectivity issues.
By performing a coordinated reboot of the laptop and the hotspot, users can effectively address transient network issues and establish a fresh connection. This straightforward troubleshooting approach can often yield significant improvements in connectivity and network reliability, providing a quick and efficient resolution to common connection challenges.
Resetting the Network Settings on the Laptop
Resetting the network settings on a laptop can be a valuable troubleshooting step to address persistent connectivity issues with a hotspot. This process involves reverting the network configurations to their default state, effectively clearing any misconfigured settings or conflicting parameters that may be hindering the laptop's ability to connect to the hotspot. Here's a comprehensive guide on how to reset the network settings on a laptop:
Windows Operating System:
-
Accessing Network Reset: In Windows 10 and Windows 11, navigate to the "Settings" app and select "Network & Internet." Under the "Status" tab, locate and click on "Network reset." This initiates the network reset process.
-
Confirming the Reset: Upon selecting "Network reset," a confirmation window will appear, outlining the consequences of resetting the network settings. Review the information provided and proceed to confirm the network reset.
-
Initiating the Reset: After confirming the network reset, the system will prompt for user verification. Enter the administrator password or provide confirmation, and proceed with the network reset. The laptop will then restart to apply the network reset changes.
macOS Operating System:
-
Accessing Network Preferences: On a Mac, open the "System Preferences" and select "Network." Click on the gear icon at the bottom of the network connections list and choose "Set Service Order."
-
Reordering Network Services: In the "Set Service Order" window, arrange the network services in the preferred order by dragging them up or down. This step can resolve potential conflicts between network interfaces.
-
Renewing DHCP Lease: In the "Network" preferences, select the active network connection (Wi-Fi or Ethernet) and click "Advanced." Navigate to the "TCP/IP" tab and click "Renew DHCP Lease." This action can clear network configuration issues and obtain a new IP address.
Testing the Connection:
After resetting the network settings, attempt to connect the laptop to the hotspot and assess the network performance. Check for improvements in connection stability, signal strength, and overall network reliability. By resetting the network settings, users can effectively eliminate persistent network configuration issues and establish a clean slate for seamless connectivity.
Resetting the network settings on a laptop serves as a proactive measure to resolve complex connectivity issues, providing a fresh start for network communication. This troubleshooting approach can often yield significant improvements in the laptop's ability to connect to a hotspot, ultimately enhancing the user experience and productivity.