Introduction
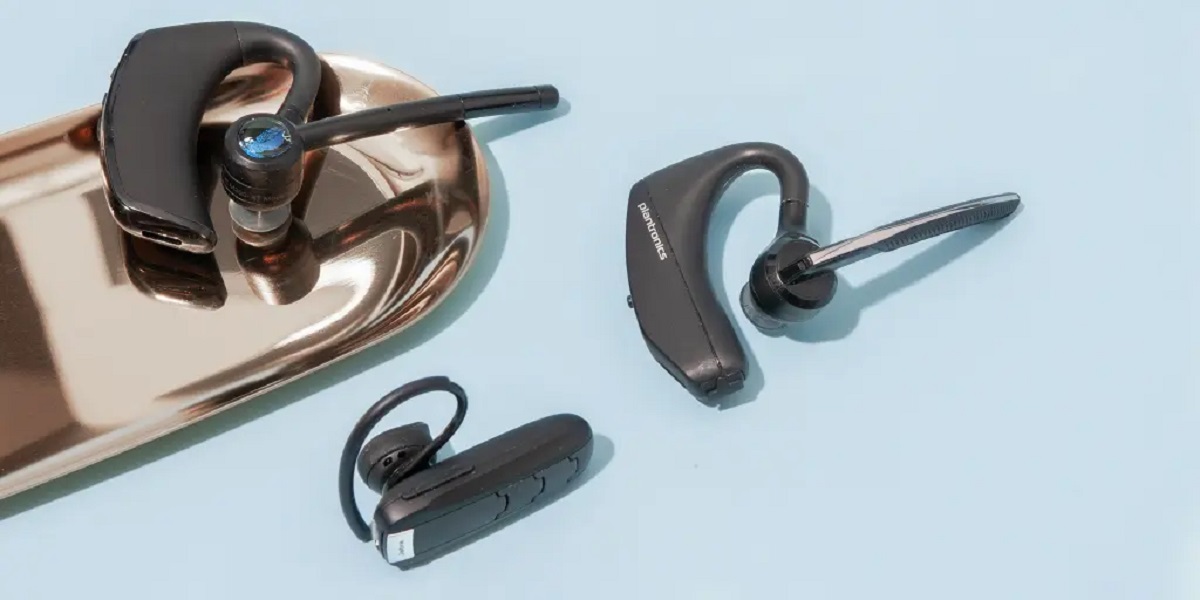
Connecting your Plantronics headset to your phone opens up a world of convenience and hands-free communication. Whether you're constantly on the move or simply seeking a seamless way to manage calls while multitasking, this pairing offers a harmonious solution. By leveraging the power of Bluetooth technology, you can effortlessly link your headset to your phone, enabling crystal-clear conversations without the hassle of holding a device to your ear.
In this comprehensive guide, we'll delve into the step-by-step process of connecting your Plantronics headset to your phone. From checking compatibility to testing the connection, each stage is designed to ensure a smooth and successful pairing. By following these instructions, you can unleash the full potential of your Plantronics headset, enhancing your communication experience and streamlining your daily activities.
So, whether you're preparing to hit the road, juggling work tasks, or simply seeking a more convenient way to manage calls, this guide will equip you with the knowledge and confidence to seamlessly connect your Plantronics headset to your phone. Let's dive into the process and unlock the seamless synergy between your headset and your phone.
Step 1: Check Compatibility
Before embarking on the process of connecting your Plantronics headset to your phone, it's crucial to ensure that both devices are compatible. This compatibility check serves as the foundational step, laying the groundwork for a successful and seamless pairing experience.
Plantronics headsets are designed to be compatible with a wide range of devices, including smartphones, tablets, and computers. However, it's essential to verify that your specific phone model supports Bluetooth connectivity and is compatible with the Plantronics headset you intend to use.
To initiate the compatibility check, start by referring to the user manual or official product specifications of your Plantronics headset. These resources provide detailed information about the supported devices and Bluetooth profiles. Additionally, you can explore the official Plantronics website or contact their customer support for comprehensive compatibility details.
Next, navigate to the settings menu on your phone and locate the Bluetooth section. Here, you can verify the Bluetooth version supported by your phone and ensure that it aligns with the requirements of your Plantronics headset. Most modern smartphones are equipped with Bluetooth 4.0 or higher, offering robust support for a wide array of Bluetooth devices, including Plantronics headsets.
Furthermore, consider checking for any specific compatibility requirements outlined by Plantronics for your headset model. Certain advanced features or functionalities may necessitate specific compatibility criteria, and being aware of these details can streamline the pairing process and enhance the overall user experience.
By diligently checking the compatibility between your phone and Plantronics headset, you lay the groundwork for a seamless and efficient pairing process. This proactive approach not only mitigates potential compatibility issues but also instills confidence in the stability and performance of the connected devices.
Armed with the assurance of compatibility, you can confidently proceed to the next steps, knowing that your phone and Plantronics headset are poised to establish a robust and harmonious connection, enabling you to harness the full potential of hands-free communication and convenience.
With compatibility confirmed, you're now ready to delve into the subsequent steps, leading you closer to the seamless integration of your Plantronics headset with your phone.
Step 2: Charge Your Plantronics Headset
Ensuring that your Plantronics headset is adequately charged is a pivotal preparatory step that sets the stage for a seamless and uninterrupted connection with your phone. A fully charged headset not only facilitates an extended usage time but also optimizes the pairing process, minimizing potential disruptions due to low battery levels.
To commence the charging process, locate the charging port on your Plantronics headset. Depending on the model, the charging port may be positioned on the side or bottom of the device. Once identified, proceed to connect the appropriate charging cable to the headset, ensuring a secure and snug fit to initiate the charging cycle.
Subsequently, plug the other end of the charging cable into a power source. This can be a standard wall outlet, a USB port on your computer, or a portable power bank, offering flexibility and convenience based on your immediate surroundings. As the charging commences, you may observe a visual indicator on the headset, such as an LED light, signaling the initiation of the charging process.
While the headset is charging, it's advisable to allow for sufficient time to achieve a full charge, especially if it's the initial charging cycle or if the headset has been idle for an extended period. This thorough charging approach ensures that the headset's battery is primed for sustained usage, empowering you with extended talk and standby times once the pairing with your phone is established.
As the charging progresses, consider consulting the user manual or product specifications to familiarize yourself with the typical charging duration for your specific Plantronics headset model. This insight enables you to gauge the progress and anticipate the completion of the charging process, empowering you to seamlessly transition to the subsequent steps with a fully charged headset at your disposal.
Once the charging indicator confirms that the headset is fully charged, carefully disconnect the charging cable from the headset and the power source. With a fully charged Plantronics headset in hand, you're now primed to embark on the next stages of connecting it to your phone, equipped with the confidence and assurance of sustained usage and seamless connectivity.
By diligently charging your Plantronics headset, you establish a strong foundation for a successful pairing experience, ensuring uninterrupted communication and a hassle-free connection with your phone. This proactive approach underscores the significance of optimizing the headset's battery performance, setting the stage for a harmonious integration with your phone and unlocking the full potential of hands-free communication.
With your Plantronics headset now fully charged, let's proceed to the subsequent steps, propelling you closer to the seamless connection and the enhanced communication experience that awaits.
Step 3: Turn on Bluetooth on Your Phone
Before initiating the pairing process, it is essential to activate the Bluetooth functionality on your phone. This pivotal step lays the groundwork for establishing a seamless and robust connection between your phone and the Plantronics headset, enabling streamlined communication and hands-free convenience.
To commence this process, navigate to the settings menu on your phone, typically represented by a gear or cogwheel icon. Once within the settings interface, locate the section labeled "Connections" or "Network & Internet," where you can access the Bluetooth settings. The precise location of the Bluetooth settings may vary slightly depending on the phone model and the customized user interface, but it is commonly found within the connectivity or network-related options.
Upon accessing the Bluetooth settings, you will encounter a toggle switch or a dedicated button to activate Bluetooth. Engage this control to enable Bluetooth functionality on your phone, initiating the process of scanning for external devices, including the Plantronics headset, within its vicinity.
As the Bluetooth is activated, an iconic Bluetooth symbol typically appears in the notification bar or status bar of your phone, signifying that the wireless technology is now operational and actively seeking compatible devices for pairing.
It is important to ensure that the Bluetooth on your phone remains discoverable during the pairing process, allowing the Plantronics headset to detect and establish a connection with your phone. This discoverability setting is often found within the Bluetooth settings menu, denoted by an option such as "Make device discoverable" or "Visible to other devices."
By enabling the discoverability feature, your phone becomes accessible to the Plantronics headset, facilitating the seamless pairing process and the establishment of a stable and reliable connection.
With Bluetooth activated and the discoverability feature enabled, your phone is now primed to engage in the pairing process with the Plantronics headset, paving the way for a harmonious integration that enhances your communication experience and empowers you with hands-free convenience.
By diligently activating Bluetooth on your phone, you have taken a crucial step towards forging a seamless connection with your Plantronics headset, setting the stage for effortless communication and enhanced productivity. With Bluetooth now operational on your phone, you are ready to progress to the subsequent steps, propelling you closer to the successful pairing and the myriad benefits it brings.
Step 4: Pair Your Plantronics Headset with Your Phone
With Bluetooth activated on your phone and the Plantronics headset fully charged and ready, it's time to initiate the pairing process. This pivotal step forms the bridge that connects your headset and phone, enabling seamless communication and hands-free convenience.
To commence the pairing process, ensure that your Plantronics headset is in pairing mode. Depending on the model, this may involve pressing and holding the designated pairing button or following a specific sequence of button presses to activate the pairing function. Consult the user manual or official product specifications for detailed instructions on entering pairing mode for your specific Plantronics headset model.
Once the headset is in pairing mode, navigate to the Bluetooth settings on your phone. Within the list of available devices, your Plantronics headset should appear as a discoverable option, typically denoted by the model name or a recognizable identifier. Select the Plantronics headset from the list to initiate the pairing process.
As the pairing commences, your phone and the Plantronics headset exchange encrypted data to establish a secure and stable connection. This process may be accompanied by on-screen prompts or audio cues from the headset, guiding you through the pairing sequence and confirming the successful establishment of the connection.
Upon successful pairing, your phone displays a confirmation message, indicating that the Plantronics headset is now connected and ready for use. Depending on the phone model and the customized user interface, this confirmation may include a visual indicator such as a Bluetooth icon next to the headset name or a notification pop-up confirming the successful pairing.
With the Plantronics headset successfully paired with your phone, you are now poised to harness the full potential of hands-free communication and seamless call management. This robust connection empowers you to engage in crystal-clear conversations, navigate through tasks with enhanced productivity, and enjoy the convenience of hands-free communication in various settings.
By diligently following the pairing process, you have forged a strong and reliable connection between your Plantronics headset and your phone, unlocking a world of convenience and seamless communication. With the successful pairing accomplished, you are now prepared to explore the final step, validating the connection and ensuring a smooth and uninterrupted communication experience.
With the Plantronics headset now seamlessly paired with your phone, let's proceed to the subsequent step, culminating in the validation of the connection and the assurance of a harmonious integration that enhances your communication experience.
Step 5: Test the Connection
After successfully pairing your Plantronics headset with your phone, it's essential to validate the connection through a comprehensive testing process. This critical step ensures that the paired devices seamlessly communicate, enabling crystal-clear audio transmission and hands-free convenience.
To initiate the testing process, place a test call using your phone while wearing the Plantronics headset. Dial a familiar number, such as a friend or family member, to engage in a brief conversation and assess the audio quality and call management capabilities facilitated by the headset-phone connection.
As the call connects, pay close attention to the audio clarity and volume levels experienced through the Plantronics headset. Evaluate the sound quality, ensuring that the conversation is crisp, devoid of distortions, and effectively transmitted through the headset's speakers and microphone. This assessment provides valuable insights into the performance of the headset-phone connection, validating its ability to facilitate seamless communication.
During the test call, explore the hands-free functionality of the Plantronics headset by engaging in various tasks while conversing. This may include walking around the room, jotting down notes, or multitasking to simulate real-world scenarios where hands-free communication is invaluable. Assess the stability of the connection and the headset's ability to maintain consistent audio transmission, further validating its reliability and convenience.
Additionally, experiment with the call management features offered by the Plantronics headset, such as answering and ending calls, adjusting the volume, and utilizing any advanced functionalities specific to your headset model. This comprehensive evaluation ensures that the headset seamlessly integrates with your phone, empowering you with intuitive call control and enhanced communication capabilities.
As the test call concludes, reflect on the overall experience and the seamless integration between your Plantronics headset and your phone. Confirm that the connection remains stable, the audio quality is exceptional, and the hands-free functionality enhances your communication experience.
By diligently testing the connection between your Plantronics headset and your phone, you validate the successful pairing and ensure a seamless integration that enhances your communication experience. With the connection validated, you can confidently embrace the convenience of hands-free communication, leveraging the full potential of your Plantronics headset in various settings.
With the connection successfully tested and validated, you have now completed the comprehensive process of connecting your Plantronics headset to your phone, unlocking a world of convenience and seamless communication.
Conclusion
In conclusion, the process of connecting your Plantronics headset to your phone culminates in a seamless and harmonious integration that empowers you with hands-free communication and enhanced productivity. By diligently following the step-by-step instructions outlined in this guide, you have embarked on a journey that unlocks the full potential of your Plantronics headset, transforming the way you manage calls and engage in conversations.
The meticulous approach of checking compatibility ensures that your phone and Plantronics headset are poised for a stable and reliable connection, mitigating potential issues and instilling confidence in the pairing process. This proactive step sets the stage for a seamless integration, laying the foundation for uninterrupted communication and convenience.
Charging your Plantronics headset diligently optimizes its battery performance, ensuring sustained usage and minimizing disruptions during the pairing process. By prioritizing a full charge, you enhance the headset's capabilities, empowering it to seamlessly connect with your phone and deliver extended talk and standby times.
Activating Bluetooth on your phone signifies the initiation of a pivotal phase, enabling the wireless technology to seek and establish a robust connection with the Plantronics headset. This proactive step underscores the significance of accessibility and discoverability, streamlining the pairing process and fostering a harmonious integration that enhances your communication experience.
The pivotal act of pairing your Plantronics headset with your phone forms the bridge that connects these devices, facilitating crystal-clear conversations and hands-free convenience. This seamless connection empowers you with intuitive call management and enhanced productivity, underscoring the transformative impact of hands-free communication in various settings.
Validating the connection through comprehensive testing ensures that the paired devices seamlessly communicate, delivering exceptional audio quality and reliable call management capabilities. This critical step reaffirms the seamless integration between your Plantronics headset and your phone, validating its ability to enhance your communication experience and streamline your daily activities.
In essence, the process of connecting your Plantronics headset to your phone transcends mere technological integration, culminating in a transformation of your communication experience. By embracing the convenience of hands-free communication and seamless call management, you unlock a world of productivity and efficiency, empowering you to navigate through tasks with unparalleled ease and engage in conversations with unparalleled clarity.
With the successful completion of the connection process, you are now equipped to harness the full potential of your Plantronics headset, seamlessly integrating it into your daily routine and embracing the transformative power of hands-free communication.


