Introduction
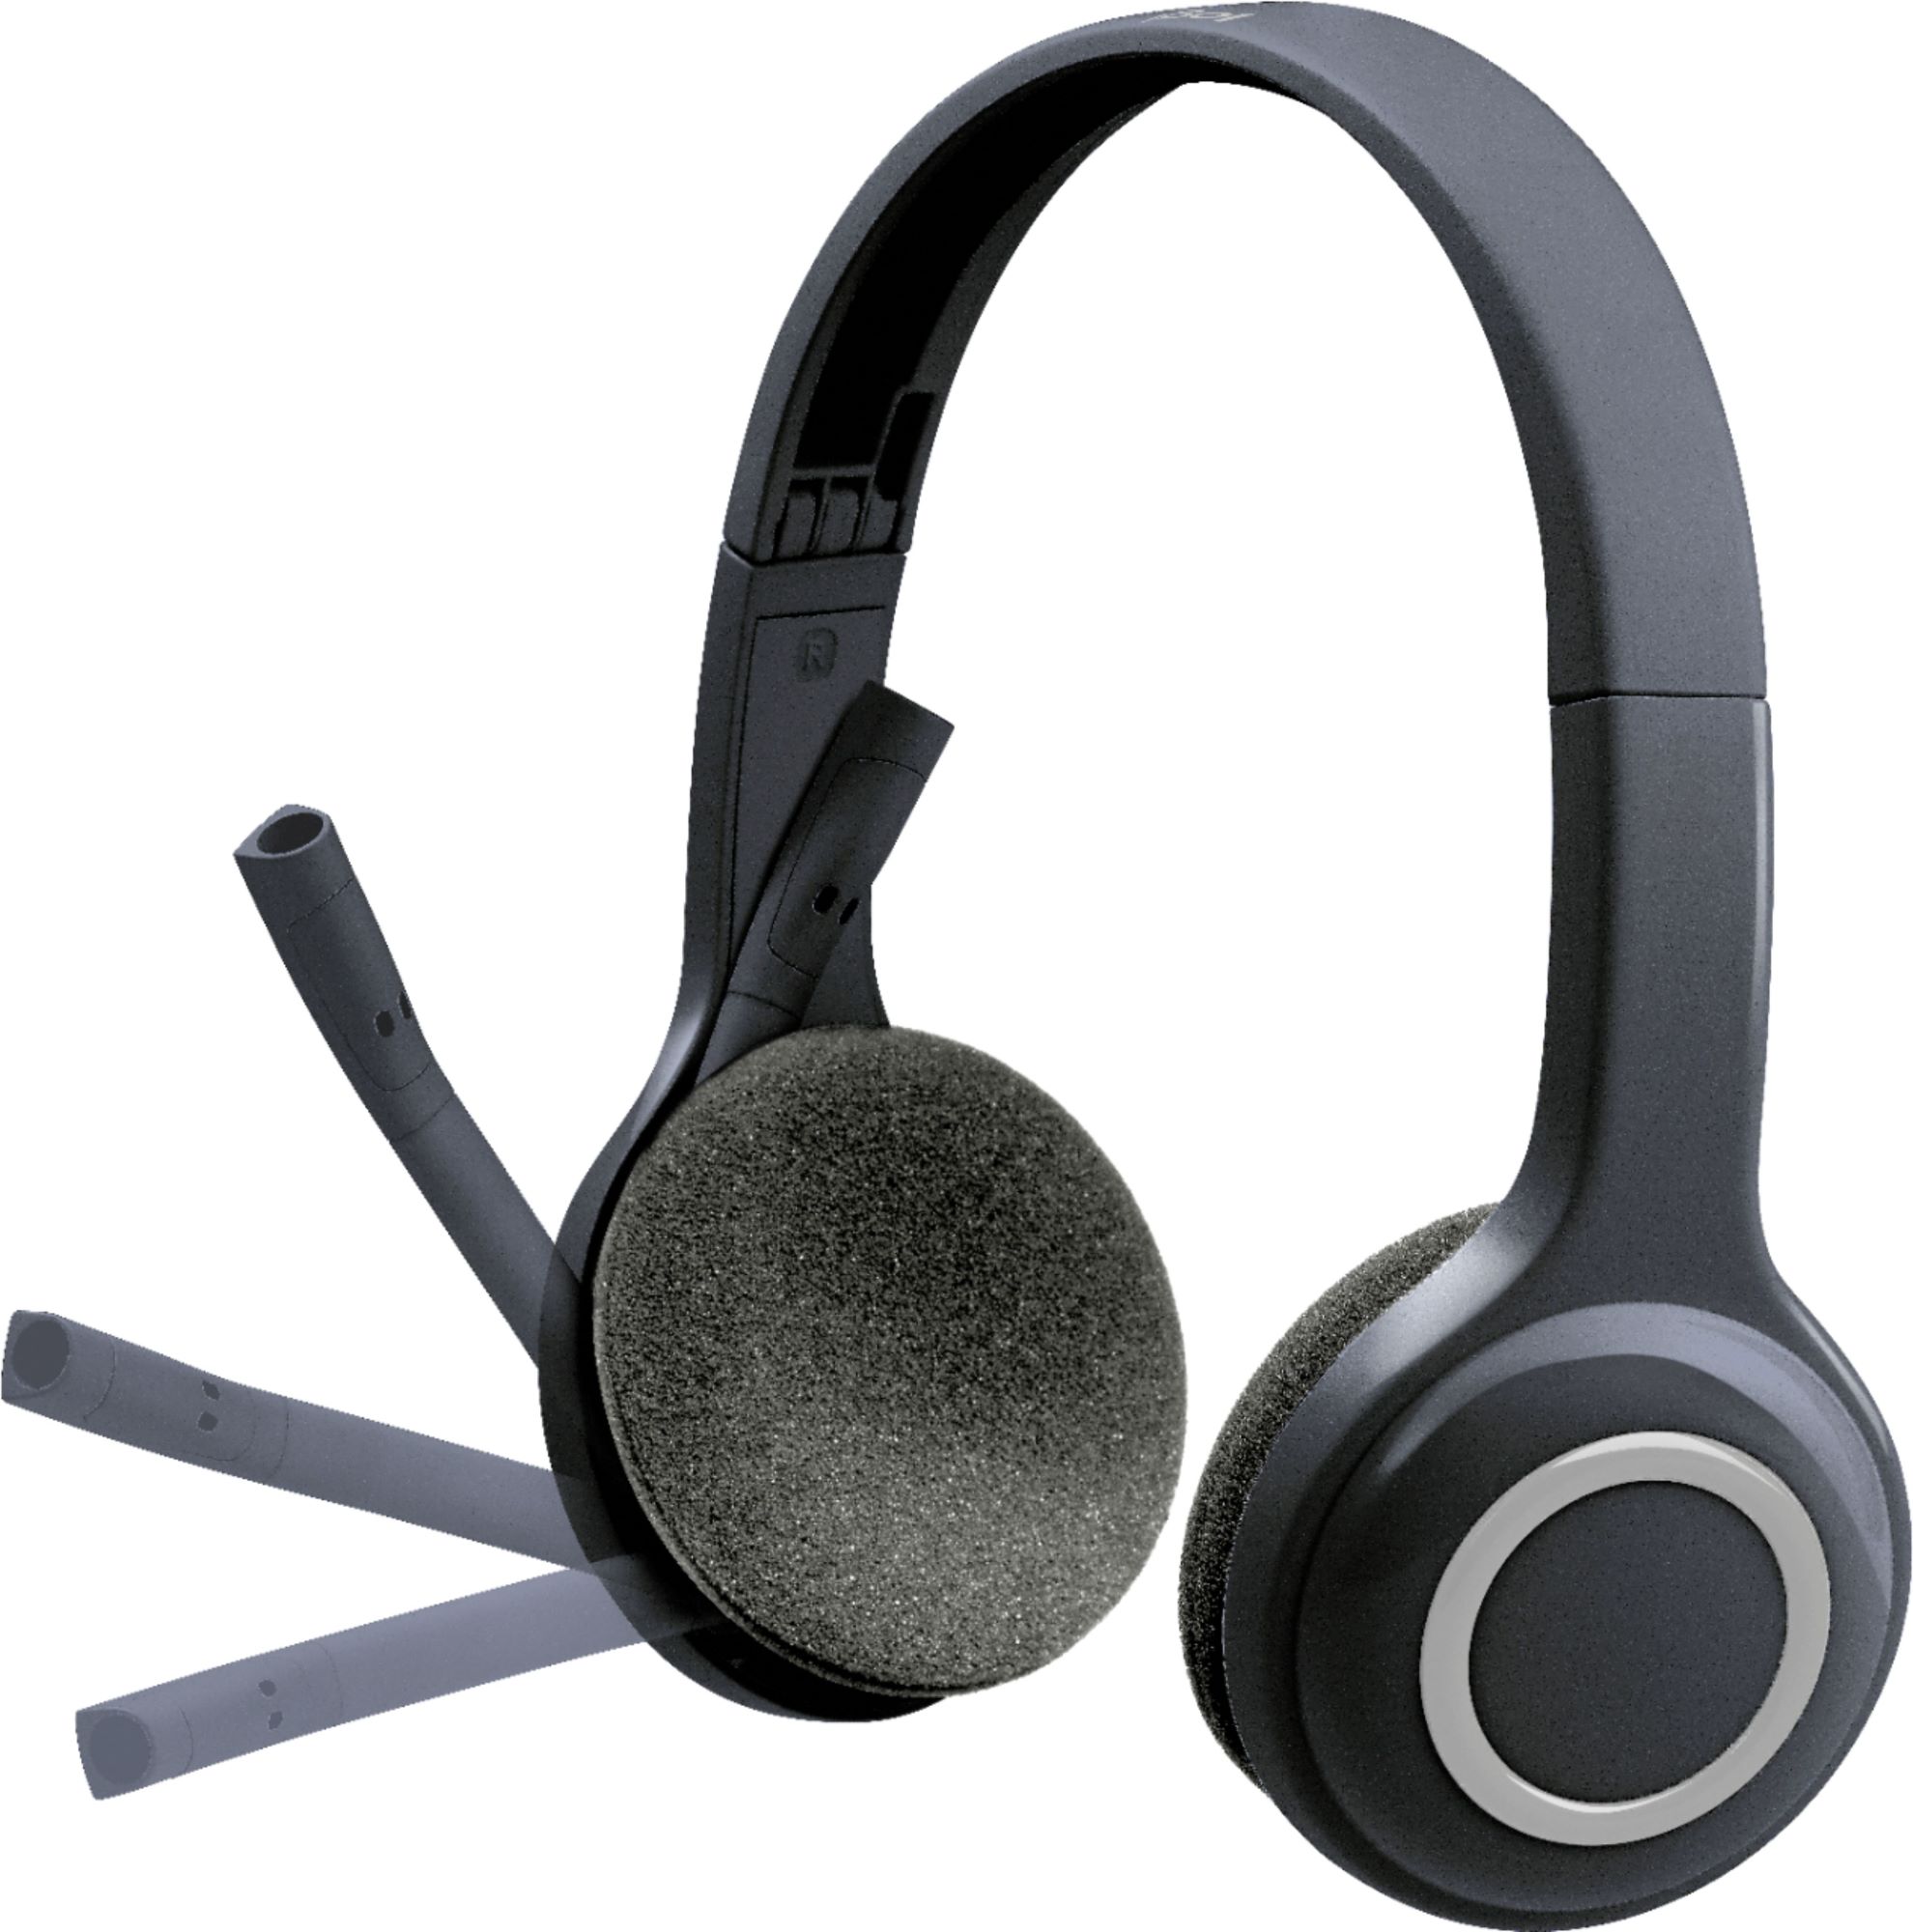
Headsets have become an indispensable part of our daily lives, serving as our faithful companions during work, leisure, and communication. Whether you are a music enthusiast, a gamer, or a professional who relies on seamless audio and communication, a malfunctioning headset can be a major inconvenience. However, fear not, as many common headset issues can be resolved with some basic repair knowledge and the right tools at your disposal.
In this comprehensive guide, we will delve into the art of headset repair, equipping you with the essential skills to troubleshoot and fix common issues that may arise with your beloved audio gear. From addressing a loose or broken headband to tackling one-sided audio playback and mic malfunctions, we will cover a wide array of problems that you may encounter. By the end of this journey, you will feel empowered to breathe new life into your trusty headset, saving both money and the environment by avoiding unnecessary replacements.
So, grab your toolkit and get ready to embark on a rewarding journey of headset repair. Whether you are a seasoned DIY enthusiast or a newcomer to the world of gadget maintenance, this guide will provide you with the knowledge and confidence to tackle headset issues head-on. Let's roll up our sleeves and dive into the fascinating realm of headset repair, where a few simple fixes can make a world of difference in restoring the functionality and comfort of your cherished audio companion.
Tools Needed for Headset Repair
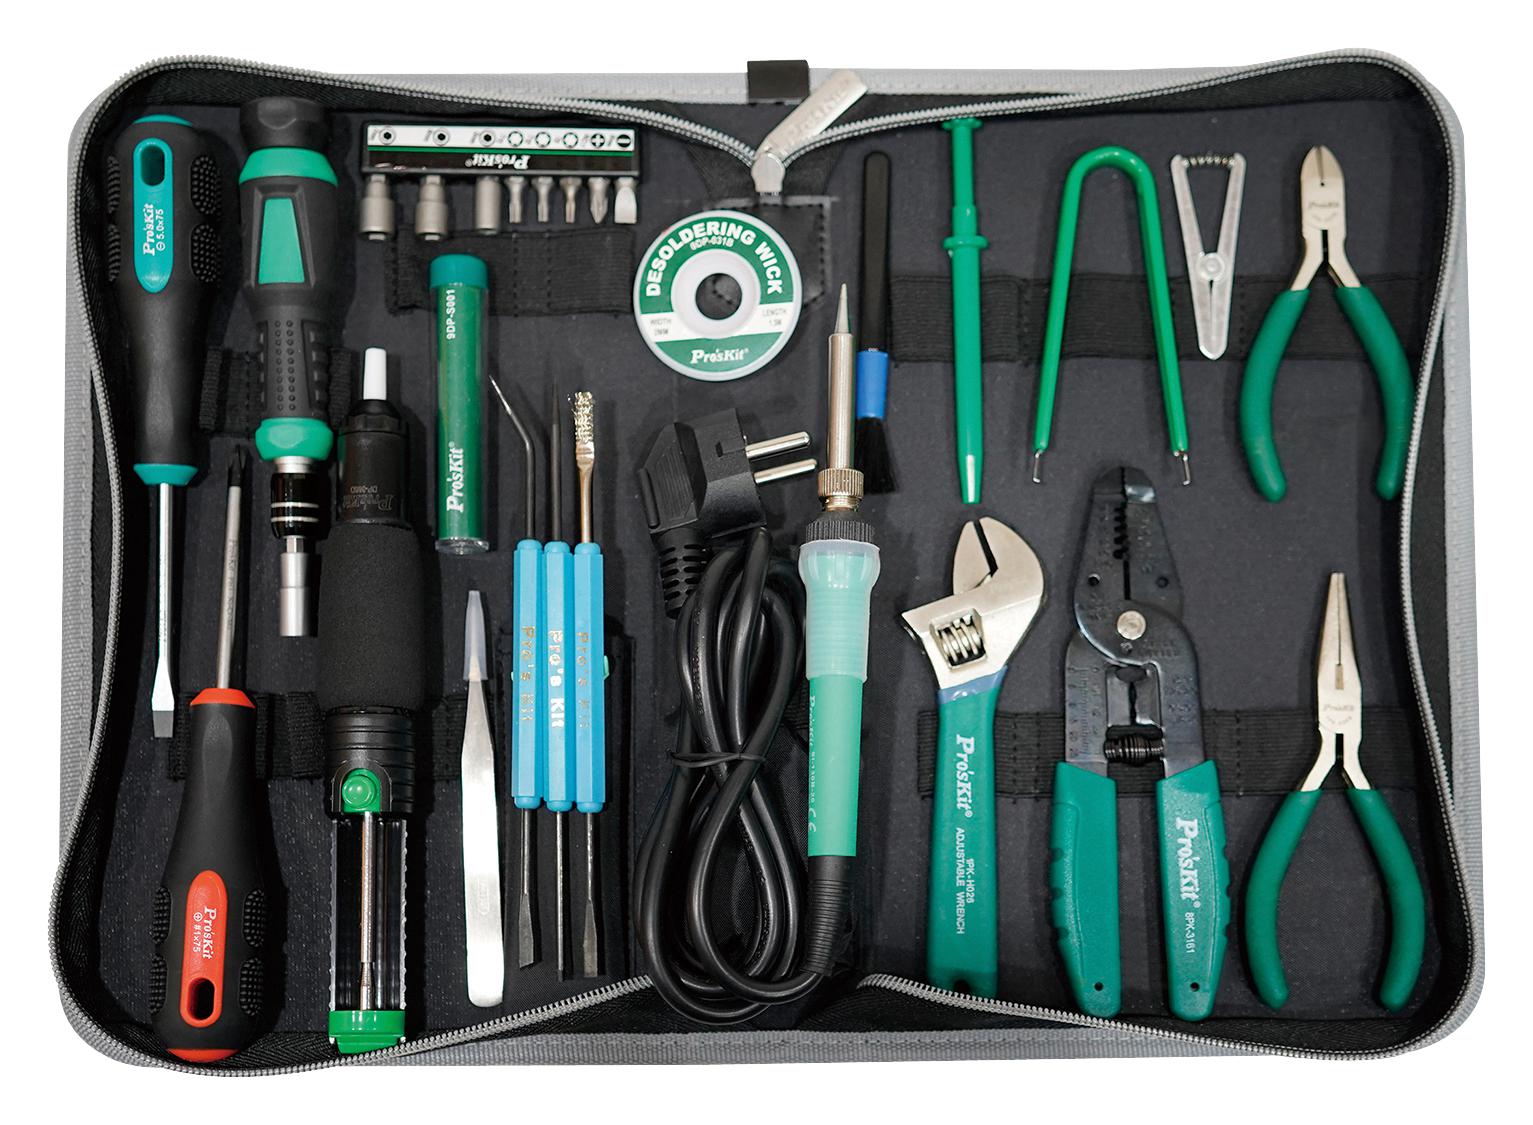
When it comes to repairing your headset, having the right tools at your disposal can make all the difference. Before delving into the intricacies of headset repair, it's essential to gather a few key items that will enable you to tackle various issues effectively. Here's a comprehensive list of tools that you should have on hand for headset repair:
1. Precision Screwdriver Set
A precision screwdriver set is a fundamental tool for headset repair, as it allows you to access and disassemble intricate components with ease. Look for a set that includes a variety of Phillips, flathead, and Torx screwdriver tips to accommodate different types of screws commonly found in headsets.
2. Soldering Iron and Solder
For addressing electrical and wiring issues, a soldering iron and solder are indispensable. These tools are essential for reattaching loose wires, fixing broken connections, and conducting intricate repairs to the headset's internal circuitry.
3. Multimeter
A multimeter is a versatile instrument that aids in diagnosing electrical problems within the headset. With the ability to measure voltage, current, and resistance, a multimeter empowers you to identify and troubleshoot issues related to audio output, connectivity, and electrical components.
4. Replacement Parts
Having a stock of common replacement parts such as audio jacks, ear cushions, and headband padding can be invaluable for addressing physical wear and tear. Keeping these parts on hand ensures that you can swiftly replace damaged components, restoring your headset to its optimal condition.
5. Adhesive and Lubricants
Adhesive solutions such as super glue or epoxy, along with lubricants like silicone grease, can aid in repairing and reinforcing various headset components. Whether it's reattaching a loose headband or lubricating swivel joints, these products play a crucial role in restoring the functionality and comfort of your headset.
6. Cleaning Tools
A set of cleaning tools, including microfiber cloths, cotton swabs, and electronic cleaning solution, is essential for maintaining and restoring the aesthetic appeal of your headset. Regular cleaning not only improves the overall hygiene of the device but also prevents dirt and debris from causing technical issues.
By ensuring that you have these essential tools at your disposal, you will be well-prepared to address a wide range of headset issues effectively. With the right equipment in hand, you can approach headset repair with confidence, knowing that you have the means to diagnose, troubleshoot, and rectify common problems that may arise. Now that you are equipped with the necessary tools, let's delve into the specific techniques for addressing various headset issues, empowering you to breathe new life into your beloved audio gear.
Fixing a Loose or Broken Headband
A loose or broken headband can significantly compromise the comfort and stability of your headset, detracting from the overall audio experience. Fortunately, addressing this issue is well within your reach with the right tools and techniques. Here's a step-by-step guide to effectively fix a loose or broken headband on your headset:
1. Assessment and Disassembly
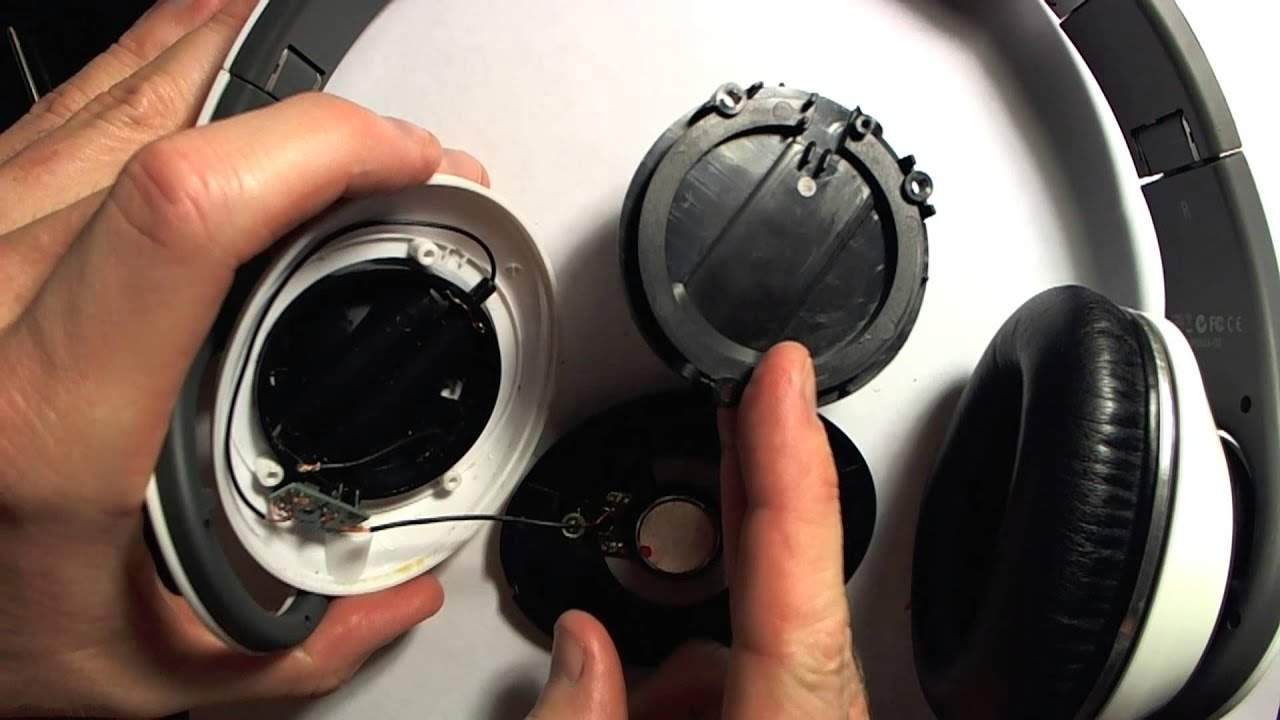
Begin by carefully examining the headband to identify the nature and extent of the damage. If the headband is simply loose, it may require tightening or repositioning. In the case of a broken headband, assess the point of fracture to determine the best course of action. Next, disassemble the headset, using the appropriate screwdriver from your toolkit to remove the ear cups and access the headband assembly.
2. Repairing a Loose Headband
If the headband is loose but not broken, you can often address the issue by tightening the internal mechanism. Locate the adjustable sliders or hinges on the headband and use a precision screwdriver to access the tightening screws. Carefully adjust the tension to achieve the desired firmness, ensuring that the headband retains its adjustability while providing a secure fit.
3. Fixing a Broken Headband
In the case of a broken headband, repairing the damage may involve reinforcing the fractured section with an adhesive or performing a partial replacement. If the headband is made of metal or plastic, consider using a strong adhesive designed for bonding these materials. Apply the adhesive evenly to the fractured area, ensuring a secure and durable bond. For more extensive damage, replacing the broken segment with a compatible headband part may be necessary.
4. Reassembly and Testing
Once the repair or reinforcement is complete, carefully reassemble the headset, ensuring that all components are securely fastened. Test the adjusted or repaired headband for flexibility, stability, and comfort. Ensure that the adjustment mechanism functions smoothly and that the repaired section of the headband remains secure under normal usage conditions.
By following these steps, you can effectively address a loose or broken headband, restoring the functionality and comfort of your headset. With a methodical approach and the right tools at your disposal, you can breathe new life into your beloved audio gear, ensuring that it continues to provide a reliable and enjoyable audio experience.
Repairing a Faulty Audio Jack
A faulty audio jack can be a frustrating setback, disrupting your ability to enjoy seamless audio playback and communication. Whether you are experiencing intermittent connectivity, distorted sound, or complete audio loss, addressing issues with the audio jack is crucial for restoring the functionality of your headset. With the right tools and techniques, you can effectively troubleshoot and repair a faulty audio jack, ensuring that your headset delivers consistent and high-quality audio output.
1. Inspection and Diagnosis
The first step in addressing a faulty audio jack is to inspect the jack and surrounding components for any visible damage or debris. Use a magnifying glass or a smartphone camera with macro capability to closely examine the audio jack, looking for bent or broken pins, loose connections, or foreign objects obstructing the port. Additionally, check the cable leading to the audio jack for any signs of wear, fraying, or exposed wiring.
2. Cleaning and Debris Removal
If the audio jack appears to be obstructed by debris or dust, carefully clean the port using compressed air or a small brush designed for electronic components. Gently insert and remove a wooden toothpick or cotton swab into the jack to dislodge any accumulated debris, ensuring that the port is free from obstructions that may impede proper connectivity.
3. Re-soldering Connections
If the issue lies with loose or broken internal connections within the audio jack, using a soldering iron and solder can facilitate the repair process. Disassemble the headset to access the internal wiring leading to the audio jack. Carefully inspect the soldered connections, looking for any signs of detachment or damage. Re-solder any loose or broken connections, ensuring that the wiring is securely and properly attached to the audio jack terminals.
4. Replacement of Audio Jack
In cases where the audio jack is irreparably damaged or the internal connections are beyond repair, replacing the audio jack may be the most effective solution. Utilize a compatible replacement audio jack and carefully desolder the existing jack from the headset. Solder the new audio jack in place, ensuring that the connections are secure and the jack is properly aligned within the headset housing.
5. Testing and Verification
After performing the necessary repairs or replacement, reassemble the headset and test the audio jack for functionality. Connect the headset to a compatible audio source and verify that the audio output is clear, consistent, and free from any previous issues. Ensure that the connection remains stable and that the audio jack effectively transmits audio signals without interruption.
By following these steps, you can effectively address and repair a faulty audio jack, restoring the seamless functionality of your headset. With a methodical approach and the right tools at your disposal, you can overcome audio jack issues, ensuring that your headset continues to provide a reliable and immersive audio experience.
Replacing a Damaged Ear Cushion
A damaged ear cushion can significantly diminish the comfort and acoustics of your headset, affecting both the listening experience and the overall aesthetic appeal. Fortunately, replacing a damaged ear cushion is a straightforward process that can breathe new life into your beloved headset. With a few simple tools and a compatible replacement cushion, you can restore the comfort and functionality of your headset in no time.
1. Assessment and Removal
Begin by assessing the condition of the damaged ear cushion. Look for signs of wear, tearing, or deterioration, and determine the type of attachment mechanism used to secure the cushion to the ear cup. In most cases, ear cushions are either attached using a snap-on mechanism or secured with a ring that twists into place. Carefully remove the damaged ear cushion by following the specific detachment method applicable to your headset model.
2. Selection of Replacement Cushion
Once the damaged ear cushion has been removed, select a replacement cushion that is compatible with your headset model. Consider factors such as material, size, and design to ensure that the replacement cushion aligns with the original specifications of your headset. Opt for a cushion made from high-quality materials that offer both durability and comfort, enhancing the overall listening experience.
3. Installation of Replacement Cushion
Align the replacement cushion with the ear cup, ensuring that it corresponds to the attachment mechanism and orientation of the original cushion. If the cushion utilizes a snap-on mechanism, firmly press the cushion into place, ensuring that it securely attaches to the ear cup. In the case of a cushion secured with a twisting ring, carefully align the cushion and twist the ring into position, ensuring a snug and secure fit.
4. Verification and Comfort
After installing the replacement cushion, verify that it is securely attached and aligned with the ear cup. Gently press around the perimeter of the cushion to ensure that it maintains a consistent and secure attachment. Test the headset by wearing it and assessing the comfort and seal provided by the replacement cushion. Ensure that the cushion effectively encloses the ear, providing optimal acoustics and noise isolation.
By following these steps, you can effectively replace a damaged ear cushion, rejuvenating the comfort and functionality of your headset. With a compatible replacement cushion and a methodical approach, you can ensure that your headset continues to deliver a comfortable and immersive audio experience, free from the discomfort and compromises posed by a damaged ear cushion.
Fixing One-sided Audio Playback
One-sided audio playback, where sound is only audible from one ear cup, can be a frustrating issue that compromises the immersive and balanced audio experience provided by your headset. This common problem often stems from a variety of underlying causes, including damaged wiring, faulty connections, or issues with the audio driver. However, with the right tools and techniques, you can effectively troubleshoot and address one-sided audio playback, restoring the symmetrical and high-quality sound output of your headset.
1. Inspection and Diagnosis
Begin by carefully inspecting the headset cable and connectors for any visible signs of damage, such as fraying, exposed wiring, or bent pins. Additionally, examine the internal wiring within the headband and ear cups, looking for any loose or detached connections that may be causing the one-sided audio playback issue.
2. Cable and Connector Examination
Focus on the cable leading to the affected ear cup, checking for any signs of wear, kinks, or damage near the connector. Gently flex and manipulate the cable while listening for changes in audio output, as this can help identify areas of potential damage or weakness in the wiring.
3. Repairing or Replacing the Cable
If the issue is isolated to the headset cable, you may opt to repair or replace the affected section. Using a precision screwdriver and wire strippers, carefully remove the damaged portion of the cable and splice in a new section, ensuring proper insulation and secure connections. Alternatively, replacing the entire cable with a compatible replacement can provide a comprehensive solution to cable-related audio playback issues.
4. Internal Wiring Inspection
Disassemble the ear cups and headband to access the internal wiring and circuitry. Carefully inspect the soldered connections and wiring leading to the affected ear cup, checking for any loose or detached wires that may be causing the one-sided audio playback. Re-solder any compromised connections, ensuring a secure and reliable electrical pathway.
5. Audio Driver and Component Testing
Conduct thorough testing of the audio drivers within the affected ear cup, verifying that they are functioning correctly and transmitting audio signals as intended. Utilize a multimeter to measure the continuity of the wiring and connections, identifying any areas of resistance or discontinuity that may be contributing to the one-sided audio playback issue.
By following these steps, you can effectively troubleshoot and address one-sided audio playback, restoring the balanced and immersive sound output of your headset. With a methodical approach and the right tools at your disposal, you can overcome audio playback issues, ensuring that your headset continues to provide a reliable and enjoyable audio experience.
Troubleshooting Mic Issues
When encountering mic issues with your headset, it can hinder your ability to communicate clearly during calls, gaming sessions, or virtual meetings. Addressing mic problems requires a systematic approach to diagnose and resolve the underlying issues effectively. Here's a comprehensive guide to troubleshooting mic issues and restoring the optimal functionality of your headset's microphone.
1. Mic Inspection and Connectivity
Begin by inspecting the microphone boom or built-in mic for any visible damage, such as bent or obstructed components. Ensure that the mic is securely attached to the headset and that the connecting cable, if applicable, is free from wear or fraying. Verify that the mic input jack on the headset is clean and free from debris that may impede proper connectivity.
2. Audio Settings and Device Configuration
Check the audio settings on your computer, gaming console, or mobile device to ensure that the headset mic is selected as the default input device. Adjust the mic volume and sensitivity settings as needed, ensuring that the input levels are optimized for clear and consistent audio capture. Additionally, review the device-specific configuration options to troubleshoot mic-related issues and ensure that the headset is recognized as the primary audio input source.
3. Cable and Connector Examination
If your headset features a detachable mic or utilizes a wired connection, carefully inspect the mic cable and connector for any signs of damage or wear. Gently manipulate the cable near the connector while monitoring the audio input to identify potential areas of cable-related issues. Consider replacing the mic cable or connector if damage is detected, ensuring a reliable and uninterrupted connection.
4. Mic Sensitivity and Noise Cancellation
Adjust the mic sensitivity settings on your device to optimize audio capture while minimizing background noise and echoes. Experiment with different sensitivity levels and noise cancellation features to determine the ideal configuration that delivers clear and focused audio transmission. Additionally, ensure that the mic boom is positioned correctly to capture your voice effectively without being obstructed by external factors.
5. Software and Driver Updates
Check for software and driver updates for your headset, ensuring that you have the latest firmware and audio-related software installed. Updating the headset's firmware and associated drivers can resolve compatibility issues, improve mic performance, and address software-related bugs that may be affecting the microphone functionality.
6. Mic Testing and Verification
Conduct thorough testing of the headset mic in various scenarios, such as voice recording, online calls, and gaming communication. Verify that the mic captures your voice clearly and consistently, without distortion, static, or intermittent dropout. Test the mic across different devices to isolate potential compatibility issues and ensure that it delivers reliable performance across various platforms.
By following these troubleshooting steps, you can effectively diagnose and resolve mic issues with your headset, ensuring that the microphone delivers clear and reliable audio capture. With a methodical approach and attention to detail, you can overcome mic-related challenges and restore the seamless communication and audio transmission capabilities of your trusted headset.
Conclusion
In the realm of gadget maintenance, the art of headset repair emerges as a valuable skill that empowers individuals to breathe new life into their cherished audio companions. Throughout this comprehensive guide, we have ventured into the fascinating world of headset repair, equipping readers with the essential knowledge and techniques to address common issues that may arise with their headsets. From loose or broken headbands to faulty audio jacks, damaged ear cushions, one-sided audio playback, and mic malfunctions, we have explored a diverse array of troubleshooting and repair methods aimed at restoring the functionality and comfort of headsets.
By delving into the intricacies of headset repair, readers have gained valuable insights into the diagnostic and repair processes, enabling them to approach headset issues with confidence and precision. Armed with the right tools, such as precision screwdriver sets, soldering irons, replacement parts, and cleaning tools, individuals can embark on the journey of headset repair with a sense of preparedness and determination. The ability to assess, disassemble, repair, and test various components of a headset not only fosters a sense of self-sufficiency but also promotes environmental sustainability by extending the lifespan of electronic devices.
Moreover, the troubleshooting techniques outlined in this guide emphasize the importance of meticulous inspection, thoughtful diagnosis, and systematic repair methods. Whether it's addressing physical wear and tear, electrical connectivity issues, or audio-related malfunctions, the step-by-step approach to headset repair ensures that individuals can overcome challenges with clarity and efficiency. Furthermore, the emphasis on testing and verification underscores the significance of ensuring that the repaired headset components function reliably and consistently, delivering an optimal audio experience.
As we conclude this guide, it's important to recognize that headset repair is not just about technical proficiency; it's a testament to the resilience and ingenuity of individuals who seek to preserve and revitalize their beloved gadgets. By embracing the art of headset repair, individuals can foster a deeper connection with their audio gear, nurturing a sense of ownership and appreciation for the devices that accompany them through countless moments of entertainment, productivity, and communication.
In essence, this guide is a testament to the transformative power of knowledge and resourcefulness, empowering individuals to overcome headset issues and embark on a rewarding journey of maintenance and repair. As we bid adieu to this exploration of headset repair, let's carry forward the spirit of innovation and determination, knowing that with the right tools and techniques, we can breathe new life into our trusty headsets, ensuring that they continue to enrich our lives with immersive audio experiences for years to come.


