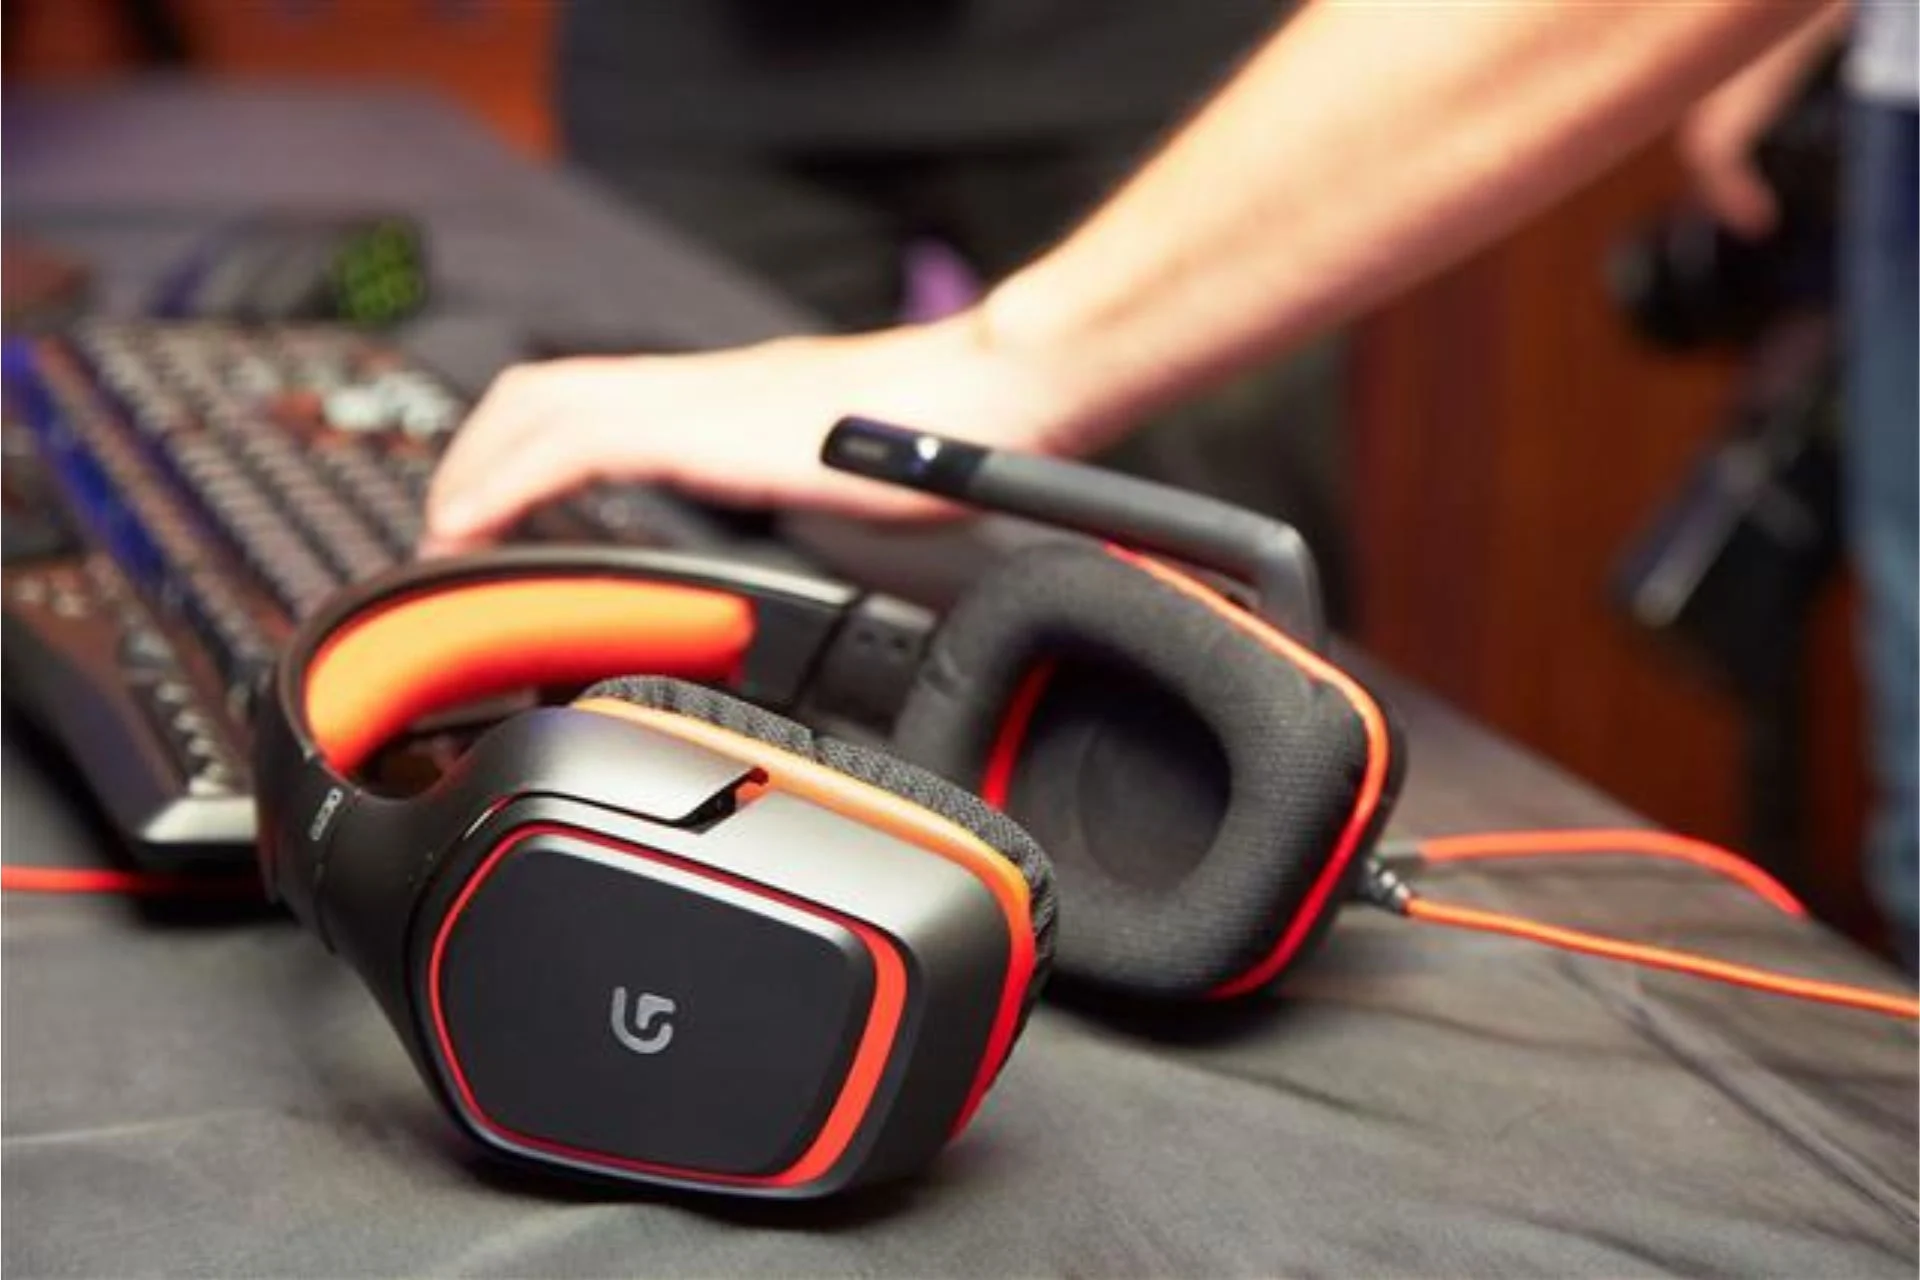
Why Headset Hygiene is Important
Ensuring proper hygiene for your headset is crucial for maintaining not only the device's longevity but also your own well-being. Headsets, whether they are over-ear, on-ear, or in-ear, come into close contact with your skin and hair, making them susceptible to accumulating dirt, oil, and bacteria over time. Here are the key reasons why prioritizing headset hygiene is essential:
-
Preventing Skin Irritation: Regular use of headsets can lead to the buildup of sweat, oil, and dead skin cells on the ear cups and ear tips. If not cleaned regularly, these residues can cause skin irritation, leading to discomfort and even skin infections.
-
Avoiding Ear Infections: In-ear headsets, in particular, are inserted directly into the ear canal, making them more prone to accumulating earwax, dirt, and bacteria. Failing to clean these earpieces regularly can increase the risk of ear infections and other ear-related issues.
-
Maintaining Sound Quality: Dirt and grime that accumulate on the headset's ear cups or ear tips can affect the sound quality. Over time, these particles can clog the sound vents, leading to muffled or distorted audio. By keeping your headset clean, you can ensure optimal sound performance.
-
Preventing the Spread of Germs: Headsets are often shared among family members, friends, or colleagues. Without proper hygiene practices, these devices can become breeding grounds for germs and bacteria, potentially leading to the spread of illnesses.
-
Prolonging the Lifespan of the Headset: Regular cleaning and maintenance can prevent the accumulation of dirt and debris that may cause mechanical issues or premature wear and tear. By keeping your headset clean, you can extend its lifespan and ensure it continues to function optimally.
In light of these reasons, it's evident that maintaining headset hygiene is not only about preserving the device's cleanliness but also about safeguarding your health and overall listening experience. By incorporating simple cleaning routines into your regular maintenance habits, you can ensure that your headset remains a reliable and hygienic companion for all your audio needs.
Daily Cleaning Routine
Maintaining a daily cleaning routine for your headset is essential for preserving its hygiene and ensuring a pleasant listening experience. By incorporating these simple yet effective cleaning practices into your daily habits, you can keep your headset in top condition while minimizing the accumulation of dirt, oil, and bacteria.
1. Wipe Down the Surfaces
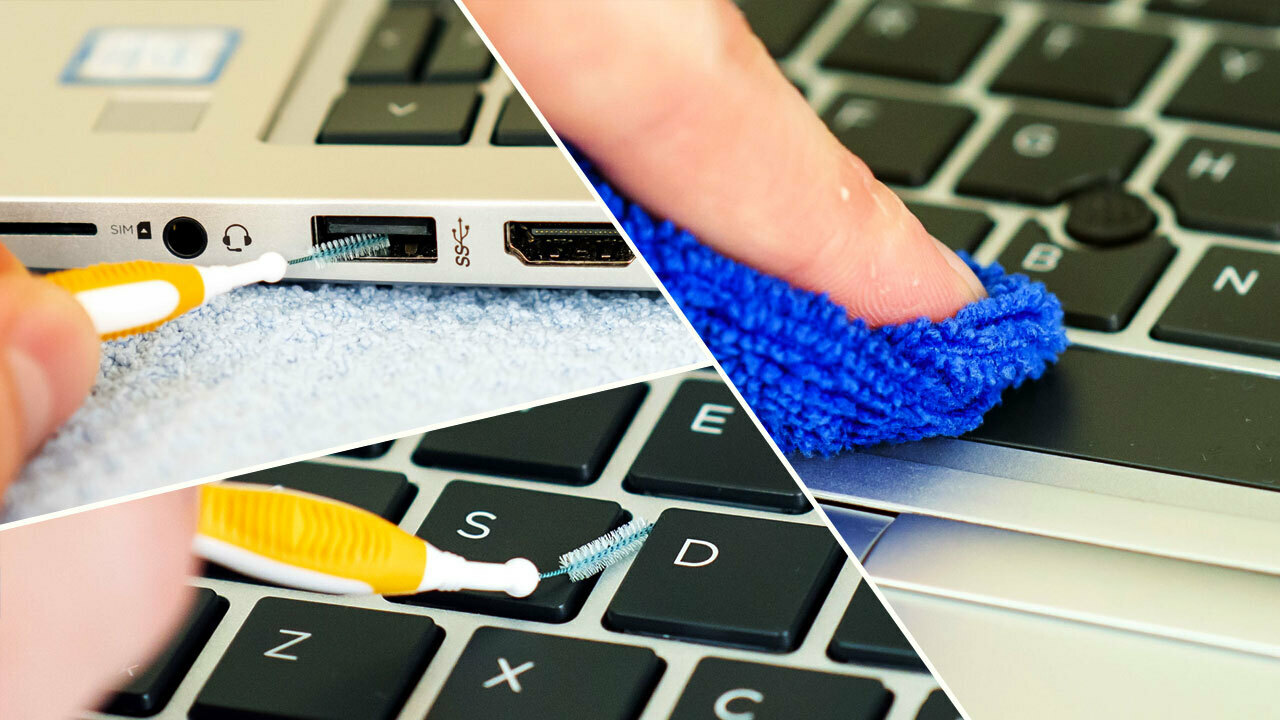
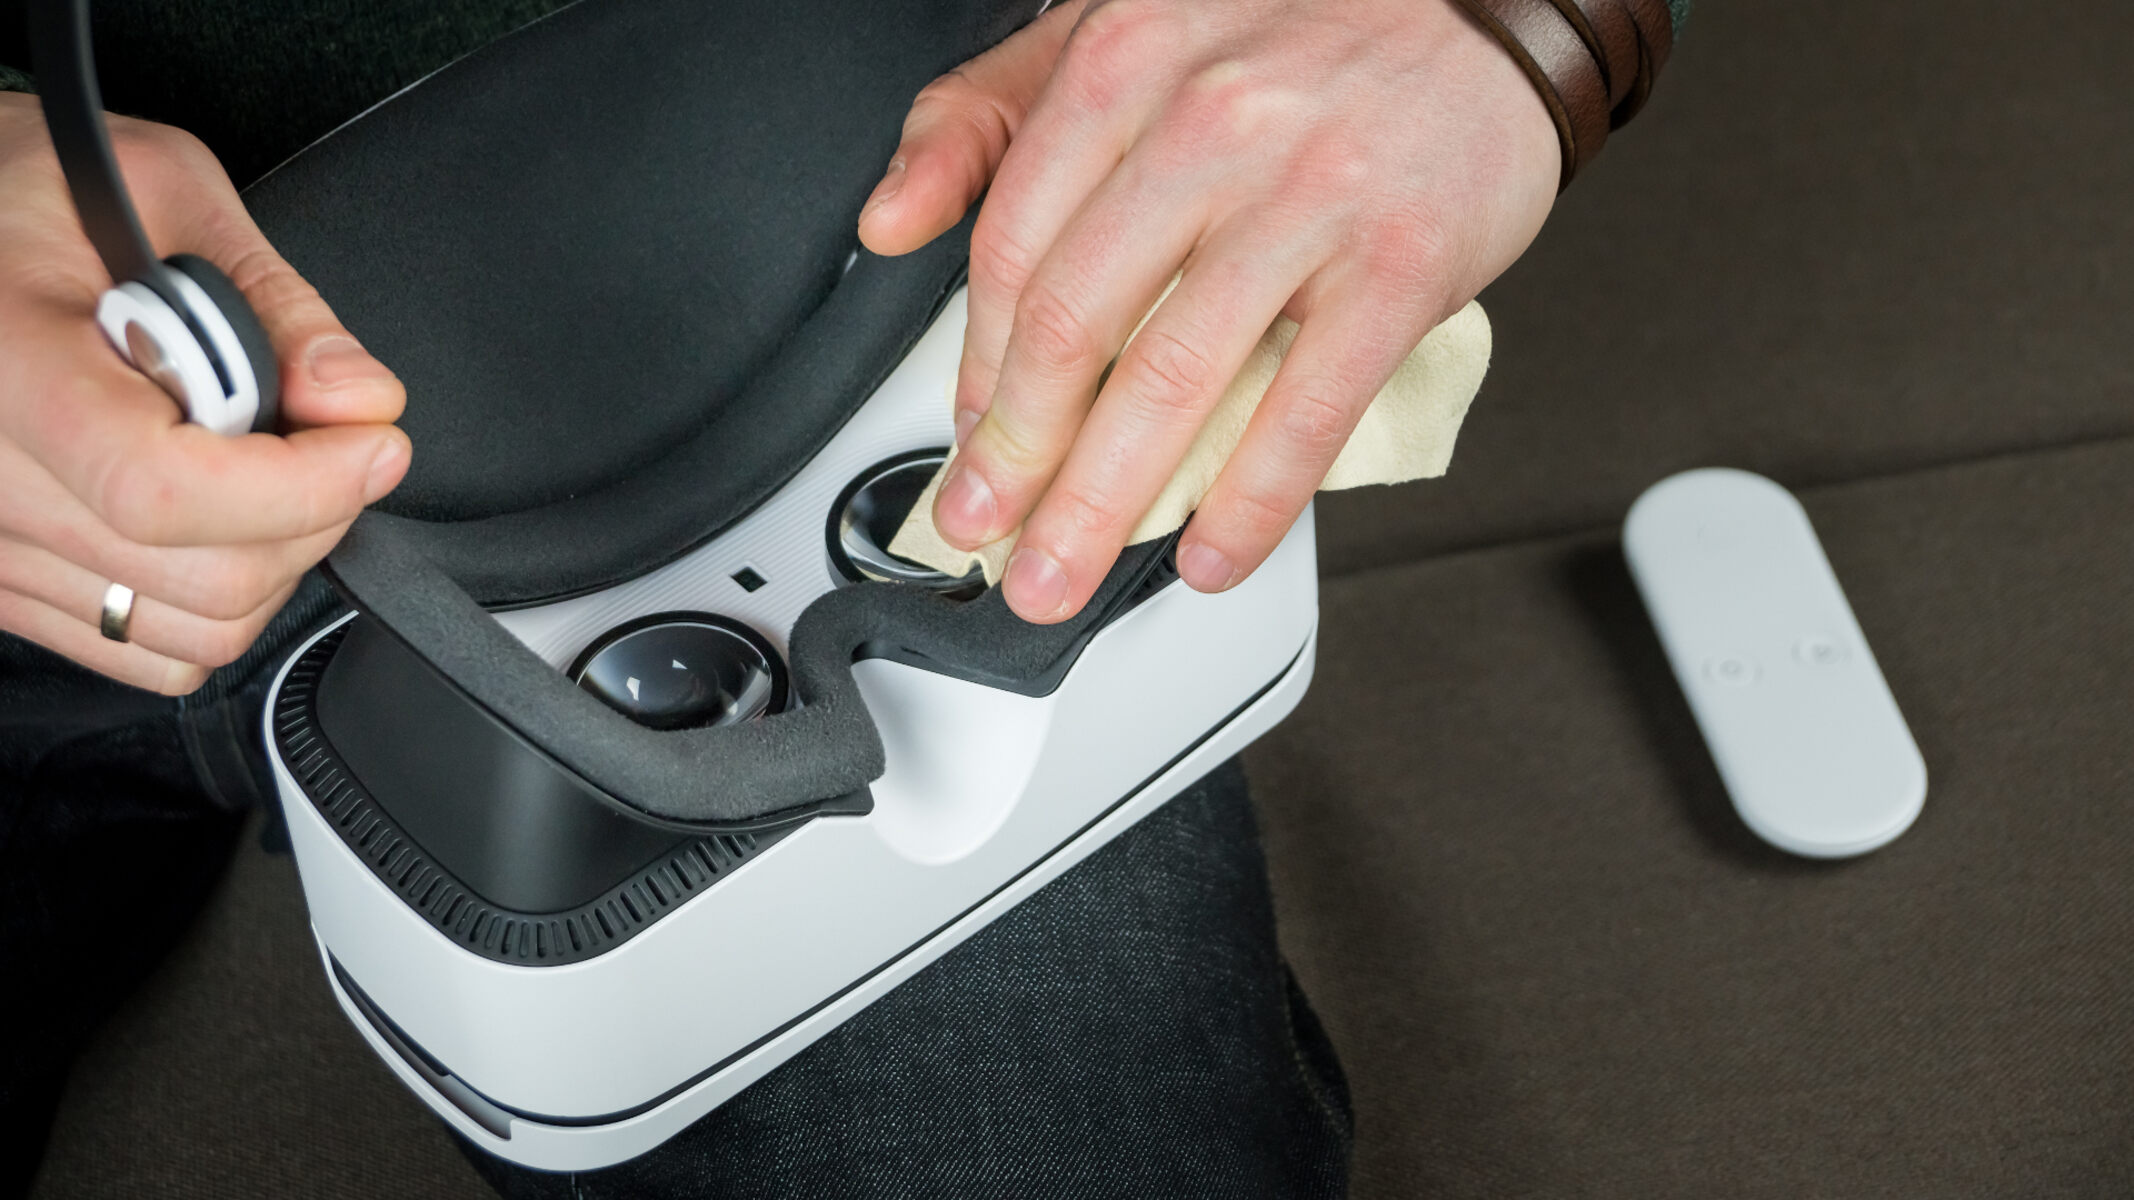
Start by using a soft, microfiber cloth dampened with a mild cleaning solution or water to gently wipe down the surfaces of your headset. Pay close attention to the ear cups, headband, and ear tips, as these areas come into direct contact with your skin and hair. This routine helps remove surface-level dirt, oils, and sweat, preventing them from building up over time.
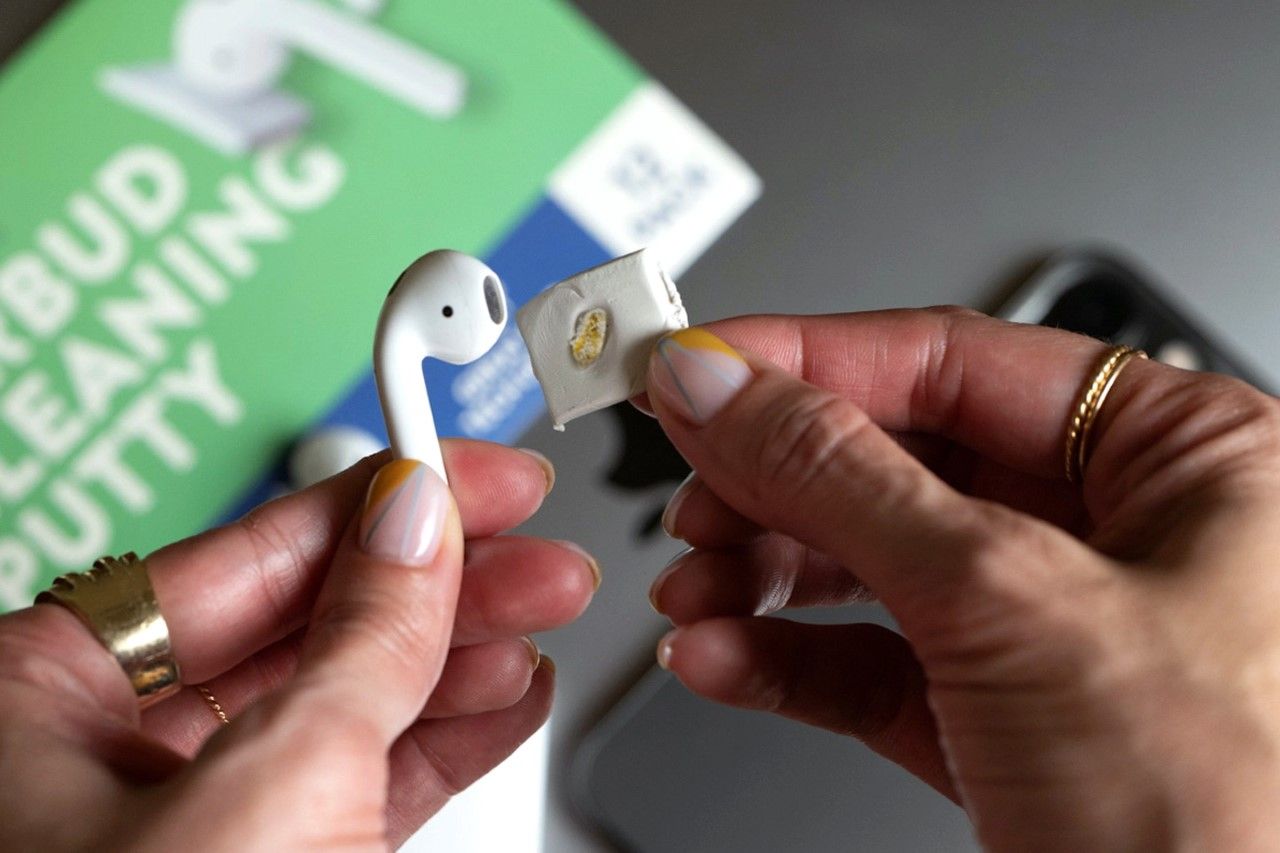
2. Clean the Ear Tips
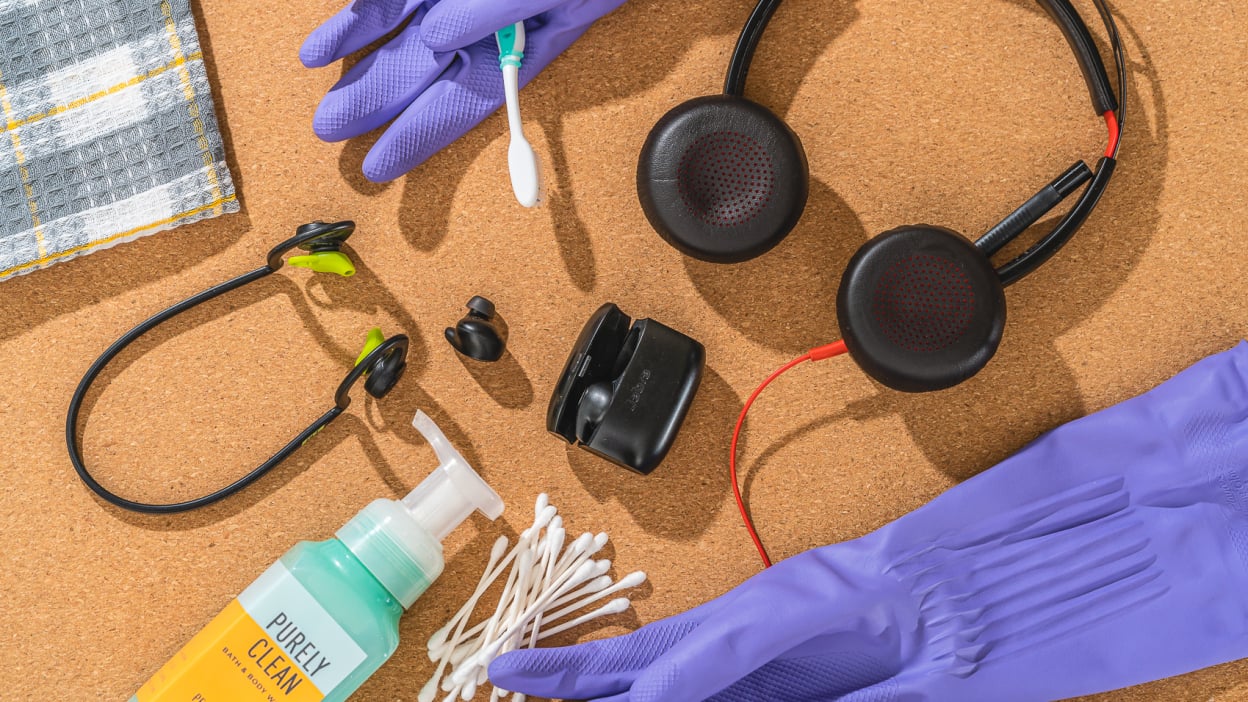
For in-ear headsets, it's crucial to clean the ear tips regularly. Remove the ear tips from the earpieces and gently wash them with mild soap and water. Ensure they are completely dry before reattaching them to the earpieces. This practice helps eliminate earwax, dirt, and bacteria that may have accumulated on the ear tips, promoting hygiene and preventing potential ear-related issues.
3. Sanitize the Headset
Use alcohol-based wipes or a mild disinfectant spray to sanitize the surfaces of your headset. Focus on areas that come into contact with your skin, such as the ear cups and headband. This step is particularly important if you share your headset with others, as it helps eliminate germs and bacteria, reducing the risk of illness transmission.
4. Brush the Mesh and Vents
If your headset has mesh-covered ear cups or ventilation ports, use a soft-bristled brush to gently remove any dust or debris that may have accumulated within the mesh. This prevents particles from clogging the vents, ensuring optimal sound quality and preventing potential mechanical issues.
5. Store Properly
After cleaning, store your headset in a clean, dust-free case or pouch to prevent it from accumulating dirt and debris when not in use. Proper storage not only maintains the headset's cleanliness but also protects it from potential damage.
By incorporating these simple cleaning steps into your daily routine, you can maintain the hygiene of your headset, ensuring it remains a reliable and comfortable companion for your audio needs. Regular cleaning not only contributes to the longevity of your device but also promotes a healthy and enjoyable listening experience.
Deep Cleaning Methods
When it comes to maintaining the hygiene of your headset, regular deep cleaning is essential to tackle stubborn dirt, grime, and bacteria that may have accumulated over time. Deep cleaning methods go beyond the daily cleaning routine and involve more thorough techniques to ensure a comprehensive cleansing of your headset.
1. Disassembly and Cleaning
For headsets with removable parts such as ear cushions, ear pads, or detachable cables, disassembling the components allows for a more thorough cleaning process. Carefully remove these parts according to the manufacturer's instructions and clean them individually. Use a mild detergent or specialized cleaning solution recommended for the specific material of the components. Gently scrub and rinse them, ensuring all residues are removed, and allow them to air dry completely before reassembling.
2. Using Compressed Air
Compressed air can be a highly effective tool for removing dust, dirt, and debris from the nooks and crannies of your headset. Utilize a can of compressed air to blow away particles from the ear cups, headband, and other intricate areas of the device. This method helps dislodge stubborn debris that may be difficult to reach with traditional cleaning tools, contributing to a more thorough cleansing process.
3. Deep Earpiece Cleaning
In-ear headsets require special attention to ensure the earpieces remain hygienic. Use a small, soft brush or specialized earpiece cleaning tool to gently remove earwax, dirt, and debris from the earpiece nozzles and mesh. Avoid using sharp objects that may damage the delicate components. Additionally, consider using specialized cleaning solutions designed for in-ear devices to sanitize and maintain the cleanliness of the earpieces.
4. Sanitizing with UV Light
UV light sanitization devices can be utilized to effectively eliminate bacteria and germs from the surfaces of your headset. These devices emit UV-C light, which is capable of destroying microorganisms, including bacteria and viruses. Simply place your headset within the UV sanitizing chamber and allow the UV light to disinfect the surfaces, contributing to a comprehensive hygiene maintenance routine.
5. Professional Cleaning Services
In some cases, particularly for high-end or specialized headsets, professional cleaning services may be available. These services utilize industry-standard cleaning techniques and specialized equipment to deep clean and sanitize headsets. Consider seeking professional cleaning services, especially for premium or intricate headsets that require delicate handling and specialized cleaning expertise.
By incorporating these deep cleaning methods into your headset maintenance routine, you can ensure that your device remains hygienic, free from stubborn residues, and optimized for an exceptional audio experience. Regular deep cleaning not only contributes to the longevity of your headset but also promotes a healthy and comfortable listening environment.
Cleaning Tips for Different Headset Materials
Headsets come in a variety of materials, each requiring specific cleaning methods to ensure optimal hygiene and longevity. Understanding the appropriate cleaning techniques for different headset materials is essential for maintaining their pristine condition. Here are detailed cleaning tips tailored to various headset materials:
Leather or Leatherette Headset Components
- Daily Maintenance: Wipe the leather or leatherette surfaces with a soft, damp cloth to remove surface-level dirt and oils. Avoid using harsh chemicals that may damage the material.
- Conditioning: Periodically apply a leather conditioner to keep the material supple and prevent cracking. Ensure the conditioner is compatible with the specific type of leather or leatherette used in your headset.
Fabric or Cloth Headset Components
- Vacuuming: Use a soft brush attachment on a vacuum cleaner to gently remove dust and debris from fabric or cloth surfaces. This prevents particles from embedding into the material.
- Spot Cleaning: Address stains promptly with a mild detergent and water. Blot the stained area with a clean, damp cloth and allow it to air dry thoroughly.
Plastic or Metal Headset Components
- Disinfecting: Use alcohol-based wipes or a mild disinfectant spray to sanitize plastic or metal components. Wipe down the surfaces thoroughly and allow them to air dry.
- Polishing: For metal components, use a specialized metal polish to maintain their luster and prevent tarnishing. Follow the manufacturer's instructions for safe application.
Wood Headset Components
- Dusting: Regularly dust wood components with a soft, dry cloth to prevent the accumulation of debris. Avoid using water or harsh cleaning agents that may damage the wood.
- Polishing: Apply a small amount of wood polish to maintain the natural beauty of the wood. Gently buff the surface to restore its luster.
Silicone or Rubber Headset Components
- Washing: Remove silicone or rubber components, such as ear tips, and wash them with mild soap and water. Ensure they are completely dry before reattaching them to the headset.
- Avoiding Direct Sunlight: Store silicone or rubber components away from direct sunlight to prevent discoloration and deterioration.
By adhering to these tailored cleaning tips based on the specific materials of your headset, you can effectively maintain their cleanliness and integrity. Customized cleaning methods not only preserve the aesthetic appeal of the headset but also contribute to a hygienic and enjoyable audio experience.
Remember, always refer to the manufacturer's guidelines for cleaning and maintenance to ensure that the methods align with the recommended practices for your specific headset model.
Tips for Maintaining Hygiene While Sharing Headsets
Sharing headsets among family members, friends, or colleagues is a common practice, but it also poses hygiene challenges. To ensure a clean and safe listening experience when sharing headsets, consider the following tips:
-
Use Disposable Covers: Utilize disposable headphone covers or earpiece sleeves when sharing headsets. These covers act as protective barriers, preventing direct contact between the headset and the skin, thus minimizing the transfer of oils and bacteria.
-
Sanitize Between Uses: Before and after sharing the headset, sanitize the surfaces with alcohol-based wipes or a mild disinfectant spray. Pay particular attention to the ear cups, headband, and ear tips, as these areas come into direct contact with the skin and are more susceptible to harboring germs.
-
Designate Personal Headsets: Encourage individuals to have their designated headsets to minimize sharing. Labeling or color-coding the headsets can help distinguish between personal and shared devices, reducing the frequency of shared usage.
-
Educate About Hygiene Practices: Promote awareness about the importance of headset hygiene among potential users. Encourage individuals to maintain clean ears, avoid sharing headsets when experiencing illnesses, and follow proper cleaning and sanitization practices.
-
Implement Rotation Schedules: In settings where headsets are frequently shared, consider implementing rotation schedules to minimize prolonged and frequent sharing among individuals. Allowing headsets to "rest" between uses can reduce the accumulation of oils and germs.
-
Provide Cleaning Supplies: Make cleaning supplies readily available for individuals to clean the headsets before and after use. This proactive approach empowers users to take responsibility for maintaining the hygiene of the shared headsets.
By incorporating these tips into your shared headset usage practices, you can promote a hygienic and considerate environment while enjoying the convenience of shared audio devices. Prioritizing hygiene not only safeguards the health of users but also contributes to a more pleasant and comfortable listening experience for everyone involved.