Introduction
YouTube is a treasure trove of informative and entertaining videos, and sometimes you may come across a video that you want to include in a PowerPoint presentation. However, you may be wondering how to download YouTube videos and insert them into your slides. In this article, we will guide you through the process of downloading YouTube videos and integrating them seamlessly into your PowerPoint presentations.
Downloading YouTube videos may seem like a daunting task for some, especially if you are unfamiliar with the various tools and methods available. But fear not, as we will break down the process into simple and easy-to-follow steps. By the end of this guide, you’ll be able to impress your audience with captivating YouTube videos right in your PowerPoint slides.
Before we dive into the steps, it’s important to note that downloading YouTube videos should be done in accordance with YouTube’s terms of service and any applicable copyright laws. Make sure to only download and use videos in ways that are legal and adhere to the platform’s guidelines.
Now, let’s get started with the step-by-step process of downloading YouTube videos and integrating them into PowerPoint presentations. Whether you’re an educator looking to enhance your lectures or a business professional wanting to spice up your presentations, this guide will equip you with the tools and knowledge needed to successfully incorporate YouTube videos into your PowerPoint slides.
Step 1: Find the YouTube video you want to download
The first step in downloading a YouTube video to use in your PowerPoint presentation is to find the specific video you want to include. YouTube offers a vast library of videos covering a wide range of topics, so take your time to explore and find the one that best suits your needs.
To begin, open your web browser and go to the YouTube website. Once there, you can use the search bar at the top to enter keywords related to the video you’re looking for. You can search for specific video titles, channels, or even use more general terms to find relevant content. YouTube’s search algorithm will provide you with a list of videos that match your search criteria.
Take some time to browse through the search results and click on the video that interests you. This will take you to the video’s dedicated page, where you can watch and assess if it is suitable for your presentation. Pay attention to the video’s duration, content, and quality to ensure it aligns with your intended use.
While watching the video, take note of any specific timestamps or sections that you want to include in your PowerPoint presentation. This will help you later when you want to trim and edit the video to fit your desired length or focus on specific segments.
Once you have identified the perfect YouTube video for your presentation, it’s time to move on to the next step, where we will explore different tools and methods to download the video to your computer.
Step 2: Choose a YouTube video downloading tool
After finding the YouTube video you want to download, the next step is to select a suitable YouTube video downloading tool. There are various tools available that allow you to easily download videos from YouTube and save them to your computer for offline use or inclusion in your PowerPoint presentations.
When choosing a downloading tool, consider factors such as ease of use, supported video formats, download speed, and the tool’s reputation for safety and reliability. While there are many online platforms and browser extensions that claim to download YouTube videos, it’s important to choose a tool that is reputable and trustworthy.
One popular method is to use desktop software specifically designed for downloading YouTube videos. These programs often offer additional features like video conversion and editing functionalities, making them versatile tools for managing and customizing downloaded videos. Some well-known YouTube video downloading software include 4K Video Downloader, ClipGrab, and YTD Video Downloader.
Alternatively, you can also consider using online video downloading sites like SaveFrom.net, Y2Mate, or Keepvid. These websites allow you to simply paste the URL of the YouTube video and download the video file directly to your computer. Keep in mind that using online services may have limitations on video quality or impose restrictions on the number of videos you can download per day.
Additionally, if you prefer browser extensions, there are options available for popular web browsers like Google Chrome and Mozilla Firefox. Extensions like Video Downloader professional, YouTube Video Downloader, or Easy YouTube Video Downloader provide a convenient way to download videos directly while browsing YouTube.
Take your time to explore different tools and find the one that suits your needs and preferences. Ensure that the tool you choose provides the necessary features and functionality you require for downloading YouTube videos effortlessly.
Once you have chosen the YouTube video downloading tool, proceed to the next step where we will guide you through the process of downloading and installing the tool on your computer.
Step 3: Download and install the chosen tool
Once you have selected the YouTube video downloading tool that best suits your needs, the next step is to download and install it on your computer. The process may vary depending on the tool you have chosen, but generally, it is a straightforward process.
Start by navigating to the official website of the tool you have selected. Look for a “Download” or “Get” button on the website’s homepage or in the downloads section. Click on the button to initiate the download process.
Depending on your browser and the security settings on your computer, you may be prompted to confirm the download or choose a location to save the installation file. It is recommended to save the file to a location easily accessible on your computer, such as the desktop or Downloads folder.
Once the file is downloaded, locate it on your computer and double-click on it to start the installation process. Follow the on-screen instructions provided by the installer to complete the installation. These instructions may include accepting the tool’s terms and conditions, choosing an installation location, and selecting additional options like creating desktop shortcuts.
During the installation, make sure to read any prompts carefully and review the information provided. Some installation processes may include bundled software or promotional offers that you can choose to accept or decline. Be cautious and only install additional software or tools that you trust and require.
After the installation is complete, you can close the installer and launch the YouTube video downloading tool. Depending on the tool, it may automatically open or be accessible from the Start menu or desktop shortcut created during installation.
Once you have successfully downloaded and installed the chosen tool, you are ready to move on to the next step, where we will guide you through the process of copying the URL of the YouTube video you want to download.
Step 4: Copy the URL of the YouTube video
With your YouTube video downloading tool installed and ready to use, the next step is to copy the URL of the YouTube video you want to download. The video’s URL, or web address, is a unique identifier that allows you to access the specific video on the YouTube platform.
To copy the URL, open a web browser and navigate to the YouTube website. Search for the video you want to download and click on it to open the video’s dedicated page.
Once you’re on the YouTube video’s page, look at the address bar at the top of the browser window. The URL should be displayed in the address bar. Select the entire URL by clicking on it and pressing Ctrl + C (or Command + C on a Mac) to copy it to your clipboard.
If you prefer an alternative method to copy the URL, you can right-click anywhere on the video’s page and select “Copy video URL” or a similar option from the context menu that appears.
It’s essential to ensure that you have copied the complete URL of the video, including any extra parameters or identifiers. These parameters may be added to the URL to specify starting timestamps, video quality, or other settings. Having the complete URL ensures that the downloading tool can accurately identify and download the video.
After copying the URL, you can close the web browser or navigate to another page if needed. The URL is now saved to your clipboard, and you can proceed to the next step, where we will guide you in launching the YouTube video downloading tool.
Step 5: Launch the YouTube video downloading tool
Now that you have copied the URL of the YouTube video you want to download, it’s time to launch the YouTube video downloading tool that you installed in the previous step. The tool will allow you to paste the URL and initiate the downloading process.
Locate the YouTube video downloading tool on your computer. Depending on the installation method, it might be accessible from the Start menu, desktop shortcut, or directly from the folder where you installed it.
Double-click on the tool’s icon or select it from the appropriate location to launch the application. The tool’s interface should appear on your screen, providing you with options and features related to YouTube video downloading.
Take a moment to familiarize yourself with the tool’s interface and available functions. Most YouTube video downloading tools provide a simple and intuitive user interface, making it easy for you to navigate and use its various features.
Some YouTube video downloading tools may require you to sign in or create an account to use certain advanced functionalities, so be prepared to provide the necessary information if prompted. However, for basic downloading purposes, signing in is usually not required.
Once you have launched the YouTube video downloading tool, you’re ready to move on to the next step, where we will guide you through the process of pasting the YouTube video URL into the tool for downloading.
Step 6: Paste the YouTube video URL into the tool
With the YouTube video downloading tool launched, it’s time to paste the URL of the YouTube video you want to download. This step is crucial as it allows the tool to identify and retrieve the specific video you want to save.
In the YouTube video downloading tool’s interface, you should see an input field or box where you can paste the URL. This field is usually labeled as “URL,” “Paste URL,” or something similar.
To paste the URL, right-click inside the URL input field and select “Paste” from the context menu. Alternatively, you can simply press Ctrl + V (or Command + V on a Mac) to paste the URL from your clipboard.
Ensure that the entire URL you copied from the YouTube website is pasted correctly into the tool. Double-check for any missing characters or extra spaces that may prevent the tool from accurately identifying the YouTube video.
After pasting the YouTube video URL into the downloading tool, take a moment to review any additional settings or options available. Some tools may allow you to customize the video format, quality, or output destination. Adjust these settings according to your preferences, keeping in mind the requirements of your PowerPoint presentation.
Once you’re satisfied with the settings, double-check that the URL is correctly entered, and all necessary adjustments are made. Then, proceed to the next step, where we will guide you through choosing the desired video format and quality for downloading.
Step 7: Choose the desired video format and quality
After pasting the YouTube video URL into the downloading tool, the next step is to choose the desired video format and quality for downloading. Different YouTube video downloading tools offer various options for video formats and qualities, allowing you to select the most suitable options for your needs.
In most YouTube video downloading tools, you will find a dropdown menu or a set of options where you can select the desired video format. These formats may include MP4, AVI, WMV, MOV, or others, depending on the capabilities of the tool.
Consider the compatibility of the selected video format with your PowerPoint presentation software. MP4 is a commonly supported video format and is generally recommended for PowerPoint compatibility. However, ensure that the format you choose is supported by your PowerPoint version to avoid any playback issues.
In addition to the video format, the video downloading tool may also provide options to choose the video quality. Higher quality videos generally provide better resolution and visual clarity but may come with larger file sizes. Evaluate the balance between video quality and file size to choose the option that meets your requirements.
Keep in mind that the availability of different video formats and qualities may vary depending on the downloading tool you are using. Some tools may offer more extensive customization options, while others may have limited choices. Select the options that best align with your preferences and the capabilities of your PowerPoint presentation.
Once you have chosen the desired video format and quality, double-check that all the settings are correctly configured. Ensure that the video format and quality you selected are compatible with both the downloading tool and your PowerPoint software.
Now that you have chosen the video format and quality, proceed to the next step, where we will guide you through starting the video download process.
Step 8: Start the video download process
After selecting the desired video format and quality, it’s time to initiate the video download process. This step will allow the YouTube video downloading tool to retrieve the video from the provided URL and save it to your computer in the chosen format and quality.
In the YouTube video downloading tool’s interface, look for a button or option that starts the download process. This button is typically labeled as “Download,” “Start,” or something similar.
Click on the designated button to begin the video download process. The downloading tool will now communicate with the YouTube servers and fetch the video file based on the URL you provided.
During the download process, you may see a progress bar or indicator that shows the download status. This progress bar will give you an estimate of how long it will take to complete the download based on your internet connection and the size of the video file.
While the video is being downloaded, it’s important to avoid closing the YouTube video downloading tool or interrupting the process. Doing so may result in an incomplete or corrupted video file.
Be patient and allow the YouTube video downloading tool to complete the download. Once the download is finished, you will be notified, and the video file will be saved to your designated output location, as specified during the earlier steps.
With the video successfully downloaded, you can now proceed to the next step, where we will guide you on how to locate the downloaded video file on your computer.
Step 9: Locate the downloaded video file
Once the video download process is complete, it’s important to locate the downloaded video file on your computer. Knowing the file’s location will allow you to easily access and insert it into your PowerPoint presentation.
The YouTube video downloading tool you are using may have a default location where the downloaded videos are saved. Check the settings or preferences of the downloading tool to determine the default download folder.
In most cases, the downloaded video file will be stored in your computer’s “Downloads” folder. This is the default location where many web browsers and applications save downloaded files.
Open your computer’s file explorer or file manager and navigate to the “Downloads” folder. Look for the recently downloaded video file. Depending on the downloading tool and your computer’s settings, the file may either have the same name as the YouTube video or a modified name based on the tool’s conventions.
If you are unable to find the video file in the “Downloads” folder or the default location, try using the search functionality in your file explorer. Enter the name of the downloaded video or use specific keywords related to the video, and the search results should display the file you are looking for.
Once you have located the downloaded video file, take note of its file format and ensure that it is compatible with your PowerPoint software. If necessary, consider converting the video file to a supported format using additional software or the features provided by the YouTube video downloading tool you used.
Make a mental or written note of the file’s location, as you will need it in the subsequent step when inserting the video into your PowerPoint presentation.
Now that you have successfully located the downloaded video file, proceed to the next step, where we will guide you through the process of inserting the video into your PowerPoint slides.
Step 10: Insert the video into PowerPoint
With the downloaded video file ready, it’s time to insert it into your PowerPoint presentation. Adding a video to your slides can enhance engagement and make your presentation more dynamic and visually appealing.
Open your PowerPoint presentation and navigate to the slide where you want to insert the video. Click on the slide to select it, or select multiple slides if you want the video to appear on multiple slides.
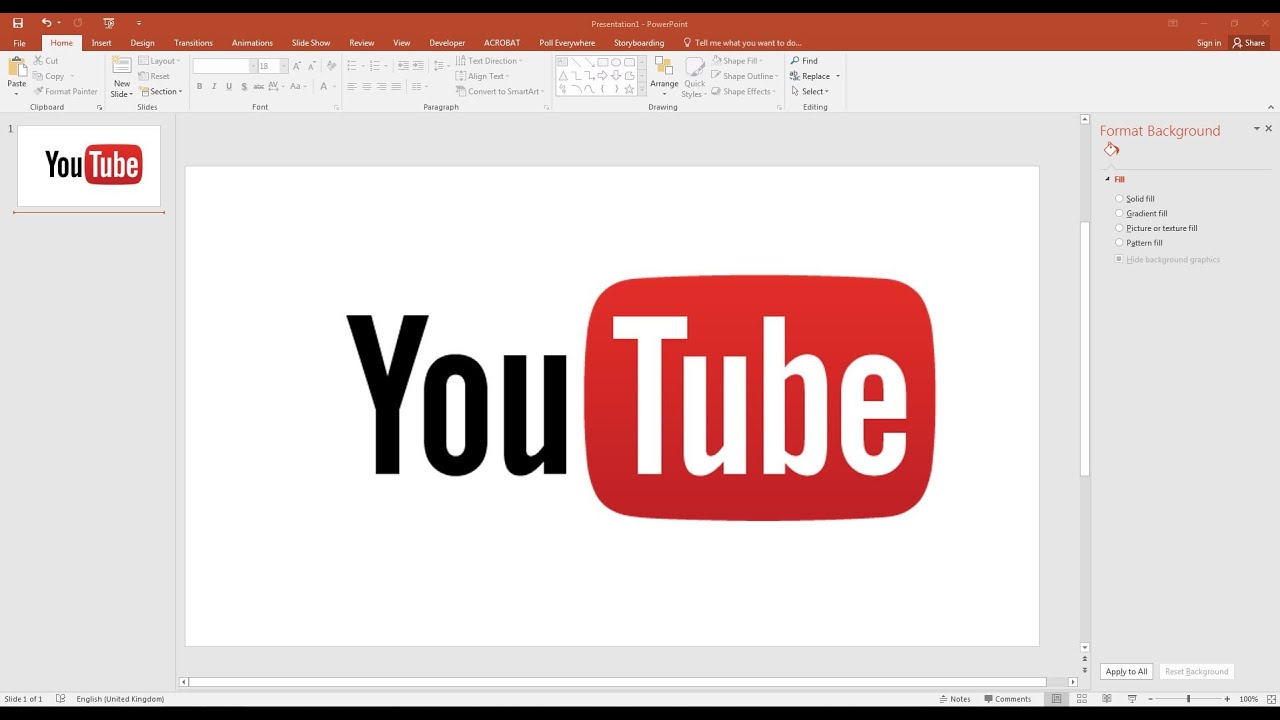
To insert the video, select the “Insert” tab at the top of the PowerPoint window. Look for the “Media” group in the toolbar, and click on the “Video” button. From the drop-down menu, choose “Video from File.”
A file explorer window will open, allowing you to navigate to the location where the downloaded video file is stored. Locate the video file and double-click on it or select it and click the “Insert” button.
PowerPoint will now insert the video onto your selected slide(s). Depending on your PowerPoint version and settings, you may see a video placeholder or a preview of the video on the slide.
Adjust the size and position of the video on your slide by clicking and dragging the video frame. You can also resize the video by selecting it and dragging the corner handles. Use the alignment and distribution options in the PowerPoint toolbar to position the video precisely on the slide.
By default, PowerPoint may set the video to autoplay when the slide containing the video is displayed during the presentation. If you prefer, you can modify the playback settings of the video by right-clicking on it, selecting “Video Options” or “Format Video” from the context menu, and exploring the various playback options available. These options may include autoplay, looping, and volume control.
Once you have positioned and adjusted the video on the slide to your satisfaction, save your PowerPoint presentation to ensure that the video is embedded and saved within the file. This will ensure that the video remains intact and plays correctly when you present the slides on different devices.
Now, you have successfully inserted the downloaded YouTube video into your PowerPoint presentation. Proceed to the next step, where we will guide you through adjusting the video settings and layout in PowerPoint to further enhance its appearance.
Step 11: Adjust the video settings and layout in PowerPoint
After inserting the downloaded YouTube video into your PowerPoint presentation, it’s important to adjust its settings and layout to ensure it fits seamlessly into your slides and enhances the overall visual experience.
Select the slide containing the video and click on the video to activate the “Video Tools” tab at the top of the PowerPoint window. This contextual tab provides various options and settings specifically for working with videos in PowerPoint.
One important aspect to consider is the video play options. By default, the video may play automatically when the slide is displayed. To modify this behavior, click on the “Playback” options in the “Video Tools” tab, and you can choose to have the video start automatically, play when clicked, or play in a loop.
You can also adjust the appearance of the video on the slide. PowerPoint offers options to apply video styles, such as borders, effects, and shapes, to enhance its visual appeal. Explore the “Video Styles” options to find a style that complements your presentation’s overall design and theme.
If you want to trim the video or modify its duration, select the video, and click on the “Trim Video” option in the “Video Tools” tab. This allows you to remove unnecessary parts of the video or focus on specific segments that are relevant to your presentation.
Additionally, you can explore other video editing options provided by PowerPoint, such as adjusting the brightness, contrast, or volume of the video. These options can help optimize the video’s appearance and ensure it aligns with the overall visual aesthetics of your presentation.
Take some time to preview the slide and the video playback to ensure everything is working as desired. Make any further adjustments or modifications to the video settings or layout based on your specific requirements and preferences.
Remember to save your PowerPoint presentation after making all the necessary adjustments. This will ensure that the video’s settings and layout are saved and maintained when you open the presentation on different devices or share it with others.
Now, you have successfully adjusted the video settings and layout in PowerPoint. Your presentation is now ready for the final touches and any further additions you wish to make.
Conclusion
Congratulations! You have now learned how to download YouTube videos and seamlessly integrate them into your PowerPoint presentations. By following the step-by-step guide outlined in this article, you can enhance the visual appeal and engagement of your presentations, capturing the attention of your audience with captivating videos.
We began by finding the YouTube video you wanted to download, ensuring its suitability for your presentation. Then, we guided you through the process of choosing a YouTube video downloading tool, downloading and installing the tool on your computer, and copying the URL of the YouTube video.
Next, we covered how to launch the YouTube video downloading tool, paste the YouTube video URL into the tool, and choose the desired video format and quality for downloading. We then moved on to starting the video download process and locating the downloaded video file on your computer.
With the video file in hand, we explored the process of inserting the video into your PowerPoint presentation, adjusting its settings, and refining its layout to ensure a seamless integration into your slides. Finally, we highlighted the importance of saving your presentation to preserve the video’s embedded format.
By following these steps and taking advantage of the features provided by YouTube video downloading tools and PowerPoint, you can create engaging and impactful presentations that incorporate the power of video content. Remember to always respect copyright laws and adhere to YouTube’s terms of service when downloading and using videos from the platform.
Now that you have the knowledge and skills to integrate YouTube videos into your PowerPoint presentations, go ahead and unleash your creativity. Elevate your presentations to the next level by incorporating compelling videos that inform, entertain, and inspire your audience.
So, go ahead and impress your viewers with captivating YouTube videos in your PowerPoint presentations. Happy presenting!