Introduction
YouTube has become an incredibly popular platform for sharing and watching videos of all kinds. However, there may be times when you want to download YouTube videos and watch them on a different media device, such as a DVD player. While YouTube does not provide a direct option to download videos, there are several methods you can use to achieve this.
In this article, we will explore three different options for downloading YouTube videos to a DVD. Option 1 involves using third-party software, Option 2 utilizes online downloader services, and Option 3 focuses on ripping and burning DVDs. Each option has its pros and cons, so you can choose the method that suits your needs and preferences.
Before we dive into the different options, it is important to note that downloading YouTube videos without the permission of the content owners may violate copyright laws. Always ensure that you have the necessary rights or permissions to download and use the videos.
Now, let’s explore the three options in detail:
Option 1: Using Third-Party Software
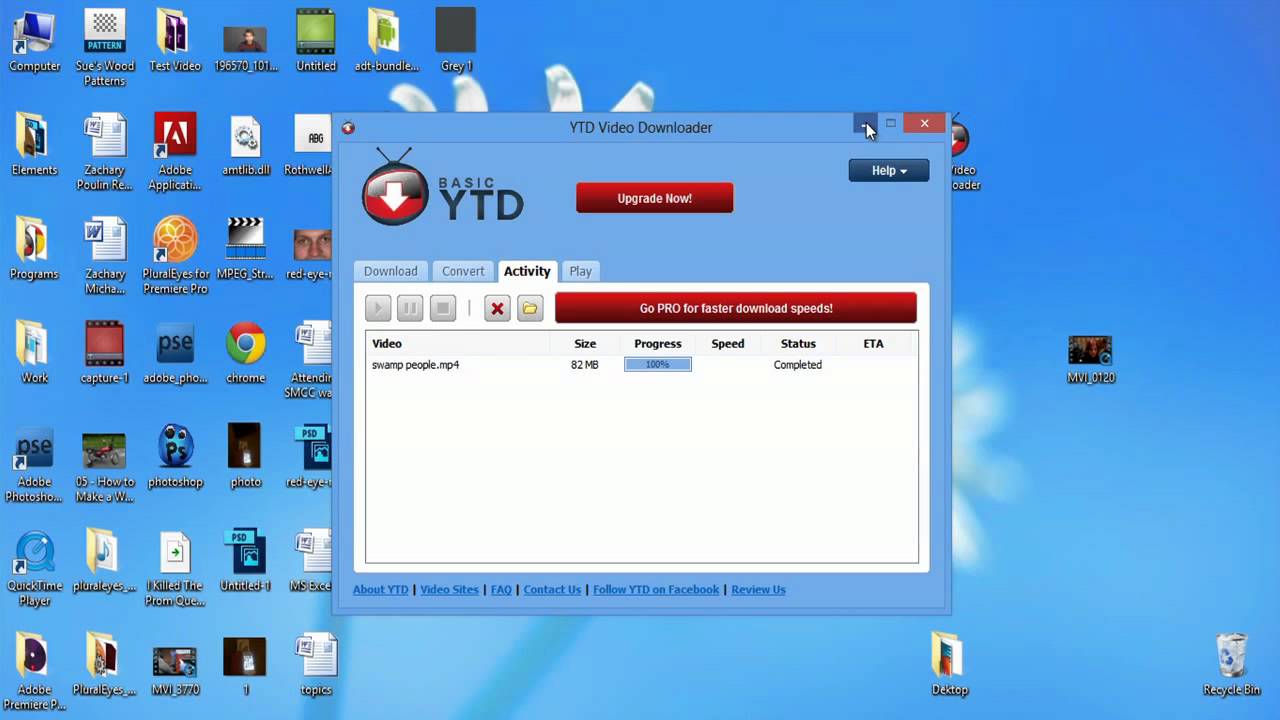
One of the most common methods for downloading YouTube videos to a DVD is by using third-party software. There are various software options available that allow you to download videos from YouTube and convert them into a format compatible with DVD players. Here’s how you can do it:
- Step 1: Research and choose a reliable third-party software that specializes in downloading YouTube videos. There are both free and paid options available, so consider your budget and specific requirements.
- Step 2: Download and install the software on your computer. Ensure that you are downloading from a reputable source to avoid any malware or viruses.
- Step 3: Launch the software and find the option to input the URL of the YouTube video you want to download. Copy and paste the URL into the designated field.
- Step 4: Select the desired video quality and output format for the downloaded video. Some software may also provide the option to choose a specific DVD format.
- Step 5: Start the downloading process by clicking the appropriate button. The software will fetch the video from YouTube and save it to your computer’s local storage.
- Step 6: Once the video is downloaded, open the DVD burning software that came with your computer or download a reliable third-party DVD burning software.
- Step 7: Follow the instructions provided by the DVD burning software to create a DVD project. Import the downloaded YouTube video into the project.
- Step 8: Customize the DVD menu if desired, and then proceed to burn the video onto a blank DVD. Make sure to use a compatible DVD disc for best results.
Using third-party software provides a convenient and straightforward way to download YouTube videos and burn them to a DVD. However, keep in mind that some software may come with limitations or watermarks on the final DVD. It’s important to read reviews and choose reputable software that meets your needs.
Now that we’ve explored Option 1, let’s move on to Option 2: utilizing online downloader services.
Option 2: Utilizing Online Downloader Services
If you prefer not to download any software or want a quick and hassle-free method to download YouTube videos to a DVD, utilizing online downloader services is a great option. These services allow you to directly download YouTube videos and provide the option to convert them into a compatible format for DVD players. Here’s how you can do it:
- Step 1: Open your preferred web browser and search for reputable online YouTube downloader services. There are many options available, so choose one that suits your needs.
- Step 2: Once you have found a suitable online downloader, go to the YouTube video that you want to download and copy its URL from the address bar.
- Step 3: Visit the chosen online downloader service and paste the YouTube video URL into the provided input field.
- Step 4: Select the desired video quality and output format. Some online services may also give you the option to choose a specific DVD format.
- Step 5: Start the downloading process by clicking the appropriate button. The online downloader will fetch the YouTube video and save it as a downloadable file on your computer.
- Step 6: Once the video is downloaded, open your computer’s DVD burning software or download a reliable third-party DVD burning software.
- Step 7: Create a new DVD project using the DVD burning software and import the downloaded YouTube video into the project.
- Step 8: Customize the DVD menu and other settings according to your preferences, and then proceed to burn the video onto a blank DVD.
Utilizing online downloader services eliminates the need for installing additional software and provides a quick way to download and convert YouTube videos to a DVD format. However, keep in mind that the availability and reliability of these services can vary. It is crucial to use trustworthy online downloaders to ensure the security and quality of the downloaded videos.
Now that we’ve looked at Option 2, let’s move on to Option 3: ripping and burning DVDs.
Option 3: Ripping and Burning DVDs
If you have a collection of YouTube videos that you want to download and burn to a DVD, a great option is to rip and burn the videos directly onto a DVD without converting them. This method is ideal if you want to maintain the original video quality and playback experience. Here’s how you can do it:
- Step 1: Download and install a DVD ripping software on your computer. There are both free and paid options available, so choose one that meets your needs.
- Step 2: Launch the DVD ripping software and insert the DVD into your computer’s DVD drive. Make sure the DVD contains the desired YouTube videos.
- Step 3: Select the appropriate settings in the DVD ripping software. You may be asked to specify the source DVD and destination folder for the ripped video files.
- Step 4: Begin the ripping process by clicking the appropriate button on the software. The software will extract the video files from the DVD and save them to your computer’s storage.
- Step 5: Once the videos are ripped, open your DVD burning software or download a reliable third-party DVD burning software.
- Step 6: Create a new DVD project using the DVD burning software and import the ripped YouTube video files into the project.
- Step 7: Customize the DVD menu and other settings as desired, and then proceed to burn the video files onto a blank DVD.
- Step 8: Follow the instructions provided by the DVD burning software to successfully burn the videos onto the DVD.
Ripping and burning DVDs directly allows you to preserve the original video quality and enjoy a seamless playback experience. However, keep in mind that this method may require specific DVD ripping software and might take more time compared to other options.
Now that we’ve explored Option 3, you have a variety of methods to choose from when it comes to downloading YouTube videos to a DVD. Depending on your preferences and requirements, you can select the option that suits you best.
Step 1: Downloading the YouTube Video
Downloading YouTube videos is the first step in the process of creating a DVD from the videos you want. This step allows you to save the videos onto your computer’s local storage so that you can later convert and burn them to a DVD. Here’s how you can do it:
- Option 1: Using Third-Party Software
- If you have chosen Option 1 and decided to use third-party software, follow the instructions provided by the software you have selected. Typically, you will need to copy the URL of the YouTube video you want to download and paste it into the software’s interface. From there, the software will handle the download process and save the video onto your computer.
- Option 2: Utilizing Online Downloader Services
- For Option 2, when using an online downloader service, first, visit the chosen online downloader website. Then, copy the URL of the YouTube video you wish to download and paste it into the provided input field on the website. Once you click the download button, the service will fetch the video from YouTube and save it to your computer’s storage.
- Option 3: Ripping and Burning DVDs
- If you have chosen Option 3 and prefer to rip and burn DVDs, the first step is to insert the DVD containing the YouTube videos into your computer’s DVD drive. Then, use your chosen DVD ripping software to extract the video files from the DVD. This process will save the videos onto your computer’s storage.
During the downloading process, it’s essential to consider the video quality and format that you want to download. Some software or online services may allow you to select the desired quality before initiating the download. This step ensures that you have the highest quality version of the YouTube video for later conversion and burning.
Now that the YouTube video is downloaded and saved on your computer, you can proceed to the next step, which is converting the video format to a format compatible with DVD players.
Step 2: Converting the Video Format
After downloading the YouTube video, the next step in creating a DVD is converting the video format. This is necessary because DVD players have specific format requirements and may not play certain file types directly. By converting the video format, you ensure compatibility with DVD players. Follow these steps to convert the video format:
- Option 1: Using Third-Party Software
- If you have chosen Option 1 and are using third-party software, open the software and locate the downloaded YouTube video in your computer’s storage. Look for the conversion or export feature in the software and select the desired output format that is compatible with DVD players, such as MPEG-2 or DVD-Video. Start the conversion process, and the software will convert the video file into the appropriate format for burning onto a DVD.
- Option 2: Utilizing Online Downloader Services
- In Option 2, if you are using an online downloader service, check if the service provides an option to convert the downloaded video file into a DVD-compatible format. Some online services may automatically convert the video file to a format suitable for DVD players during the download process. If not, you can use video conversion software or online converters to convert the downloaded video file to the desired DVD format.
- Option 3: Ripping and Burning DVDs
- If you have chosen Option 3 and decided to rip and burn DVDs directly, it is not necessary to convert the video format. The ripped video files are already in a compatible format for DVD players. However, if you prefer to convert the video format for any reason, you can use video conversion software to do so before proceeding to the DVD burning process.
When converting the video format, it is important to choose the appropriate output settings to ensure optimal playback quality on DVD players. Consider aspects such as video resolution, frame rate, and bitrate based on the capabilities of your DVD player. Additionally, you may want to customize other aspects like subtitles, audio format, and aspect ratio to suit your preferences.
Now that you have successfully converted the video format, you are ready for the final step: burning the video onto a DVD.
Step 3: Burning the Video onto a DVD
The final step in the process of creating a DVD from a downloaded YouTube video is burning the video onto a DVD. This step involves transferring the converted video file onto a blank DVD disc using DVD burning software. Follow these steps to burn the video onto a DVD:
- Option 1: Using Third-Party Software
- If you have chosen Option 1 and are using third-party DVD burning software, open the software and begin a new DVD project. Look for an option to import or add the converted video file into the project. Once the video file is added, you may have the option to customize the DVD menu, add subtitles, and make other adjustments. After completing the customization, insert a blank DVD disc into your computer’s DVD drive and proceed to burn the video file onto the disc using the software’s burn or create button.
- Option 2: Utilizing Online Downloader Services
- If you have chosen Option 2 and have utilized an online downloader service that also offers DVD burning capabilities, follow the instructions of the service to create a DVD project. Typically, you will need to upload the converted video file and customize the DVD menu if desired. Once the project is ready, the online service will guide you through the process of burning the video onto a blank DVD disc.
- Option 3: Ripping and Burning DVDs
- If you have chosen Option 3 and ripped the YouTube videos directly from a DVD, you can skip the burning step as the videos are already in the DVD format. However, if you have converted the video format and want to burn the videos onto a DVD, follow the steps mentioned earlier for Option 1 or Option 2.
During the DVD burning process, make sure to select the appropriate settings for your DVD project, such as the burning speed, disc label, and disc finalization options. These settings may vary depending on the DVD burning software or online service you are using.
Once the burning process is complete, you will have a DVD containing the downloaded YouTube video. Test the DVD on your DVD player to ensure that it plays correctly and enjoy your favorite YouTube videos on a DVD format.
Conclusion
Downloading YouTube videos and burning them onto a DVD allows you to enjoy your favorite content on a larger screen and share it with others. In this article, we have explored three options for downloading YouTube videos to a DVD: using third-party software, utilizing online downloader services, and ripping and burning DVDs.
Option 1 involves using third-party software, which provides a convenient way to download and convert YouTube videos. It allows for customization and optimization of the video format before burning it onto a DVD.
Option 2, utilizing online downloader services, offers a quick and hassle-free method to download YouTube videos directly from the web without the need for installing additional software. However, it’s important to use trusted and reliable online services to ensure the security and quality of the downloaded videos.
Option 3, ripping and burning DVDs, is a suitable solution for those who prefer to maintain the original video quality and playback experience. It requires DVD ripping and burning software and allows for direct conversion and burning of YouTube videos onto a DVD without the need for additional steps.
Regardless of the method you choose, always remember to comply with copyright laws and obtain the necessary rights or permissions to download and use YouTube videos. Respect the intellectual property of content creators and use video content responsibly.
Now that you have learned about these different options, you can choose the method that best fits your needs and preferences. Enjoy the process of creating your own DVD collection of favorite YouTube videos and elevate your viewing experience.