Introduction
Are you looking to download photos from your Samsung phone to your computer? Whether it’s for creating backups, freeing up space on your phone, or simply wanting to have your precious memories stored on multiple devices, transferring photos is a common need for many Samsung phone users. Luckily, the process is straightforward and doesn’t require any special technical skills.
In this article, we will guide you through the step-by-step process of downloading photos from your Samsung phone to your computer. By following these easy instructions, you’ll be able to access and save your photos in no time.
Before we begin, there are a few things you’ll need. Firstly, make sure you have a USB cable that can connect your Samsung phone to your computer. This is usually the same cable used for charging your phone. Additionally, ensure that your Samsung phone is charged and unlocked, as you’ll need to interact with it during the process.
Now, let’s get started with the first step: connecting your Samsung phone to a computer.
Step 1: Connect your Samsung phone to a computer
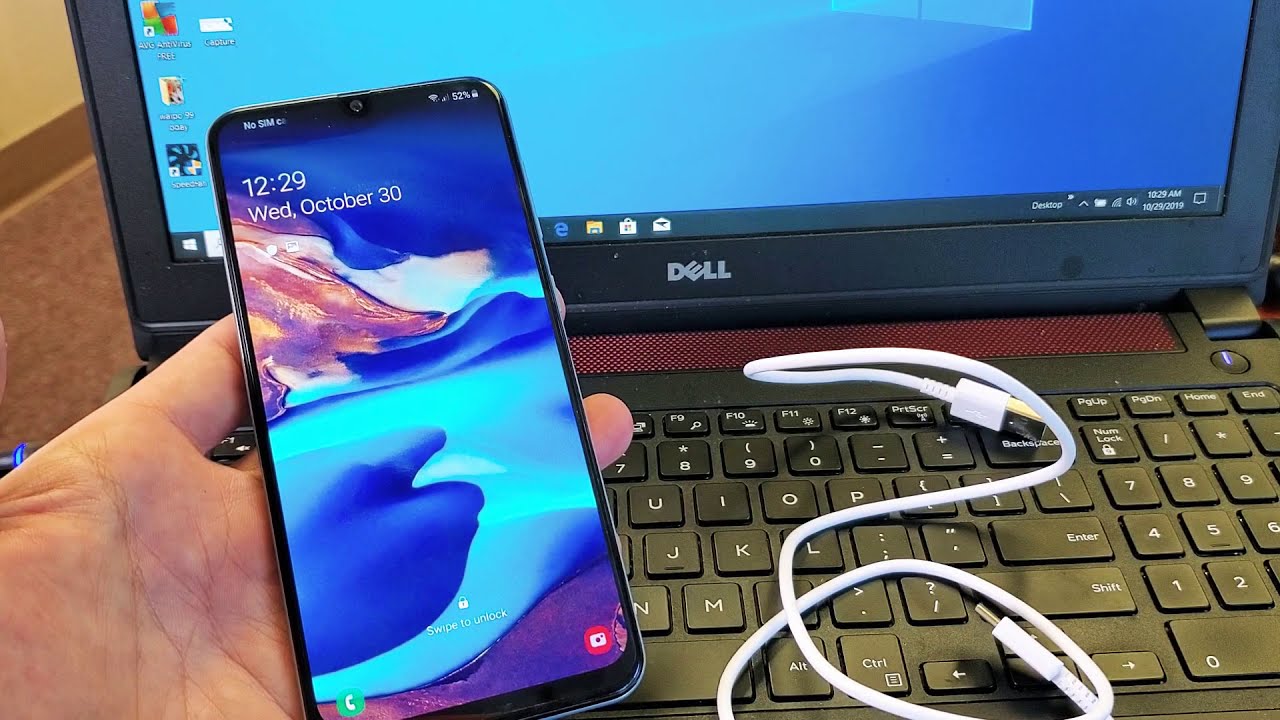
The first step in downloading photos from your Samsung phone is to establish a connection between your phone and a computer. To do this, you will need to use a USB cable.
Start by locating the USB port on your computer where you can plug in the cable. Once you’ve found it, take the USB cable that came with your Samsung phone and connect one end of it to the USB port on your computer.
Next, take the other end of the USB cable and carefully insert it into the charging port on your Samsung phone. Ensure that it is securely connected, as a loose connection may interrupt the data transfer process.
Now that your Samsung phone is physically connected to your computer, you’ll need to ensure that the two devices are communicating properly. On your Samsung phone, you may see a notification indicating that it is connected to a computer via USB. Open the notification panel by swiping down from the top of your phone’s screen and tap on the notification. Select the option that allows your phone to transfer files.
On your computer, you should also see a pop-up notification indicating that a new device has been connected. If prompted, choose the option that allows your computer to access the files on your Samsung phone.
Once the necessary permissions have been granted on both devices, you have successfully connected your Samsung phone to your computer. Now you can proceed to the next step of the process: opening the File Explorer or Finder.
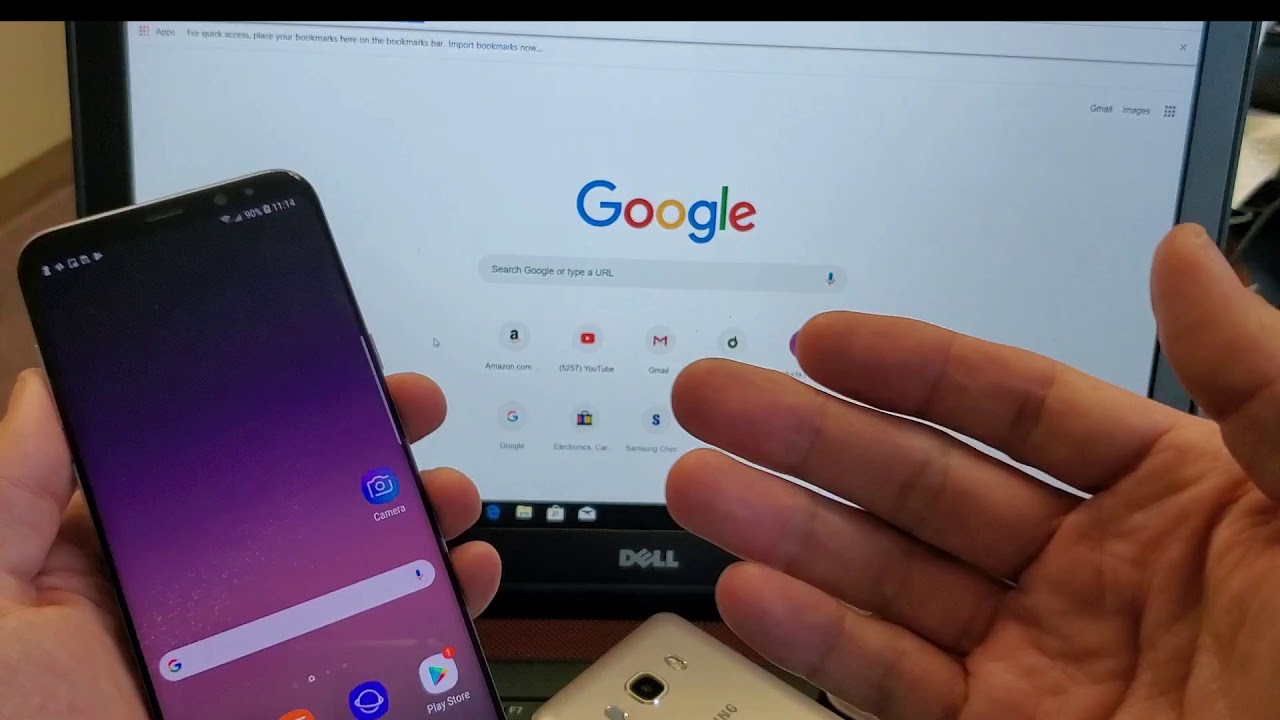
Step 2: Open the File Explorer or Finder
After connecting your Samsung phone to your computer, the next step is to open the File Explorer on a Windows computer or Finder on a Mac. These file browsing applications will allow you to navigate through the storage on your Samsung phone and access your photos.
If you are using a Windows computer, open the File Explorer by clicking on the folder icon in the taskbar or by pressing the Windows key and E on your keyboard simultaneously. The File Explorer window should now be displayed on your screen.
For Mac users, open the Finder by clicking on the Finder icon in the dock or by pressing Command + Spacebar and typing “Finder” in the Spotlight search. Once the Finder window appears, you’re ready to move on to the next step.
In the File Explorer or Finder window, you should see a list of available devices and drives on the left-hand side. Look for your Samsung phone’s name or icon and click on it to select it. This will give you access to the files and folders stored on your phone.
If you can’t find your Samsung phone listed, try disconnecting the USB cable and reconnecting it. It’s also a good idea to make sure your phone is unlocked and the screen is active. Sometimes, phones can be locked or in sleep mode, which may prevent them from being recognized by the computer.
Once you have successfully selected your Samsung phone in the File Explorer or Finder, you’re ready to move on to the next step: locating the DCIM folder.
Step 3: Locate the DCIM folder on your phone
Now that you have successfully opened the File Explorer or Finder and selected your Samsung phone, it’s time to locate the DCIM folder. The DCIM folder is where your photos are typically stored on your phone’s internal storage or SD card.
In the File Explorer or Finder window, you should see a list of folders and files. Look for the folder named “DCIM” and double-click on it to open it. This folder usually contains sub-folders named “Camera” or “Pictures” where your photos are stored.
If you don’t find the DCIM folder directly, it may be located within another folder. Browse through the folders on your phone until you locate the DCIM folder. Remember, the exact location may vary depending on your phone’s model and settings.
Once you have opened the DCIM folder and found the folder containing your photos (such as the “Camera” or “Pictures” folder), you can see a list of image files. These files represent your photos stored on your Samsung phone.
Take a moment to browse through the folders and preview the photos to ensure you have located the correct folder. You can also organize the photos in the folders, if necessary, before proceeding to the next step.
Now that you have successfully located the DCIM folder and the folder containing your photos, you’re ready to move on to the next step: copying the photos to your computer.
Step 4: Copy the photos to your computer
With the DCIM folder and the folder containing your photos open on your computer, you can now proceed to copy the photos from your Samsung phone to your computer.
To copy a single photo, simply click on the photo file to select it, then right-click and choose “Copy” from the context menu. Alternatively, you can use the shortcut key Ctrl + C (Command + C on Mac) to copy the selected photo.
If you want to copy multiple photos at once, hold down the Ctrl key (Command key on Mac) and click on each photo you want to copy. Once you have selected all the desired photos, right-click on one of the selected photos and choose “Copy” from the context menu.
Next, navigate to the desired location on your computer where you want to save the copied photos. This can be your desktop, a specific folder, or any other location of your choice.
Once you have reached the desired location, right-click and choose “Paste” from the context menu. Alternatively, you can use the shortcut key Ctrl + V (Command + V on Mac) to paste the copied photos to the selected location.
Depending on the number and size of the photos, the copying process may take some time. Be patient and avoid interrupting the process to ensure all photos are successfully transferred.
After the copying process is complete, you can verify that the photos have been successfully copied by navigating to the location where you pasted them on your computer. You should see the photos listed or displayed in the folder, ready for you to access and browse.
That’s it! You have successfully copied the photos from your Samsung phone to your computer. Now it’s time to move on to the final step: disconnecting your Samsung phone from the computer.
Step 5: Disconnect your Samsung phone from the computer
Now that you have successfully copied the photos from your Samsung phone to your computer, it’s important to safely disconnect your phone from the computer to avoid any data loss or corruption.
Before disconnecting the USB cable, make sure that any ongoing file transfers or operations involving your Samsung phone and computer are complete. This includes copying or moving files, as well as syncing or backing up any data.
To safely disconnect your Samsung phone from a Windows computer, locate the “Safely Remove Hardware and Eject Media” icon in the system tray. It may appear as a USB icon with a green checkmark. Click on this icon and select your Samsung phone from the list of devices. Once selected, a notification will appear indicating that it is safe to remove the USB cable.
For Mac users, there is no specific “safely remove” option. However, it is still important to ensure that all file transfers or operations involving your Samsung phone and computer are complete before disconnecting the USB cable.
Once you have completed these steps, gently remove the USB cable from both your Samsung phone and the computer. Be careful not to pull on the cable forcefully to avoid damage to the ports or cables.
With your Samsung phone safely disconnected from the computer, you can now access and enjoy the copied photos on your computer. You can edit, share, or organize them as desired, knowing that your original photos are safely backed up.
Remember to properly store and backup your photos on your computer or external storage to avoid any accidental loss or deletion.
That’s it! You have successfully downloaded your photos from your Samsung phone to your computer and safely disconnected your phone. Now you can enjoy your photos and have peace of mind knowing that they are safely stored on your computer.
Conclusion
Transferring photos from your Samsung phone to your computer is a simple process that allows you to have a backup of your precious memories and free up storage space on your phone. By following the steps outlined in this guide, you can easily download your photos and ensure their safety.
We started by connecting your Samsung phone to a computer using a USB cable, then proceeded to open the File Explorer or Finder to access the files on your phone. From there, we located the DCIM folder where your photos are stored and copied them to your computer.
Finally, we discussed the importance of safely disconnecting your Samsung phone from the computer to avoid any data loss or corruption.
Now that you have successfully transferred your photos, you can enjoy organizing, editing, and sharing them on your computer. Remember to regularly backup your photos to avoid losing them in case of any unforeseen events.
With this knowledge, you can confidently download photos from your Samsung phone anytime you need to. Whether it’s for creating backups, freeing up storage space, or simply organizing and accessing your photos more conveniently, transferring them to your computer is a practical solution.
We hope this guide has been helpful in assisting you with downloading photos from your Samsung phone to your computer. If you have any further questions or face any difficulties during the process, refer back to this guide or seek assistance from Samsung’s customer support.
Happy downloading!