Introduction
OneDrive is a popular cloud storage service provided by Microsoft, offering users a convenient way to store and access their files and photos from anywhere. If you have stored your precious memories and important photos on OneDrive, you might be wondering how to download them to your computer or mobile device so that you can have offline access or create backups. In this article, we will walk you through the step-by-step process of downloading photos from OneDrive.
Whether you are using the OneDrive website or the OneDrive app, the process of downloading photos is quite straightforward. You simply need to sign in to your OneDrive account, select the photos you want to download, choose the download location, and let OneDrive do the rest. In just a few easy steps, you’ll have your cherished photos saved to your device.
Downloading photos from OneDrive can be useful in various scenarios. For instance, you may want to create a local backup of your photos, especially if you are planning to delete them from your OneDrive account. Additionally, having offline access to your photos allows you to view and share them even when you don’t have an internet connection.
Now that you understand the importance of downloading photos from OneDrive and the benefits it offers, let’s dive into the step-by-step process. Whether you are using a Windows PC, a Mac, or a mobile device, we’ve got you covered. Follow the instructions provided in the upcoming sections based on your specific device and operating system, and you’ll be downloading your photos in no time.
Step 1: Sign in to OneDrive
Before you can start downloading photos from OneDrive, you need to sign in to your account. Whether you are using the OneDrive website or the OneDrive app, signing in is the first step towards accessing your photos.
If you are using the OneDrive website on your computer, open your preferred web browser and navigate to https://onedrive.live.com. Enter your Microsoft account email address and password in the provided fields, then click on the “Sign in” button.
If you are using the OneDrive app on your mobile device, launch the app and tap on the “Sign in” or “Log in” option. Enter your Microsoft account credentials and continue.
If you don’t have a Microsoft account, you can create one by clicking on the “Sign up” or “Create account” option on the login page. Follow the on-screen instructions to create your account and then sign in.
Once you have successfully signed in to your OneDrive account, you will gain access to all your stored files and photos. Now you are ready to proceed to the next step and select the photos you want to download.
Please note that it is important to ensure the security of your OneDrive account. Use a strong and unique password, enable two-factor authentication if available, and be cautious when using public computers to access your account.
Step 2: Select the photos you want to download
Once you have signed in to your OneDrive account, it’s time to choose the photos you want to download. OneDrive provides various options for selecting multiple photos at once, making the process efficient and convenient.
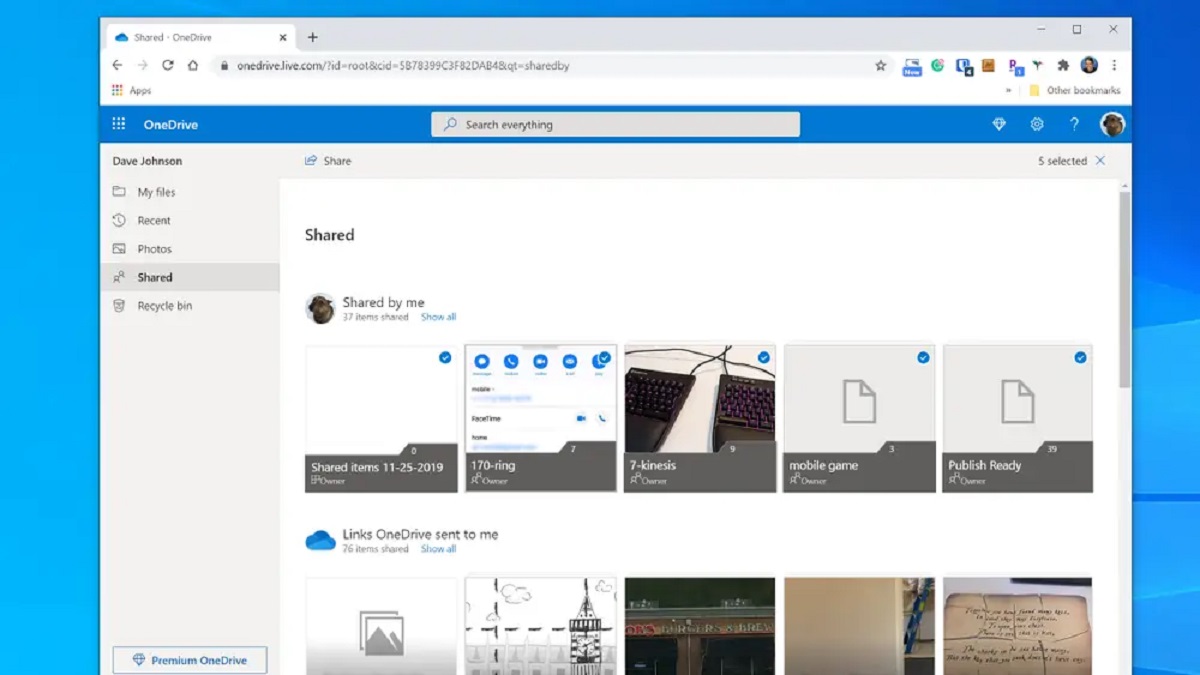
If you are using the OneDrive website, navigate to the folder where your photos are stored. You can click on the folder to open it and view the individual photos. To select multiple photos, hold down the Ctrl key on your keyboard (or Command key on a Mac) while clicking on each photo you want to download. Alternatively, you can use the Shift key to select a range of photos. Once you have made your selection, you will see a checkmark or a highlighted border around the selected photos.
On the OneDrive app for mobile devices, the selection process may vary slightly depending on your device and operating system. In general, you can tap on each photo to select it. Some mobile devices also offer the option to tap and hold on a photo, then drag your finger to select multiple photos at once.
If you have a large number of photos and find it difficult to navigate through your folders to select them, OneDrive provides a handy search feature. Simply enter keywords or file names in the search bar, and OneDrive will display the relevant results. You can then select the desired photos from the search results.
Make sure to double-check your selection and verify that all the photos you want to download are included. Once you are confident with your choices, you are ready to move on to the next step and start downloading your selected photos from OneDrive.
Remember, the process of selecting photos from OneDrive is flexible and can be customized based on your specific needs. Whether you want to download a few specific photos or a large collection, OneDrive has you covered with its intuitive selection options.
Step 3: Download photos from OneDrive
Now that you have selected the photos you want to download from OneDrive, it’s time to initiate the download process. Whether you are using the OneDrive website or the OneDrive app, the steps to download photos are simple and straightforward.
If you are using the OneDrive website on your computer, make sure you are still in the folder where your selected photos are located. Next, right-click on any of the selected photos and a context menu will appear. From the context menu, click on the “Download” or “Save” option. OneDrive will then create a ZIP file containing all the selected photos and start the download process. Once the download is complete, you can extract the photos from the ZIP file to access them on your computer.
On the OneDrive app for mobile devices, the process may differ slightly depending on your device and operating system. Generally, you can find a download or save option for your selected photos. This option might be represented by an icon, a menu item, or a swipe gesture. Tap on the appropriate option to start the download process. The photos will be saved directly to your device’s storage, typically in a designated folder.
Keep in mind that the download speed of your photos will depend on factors such as your internet connection speed and the file sizes of the selected photos. If you have a slow internet connection or are downloading a large number of photos, it may take some time for the process to complete. Be patient and let OneDrive handle the download process for you.
Once the download is finished, you can access the downloaded photos on your computer or mobile device. They will be saved in the location you specified during the download process. Now you have offline access to your photos, allowing you to view, edit, or share them without an internet connection.
Downloading photos from OneDrive is a quick and efficient way to ensure that you always have access to your precious memories, even when you are offline. With just a few clicks or taps, you can save your selected photos to your desired location and enjoy the convenience of offline access.
Now that you have successfully downloaded your photos from OneDrive, let’s move on to the final step and choose the download location.
Step 4: Choose the download location
After downloading your photos from OneDrive, it’s time to choose the location where you want to save them on your computer or mobile device. By default, OneDrive will typically save the downloaded photos in your device’s default Downloads folder, but you have the flexibility to specify a different location if desired.
If you are using the OneDrive website on your computer, you may have the option to choose the download location during the download process. After right-clicking on the selected photos and clicking on the “Download” or “Save” option, a dialog box may appear asking you to specify where you want to save the photos. Browse to the desired folder or create a new one, and click on the “Save” button to proceed. This allows you to organize your photos in a location that makes sense to you.
On the OneDrive app for mobile devices, the download location may be predetermined and set to your device’s default photo storage location. If you want to save the downloaded photos to a specific folder, you can typically transfer them to your desired location after the download is complete. Utilize your device’s file manager or gallery app to move the photos to the desired folder or create a new one for better organization.
Choosing the right download location is important to maintain an organized collection of your downloaded photos. Consider creating a dedicated folder for your OneDrive downloads or arranging them in a folder structure that aligns with your existing photo library. This will make it easier to find and manage your photos in the future.
Remember to periodically create backups of your downloaded photos to ensure their safety and avoid any potential data loss. You can use external hard drives, cloud storage services, or other backup methods to keep your photos secure and protected.
With your photos safely downloaded and stored in the location of your choice, you can now enjoy quick and convenient access to your cherished memories. Whether you plan to edit, share, or simply relive those special moments, having your photos readily available on your computer or mobile device gives you the flexibility you need.
Congratulations! You have successfully completed the process of downloading photos from OneDrive and choosing the download location. Now you can make the most of your offline photo collection and easily manage your digital memories.
Conclusion
Downloading photos from OneDrive is a straightforward process that allows you to have offline access to your cherished memories and important images. Whether you are using the OneDrive website or the OneDrive app, following a few simple steps will enable you to download and save your selected photos to your computer or mobile device.
In this article, we discussed the four essential steps to download photos from OneDrive. We started by signing in to your OneDrive account, ensuring that you have the necessary access to your files and photos. Next, we moved on to selecting the photos you want to download, using the convenient selection options provided by OneDrive. Then, we covered the actual downloading process from OneDrive, highlighting the different methods for downloading photos on both the website and the app. Finally, we emphasized the importance of choosing the right download location to keep your photos organized and easily accessible.
Remember to regularly back up your downloaded photos to avoid any loss of data. Additionally, take advantage of OneDrive’s various features like folder organization, search capabilities, and sharing options to enhance your photo management experience.
By following this guide, you can confidently download photos from OneDrive and enjoy the convenience of offline access to your precious memories. Whether you’re creating backups or just want to have your favorite photos readily available, downloading from OneDrive empowers you to take control of your digital photo collection.
So go ahead, sign in to your OneDrive account, select your desired photos, download them to your preferred location, and embark on a seamless journey of reliving your cherished memories whenever and wherever you want.