What Is OneDrive?
OneDrive is a cloud storage service provided by Microsoft that allows you to store and access your files and documents from anywhere and on any device. It seamlessly integrates with Windows 10, making it a convenient and efficient tool for file management and collaboration.
With OneDrive, you can store and sync your files, photos, and videos across multiple devices, such as your PC, laptop, tablet, and smartphone. It offers a generous amount of free storage space, with the option to upgrade to a premium plan for additional space.
OneDrive not only provides a secure and reliable storage solution, but it also offers a range of features that enhance productivity and collaboration. You can easily share files and folders with others, allowing for seamless cooperation on projects and documents. Additionally, OneDrive integrates with Microsoft Office applications, enabling you to create and edit documents online without the need for third-party software.
OneDrive also offers an automatic backup feature, ensuring that your valuable files are protected from accidental loss or device failure. It maintains a version history for your files, allowing you to restore previous versions if needed. Furthermore, OneDrive uses advanced encryption and security measures to protect your data, giving you peace of mind.
Whether you are a student, a professional, or a casual user, OneDrive provides a highly accessible and user-friendly platform for storing, organizing, and sharing files. Its seamless integration with Windows 10 makes it a powerful tool in today’s digital world, allowing you to work and collaborate more efficiently and effectively.
How Does OneDrive Work in Windows 10?
OneDrive works seamlessly with Windows 10, providing a smooth and integrated experience for managing and accessing your files. When you sign in to Windows 10 with your Microsoft account, OneDrive is automatically set up and ready to use.
OneDrive creates a dedicated folder on your computer called “OneDrive,” where you can easily store and organize your files. Any files you save within this folder are automatically synced and backed up to the cloud, ensuring that your data is always protected and accessible.
When you save a file to your OneDrive folder, it is automatically synchronized and available on all your devices, including other computers, tablets, and smartphones where you have signed in with your Microsoft account. This means you can access your files from anywhere, at any time, and from any device with an internet connection.
OneDrive uses a process called “selective sync,” which allows you to choose which folders or files you want to sync to each device. This feature is particularly useful if you have limited storage space on a specific device and need to prioritize certain files or folders.
In addition to accessing your files through the dedicated OneDrive folder, you can also access them through the OneDrive website or the OneDrive app. The website provides a convenient way to browse and manage your files online, while the app allows you to access and manage your files directly from your mobile devices.
OneDrive integrates seamlessly with other Microsoft Office applications, such as Word, Excel, and PowerPoint. This integration allows you to easily open, edit, and save documents directly to your OneDrive storage, ensuring that your files are always up to date and accessible across all devices.
Furthermore, OneDrive offers built-in search functionality, making it easy to find specific files or folders. You can search by file name, keywords, or even content within documents, saving you time and effort in locating the information you need.
Overall, OneDrive in Windows 10 provides a robust and efficient file storage and synchronization solution. It simplifies file management, eliminates the need for physical storage devices, and enables seamless access and collaboration across multiple devices and platforms.
Benefits of Using OneDrive in Windows 10
OneDrive offers a wide range of benefits for users of Windows 10, making it an invaluable tool for file management and collaboration. Here are some key advantages of using OneDrive:
- Easy Access and Syncing: OneDrive allows you to access your files from anywhere and on any device. Whether you’re using a PC, laptop, tablet, or smartphone, your files stay in sync, ensuring that you always have the latest version available to you.
- Seamless Integration: OneDrive seamlessly integrates with Windows 10, providing a native file storage solution. It is integrated into the operating system, making it easy to access, manage, and share your files without the need for additional software.
- Collaboration and Sharing: OneDrive makes it simple to share files and folders with others. You can easily control access permissions, allowing you to collaborate on documents, projects, or presentations with colleagues, friends, or family members.
- Version Control and File Recovery: OneDrive maintains a version history of your files, allowing you to recover previous versions if needed. This feature comes in handy if you need to revert changes or if you accidentally delete or overwrite a file.
- Automatic Backup: OneDrive provides automatic backup for your important files, ensuring that they are protected from data loss. If your device is lost, stolen, or damaged, you can rest easy knowing that your files are securely backed up in the cloud.
- Anywhere Collaboration: OneDrive enables seamless collaboration on documents through real-time co-authoring. Multiple users can edit a file simultaneously, allowing for efficient collaboration and eliminating the need for emailing back and forth.
- Extra Storage Space: OneDrive offers a generous amount of free storage space, with the option to upgrade to a premium plan for even more storage. This gives you plenty of room to store your files, photos, and videos without worrying about running out of space.
- Mobile Access and Offline Mode: OneDrive has mobile apps for iOS and Android devices, allowing you to access and manage your files on the go. You can even mark files for offline availability, ensuring that you can access them even without an internet connection.
These are just a few of the many benefits of using OneDrive in Windows 10. Whether you’re a student, a professional, or a casual user, OneDrive provides a convenient and secure way to store, access, and collaborate on your files from anywhere, at any time.
How to Access OneDrive in Windows 10?
Accessing OneDrive in Windows 10 is a straightforward process that gives you quick and convenient access to your files. Here are the steps to access OneDrive:
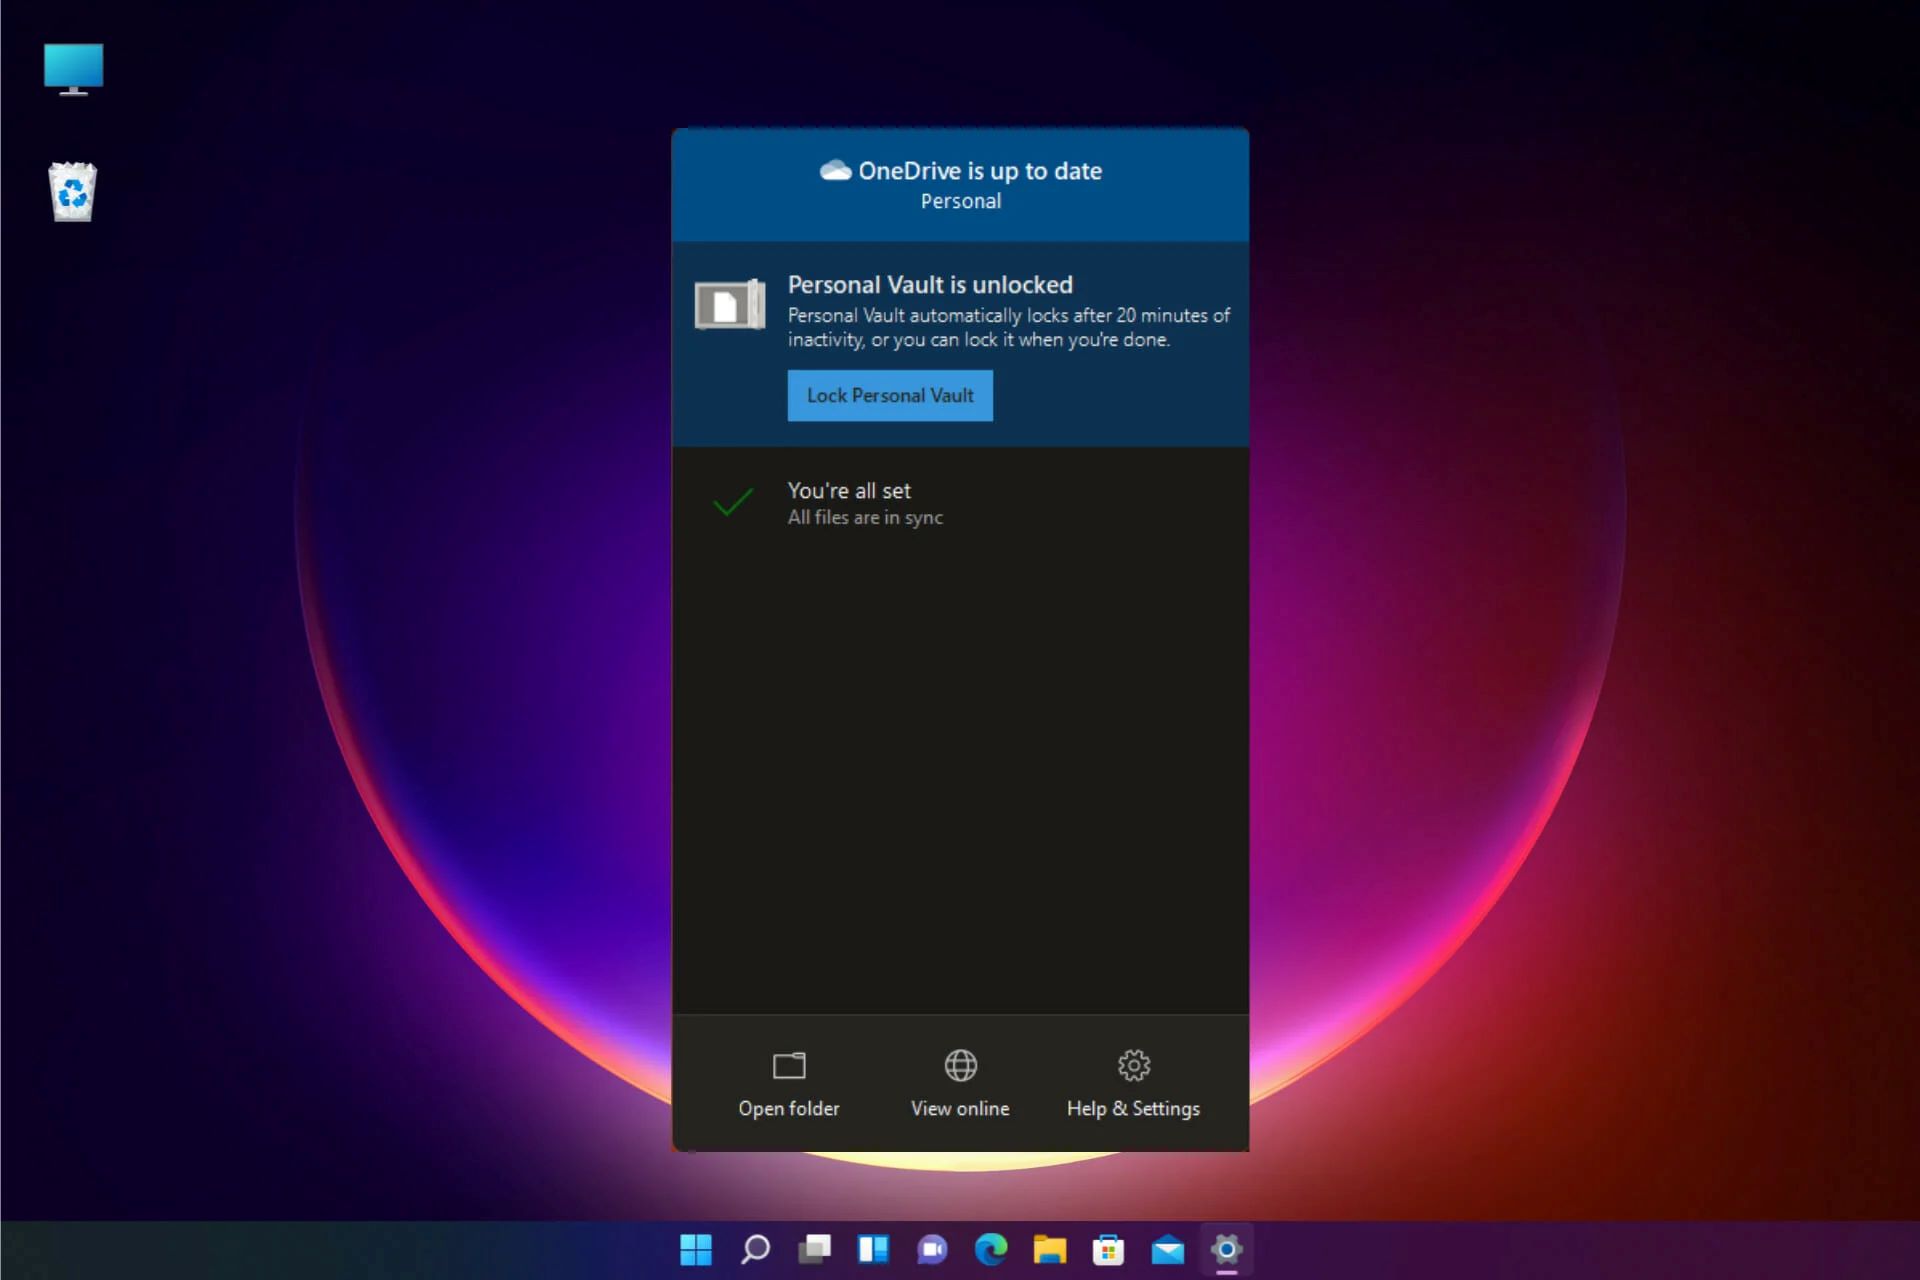
- Click on the OneDrive icon in the system tray located in the bottom right corner of the taskbar. If you don’t see the icon, click on the upward arrow to reveal all the hidden icons.
- A pop-up window will appear, displaying your OneDrive files and folders. You can scroll through the list to find the specific file or folder you want to access, or you can use the search bar at the top to search for a specific file by name or keyword.
- To open a file, simply double-click on it. This will open the file using the default associated application (e.g., Word for Word documents, Excel for Excel spreadsheets, etc.).
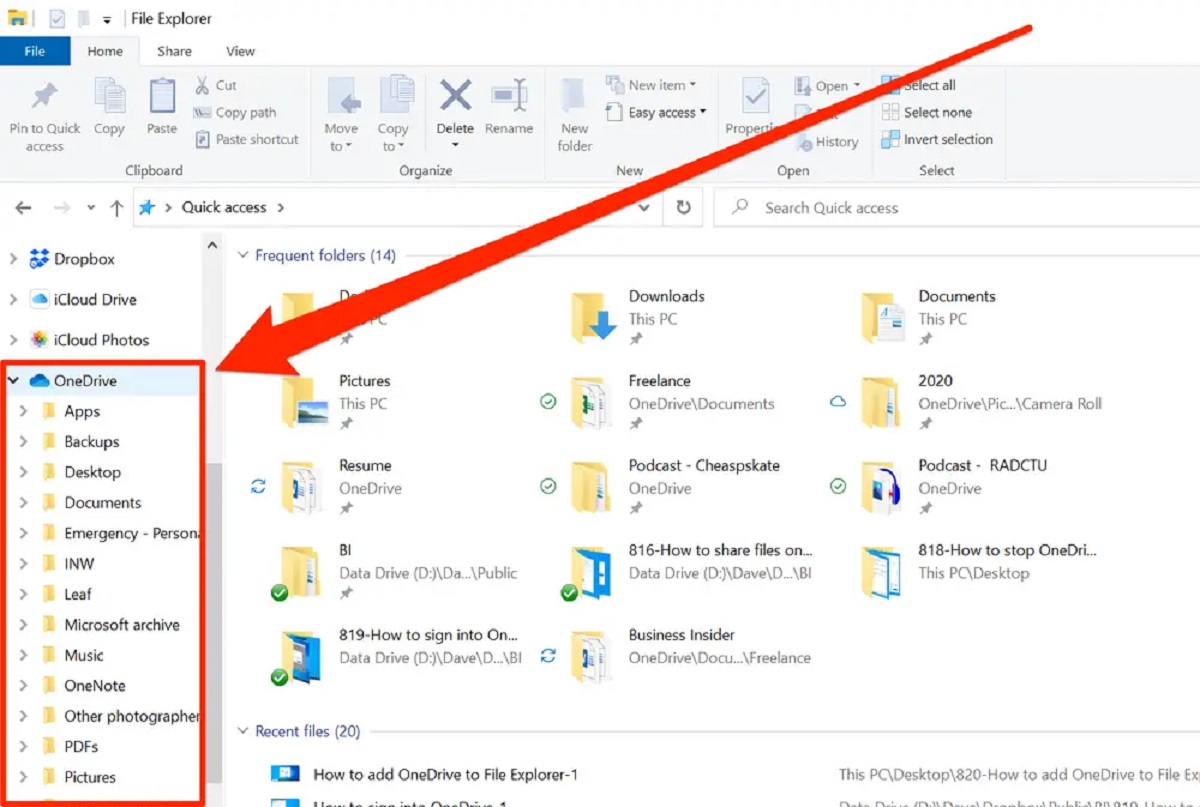
- If you want to access OneDrive files through the Windows File Explorer, open File Explorer by pressing the Windows key + E on your keyboard or by clicking on the File Explorer icon on the taskbar.
- In the left-hand pane of File Explorer, you will see a list of navigation links. Look for the “OneDrive” link and click on it to expand the list of folders and files in your OneDrive storage.
- You can now browse through your OneDrive files and folders in the main window of File Explorer. Double-click on a file to open it with the associated application, or right-click on a file or folder to access various options such as renaming, moving, copying, or deleting.
In addition to accessing OneDrive through the system tray icon and File Explorer, you can also access it through the OneDrive website or the OneDrive app on your mobile devices. Simply visit the website or launch the app, sign in with your Microsoft account, and you will be able to view and manage your files from there.
By following these simple steps, you can easily access your OneDrive files and enjoy the convenience and flexibility of having your files accessible from anywhere and on any device with Windows 10.
How to Set Up OneDrive in Windows 10?
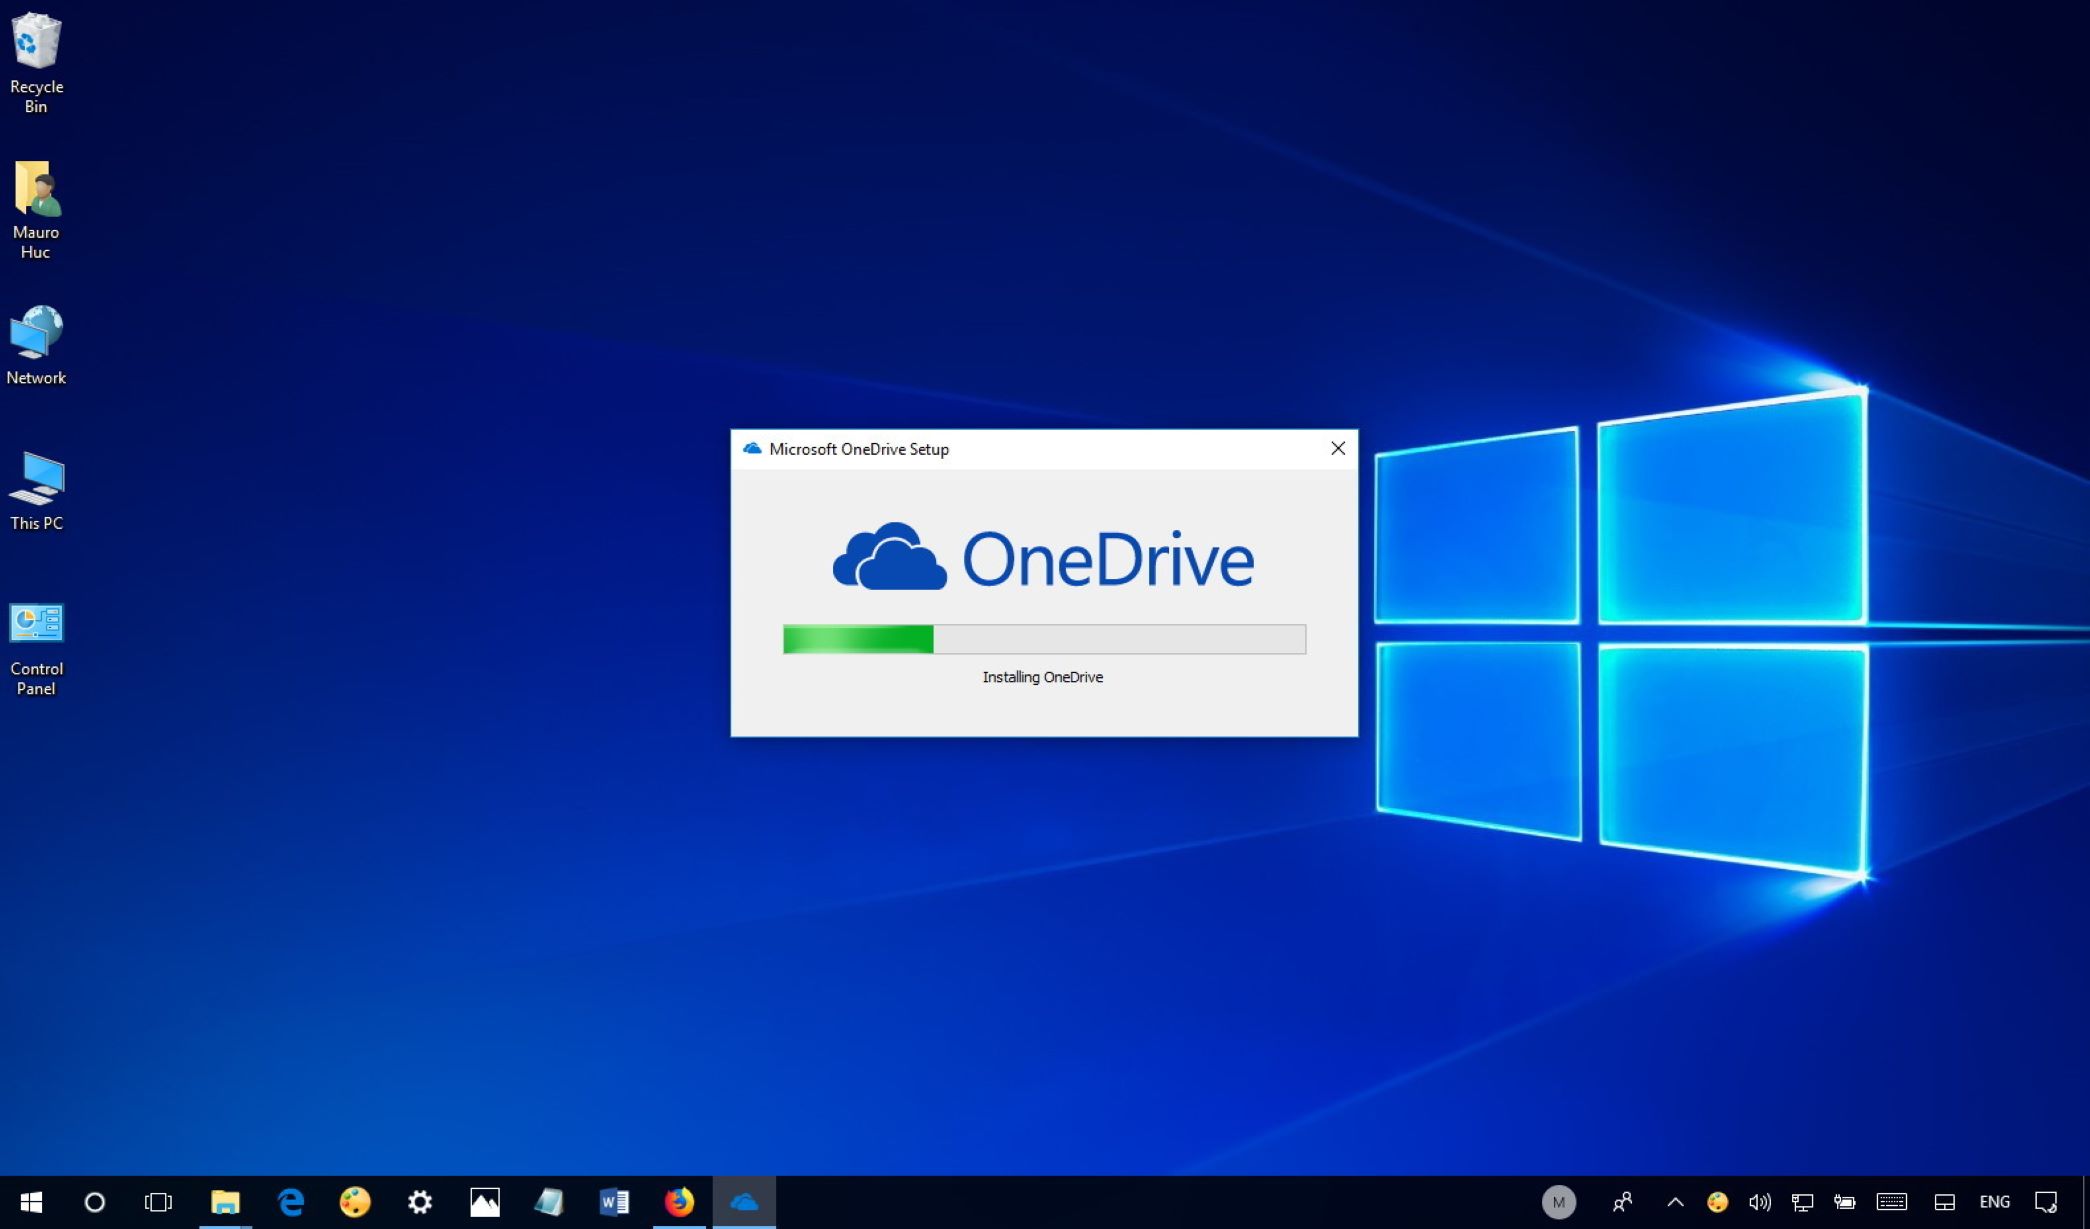
Setting up OneDrive in Windows 10 is a straightforward process that allows you to start using the cloud storage service in no time. Here are the steps to set up OneDrive:
- Click on the Start button in the taskbar, then type “OneDrive” in the search box. Click on the “OneDrive” application that appears in the search results.
- A “Welcome to OneDrive” window will open. Enter your Microsoft account email address and click “Sign in”. If you don’t have an account, click on the “Create one!” link to set up a new Microsoft account.
- Enter your password and click “Sign in”. If you have two-factor authentication enabled for your Microsoft account, follow the additional steps to complete the sign-in process.
- Next, you will be prompted to choose the folders you want to sync to your computer. By default, the “Sync all files and folders in OneDrive” option is selected. If you only want to sync specific folders, click on the “Choose folders” button and select the folders you want to sync. Click “Next” to proceed.
- In the next window, you can choose whether to enable the “Protect your important folders” feature. This feature will automatically back up your Desktop, Documents, and Pictures folders to OneDrive. Make your selection and click “Next”.
- OneDrive will now start syncing your selected files and folders to your computer. The progress of the initial sync will be displayed, and you can close the setup window once the sync is complete.
Once OneDrive is set up, you can access your files and manage your storage through the OneDrive folder on your computer or via the OneDrive website or app. Any changes you make to files within the OneDrive folder will automatically be synced to the cloud and to any other devices linked to your account.
To check the status of the OneDrive sync, simply click on the OneDrive icon in the system tray. A small pop-up window will display the sync status, including any pending uploads or downloads.
Setting up OneDrive in Windows 10 is a quick and easy process that allows you to take full advantage of the cloud storage service and seamlessly access your files from any device.
How to Add and Sync Files in OneDrive?
Adding and syncing files in OneDrive is a simple process that ensures your files are always up to date across all your devices. Here’s how you can add and sync files in OneDrive:
- To add files to OneDrive from your computer, open the File Explorer by pressing the Windows key + E or by clicking on the File Explorer icon on the taskbar.
- Navigate to the folder where you want to add the files in your OneDrive storage.
- Simply drag and drop the files from your local computer to the desired folder in the OneDrive folder. Alternatively, you can right-click on the file, select “Copy,” navigate to the OneDrive folder, right-click inside the folder, and choose “Paste.”
- The files will now be uploaded to your OneDrive storage and automatically synced across all your devices linked to your account.
- If you want to add files to OneDrive from the web, open the OneDrive website and sign in with your Microsoft account.
- Click on the “Upload” button and select “Files” or “Folders” from the drop-down menu.
- Navigate to the location of the files or folders on your computer and select the ones you want to upload. Click “Open” to start the upload process.
- Once the upload is complete, the files will be available in your OneDrive storage and synced to your other devices.
To ensure that your files are always synced, make sure that you are connected to the internet and that your OneDrive application is running in the background. Any changes you make to files within the OneDrive folder, such as modifying, renaming, or deleting files, will automatically be synced to the cloud and to your other devices.
It’s important to note that the syncing process may take some time, especially for large files or if you have a slow internet connection. You can check the status of the sync by clicking on the OneDrive icon in the system tray, which will display any pending uploads or downloads.
By following these steps, you can effortlessly add and sync files in OneDrive, ensuring that your important files are always accessible and up to date across all your devices.
How to Share Files and Folders on OneDrive?
OneDrive makes it easy to share files and folders with others, allowing for seamless collaboration and efficient sharing of information. Here’s how you can share files and folders on OneDrive:
- Open the OneDrive website or navigate to the OneDrive folder on your computer using File Explorer.
- Locate the file or folder you want to share and right-click on it.
- In the context menu that appears, select “Share” to open the sharing options.
- A dialog box will appear, prompting you to enter the names or email addresses of the people you want to share the file or folder with.
- You can choose whether to allow the recipients to edit the file or folder or only view it. To grant editing permissions, check the “Allow editing” box.
- If you want to add a personalized message to the recipients, you can enter it in the “Message” field.
- Click on the “Send” button to share the file or folder. The recipients will receive an email notification with a link to access the shared file or folder.
- Alternatively, if you are using the OneDrive website, you can click on the “Copy link” button to copy the link to the clipboard. You can then manually share the link with others through email or other communication channels.
If you want to share a file or folder with a large group of people or with people who may not have a Microsoft account, you can create a sharing link that allows anyone with the link to access the file or folder. To create a sharing link, follow these steps:
- Open the OneDrive website or navigate to the OneDrive folder on your computer using File Explorer.
- Locate the file or folder you want to share and right-click on it.
- In the context menu that appears, select “Share” to open the sharing options.
- In the sharing options dialog box, click on the “Copy link” button. The link will be copied to your clipboard.
- You can then share the link with others through email, messaging apps, or any other platform. Anyone with the link will be able to access the shared file or folder.
By following these simple steps, you can easily share files and folders on OneDrive, enabling collaboration and seamless sharing of information with others.
How to Collaborate on Documents with OneDrive?
OneDrive offers robust collaboration features that allow users to work together on documents in real time, making it easy to collaborate and streamline the document creation process. Here’s how you can collaborate on documents with OneDrive:
- Open the OneDrive website or navigate to the OneDrive folder on your computer using File Explorer.
- Locate the document you want to collaborate on and double-click to open it.
- The document will open in the associated Office application, such as Word, Excel, or PowerPoint, either online or in the desktop application, depending on your settings.
- While working on the document, you can make edits, add comments, and format the content as needed.
- To collaborate with others, click on the “Share” button located in the top-right corner of the document editing interface.
- In the sharing options dialog box, enter the names or email addresses of the people you want to collaborate with. You can also choose whether to allow editing or only viewing access.
- Optionally, you can add a message in the “Message” field to provide context or instructions to the collaborators.
- Click on the “Send” button to invite the collaborators. They will receive an email notification with a link to access the document.
- You and your collaborators can now work on the document simultaneously. Any changes made by one person will be reflected in real time for everyone else viewing or editing the document.
- Collaborators can add comments or reply to existing comments, facilitating discussions and feedback on specific parts of the document.
- All changes and comments made by different collaborators are tracked and attributed to each individual, providing an organized view of the document history.
- Collaborators can also see each other’s cursors, facilitating real-time communication and awareness of who is working on what part of the document.
By leveraging the collaboration features of OneDrive, you can effectively work together with others on documents, enhance productivity, and streamline the document creation process.
How to Restore Previous Versions of Files using OneDrive?
OneDrive provides a convenient feature that allows you to restore previous versions of files, giving you the flexibility to revert changes or recover accidentally deleted or overwritten content. Here’s how you can restore previous versions of files using OneDrive:
- Open the OneDrive website or navigate to the OneDrive folder on your computer using File Explorer.
- Locate the file for which you want to restore a previous version.
- Right-click on the file and select “Version history” from the context menu. This will open the Version history pane, showing a list of available versions of the file.
- Scroll through the list to find the specific version you want to restore. The version history includes the date and time of each version’s creation, as well as who made the changes.
- Click on the version you want to restore. You will have the option to either open the selected version to view it or to restore it.
- If you choose to open the version, it will open in the associated application, such as Word, Excel, or PowerPoint, allowing you to view the content and compare it with the current version.
- If you decide to restore the version, click on the “Restore” button. The selected version will replace the current version of the file, and the changes made in that version will be applied.
- Once you have restored the previous version, it will become the current version of the file, and any subsequent changes made will create new versions.
- If you change your mind and want to revert back to the most recent version, you can repeat the process and select the latest version from the Version history pane.
It’s important to note that the version history feature in OneDrive is not limited to just the most recent versions. It allows you to access and restore older versions to meet your specific needs.
This feature can be particularly useful if you accidentally delete or modify a file or if you need to refer back to an earlier version for comparison or retrieval of specific content.
By following these steps, you can easily restore previous versions of files using OneDrive, giving you enhanced control over your files and ensuring that you can recover or revert changes when needed.
How to Free Up Storage Space in OneDrive?
If you’re running low on storage space in your OneDrive account, there are several strategies you can employ to free up space and optimize your storage. Here are some effective ways to free up storage space in OneDrive:
- Delete Unnecessary Files: Review your files and remove any unnecessary documents, photos, or videos that you no longer need. You can select multiple files at once for efficient deletion.
- Empty the Recycle Bin: Deleted files are sent to the OneDrive Recycle Bin, where they continue to occupy storage space. Emptying the Recycle Bin will permanently delete these files and free up storage space.
- Enable Files On-Demand: If you have Windows 10, you can enable Files On-Demand, which allows you to access files in your OneDrive without downloading them locally. This can help save storage space on your device.
- Compress Files and Folders: Compressing larger files and folders can reduce their file size, freeing up valuable storage space. Right-click on the file or folder, select “Send to,” and choose “Compressed (zipped) folder.”
- Move Files to External Storage: Consider moving less frequently accessed files to external storage devices, such as external hard drives or USB flash drives, to free up space in your OneDrive.
- Use the OneDrive Folder Cleanup: OneDrive offers a handy feature called Folder Cleanup that helps identify and remove duplicate files, outdated documents, and unused files. To access it, go to the OneDrive website, select “Files” view, and click on “Folder Cleanup” in the header.
- Optimize Photo and Video Storage: OneDrive offers an option to automatically optimize and store photos and videos in a smaller size, saving storage space. To enable this feature, go to the OneDrive settings and enable “Convert uploaded photos to quicker-to-load formats.”
- Offload Files to Archive or Cloud Storage: For files that you rarely access but want to keep for long-term storage, consider moving them to an archive or cloud storage solution, such as Azure Archive Storage or another cloud service.
By implementing these strategies, you can effectively free up storage space in your OneDrive account, ensuring that you have ample room for your important files while optimizing the storage capacity.
Frequently Asked Questions (FAQs) about OneDrive in Windows 10
Here are some frequently asked questions about OneDrive in Windows 10:
-
- Q: What is OneDrive?
OneDrive is a cloud storage service provided by Microsoft that allows you to store, access, and sync your files across multiple devices.
-
- Q: How much storage space do I get with OneDrive?
By default, you get 5 GB of free storage space with OneDrive. However, you can upgrade to a premium plan for additional storage, starting at 100 GB and going up to 6 TB.
-
- Q: Can I access OneDrive without an internet connection?
While an internet connection is generally required to access and sync your files in OneDrive, you can mark files for offline availability. This allows you to access them even without an active internet connection.
-
- Q: Can I share files with people who don’t have a Microsoft account?
Yes, you can create sharing links for files or folders in OneDrive that can be accessed by anyone, even if they don’t have a Microsoft account. You have control over the permissions and access level for these links.
-
- Q: Can I collaborate with others on documents in OneDrive?
Yes, OneDrive provides collaboration features that allow you to work together on documents in real time. Multiple users can simultaneously edit and make changes to a document, facilitating seamless collaboration.
-
- Q: Is OneDrive secure?
OneDrive uses advanced security measures, including encryption and multi-factor authentication, to protect your files and data. Microsoft also regularly updates and monitors its systems to ensure security.
-
- Q: How can I access my OneDrive files on a different device?
You can access your OneDrive files on any device by signing in to your Microsoft account and syncing your files. Your files will be available on that device once the synchronization is complete.
-
- Q: Can I restore deleted files in OneDrive?
Yes, OneDrive keeps deleted files in the Recycle Bin for a certain period of time. You can restore deleted files from the Recycle Bin or use the version history feature to restore previous versions of files.
-
- Q: Can I create backups of my files with OneDrive?
While OneDrive is primarily a file storage and synchronization service, it does offer backup functionality for certain folders like Desktop, Documents, and Pictures. These folders are automatically backed up to OneDrive.
-
- Q: Can I access OneDrive on my mobile devices?
Yes, there are OneDrive mobile apps available for iOS and Android devices. You can download these apps from the respective app stores to access and manage your OneDrive files on your mobile devices.
These are some common questions related to OneDrive in Windows 10. If you have any further questions or concerns, you can refer to Microsoft’s official documentation or customer support for more information.