Introduction
Streaming your gameplay on Twitch can be a thrilling experience, but what if you want to save and rewatch those amazing moments whenever you like? Luckily, Twitch provides a straightforward way to download your past streams, allowing you to keep a permanent copy and share it with others. Whether you want to relive a victorious battle, analyze your gameplay, or create highlight reels for your online community, downloading your Twitch stream is a valuable option to have.
In this article, we will guide you through the step-by-step process of downloading your Twitch stream. Whether you’re a seasoned Twitch creator or new to the platform, you’ll find the instructions easy to follow and implement. You’ll learn how to navigate Twitch’s Creator Dashboard, locate your past broadcasts, choose the desired quality, and download the video to your device. Additionally, we will provide an optional step to convert the file format, should you need it.
Before we dive into the details, it’s essential to note that downloading your Twitch stream is only possible for past broadcasts and not for live streams. So, make sure that you have already streamed the content you want to download. Now, let’s get started and learn how to download your Twitch streams hassle-free.
Step 1: Sign in to Twitch
The first step to downloading your Twitch stream is signing in to your Twitch account. Open a web browser and visit the Twitch website (www.twitch.tv). If you don’t have an account yet, you’ll need to create one by clicking on the “Sign Up” button and following the registration process.
Once you have an account, click on the “Log In” button located at the top-right corner of the Twitch homepage. Enter your username or email address and your password, then click on the “Log In” button again to access your Twitch account.
It’s important to note that the process may vary slightly if you have enabled two-factor authentication for your Twitch account. In such cases, you’ll need to enter a verification code sent to your registered email or phone number before gaining access to your account.
After successfully signing in, you’ll be redirected to your Twitch home screen. This is where you can access all the features, settings, and information related to your Twitch account. Now that you’re signed in, you’re ready to move on to the next step and access your Creator Dashboard.
Step 2: Access Your Creator Dashboard
Once you’re signed in to Twitch, the next step is to access your Creator Dashboard. The Creator Dashboard is a centralized hub where you can manage your Twitch account, view analytics, and access various creator tools.
To access your Creator Dashboard, click on your profile picture located at the top-right corner of the Twitch homepage. A drop-down menu will appear, and you’ll find the “Creator Dashboard” option. Click on it, and you’ll be taken to your Creator Dashboard page.
Alternatively, if you’re already on your Twitch home screen, you can click on your profile picture at the top-right corner and select the “Dashboard” option from the drop-down menu. This will also take you to your Creator Dashboard.
Once you’re on your Creator Dashboard, you’ll have access to a range of features and tools that enable you to manage and optimize your Twitch channel. Take some time to familiarize yourself with the various tabs and options available, such as Stream Manager, Preferences, Channel Analytics, and more.
Now that you’ve successfully accessed your Creator Dashboard, you’re ready to proceed to the next step and locate your past broadcasts, where you can find the Twitch stream that you want to download.
Step 3: Locate Your Past Broadcasts
To download your Twitch stream, you need to locate your past broadcasts. Past broadcasts are the recorded versions of your live streams that are saved on Twitch for a limited period of time, typically for 14 to 60 days depending on your account type.
To find your past broadcasts, go back to your Creator Dashboard. In the left-hand menu, you’ll see a tab labeled “Content”. Click on it to expand the menu and reveal additional options. Look for the “Videos” section and click on “All Videos”. This will take you to the Videos page, where you can find all your past broadcasts as well as other video content you have created.
On the Videos page, you’ll see a list of all your videos arranged in chronological order, with the newest ones at the top. Look for the videos with the “Past Broadcast” label, indicating that they are the recorded versions of your live streams. You may need to scroll down or use the search bar to find specific past broadcasts if you have a large library of videos.
If you’re having trouble locating a specific past broadcast, you can use the search bar at the top of the Videos page. Enter keywords or the title of the stream you’re looking for, and Twitch will filter the results based on your search query.
Once you have found the past broadcast you want to download, you’re ready to proceed to the next step and start the downloading process. Make sure to select the correct video before moving forward to avoid downloading the wrong stream.
Step 4: Select the VOD to Download
Now that you’ve located your past broadcasts on Twitch, it’s time to select the specific one you want to download. Before diving into the download process, ensure that you’ve identified the correct video and that it contains the content you wish to obtain.
On the Videos page, you’ll see a thumbnail preview of each past broadcast. Click on the thumbnail of the video you want to download, and a new page will open, displaying the details of that particular stream.
Take a moment to review the video details, including the title, date and time of the stream, duration, and any relevant tags or descriptions. This step is crucial to ensure that you’ve chosen the right content, especially if you have multiple past broadcasts.
If you’re still unsure about selecting the correct video, you can use the playback controls on the video player to preview the content. You can scrub through the video timeline or even watch a portion of it to confirm that it’s the one you intend to download.
Once you’ve confirmed that the selected video is the one you want, proceed to the next step and click on the “Download” button to initiate the download process. Remember that the availability of the “Download” option may vary depending on your account settings and the video’s status on Twitch.
Now that you’ve selected the specific video for download, let’s move on to the next step and learn how to proceed with downloading your Twitch stream.
Step 5: Click on the “Download” button
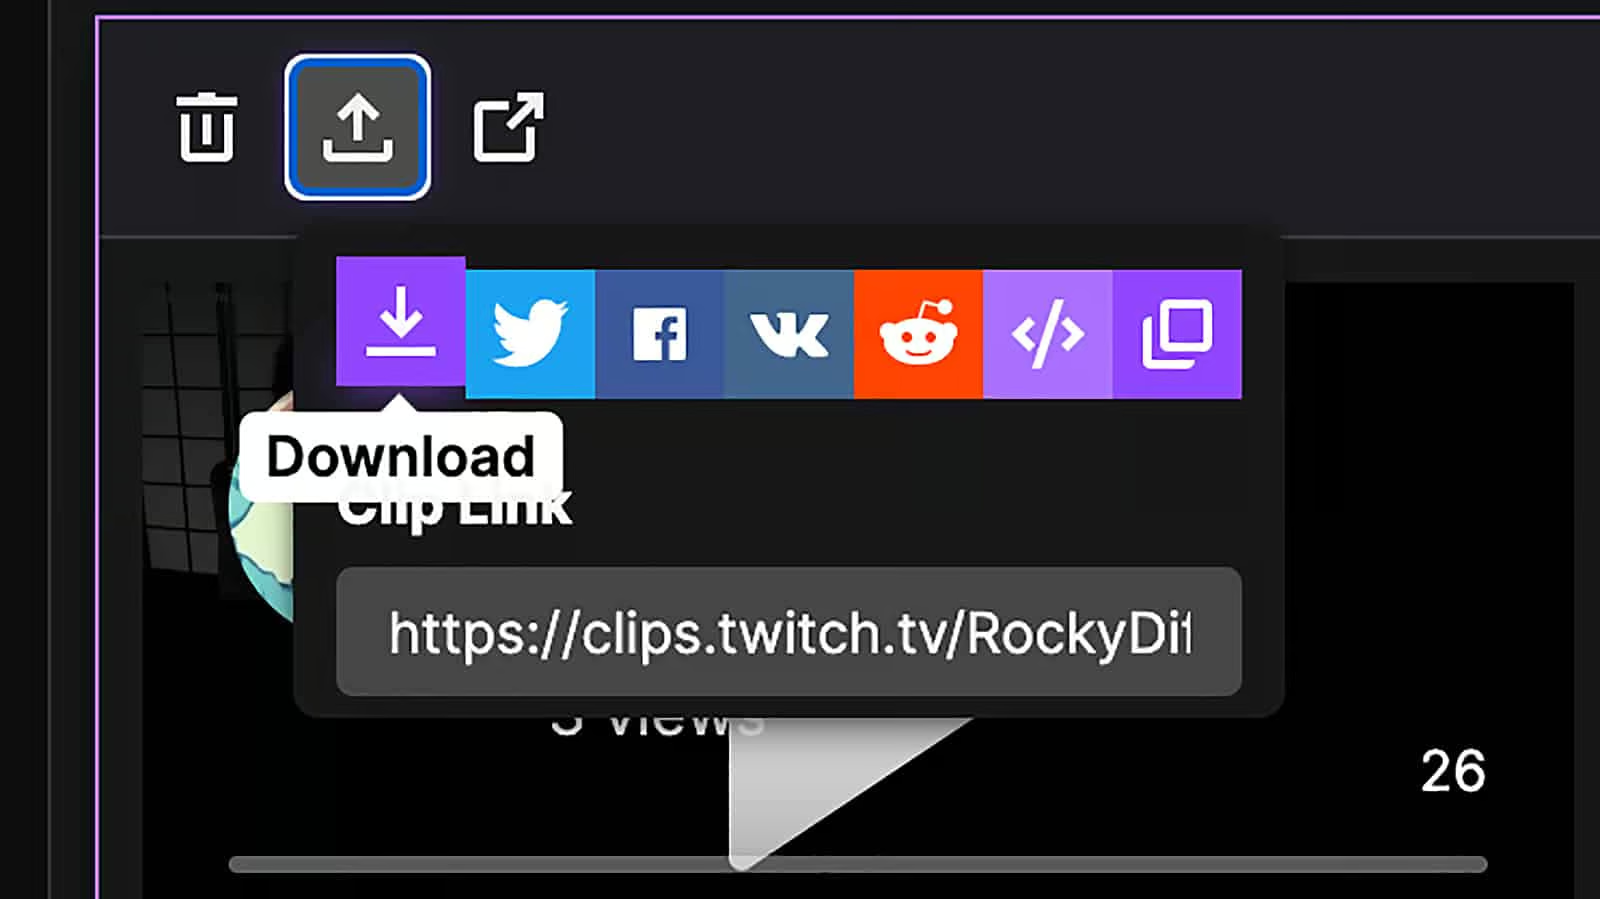
After selecting the specific past broadcast you want to download, the next step is to click on the “Download” button to initiate the download process. This button allows you to save a copy of your Twitch stream directly to your device.
On the details page of the selected video, you’ll find the “Download” button located below the video player. It’s usually accompanied by an icon or text indicating that it’s the download option. Click on this button to proceed with the download.
When you click on the “Download” button, a pop-up window may appear asking you to confirm the download or choose the desired quality for the downloaded video. This step allows you to select the resolution or quality in which you want to save your Twitch stream.
Depending on the options provided, you may see different quality settings, such as 720p, 1080p, or even higher resolutions. Choose the quality that suits your needs by clicking on the corresponding option.
After selecting the desired quality, the download process will begin. You’ll see a progress indicator or a download icon, indicating that the video is being transferred from Twitch to your device. The time it takes to complete the download will depend on the size of the video and the speed of your internet connection.
It’s important to note that once you click on the “Download” button, the process may vary slightly depending on your preferred web browser and its settings. In some cases, the video may start playing instead of initiating the download. If this happens, you can right-click on the video player and select the “Save video as” or “Save video as…” option to manually start the download.
Now that you’ve clicked on the “Download” button, the Twitch stream is being downloaded to your device. In the next step, we’ll discuss what to do once the download is complete and how to access your downloaded Twitch stream.
Step 6: Choose the Desired Quality
Once you click on the “Download” button to initiate the download process for your Twitch stream, you may have the option to choose the desired quality for the downloaded video. Selecting the appropriate quality allows you to have control over the file size and resolution of the downloaded content.
After clicking on the “Download” button, a pop-up window may appear, presenting you with different quality options for the download. The available quality settings will depend on the original broadcast’s resolution and the settings of your Twitch account.
Look for the quality options provided, which are typically denoted by the resolution, such as 720p, 1080p, or even higher resolutions. Choose the quality that suits your requirements and preferences for the downloaded Twitch stream.
Keep in mind that higher quality settings generally result in larger file sizes, while lower quality settings may sacrifice some video clarity. Consider your storage limitations and the intended use of the downloaded Twitch stream when selecting the quality. If you plan to view the stream on a smaller device or share it online, a lower quality may be sufficient. However, if you want to preserve the highest level of detail, opt for a higher quality setting.
Once you’ve chosen the desired quality, proceed with the download by confirming your selection or clicking the appropriate button in the pop-up window. The download will start, and you’ll see a progress indicator or download icon, indicating that the Twitch stream is being saved to your device.
Please note that the available quality options and the appearance of the pop-up window may vary depending on your web browser and Twitch account settings. In some cases, the download may begin automatically without the need to choose a particular quality setting.
Now that you’ve selected the desired quality for your Twitch stream download, you’re one step closer to accessing your downloaded Twitch stream. In the next step, we’ll discuss what to do while waiting for the download to complete.
Step 7: Wait for the Download to Complete
After choosing the desired quality for your downloaded Twitch stream, you’ll need to wait for the download process to complete. The time required for the download to finish will depend on various factors, including the size of the video file and the speed of your internet connection.
During the download process, you’ll typically see a progress indicator or download icon indicating that the Twitch stream is being transferred from the Twitch servers to your device. The indicator may display the remaining time, percentage completed, or a visual representation of the download progress.
While waiting for the download to complete, it’s advisable to ensure a stable internet connection. This will help prevent any interruptions or inconsistencies in the download process that could potentially affect the quality of the downloaded Twitch stream.
It’s important to note that the download speed may vary depending on your internet service provider and network congestion. If you have a slow or unstable internet connection, the download process may take longer than anticipated. In such cases, exercise patience and resist the temptation to interrupt or cancel the download prematurely.
Once the download is complete, you’ll receive a notification or see an indication that the Twitch stream has been successfully saved to your device. At this point, you can proceed to the next step and access your downloaded Twitch stream to enjoy or utilize it as desired.
Remember to avoid closing your web browser or shutting down your device while the download is in progress, as this could interrupt the process and potentially result in an incomplete or corrupted file. It’s recommended to wait until the download is fully finished before navigating away from the page or closing any browser tabs related to the download.
Now that you’ve patiently waited for the download to complete, let’s move on to the next step and learn how to access your downloaded Twitch stream.
Step 8: Access Your Downloaded Twitch Stream
Congratulations on successfully downloading your Twitch stream! Now, let’s learn how to access the downloaded video on your device and enjoy watching or utilizing it as desired.
By default, downloaded files are saved to a specific location on your device, typically in the “Downloads” folder. To access your downloaded Twitch stream, navigate to the folder where your downloads are saved. This can be done through the file explorer or by clicking on the appropriate icon on your device’s desktop or taskbar.
Once you’ve located the “Downloads” folder or the folder where the Twitch stream is saved, you should see the downloaded video file listed. The file name is usually similar to the original title of the stream or may be in a format specific to the Twitch video download process.
To open and play the downloaded Twitch stream, simply double-click on the video file. This will launch your default media player or the application associated with the file format. If your media player does not automatically open, you can right-click on the file and select “Open With” to choose a media player from the available options.
Once the video player opens, you can watch your downloaded Twitch stream as you would any other video file. Use the playback controls to pause, play, fast-forward, or rewind the video according to your preferences. Enjoy reliving your gameplay moments, analyzing your performance, or showcasing highlights to your audience.
It’s worth noting that the specific steps for accessing and playing the downloaded Twitch stream may vary depending on your operating system and the media player you have installed. If you encounter any difficulties, refer to the documentation or help resources provided by your device’s manufacturer or the media player’s developer for further assistance.
You now have access to your downloaded Twitch stream, allowing you to enjoy and utilize the content offline. In the next step, we’ll discuss an optional step of converting the file format, which may be useful depending on your specific needs or requirements.
Step 9: Optional: Convert the File Format
In some cases, you may find it necessary or beneficial to convert the file format of your downloaded Twitch stream. Converting the file format can allow for compatibility with different devices, editing software, or online platforms. Here’s how you can perform this optional step:
First, determine which file format you would like to convert your Twitch stream to. Common video file formats include MP4, AVI, MKV, and MOV, among others. Consider the requirements of the device or software you plan to use the video with, as well as the desired output quality and file size.
There are numerous video conversion software available, both free and paid, that can help you convert the file format. Perform a web search for “video file converter” and explore the options that best suit your needs. Some popular video converters include HandBrake, Freemake Video Converter, and Any Video Converter.
Once you have chosen a video conversion software, download and install it on your device following the instructions provided by the software developer. Launch the software and follow the on-screen prompts to open the downloaded Twitch stream.
Within the video conversion software, select the desired output format or file format. Most software will have a selection menu or a settings panel where you can choose the output format. Look for the appropriate option and select the desired file format from the available choices.
Adjust any additional settings or parameters according to your preferences. This may include selecting the resolution, bit rate, or codec settings, depending on the capabilities of the conversion software you are using. These settings can affect the quality and file size of the converted video.
Once you are satisfied with the settings, initiate the conversion process by clicking on the “Convert” or “Start” button within the software. Depending on the length and complexity of the Twitch stream, the conversion process may take some time to complete. Monitor the progress indicator or wait for the software to notify you when the conversion is finished.
After the conversion is complete, you will have a video file in the desired file format. You can access and view the converted Twitch stream using your default media player or an appropriate video player that supports the file format you selected.
Remember to keep a copy of both the original downloaded Twitch stream and the converted version. This way, you can preserve the original quality and formats while also having a version that meets your specific needs for compatibility or editing purposes.
Although converting the file format is an optional step, it can be beneficial for ensuring optimal playback and compatibility of your downloaded Twitch stream across various devices and platforms.
Conclusion
Congratulations! You have successfully learned how to download your Twitch stream and access it for offline viewing or further use. By following the step-by-step guide provided in this article, you can now preserve and relive your favorite gameplay moments, analyze your performance, or share highlights with your audience.
Remember, the process involves signing in to Twitch, accessing your Creator Dashboard, locating your past broadcasts, selecting the desired video, and clicking on the “Download” button. Additionally, you have the option to choose the quality and convert the file format based on your preferences and requirements.
Downloading your Twitch streams allows you to have control over your content and ensures that you can enjoy them even after they expire from the Twitch platform. Whether you want to save memorable gaming moments, create a highlight reel, or analyze your gameplay for improvement, the ability to have your Twitch streams offline provides flexibility and convenience.
Keep in mind that downloading Twitch streams is only possible for past broadcasts and not for live streams. Make sure to save your streams before they expire or use third-party tools to record them for future download.
We hope this guide has been helpful in assisting you with the process of downloading and accessing your Twitch streams. Now it’s time to put this knowledge into practice and start building your library of downloaded Twitch streams. Enjoy rewatching, sharing, and utilizing your content in new and exciting ways!
If you encounter any difficulties or have further questions, Twitch provides extensive support documentation and a vibrant community where you can seek assistance. Make use of these resources to enhance your experience and make the most of your Twitch journey.